
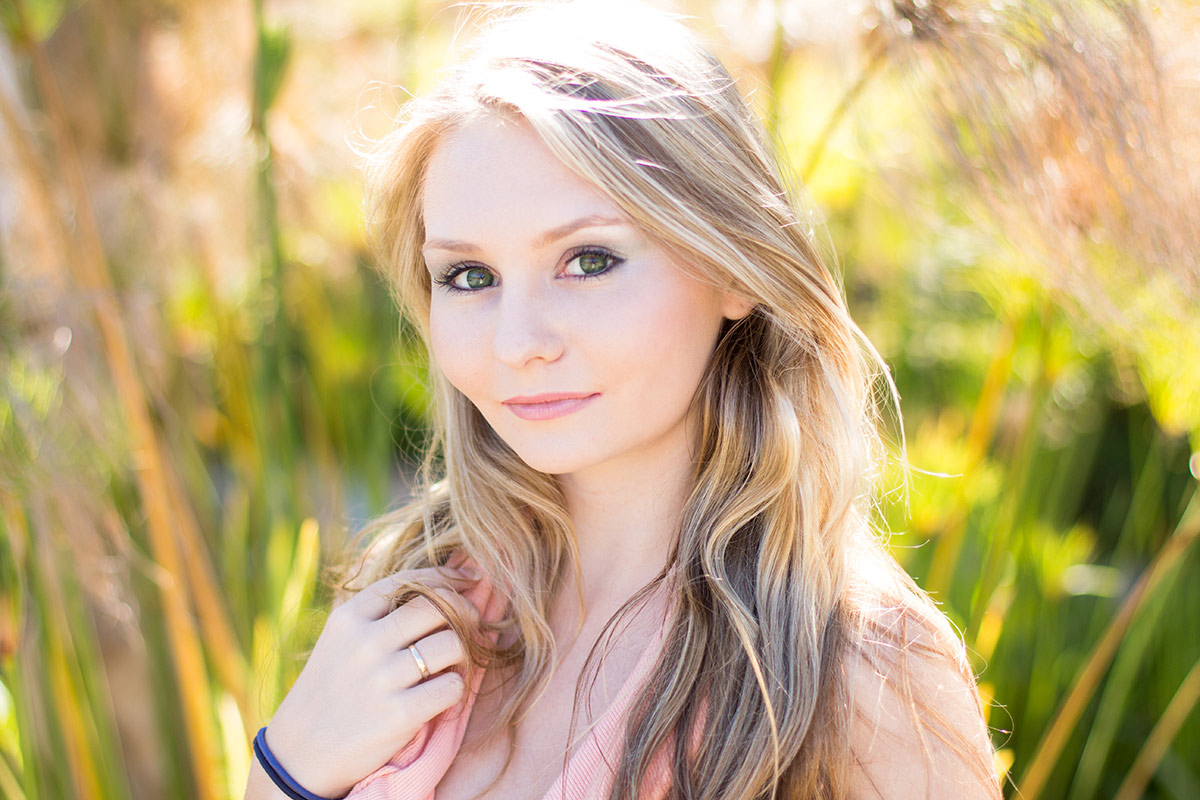
Matte Surfaces
These are surfaces that are not as rough as texture, but not smooth either. Skin, cloth, natural leather, finished woods and many food items are examples. Most of what we deal with in our daily lives would fall under the Matte surface example.
Matte surfaces have a softer way of showing us the reflection of the light source. Where texture showed us mini sources next to mini shadows, the matte surfaces have less of a drastic presentation. The surface doesn’t have that much difference between the size of the components of the texture. A cloth book cover has texture, but it is much more tightly confined than say old barn wood.
And the reflection of the source is shown as a larger area rather than many tiny reflections. This gives the texture a smooth and not altogether recognizable shape. There is an angle where the incidence will match the reflection, and be seen by the camera, but it will be a muted reflection, not a harsh one.
EXAMPLE of Matte Surface reflection of the light source. You can clearly see the reflection of the source, but the transition to the non-reflective areas is gradual and not defined.
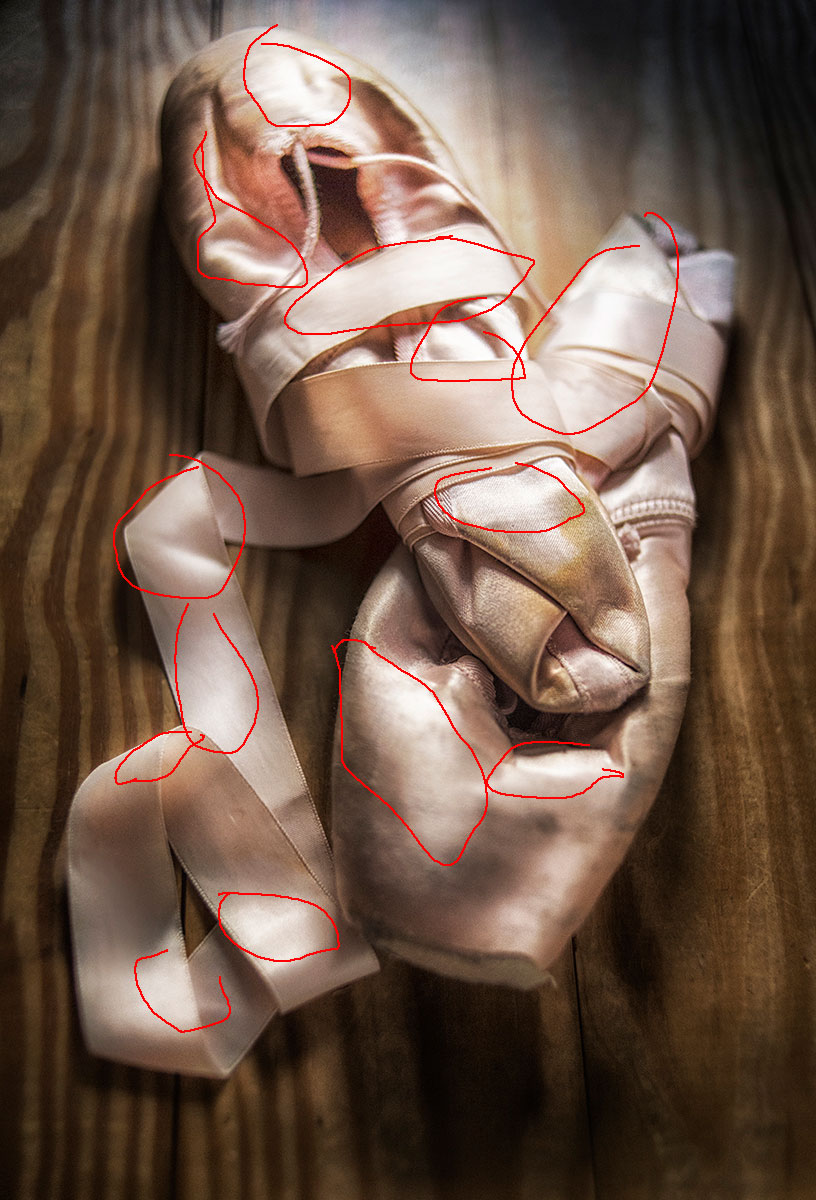
The ballet shoes are most defintely NOT a highly textured object, nor are they glossy.
Skin is one area of great interest. Portrait, beauty and fashion photographers have to be able to control the way skin looks for their imagery. And skin can present some widely diverse efficiency. Dry skin has a very matte look, wet skin becomes more efficient due to the water, and then the reflection is nearly absolute, and skin color can become an issue with the wrong kind of light presentation.
A good makeup artist helps to smooth out skin blemishes, we know. But the MUA also helps to matte the skin evenly so that the reflections of the light sources do not create very bright reflections on the face.
A model begins to sweat…err, sorry, perspire with the heat, and the skin becomes a bit more efficient due to the moisture. Liquid is much more efficient than skin, so the perspiration on the face becomes shinier. The remedy is a little bit of powder, which of course renders the skin more matte and less efficient.
Faces are full of contours and angles that can reflect the light source back to us. Tips of noses, eyebrows, cheeks, chins and foreheads are all areas of concern when we are shooting with light that has a small source. The small source can become a direct reflection on even matted skin, so keeping it within our tolerances is very important.
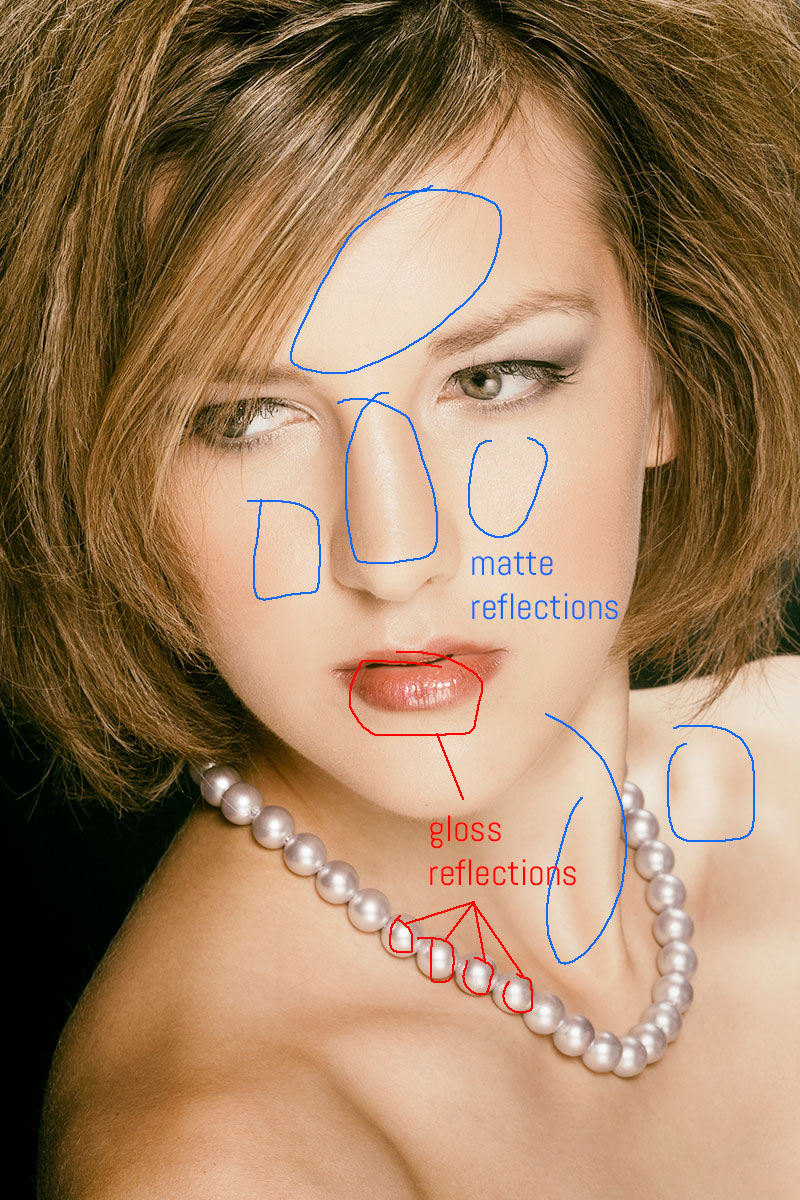
Again, you can see the very soft transition from the highlight to the non-highlight matte surface, where as the gloss lipstick provides a sharp, immediate transition to the non-reflective area.
Photoshop Note:
Trying to fix a small highlight on the tip of the nose, or one that is across the whole front of the forehead is painstaking and difficult. It can be done, of course, but working with the subject to make sure he/she is not rendering the light back to you in such a way as to need the Photoshop is much more preferable.
There may be times when we may want to enhance the matte texture, to make it more discernible, and bring out the texture instead of mitigating it.
Angle of incidence again comes to the fore. Angled to present even the smallest texture, the photographer can decide between broad light, like a softbox, or sharper light, like a direct, unmodified head, or a snoot.
Example of enhanced texture: Portrait of Tomas.
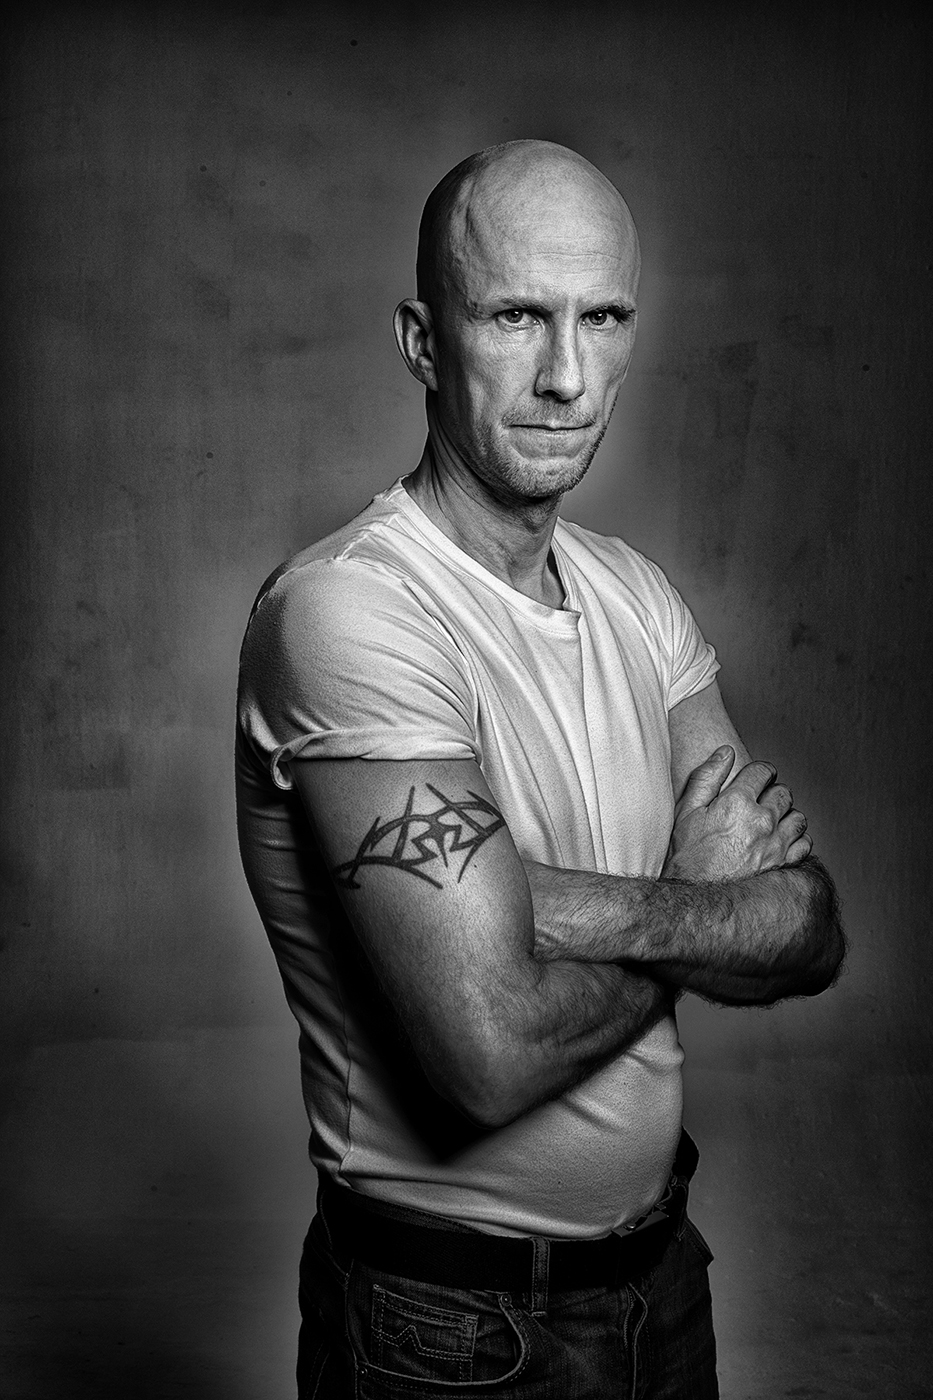
Even with the matte surface of the skin, by using a small lightsource (beauty dish at a distance) we can create more texture in this portrait by putting the light at more of a wide distance from the camera. This adds some texture from the sidelit properties of the subject. Enhancement in Photoshop is then easy, and keeps the matte surface for a cleaner presentation of skin.
Matte surfaces are where we can experiment and work with light to play down or enhance, or simply show it as it really is.
And most matte surfaces can be altered to create something more efficient or less. As we have seen, powder for skin can take away the ‘shine’ that we know is really the reflection of the light. Water or liquid can add sheen to the subject when we want the reflection. And we can use materials to create shine, like wax on a wood floor to enhance the matte to be more shiny by showing the reflection of the light as it renders back to us.
Remember that we all KNOW what shiny looks like, what matte feels like and how rough something is. It is part of what we learn from the beginnings of our lives. We touched, we saw, we felt… and we learned. Photographers aren’t creating anything new, we just learn to present it to others the way we want them to see it.
To recap:
Textured surfaces present small highlights and shadows because of the rough surface and how it reflects light. From a stone to a mountain, the texture can be enhanced by playing up the highlight and darkening the shadow.
Matte surfaces will show the highlight softly, allowing it to transition to the non-reflective part of the surface in a more gradual effect. This may be the most prevalent surface we have around us.
ASSIGNMENT:
- Look around at the matte surfaces. they will most likely be more numerous than very texturized things, or very shiny things. Take some time to quietly study what light does when it is refracted from them.
- Note how different light (direct / indirect) reflects from the surface. Make images showing the difference.
- Examine the ways that matte surfaces can become textured (heavy side/top light), or shiny (wetting the surface down changes its ability to render the highlight and now it becomes more efficient).
WordPress Themes for Photographers from Lighting Essentials
They are finally here. We have been so busy lately, but it is time to announce that the WordPress Themes for photographers are ready for purchase and installation. We are really pretty proud of these WP Themes. They are built with the incredible power of WordPress,...
Claire Curran Corbett: Dallas Beauty and Fashion Photographer
Hey everyone. It has been a terrifically busy couple of weeks. We are finalizing the book, getting the new DVD into editing form and shooting new work for clients all over the southwest. I will be sharing those images as they come out of embargo. Today we get a chance...
Eduardo Frances: San Salvador Beauty Photographer
Well a few changes are in order, more about them later. This post is a wonderful interview with my buddy Eduardo Frances. Eduardo specializes in people and glamour work in San Salvador, El Salvador. Take a look at his interview, then drop over to one of his sites and...
Mexico Workshop, April 2009
Mexico was an absolute blast this year. We had about 14 models who were there for the "Girls of Rocky Point" calendar shoot. Weather was amazing, and the resort made us feel right at home. I had a chance to shoot a couple of shots with the guys and decided to share a...
Small Strobes with Dramatic Results: Nashville Workshop Images
I have had some great workshops over the past few weeks. This weekend it is Mexico, then some recharge time. Shooting a lot of workshop images and images for the book in Mexico as we are working on the workshop itself. I have Megan, Jerry and Evan going down for some...
April 14: 24 Photos from the Lighting-Essentials Flickr Forum
I am so proud of the Lighting Essentials Flickr Forum. There are some truly amazing photographs here. Thanks to all that participate. Now if we could get the discussions going a bit... oh well. Remember to visit the photographer's Flickr page by clicking on each...
Using Ambient Light and Strobe for a Natural Looking Still Life
This is a cover shot that we did for the fragrance company. We wanted a larger space and a more natural looking scene for the cover so we sought out a warm environment. Our AD found a beautiful home that fit the bill. I knew the item that I would be shooting was...
Keeping It Organized When There are a Lot of Shots
Recently I had the pleasure of working with Coni of Glacier Design and her client, Alicia on a big catalog project. It was to be a couple of dozen shots. Most are what I would call a "drop and pop," or simple product shot. Well, of course nothing is as simple as one...
Enough Modifiers to Keep It Interesting… Real Interesting
I use my speedlights frequently when on location, but truth be told I would rather have a more robust selection of tools to modify the light. I will admit to sucking pretty bad at the DYI approach. I will simply not go into a shoot with grubby or 'home-made' equipment...
Spend a Day Shooting Portraits
Sorry for the long absence. A stolen laptop put me back a lot farther than expected. Add to that the traveling and being without internet, well, reliable internet anyway, in some of the locations. Whew... Hey, enough whining. We will make it up to you really quick...
Amazing and Astounding… and Cool Too! Twenty Seven Images From the Pool
We are so blessed with talent over at the Lighting Essentials Flickr Pool. This weeks selection is wonderful and exciting, cool and hot - all at the same time. This group has 27 very nice images to inspire you and lift your spirits. Before we go down the pool to see...
Mexico Spring Workshop is Enrolling Now
I don't use this site to overly promote the workshops, but this Mexico workshop is rather special. We have people from all over the country coming to these Rocky Point Workshops. Location: Las Palmas Resort in Rocky Point, Mexico Flying in to Phoenix International?...
Tech Sheet: Using a Tilt-Shift Lens
Tilt-shift lenses provide the small camera shooter with the functionality of a view camera. At least some of the functionality of a view camera. The front half anyway. The ability of the camera to change the relationship between lens placement and film or sensor...
Using a Location to Full Advantage
This is a post from the old site, and I thought I would redo it for the new one. There are many things you can do when you find a great location. When Bri and I stumbled upon this one, I thought it would be fun to work out several different ideas. We used flash,...
Images from the LE Flickr Pool, 26 Amazing Shots
Some amazing work gets shown on the Lighting Essentials Flickr Group, and we like to take a few minutes and share some of our favorites. There are many that I am sure should be on this list that didn't make it, and our apologies. I need to do this more often. Just...
Our First Contest and Sponsor Acknowledgement
We are excited to announce our first Lighting Essentials Photography Contest. February 2009 Contest. Editorial Assignment: Portrait in an environment. Show the subject's relationship to the environment. Final Submission Date: February 28, 2009. Special thanks to our...
Shoot Thru Umbrella and Bounce Umbrella – a Comparison
There is so much talk on some forums about the 'softness' of shoot-thru umbrellas and how much it works to provide a soft light. And there is certainly some truth to that statement... especially with umbrellas at a distance. But finessed lighting that is done close to...
Tech Sheet: Beating the Sun with Small Flash
Our Tech Sheet on using a meter will be next time, we decided for a variety of reasons to bring you this Tech Sheet on beating the sun for effect instead. Explanation could come soon on why, but I wouldn't wait for it... heh. It just happens when you are a one man...
Our Desktop Calendars for February, 2009
Well, it is tech-sheet Friday, but that will have to be tech-sheet Saturday this week. The tech sheet I am working on is about using a meter, and there are a few more images that must be shot before it is ready to go. So I have instead decided that it would be good to...
Two Portraits with One Light
This post features two shots from this past weeks workshop in Phoenix. My Phoenix Workshops are fairly intimate affairs because I draw smaller groups and my studio is rather intimate as well. In the first half of Saturday we work on portrait lighting and working with...
Creating a Simple Spray Light for Backgrounds
One of the ways to separate the subject from the background is to use a spray light. The light creates a 'halo' of light to dark behind the subject and helps make a flat background more dynamic. It is a fairly simple technique with a lot of variations possible. We can...
Creating an Ambient Look with Speedlights on Location: Tech Sheet
Here we are for our second Tech Sheet of the year. How to create a natural light look to a photograph when there is little to no ambient light to be had. We will be using a couple of speedlights for this Tech Sheet. It has been a wild first couple of weeks for me, and...
Using a Speedlight for Environmental Images that Pop
I have been working on a personal project, shooting some of the old mining towns in Eastern/Central Arizona. Sometimes I shoot natural light and sometimes I like to pull out my speedlights for a little drama. Let's take a look at some easy ways to add a sense of...
Working on the Edge of the Light: A Natural Light Assignment
Our Natural Light Assignment this week is a lot of fun and so easy to do. You only need a model or subject, a camera and lens, and a setting sun. And maybe a building or two... your call. These shots were taken in downtown Phoenix at a fun group shoot we were doing at...