WEEK ONE
IDEAS 1 - 5
WEEK TWO
IDEAS 6 - 10
WEEK THREE
IDEAS 11 - 15
WEEK FOUR
IDEAS 16 - 20
WEEK FIVE
IDEAS 21 - 25
We are going to try an experiment on Lighting Essentials.
We are going to discuss images, art, ideas, and techniques for the next 25 days.
Every weekday between December 2 (today) and Friday, January 3, 2020 we will look at something you can do.
Now.
We will challenge you with lighting ideas, business ideas, portfolio ideas, motivational activities, and general fun approaches to the creative endeavors we all love.
I believe that everyone is creative. Everyone.
And sometimes we creative people get a litle burned out, or we have over-focused on one thing and missed something else.
So let’s take it all back during this last month of the year… with all the madness that the holidays bring, here are some actionable items that can add a bit more interest to our days, and images to our portfolios.
WEEK ONE:
Start Photographing Your Setups
Ten Stranger Portraits in One Day
A DOWNLOADABLE PDF OF THIS PAGE
IT IS IMPORTANT TO NOTE:
Not everyone will want to do every challenge, but it would be cool if you did. I guarantee you the discipline, visual literacy, and control over your eye and camera will increase more than you can imagine.
But if you just want to pick and choose the ones you do, that is fine as well.
The most important thing is to have fun while challenging yourself to do something different, with different constraints around the making.
Great luck to all of you!
And if you want to share some of the work you do, here is my email link.
ONE: THE ONE HOUR CHALLENGE (DECEMBER 2, 2019)
This is a lighting and composition challenge that will get you thinking outside of the box in a hurry.
First you must decide on a subject, and I suggest this subject be something ordinary – like office supplies, or rutabagas (I must confess I am not sure what a rutabaga is, but if you do make sure you get ordinary ones.)
Go to the Dollar Store and purchase a couple of whatchamacallits, or thingimabobs. In the past I have shot sea shells, brightly colored clothes pins, thumbtacks, and a bag of nails.
Yes, the more mundane the subject the better.
Once we have our subject(s) we get the lights out and mounted on the stands. Test the lights and trigger and get ready to make photographs.
Set the clock to 1 hour, and begin your shoot.
The goal is to end up with cool, interesting, outside the box images of stuff we see all the time (well, maybe not rutabagas, but you get the idea) and present it in a way we are not familar with.
We are going to use shadow, light, color, abstraction, focus, composition… in short, we are going to be using every possible thing we can do to make a couple of paper clips look interesting.
In an hour.
You must limit yourself to an hour because the closed ended situation means you are going to be working against the clock, under pressure, being frustrated helps you get focused on what matters.
ARE YOU READY?
GO!
TWO: START PHOTOGRAPHING YOUR SETUPS (DECEMBER 3)
One of the fastest ways to become proficient while building a strong arsenal of lighting setups is to photograph them and keep them with your images.
Create a lighting notebook and print the finished image and the setup next to each other. This juxtaposition helps you create the connections between what you did and what you got.
Then you can come back that setup and do it again, and again.
And each time you change it up a little bit, you can see both the original setup and the modifications, along with the final image.
I can tell you from experience it works… and it saves you some time while you are building your lighting style and techniques.
It doesn’t have to be fancy, and you may not do it for ever (although keeping a running journal of what you do, how you do it, why you did it, and who was there) can be an incredible tool for both learning and simply enjoying.
I wish now that I had saved all my old lighting ‘books’ – actually three ring binders with 8×10’s and typewritten notes.
I suppose you could do this digitally although the feeling of impermanence is so much a part of the digital ecosystem that I find it very uninteresting for curation.
You may differ… carry on!
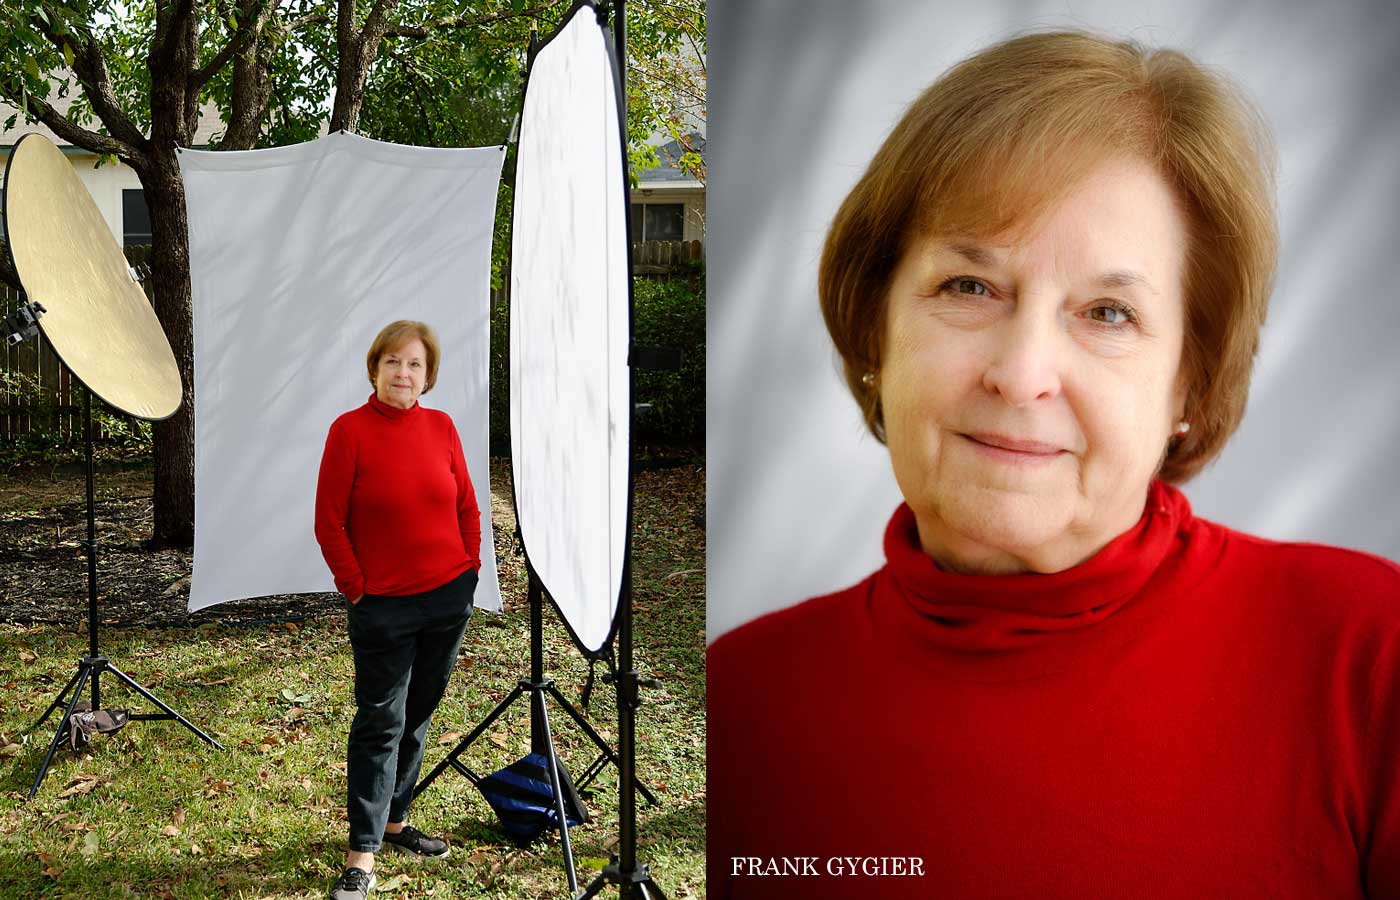
Below is a side by side by Frank Grygier from the 8 Week Natural Light Portrait class we recently finished up.
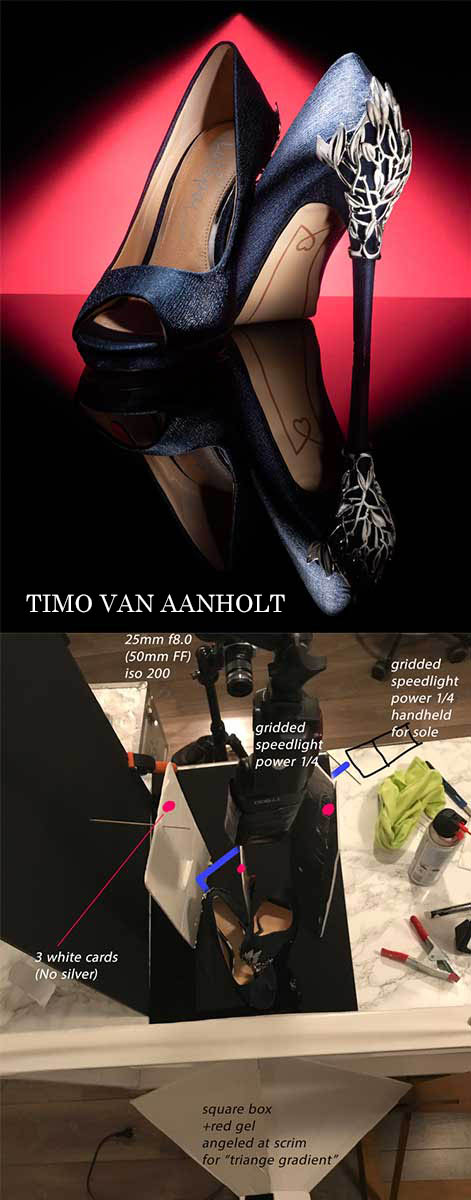
On the right: PRO TIP EXAMPLE BY TIMO VAN AANHOLT
Timo’s well crafted setup is duly noted with the information that will help him repeat this in the future. Whether as is, or with modifications. Try it… you’ll like it.
POWER TIP.
When doing a setup with strobes, note the meter settings for exposure as well as the brand and power settings of the lights. This will bring you more information as you go along because if you keep a log of the mistakes (with an image or two) and the successful image, you will see where the changes mattered.
THREE: SHOOT AS IF YOU WERE SHOOTING FILM
Film came in rolls with a limited amount of frames.
The rolls were 24 and 36 exposures for 35mm film, and 12 and 24 for 120mm (medium format).
So if you only had one roll of film, you could only take 24 or 36 images depending on what film you have in the camera.
Similar to the first exercise, this is a ‘limited’ challenge. The fact of a limited amount of time or a limited amount of frames can be both frustrating and liberating at the same time.
It forces the mind to be sharper, clearer, and more focused. It helps you see through the viewfinder with a clearer purpose because it will compel you to check and double check your composition, DoF, focus, and overall general technical aspects before you push the shutter.
And that is where the magic happens… the exercising of the “vision” muscle as you focus tightly on making sure the image you want IS the image you get.
Take a photo break and set aside two hours of a morning or afternoon at a place you really want to photograph. If you have a model you have been wanting to shoot, this will work as well.
You can take as long as you want to set up the shots or find the angles, but you only have 24 images and you must complete this within two hours. (After the exercise, shoot all the frames you want – but for two hours you focus on the image with intensity since you can only make 24 images.
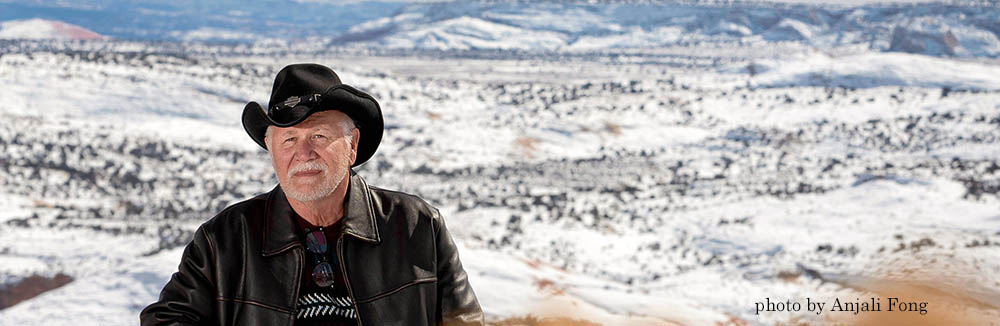
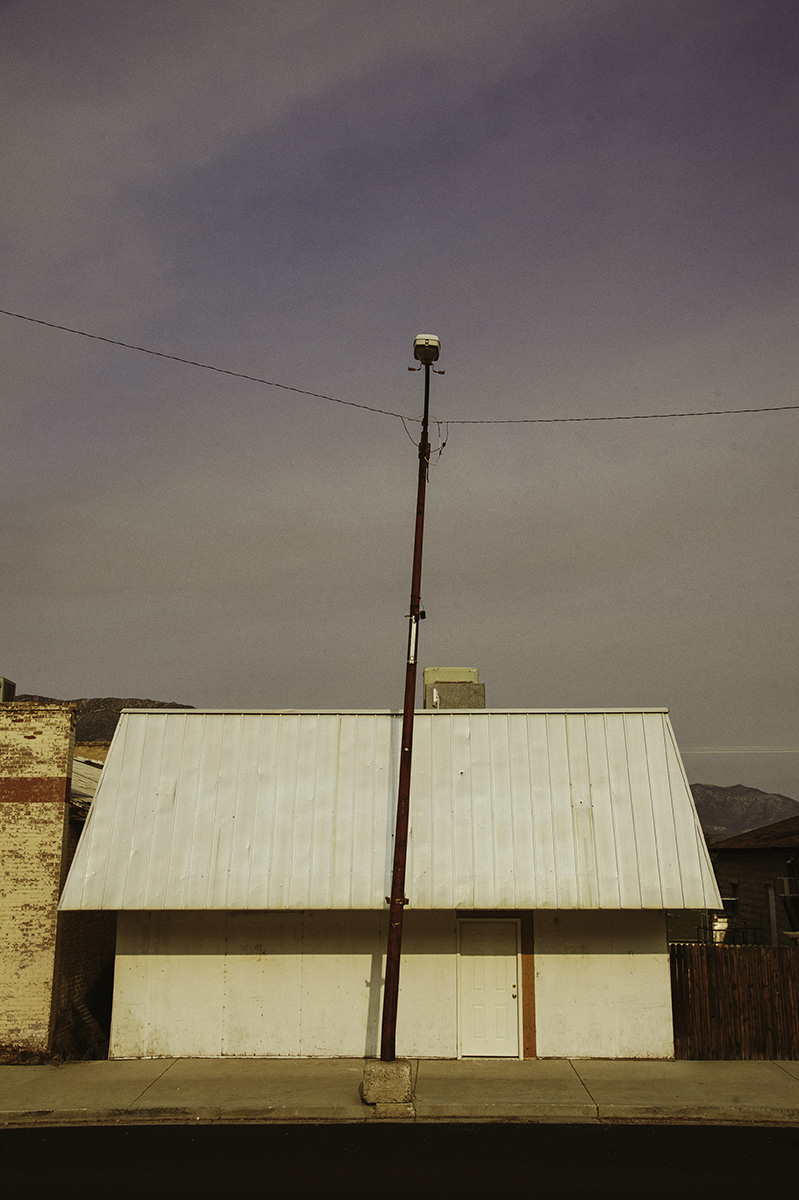
These images were made during a similar exercise I did a few months ago on my motorcycle trip.
I stopped in a little town north of Ely, NV and gave myself 20 exposures in the time I spent there. That was about 20-30 minutes.
POWER TIP.
Try this for added thrills (heh).
Tape a piece of black paper over your screen so you have no way of seeing or checking the images you take for the exercise.
And remember, you only have to do this for two hours.
Then take all the chimped images you want – but remember that first set of 24 so you can see what your intuition and native knowledge will get you.
I suspect you will be pleasantly surpised.

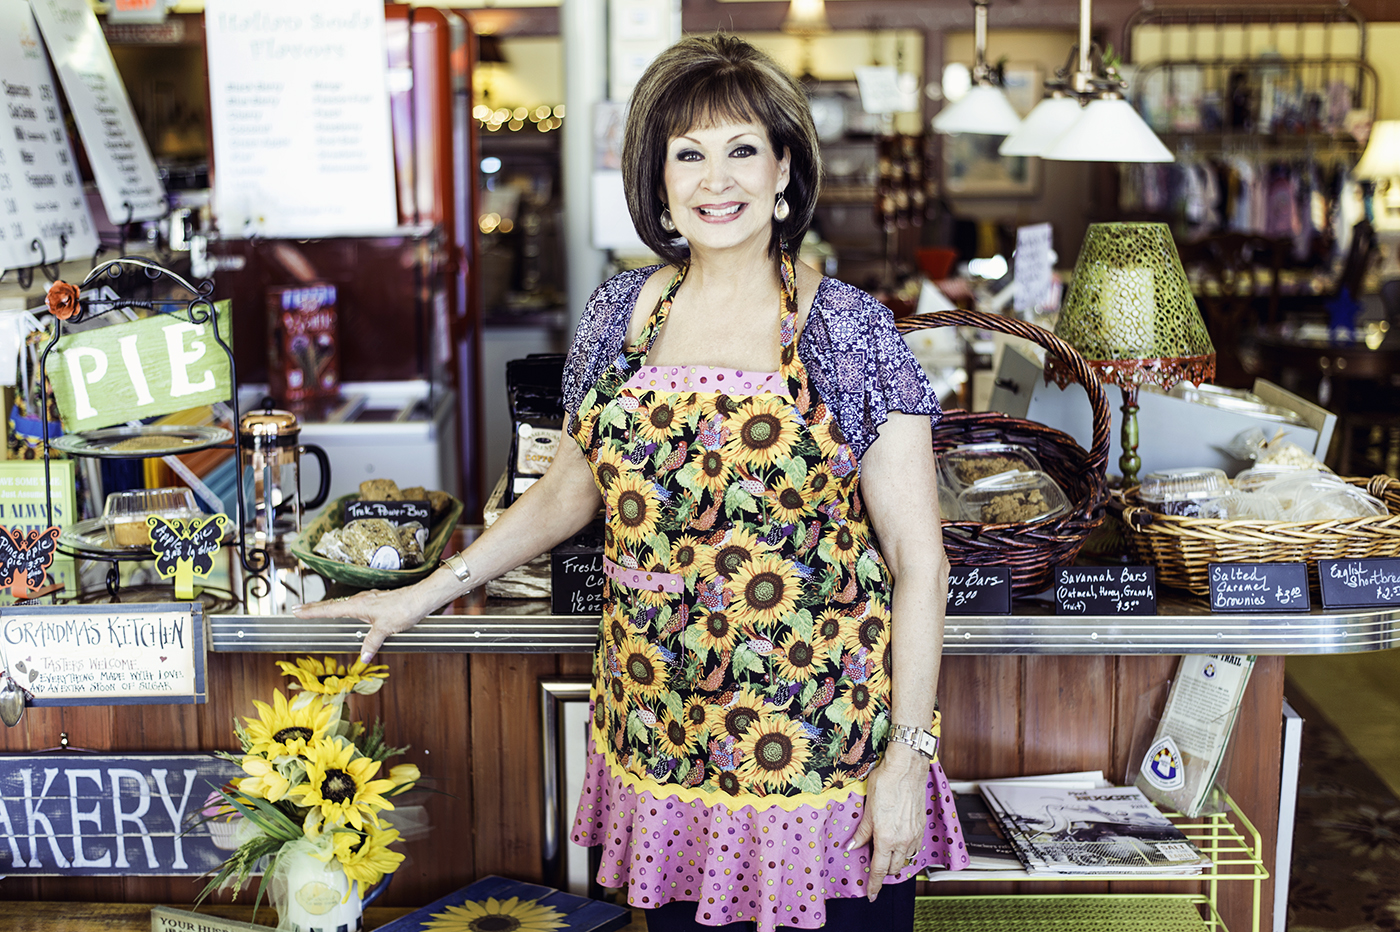
FOUR: PORTRAITS OF TEN STRANGERS IN ONE DAY
Photographing strangers can be very unnerving for a lot of us.
It is not in our comfort zone… in fact it is miles from many or our comfort zones.
And that is exactly why we should do it.. because it scares us.
(I believe the most important thing to do is what scares us the most. Fear is resistence, and resistence can crush our creativity.)
In P52 photographing a stranger is the first assignment we give… get the hard stuff done first.
And we have all heard of the “one stranger a day” portrait thing… that’s cool.
But in this situation we are going to confront, and win over our fear concerns and see how much we improve in a shorter amount of time.
One day.
Ten portraits.
And there are rules (there are always rules, sorry).
- You must engage the subject and they must be engaged with you. This is not street photography where you take photos of people who do not know you are photographing them. They must be actively involved in the portrait.
- You move them a little bit to get the shot YOU want. This will test your ability to work fast, and also to have an idea that can inspire your subject to cooperate.
- Take no more than 10 exposures and thank them.
- Make sure you send them a copy of the portrait (get email addy).
So we find someone, ask them if it is OK to make a portrait, ask to move them ‘over here’ or outside, take the photos quickly, get their name and email addy and send them an image.
Got it?
GO!
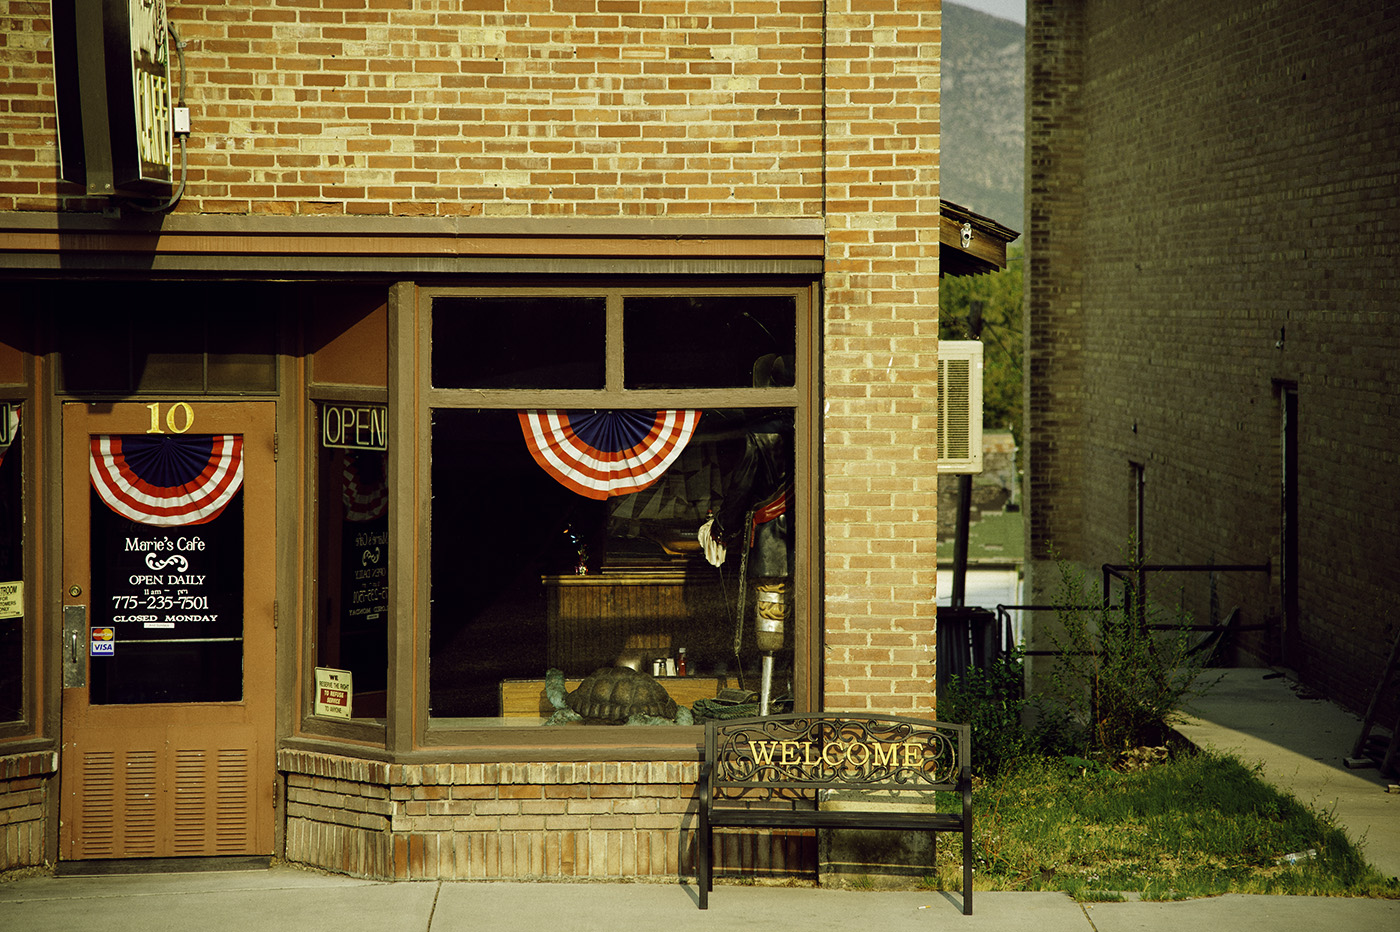
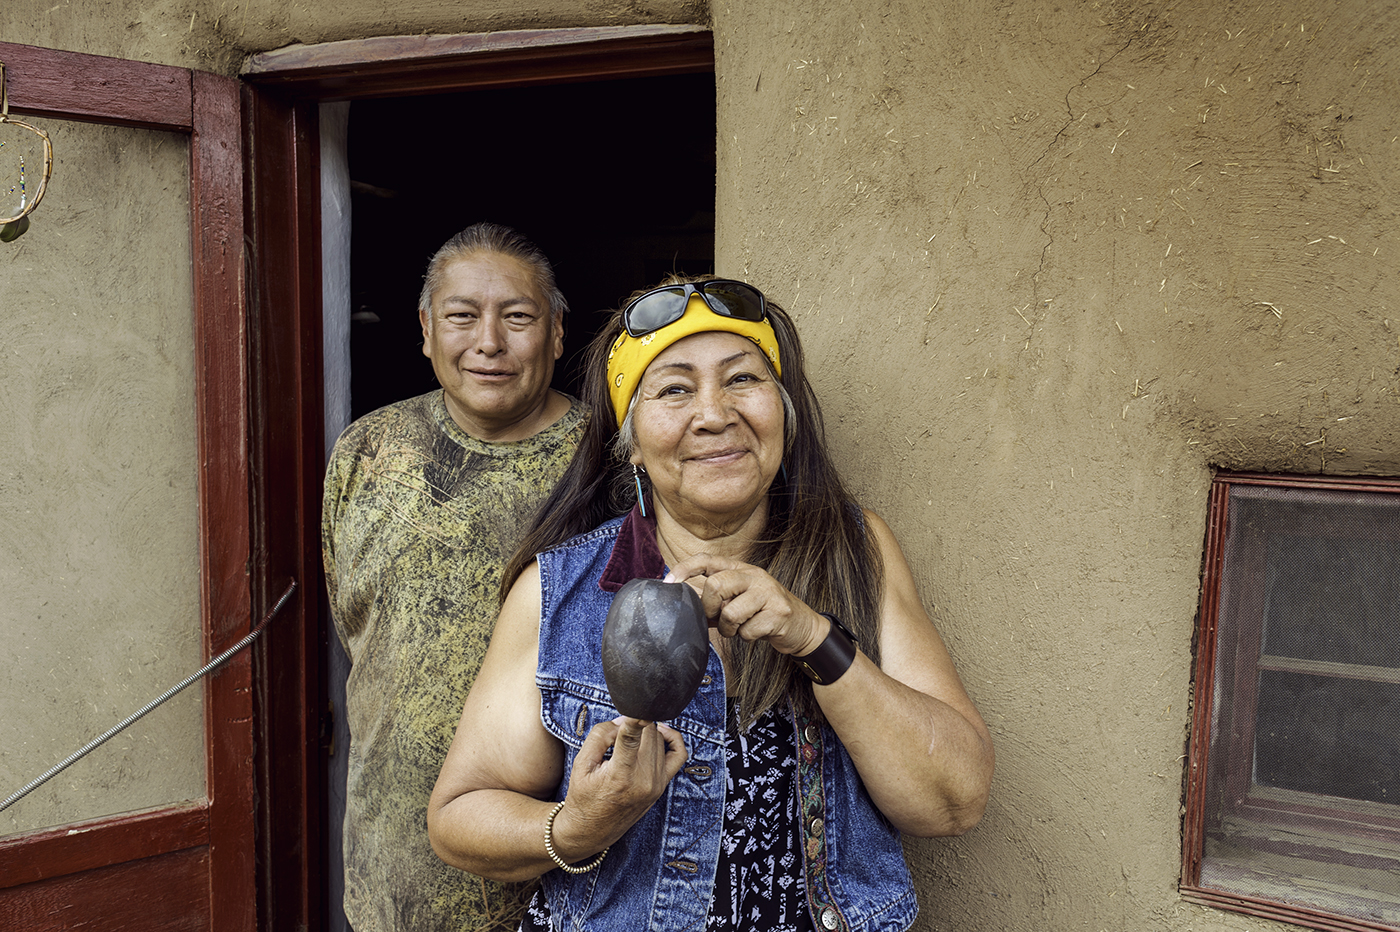
(Below, left; artists, Santa Fe, New Mexico: below right, shopowner, Superior, Arizona)
POWER TIP.
Places to find a lot of strangers possibly a little more willing to be photographed:
- Events. Rodeos, fairs, art shows, social events, parks, recreational places.
- Look for people who are loving what they are doing. I had tremendous success with a Corvette Club… they loved their cars and were happy to pose with them.
- As mentioned, car shows, motorcycle rallys, bicycle races… places where people congregate to show and entertain others.
- Your neighborhood. We interface with people everyday all around us – they may make great portrait subjects.
- Roadtrips. Fellow travelers may be very willing to share their travels and get a photo of where they are for their story.
FIVE: TRY COLOR GRADING YOUR IMAGES FOR MORE PUNCH
Color grading is usually thought of for motion pictures, but it is rapidly being adopted by photographers as well.
What is color grading? Think “Matrix” with warm almost orange highlights and blue shadows for a simple explanation.
But it can be so much more than that. Changing up the color palette in your image may give it a different mood, a different feeling.
There are many ways to color grade.
Photographers use a wide range of tools including curves, color balance, selective color, gradient maps, and luts.
Working with all the different ways we can blend layers, and mix the different methods… there are literally billions of possibilities.
And when you are starting out, they can be quite garish as we start to dial them down. It takes finesse and a gentle hand in most cases, but the images can begin to take on a more cinematic and interesting patina.
And when you find something you like, convert it into an action and keep it for making sure you can maintain consistency with your color palette.
Some photographers who use Color Grading to create a different feel for their images:
Finn Beales
Chris Crisman
Joel Grimes
While all of them do something, they do not use the same techniques. There are so many different things you can try to achieve a special color pallete for your images.
This image has not been color graded. I exported it out of Lightroom after applying contrast and sharpness.
Below is the same image with different applications of color grading.
POWER TIP.
Try exploring the different LUTS you can find online. There are many free ones out there that are pretty darn good. And remember you can stack LUTS and change opacity as well. And if you find something you like, you can save that mixture as your own LUT.
I recently purchased the Infinite Color Panel for a specific set of images I am working on and I must say I really like it a lot. I have been experimenting and saving my own presets for it and really having a lot of fun.
Check out the videos, try some of the different methods and discover something you like.

WEEK ONE
IDEAS 1 - 5
WEEK TWO
IDEAS 6 - 10
WEEK THREE
IDEAS 11 - 15
WEEK FOUR
IDEAS 16 - 20
WEEK FIVE
IDEAS 21 - 25