8 WEEK CLASS: NOVEMBER 2025
One Big Beautiful Light: Week Two
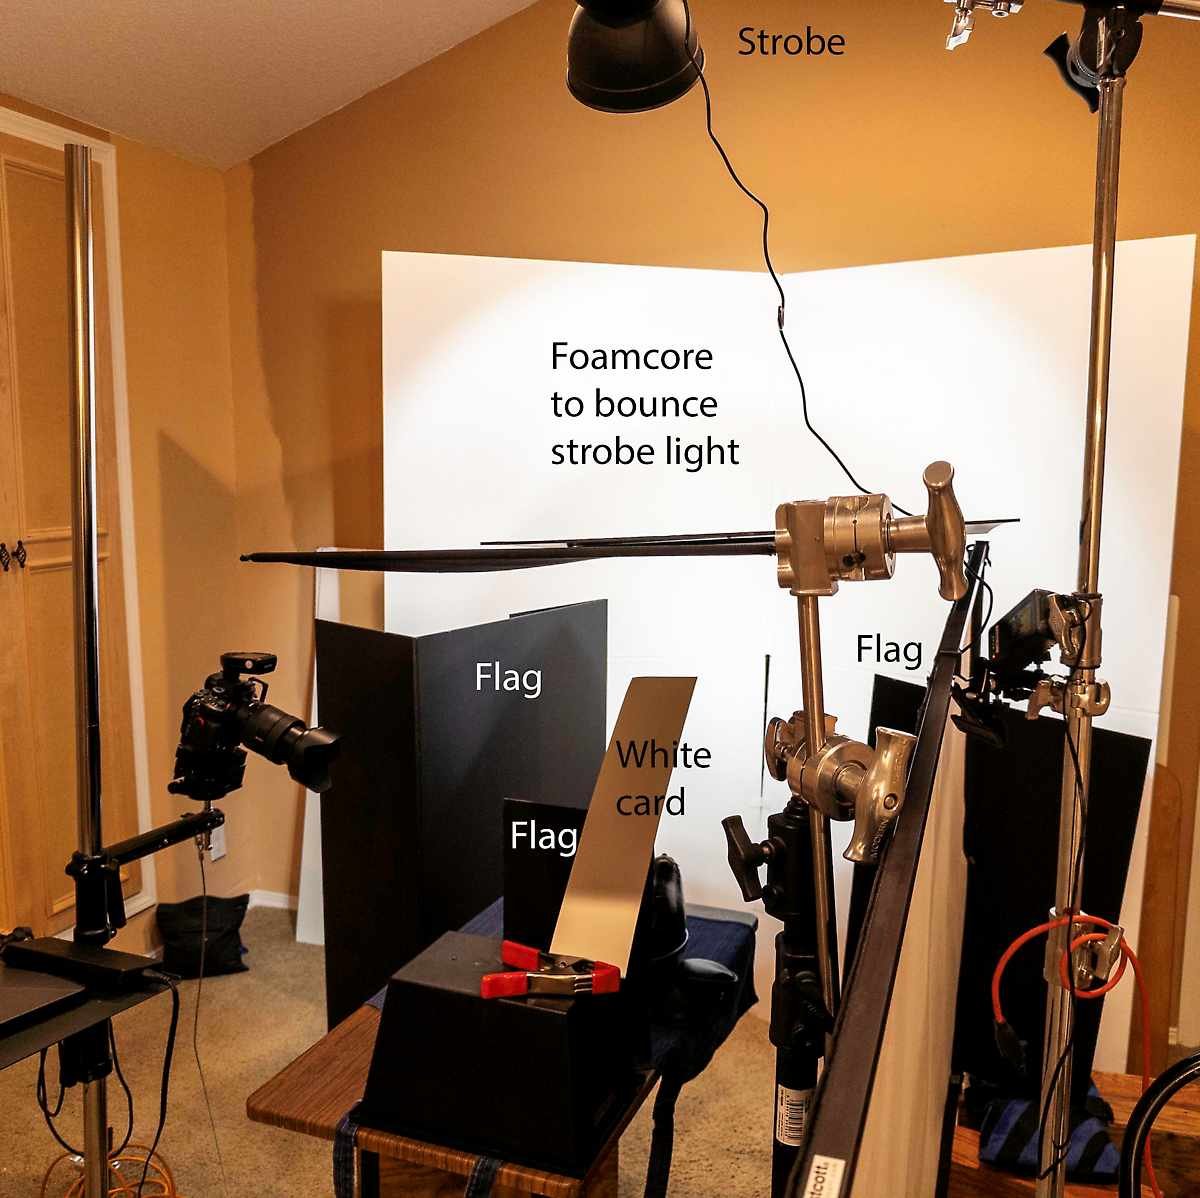
Using a white bounce card as the primary light source is absolutely workable, and in many situations it can look better and more natural than a softbox, especially for tabletop and food.
Concept: bounce card as key
-
When you aim a bare light (strobe, LED, speedlight, or even a window) into a large white card and let the reflected light hit the subject, the card effectively becomes a big, soft key. The apparent source size is now the dimensions of the card instead of the lamp head, which gives you softer, more gradual shadows.
-
This is essentially the same idea as using a white wall or ceiling as a key, just scaled down and positioned precisely around your tabletop set. For small products and food, a 24×24 in or larger foam-core board works well.
Book light variant (extra soft)
-
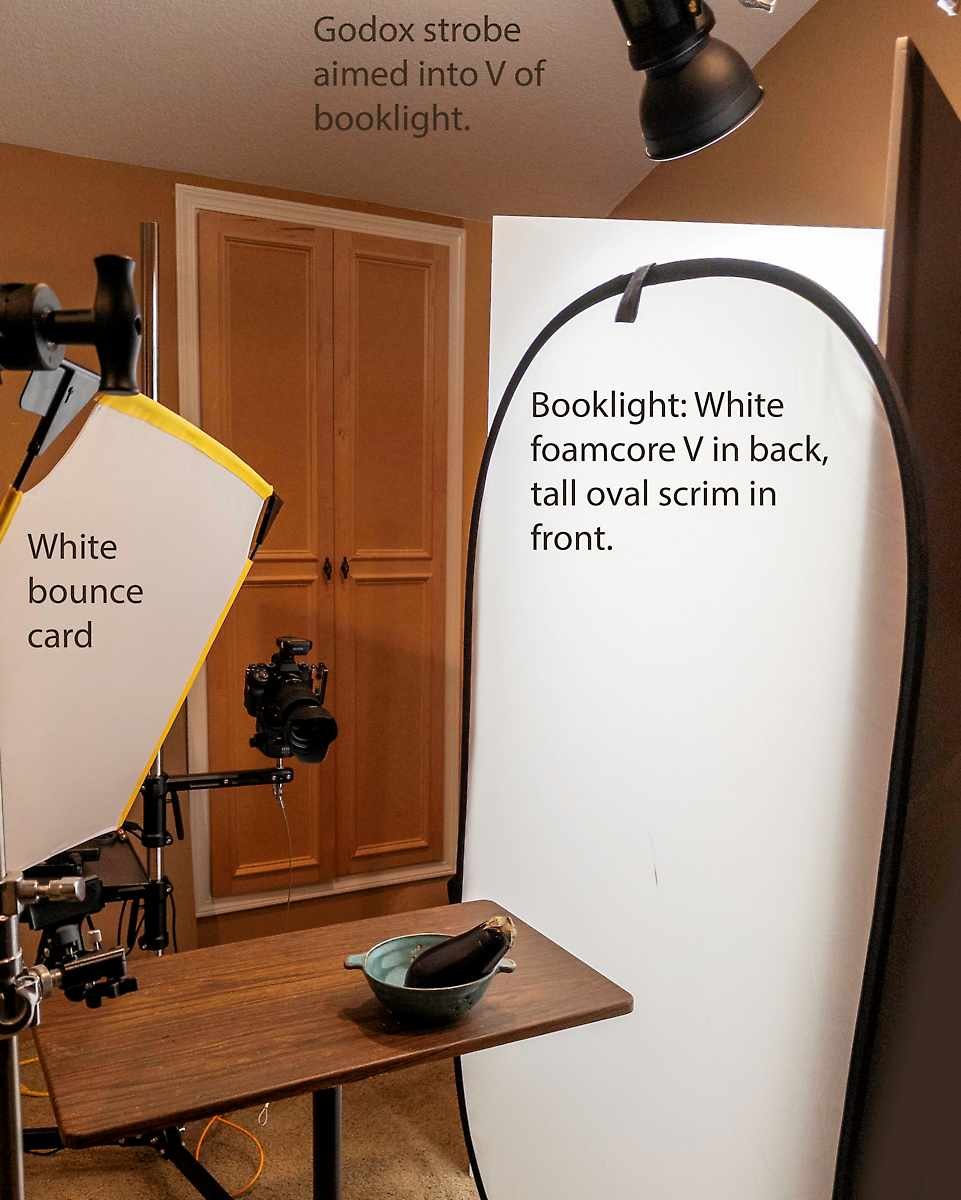
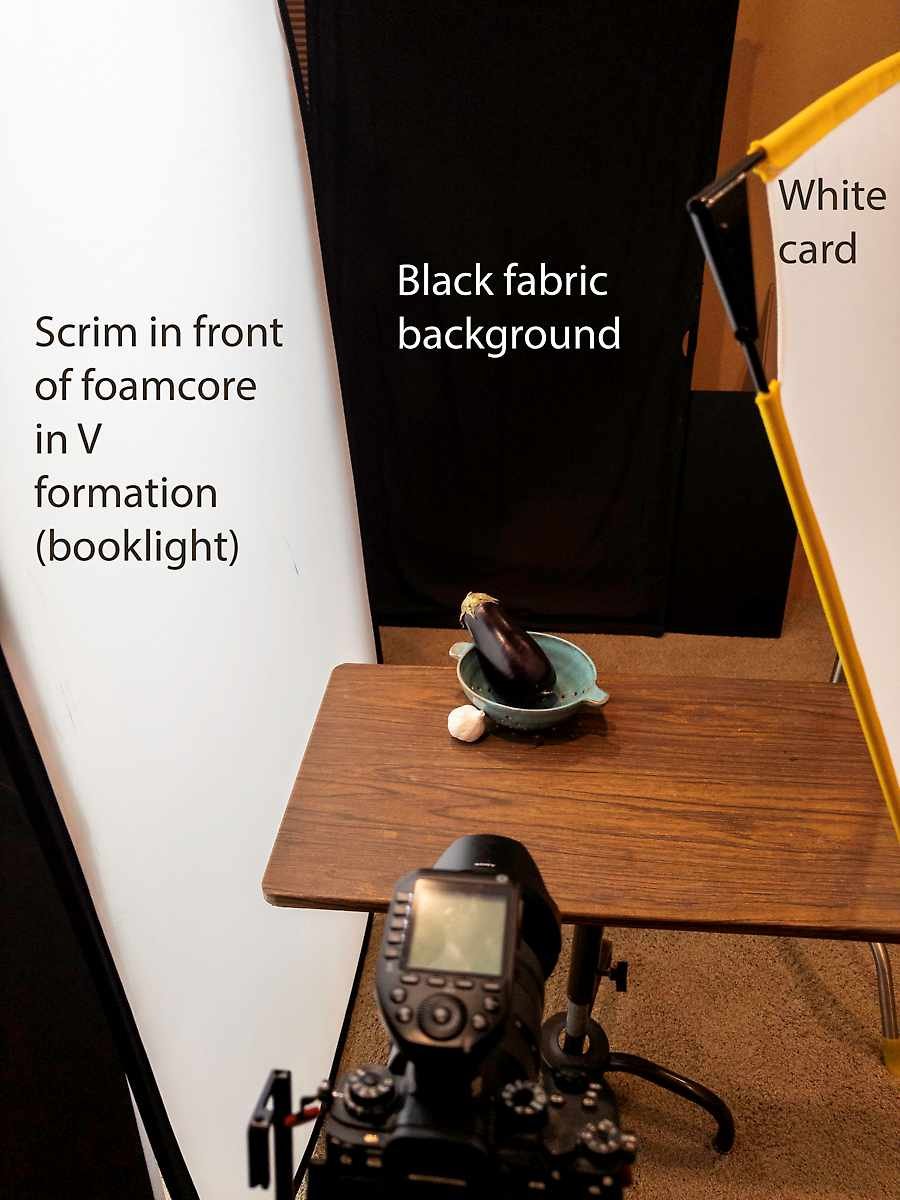
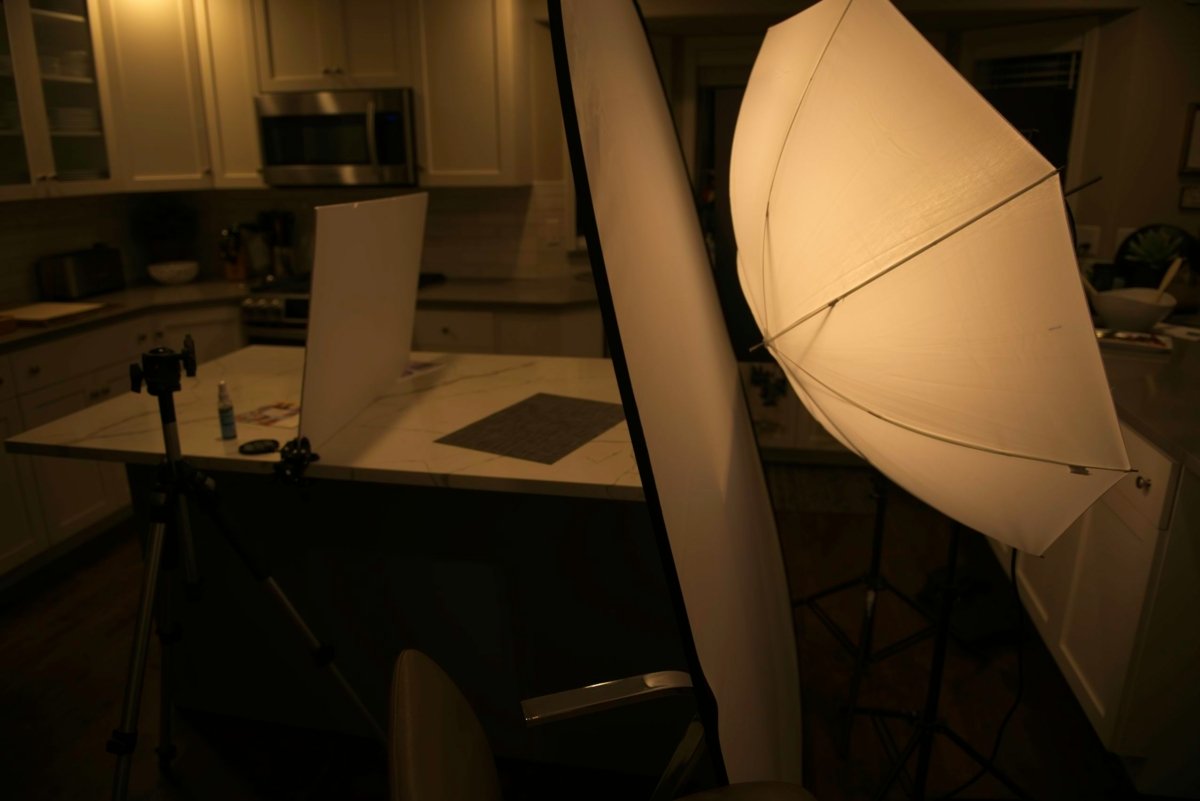
A popular refinement is the book light: you fire the lamp into a white card, then pass the bounced light through diffusion before it hits the subject. The bounce plus diffusion yields extremely soft, low-contrast light with very gentle speculars, which is terrific for reflective packaging or glossy food.
-
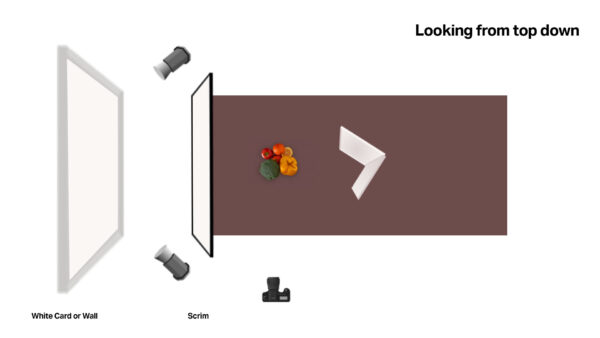
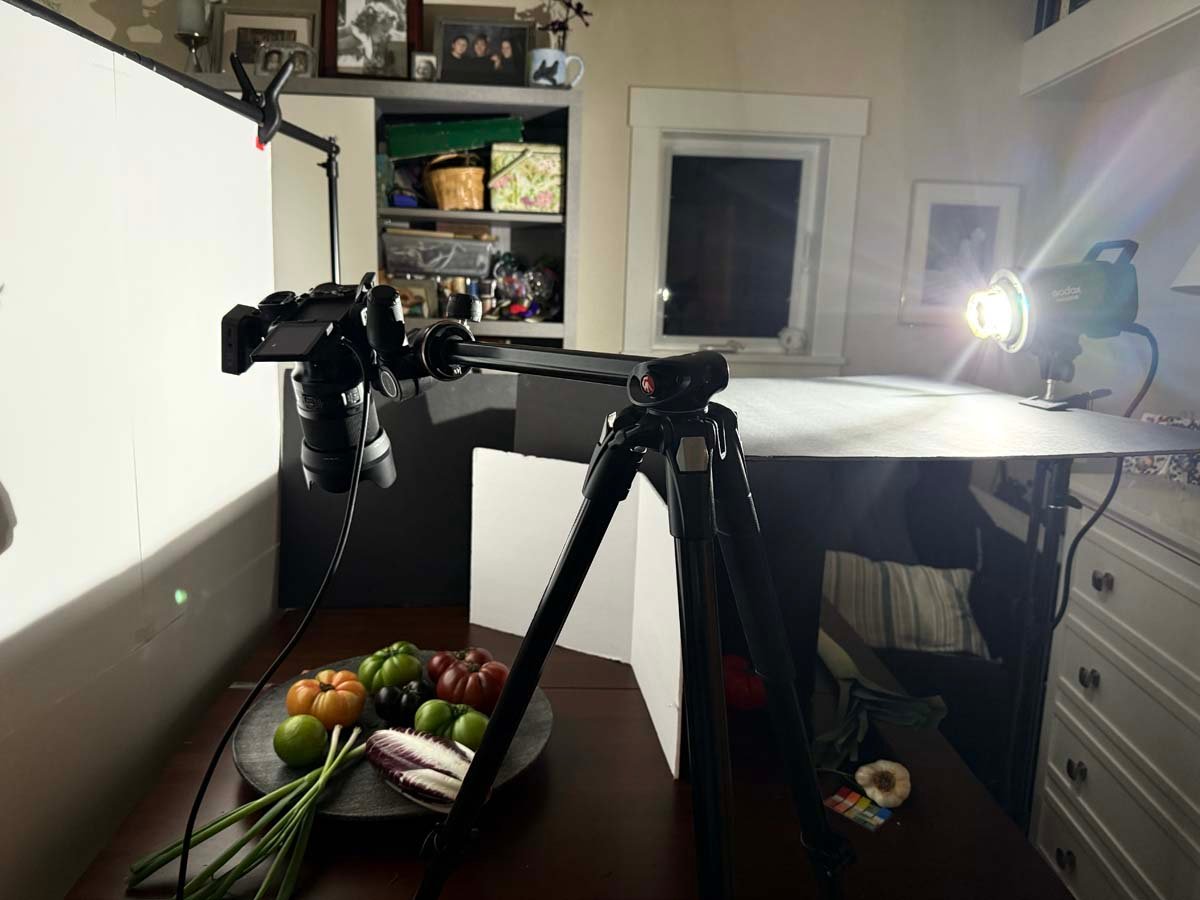
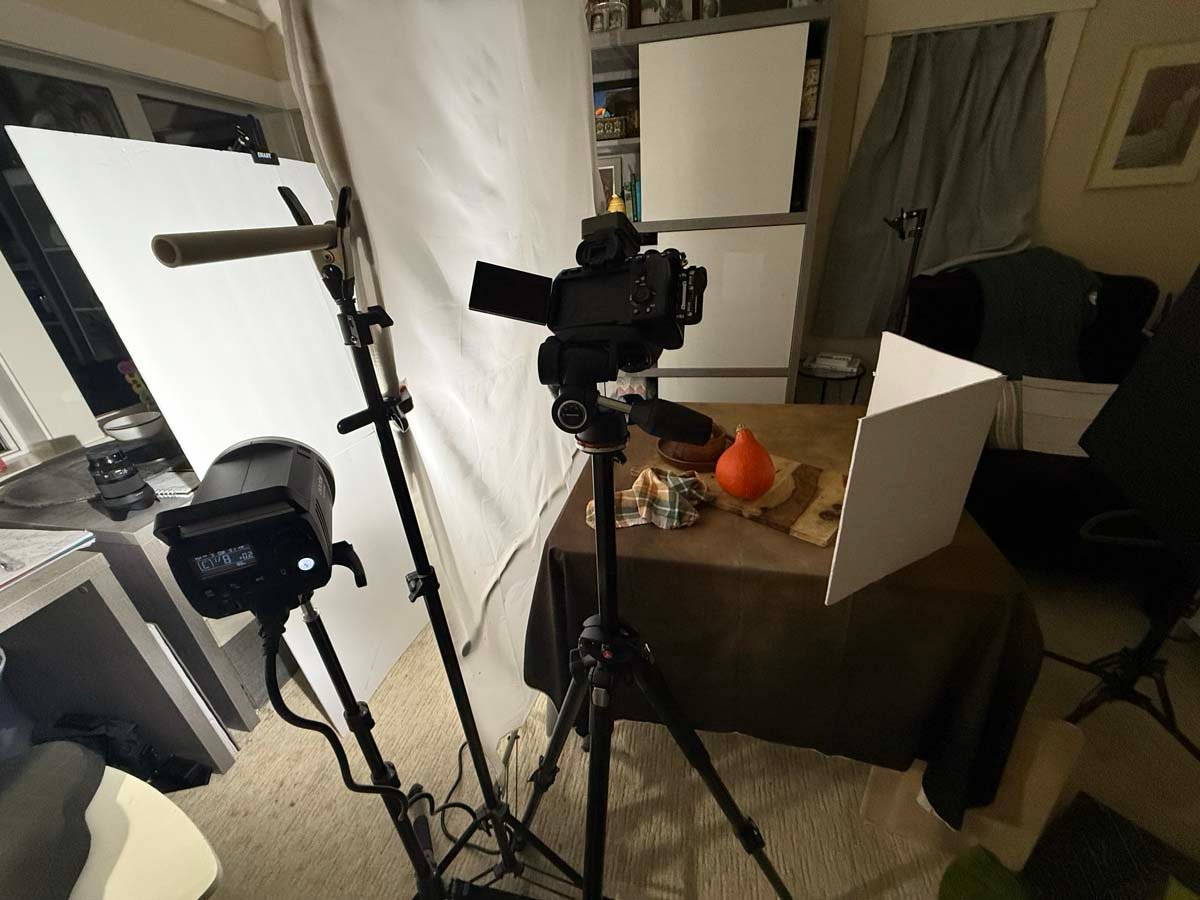
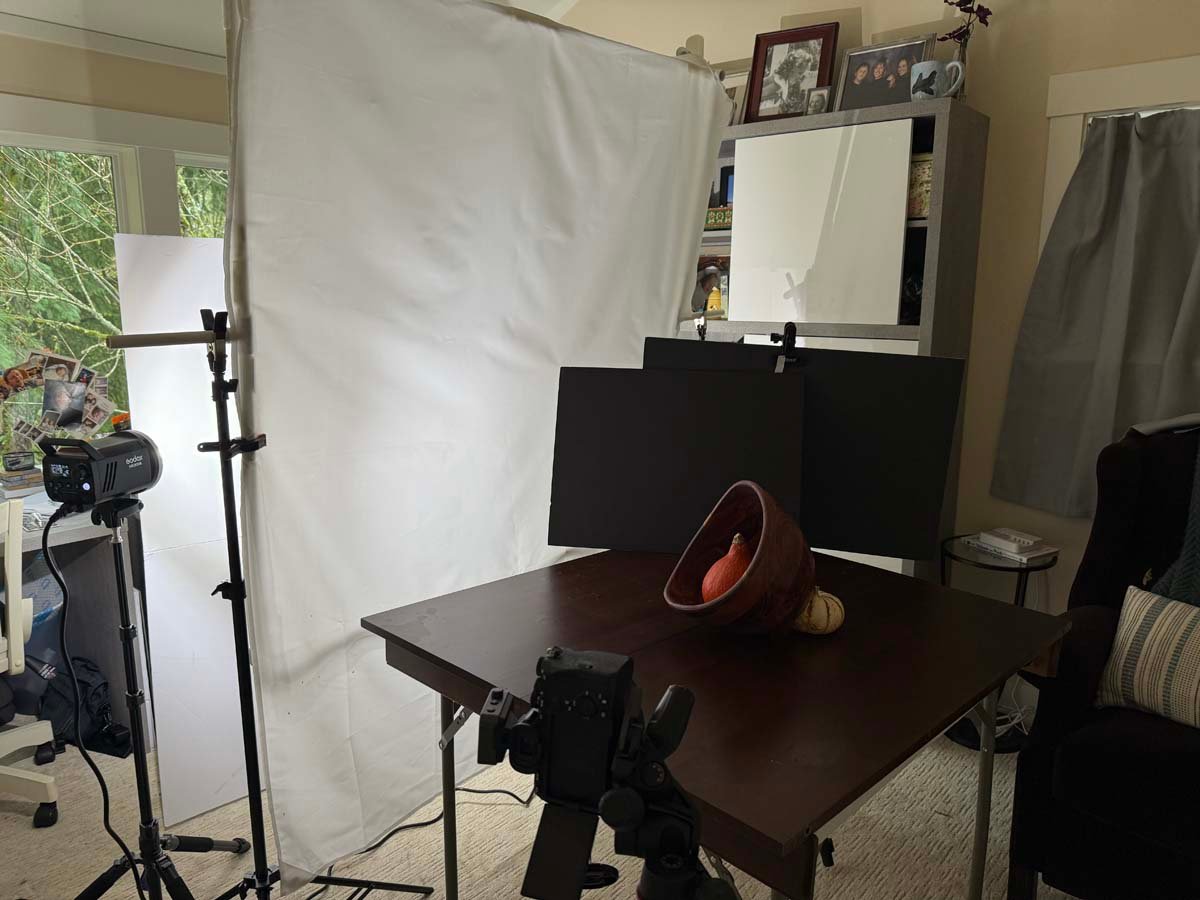
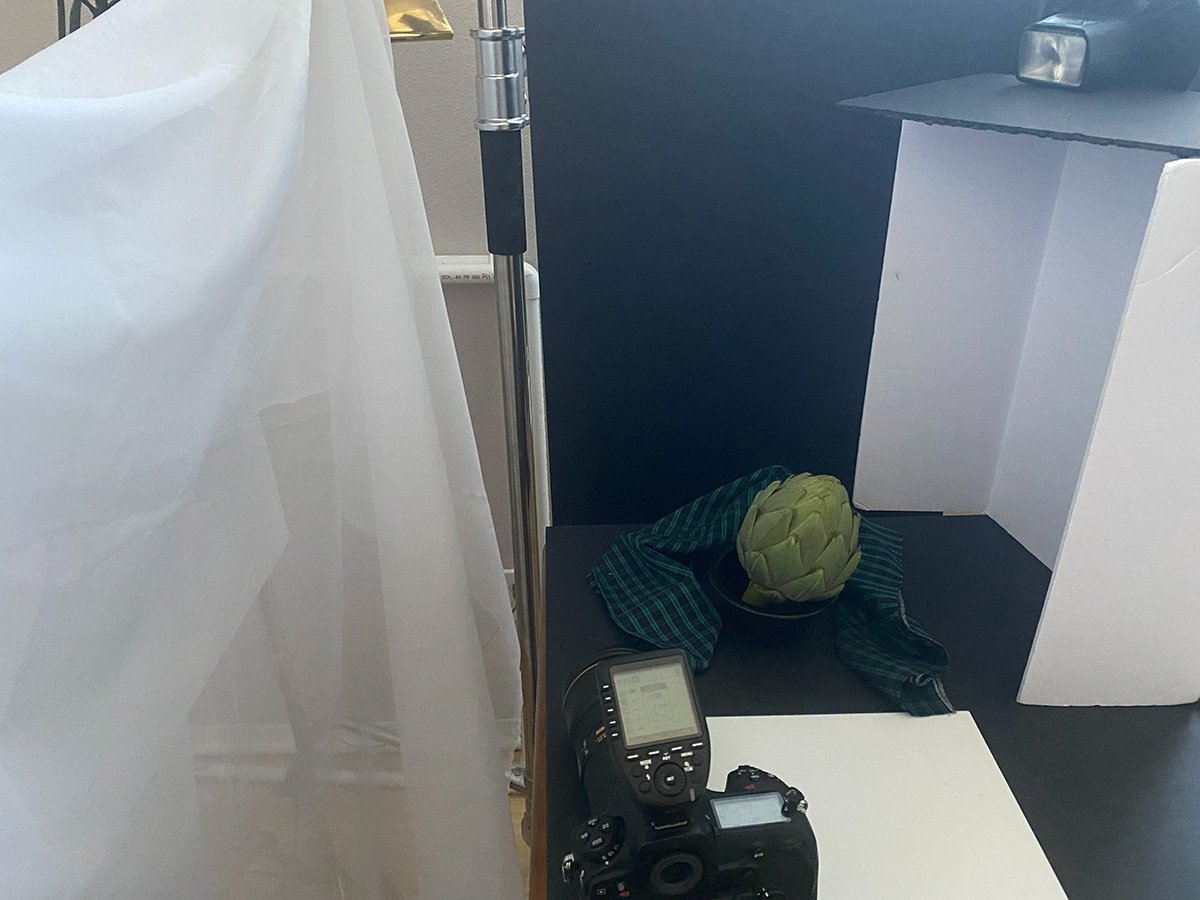
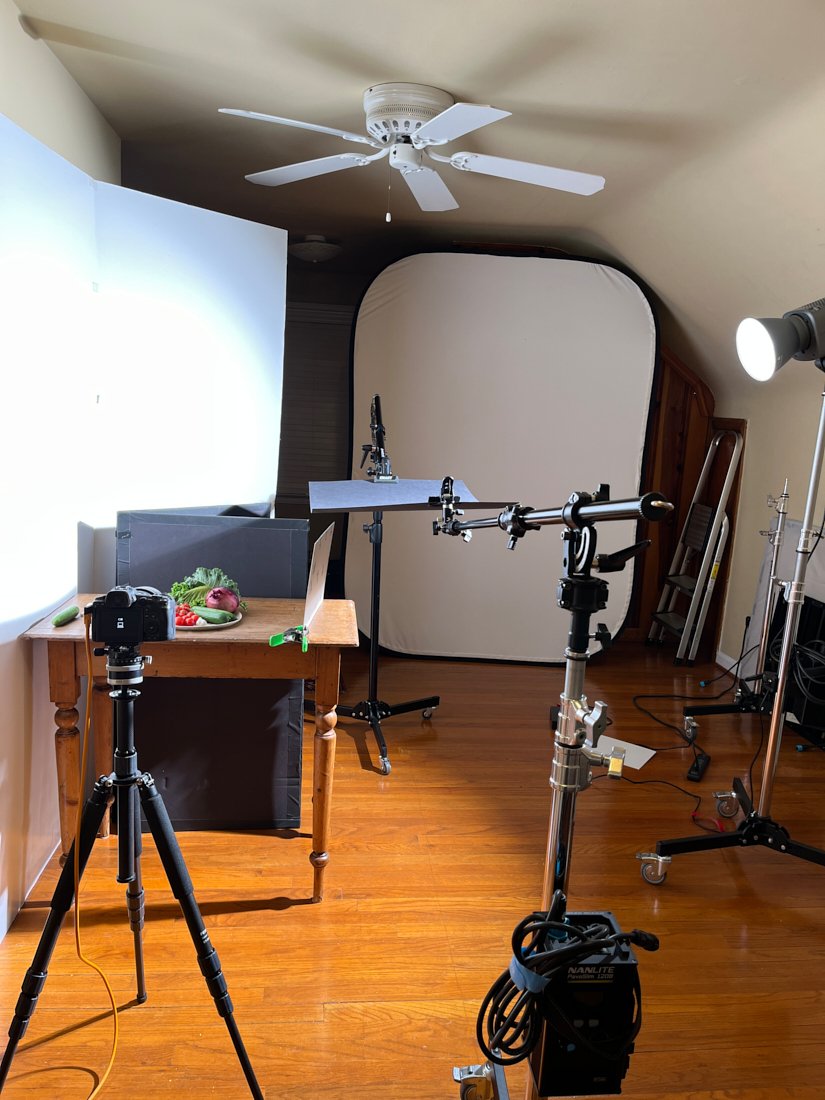
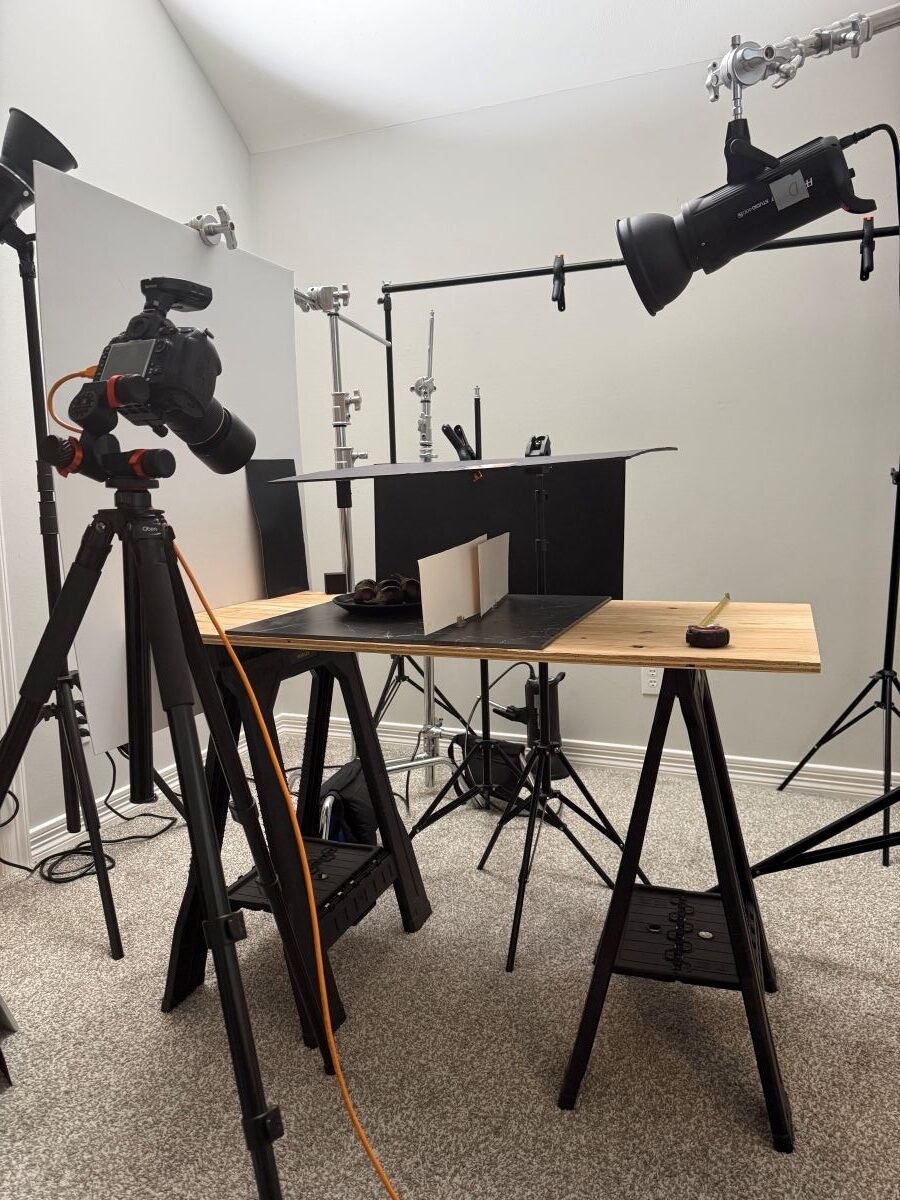
The setup typically forms a “V” or open-book shape: a light white card diffusion frame subject, with the subject close to the diffusion so the diffused surface acts as a huge key.
Practical pros and cons for tabletop
Advantages
-
Very natural, “window-like” quality of light that avoids the sometimes “boxed-in” look of small softboxes on shiny surfaces.
-
Easy to scale and shape: bigger card = softer; moving the card closer to the subject increases intensity and wrap.
-
Cheap and modular: foam core, bead board, or white showcard on clamps and C-stands can be reangled in seconds to fine-tune gradients on bottles or ceramics
Trade-offs
-
Less efficient than a softbox: you lose output in the bounce, so you may need more watt-seconds or higher ISO for the same exposure.
-
Takes up a bit more physical space around the set, especially in the book light configurations, which can be tight in a small tabletop corner.
How to try it on a tabletop set
-
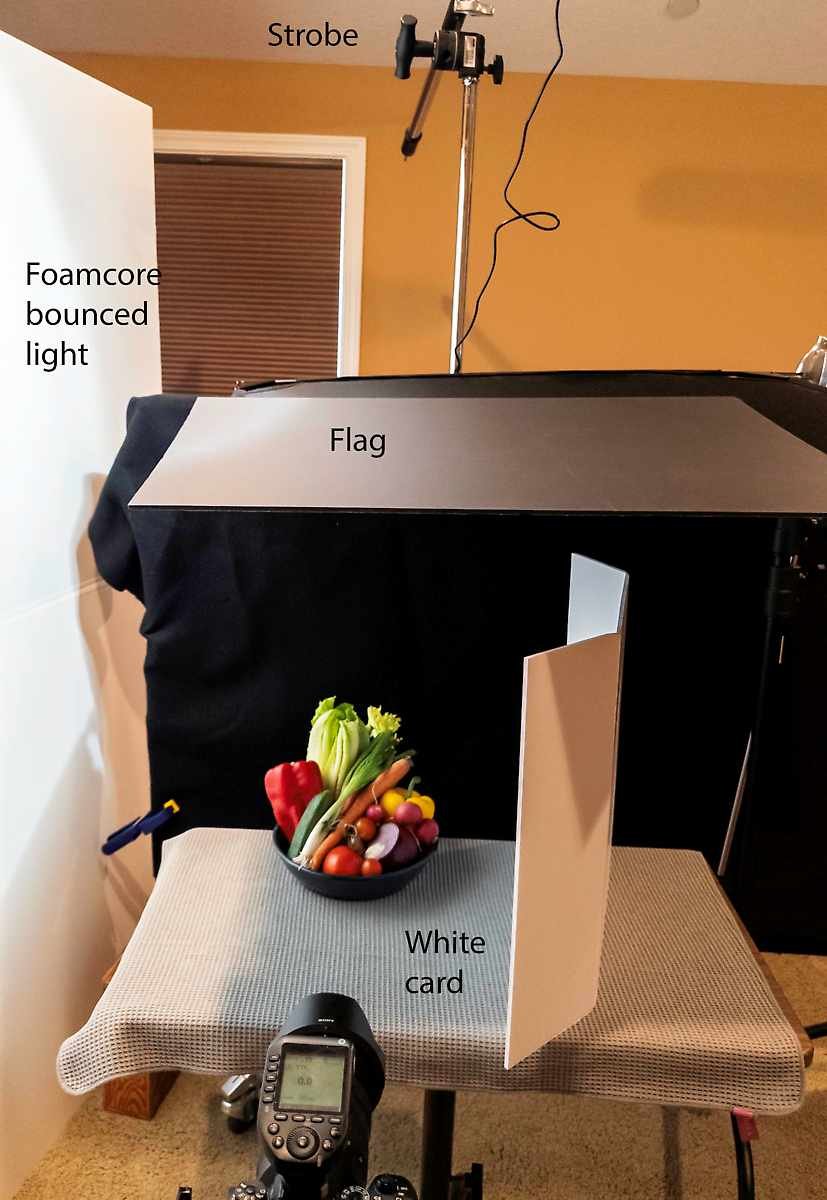
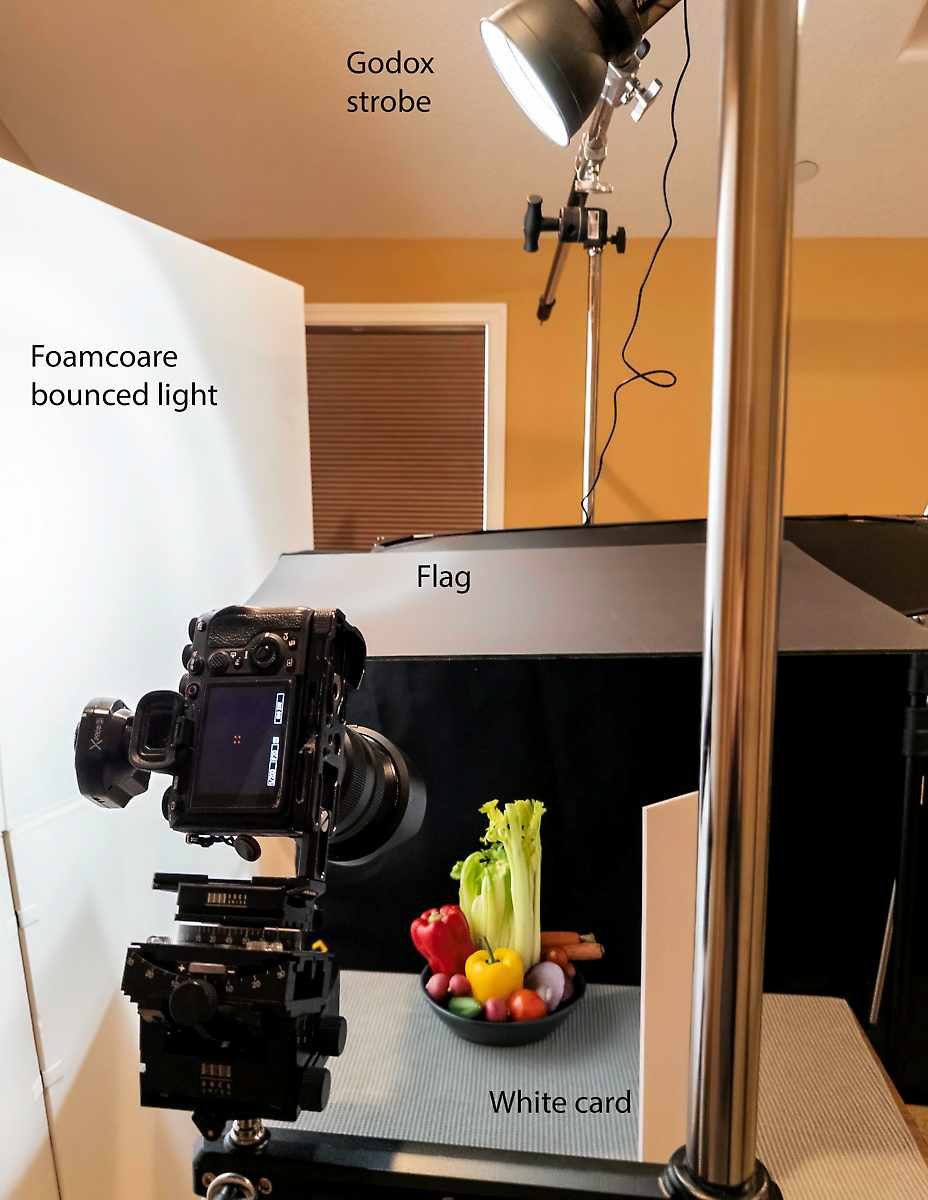
Place your bare strobe/LED a couple of feet from a large white card at roughly a 45° angle to the subject so the card faces the product like a softbox would.
-
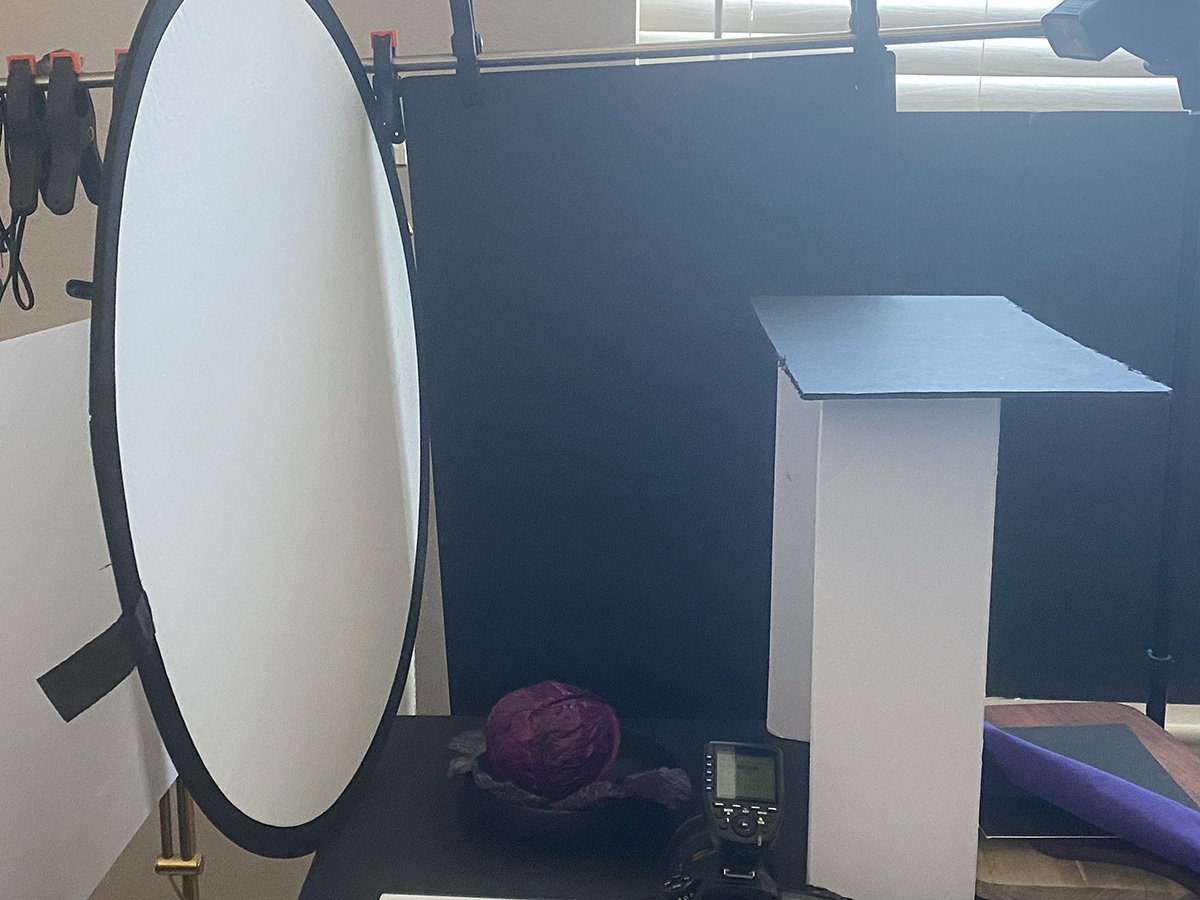
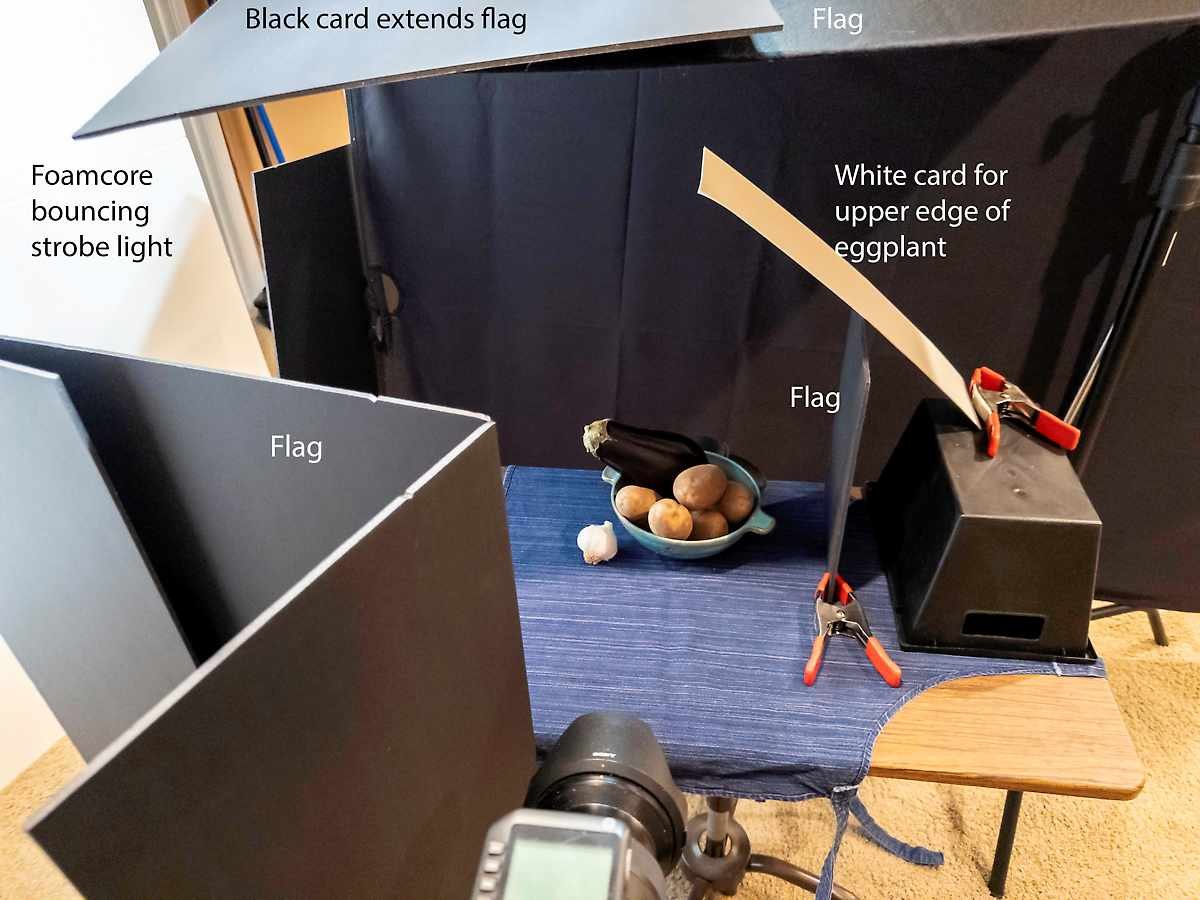
Block the light from the subject with a flag. Do not let any direct light spill onto your subject/surface/background.
-
Adjust distance and angle until you see the card’s reflection and shadow quality you like on the subject; then add a black card on the opposite side for shape or a second white card for more wrap.
Situations where bounce wins
-
You want ultra-soft, natural light
Bouncing a small light into a big white card or wall effectively turns the card into a huge source, often softer and more “room-like” than a modest 2×3 softbox. This is ideal for food and tabletop sets where you want a window light feel rather than a clearly directional box look. -
You need a bigger source than your softbox
A 4×8 ft foamcore or V-flat used as a bounce can create a key much larger than most softboxes regular shooters own, giving very gradual falloff and smoother gradients on reflective objects. This is useful for bottles, cookware, or glossy packaging that shows every shape of the source. -
You want fast, flexible placement in small sets
A bounce board is light, cheap, and easy to clamp or lean right where you need it, including low angles or odd positions where a C-stand plus softbox would be clumsy. On a crowded tabletop, that can be the difference between getting the card edge exactly where you want it on a label versus fighting hardware.
Aesthetic and control trade-offs
-
More “open” light, less edge control
Bounce tends to spill more and feel more enveloping, which is beautiful for open, airy looks but less surgical than a gridded softbox when you need tight pools of light or crisp falloff. For moody, controlled food sets, many photographers go back to softboxes or scrims plus flags. -
Needs more power, but can look more organic
You lose output when you bounce, so a given exposure often demands more watt-seconds or higher ISO than shooting through a softbox. In return, many shooters feel bounced light reads more like a real window or skylight, especially in “book-light” style setups.
Quick rule of thumb for your work
-
Favor a bounce card as key when you’re seeking natural window light for tabletop/food, want very large and forgiving speculars, or need fast, cheap, repositionable big sources around a small set.
-
Favor a softbox as key when you need efficiency, precise beam control, or repeatable, tightly shaped light, such as moody hero shots or situations where you must keep light off the background
How to set exposure when using a bounce card as key light
How to set exposure when using a bounce card as key light
Set exposure for a bounce?card key the same way you would for any soft source: meter or test off the light that’s actually hitting the subject, then adjust light power and distance until your key and ratios look right.?
Core approach
-
Meter the bounced light at the subject
With a handheld incident meter, place the dome at the subject and point it toward the bounce card (the effective source), then adjust flash/LED power until the meter gives your target f?stop at your chosen ISO and shutter. This automatically accounts for all losses in the bounce and gives you a reliable baseline exposure.? -
If you don’t have a meter: bracket from a test frame
Start from a “normal” studio baseline (for flash, e.g. ISO 100, 1/160–1/200, f/8) and take a test shot, then adjust light power first, not camera settings, until the histogram and highlights look right. If it is too dark, raise power or move the lamp closer to the card; if it is too bright, lower power or back the lamp off.?
Practical tabletop workflow
-
Lock camera settings, tune the light:
For product/food, pick your working aperture (for DOF), shutter (for ambient control), and ISO, then leave them fixed and only ride light power and card distance/angle to hit exposure.? -
Meter for the key, then check ratios:
Once the bounce key is set, add any fill/negative fill and quickly re?meter or test to ensure you’re not lifting shadows more than you want; large white cards can easily creep from subtle fill into “flat” if they get too close.??
Bounce?specific considerations
-
Expect to lose 1–3 stops in the bounce
Compared to pointing the light straight into a softbox, bouncing into a card costs output, so you’ll often run higher power or ISO for the same f?stop.? -
Watch working distance
Because the bounce surface and subject are usually fairly close, the inverse?square falloff is gentle, and small distance tweaks of the card can visibly change exposure and contrast; re?meter or re?test whenever you move the card significantly.
ASSIGNMENT
Do the exercise and show four images from it.
Portfolio Work 1:
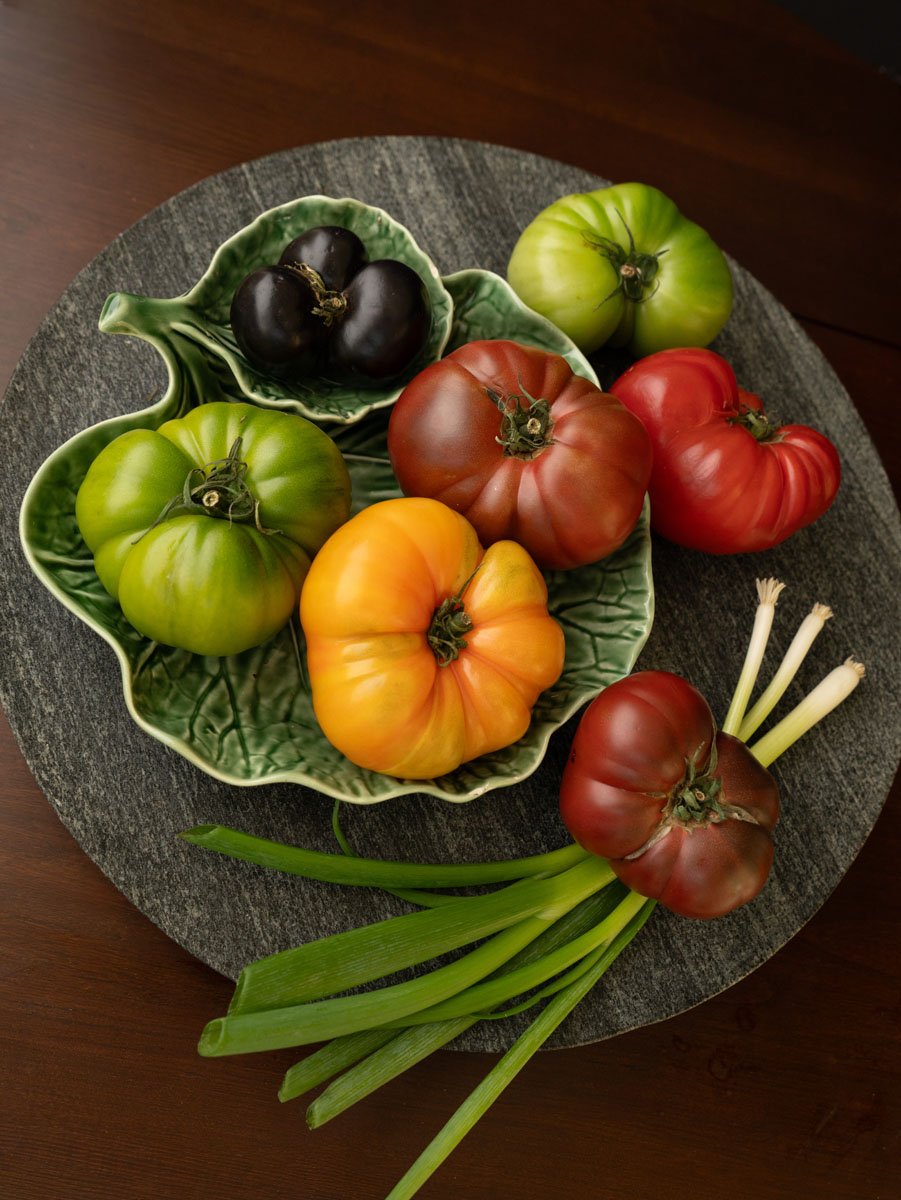
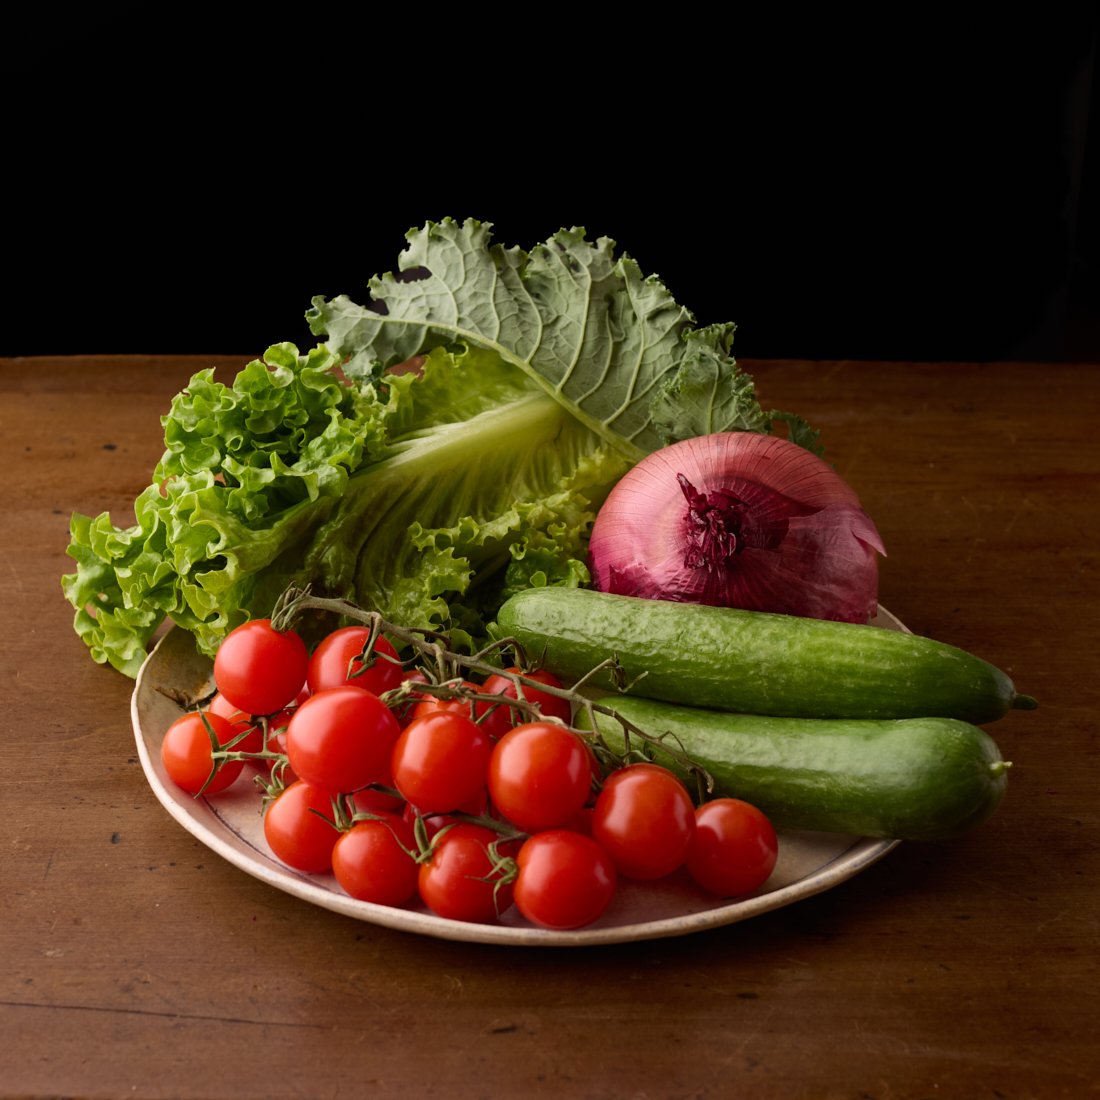
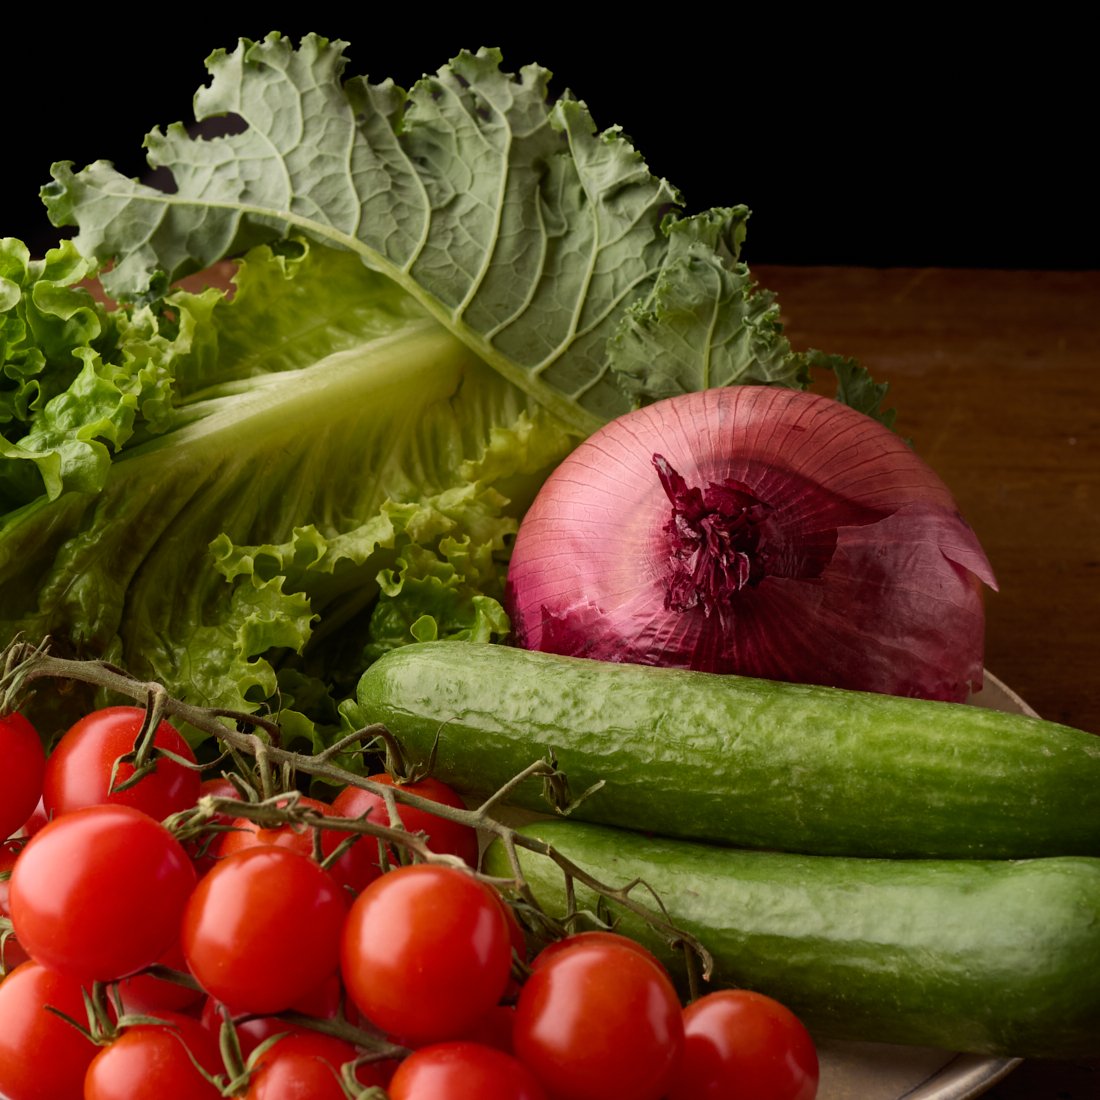
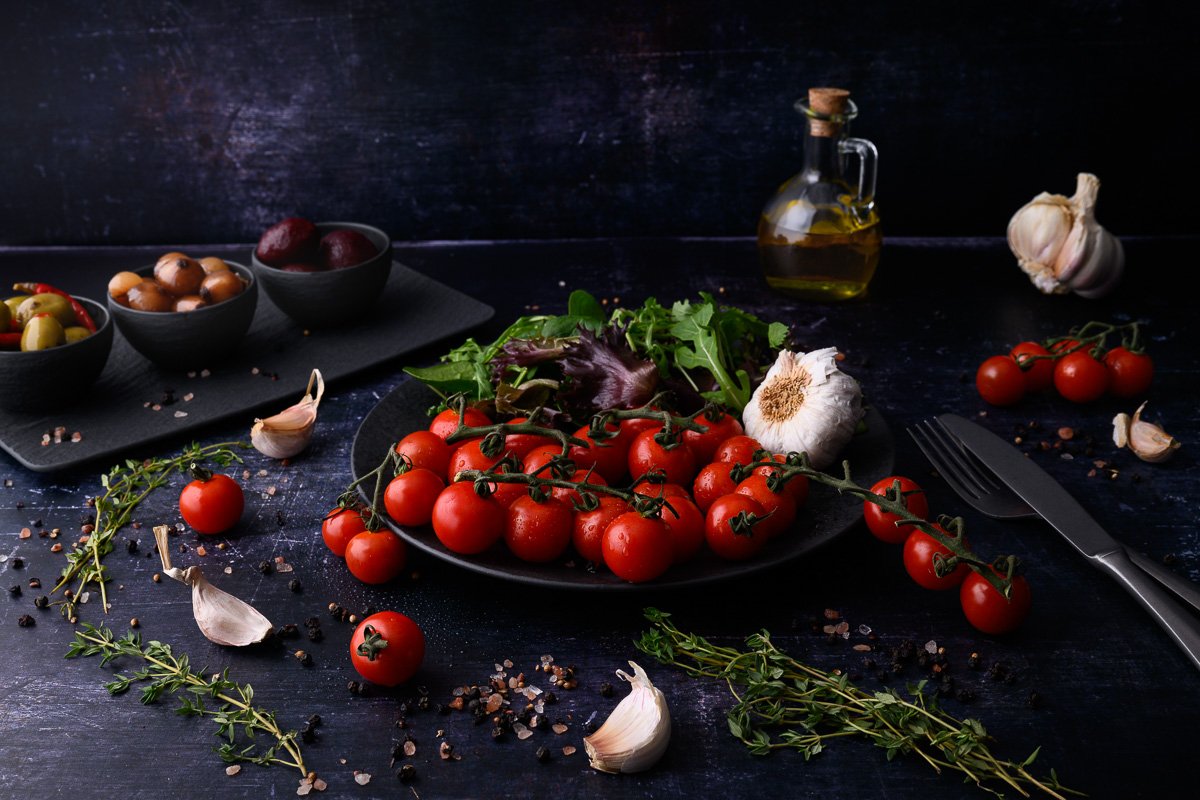
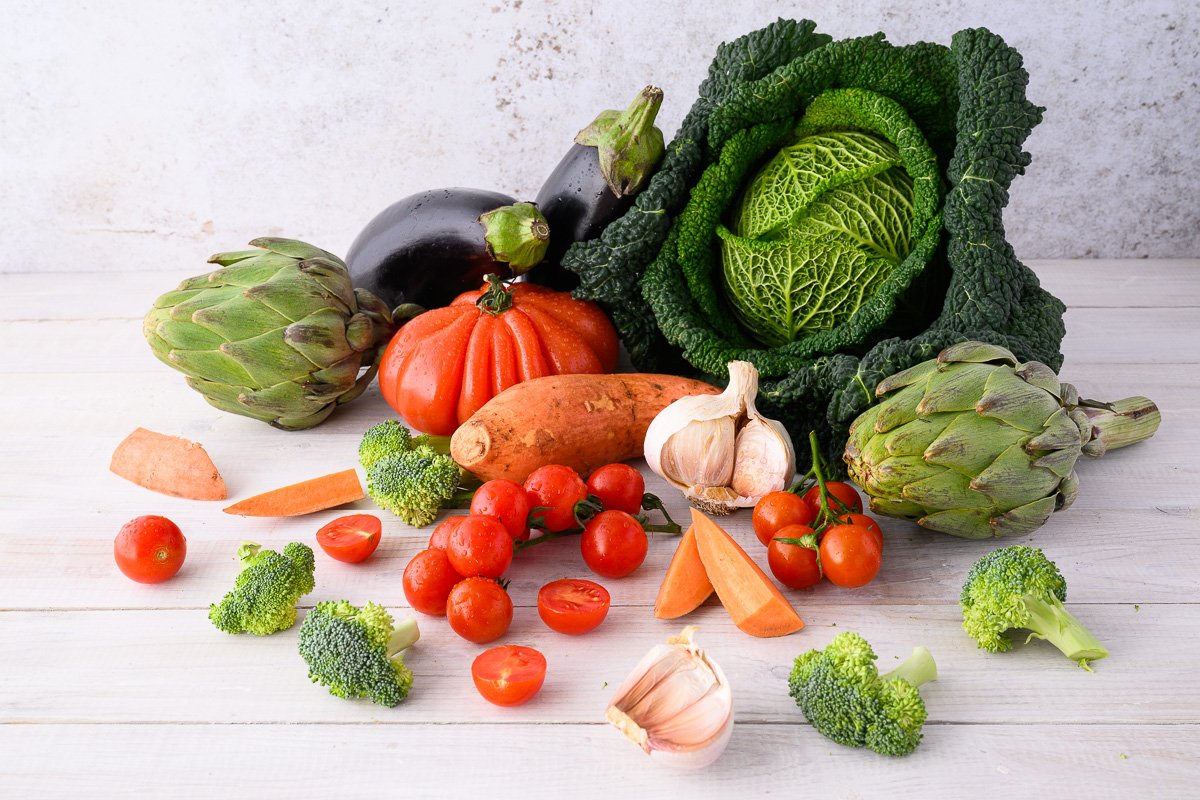
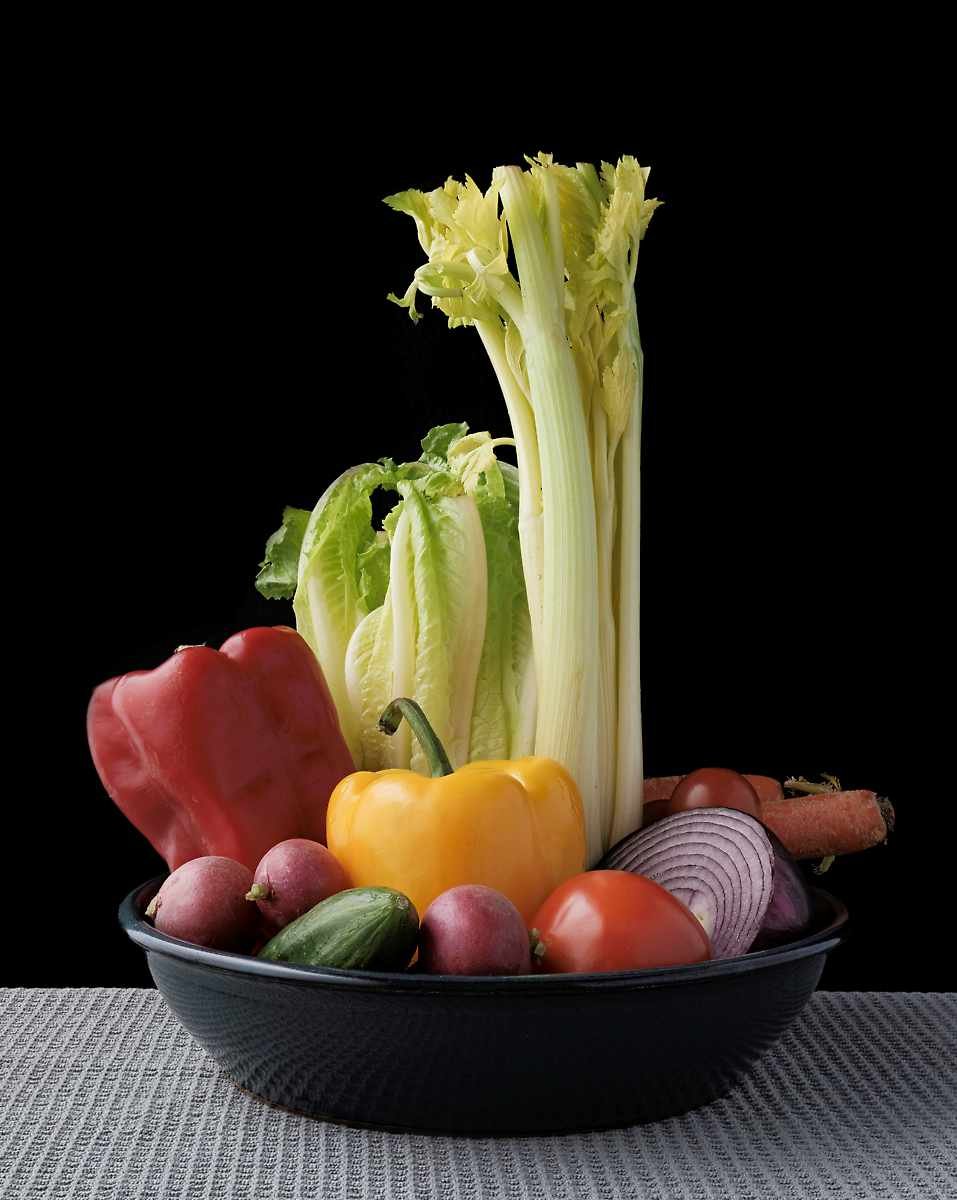
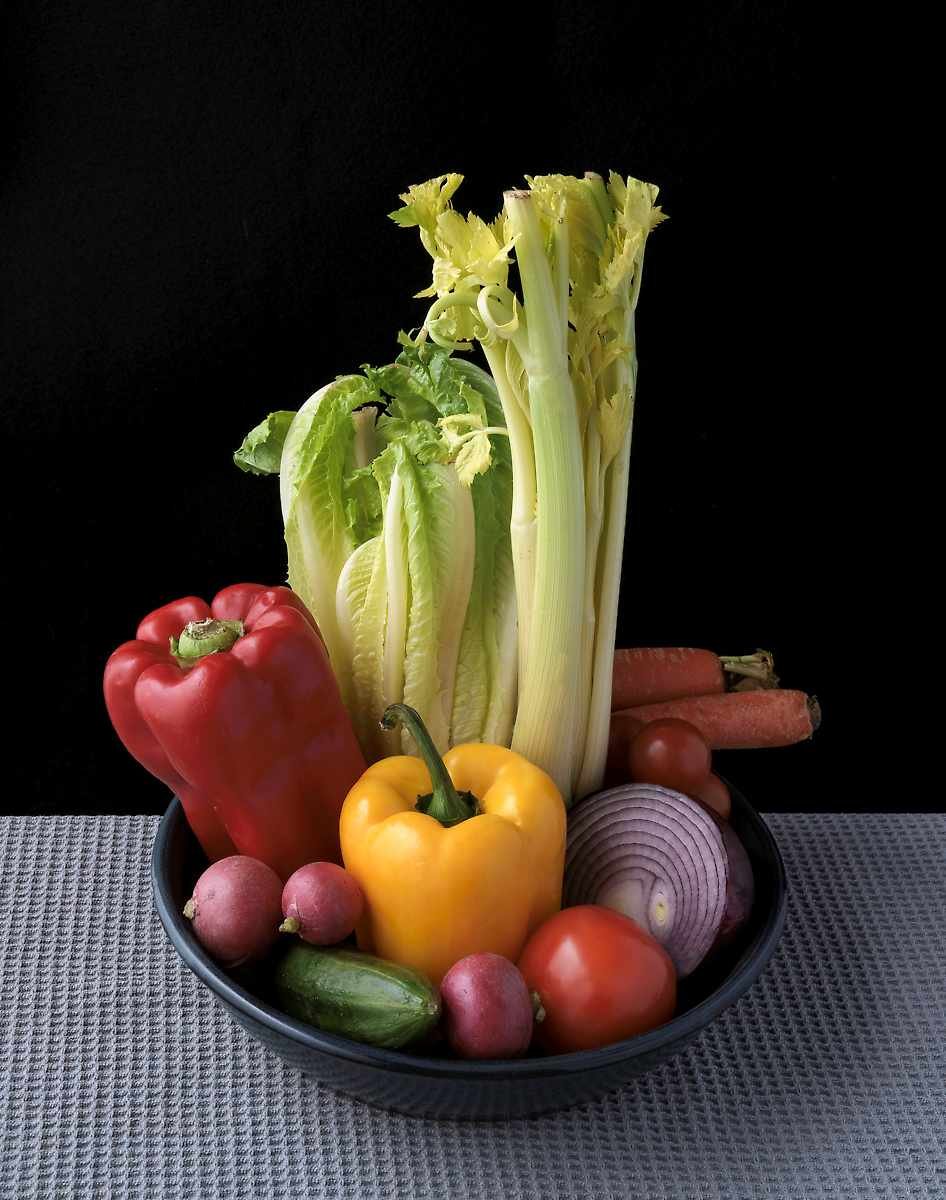
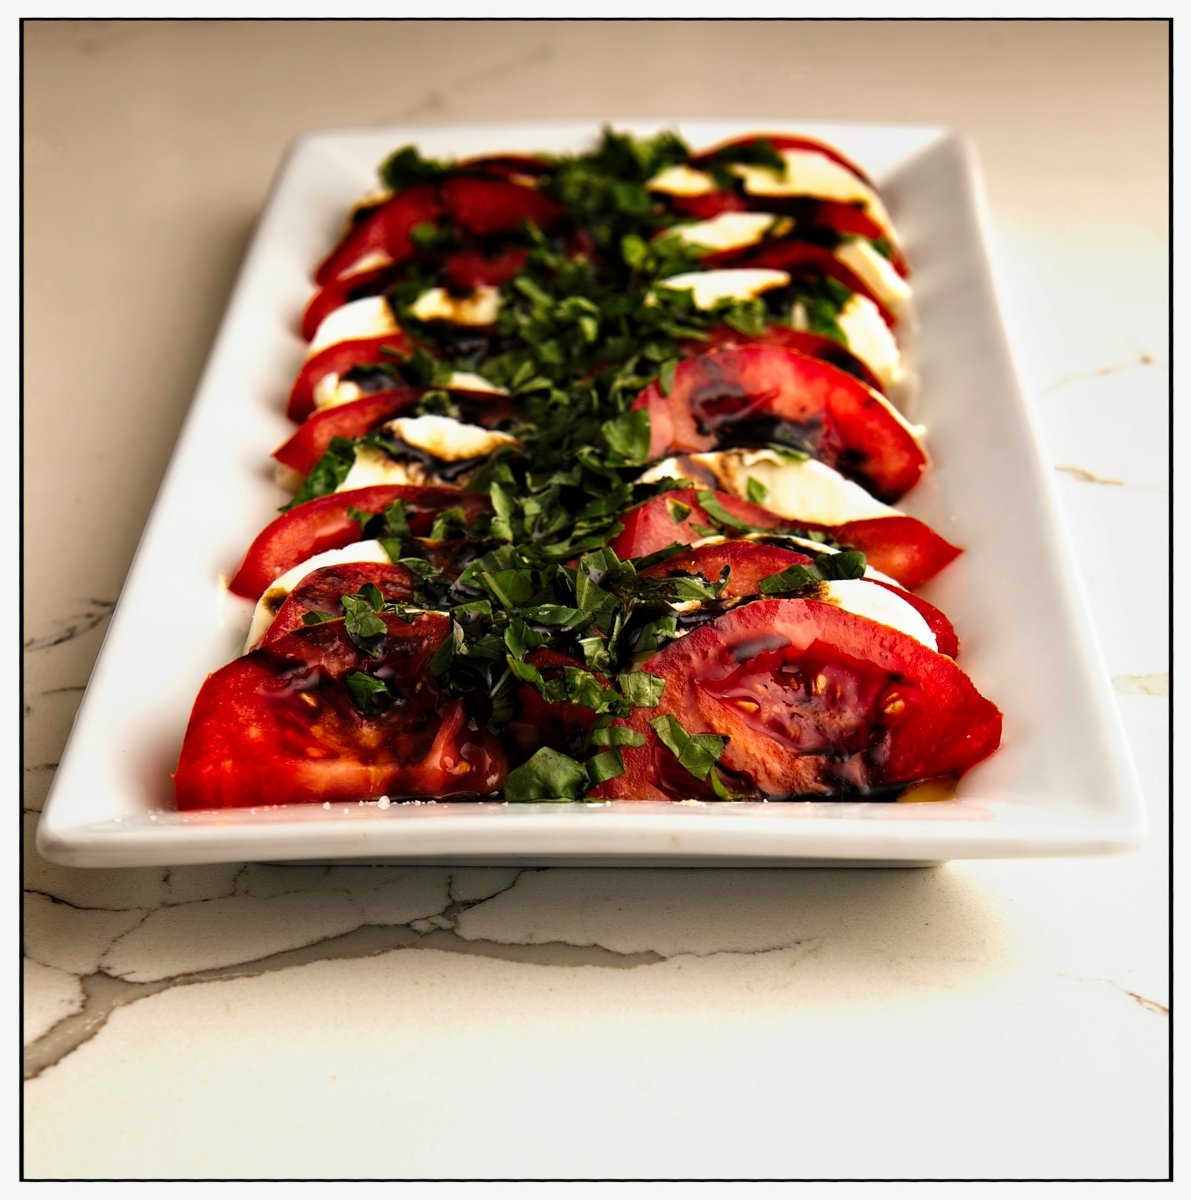
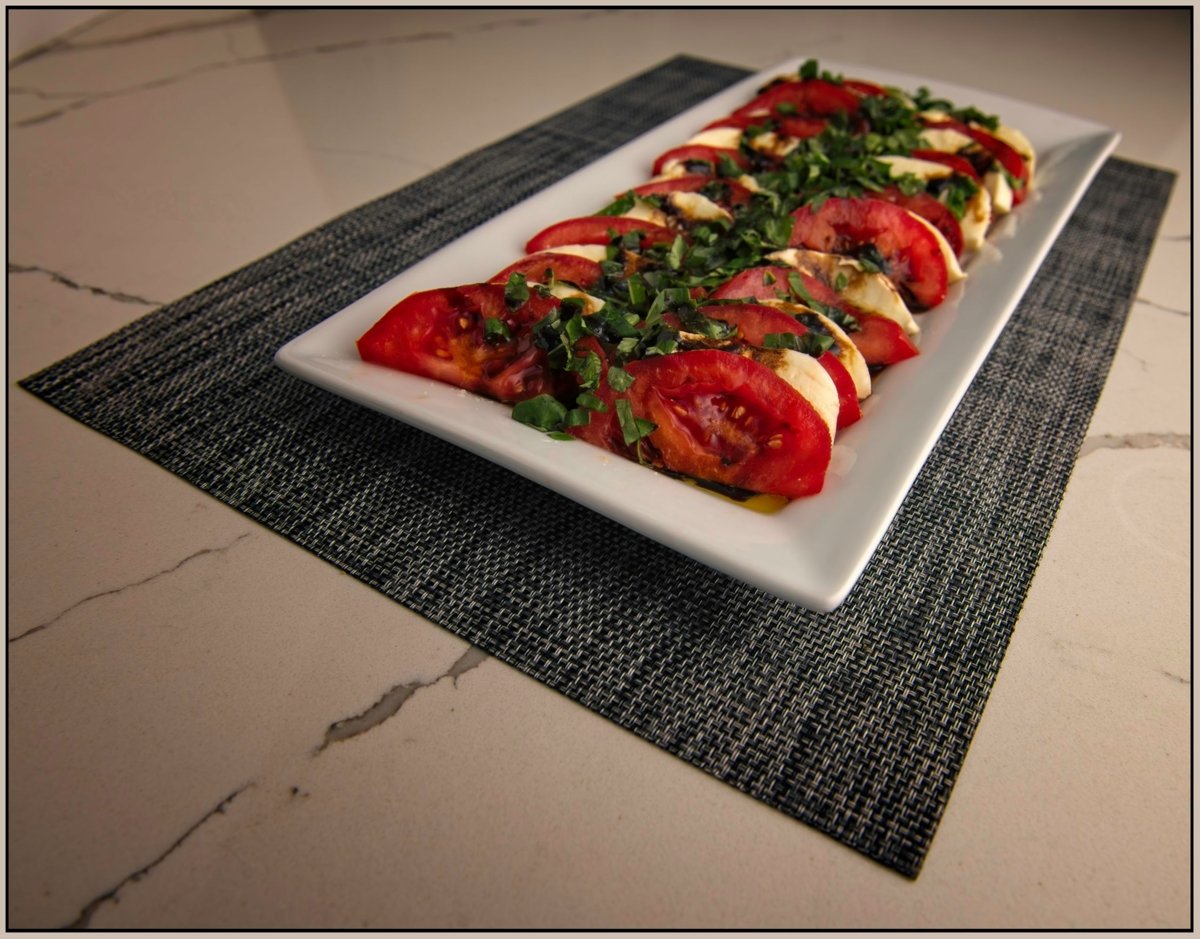
Use a collection of salad ingredients in a bowl or on a plate. Shoot both obliquely, and “naturally.” The surface should be a natural one (wood, tile, brick…).
Portfolio Work 2:
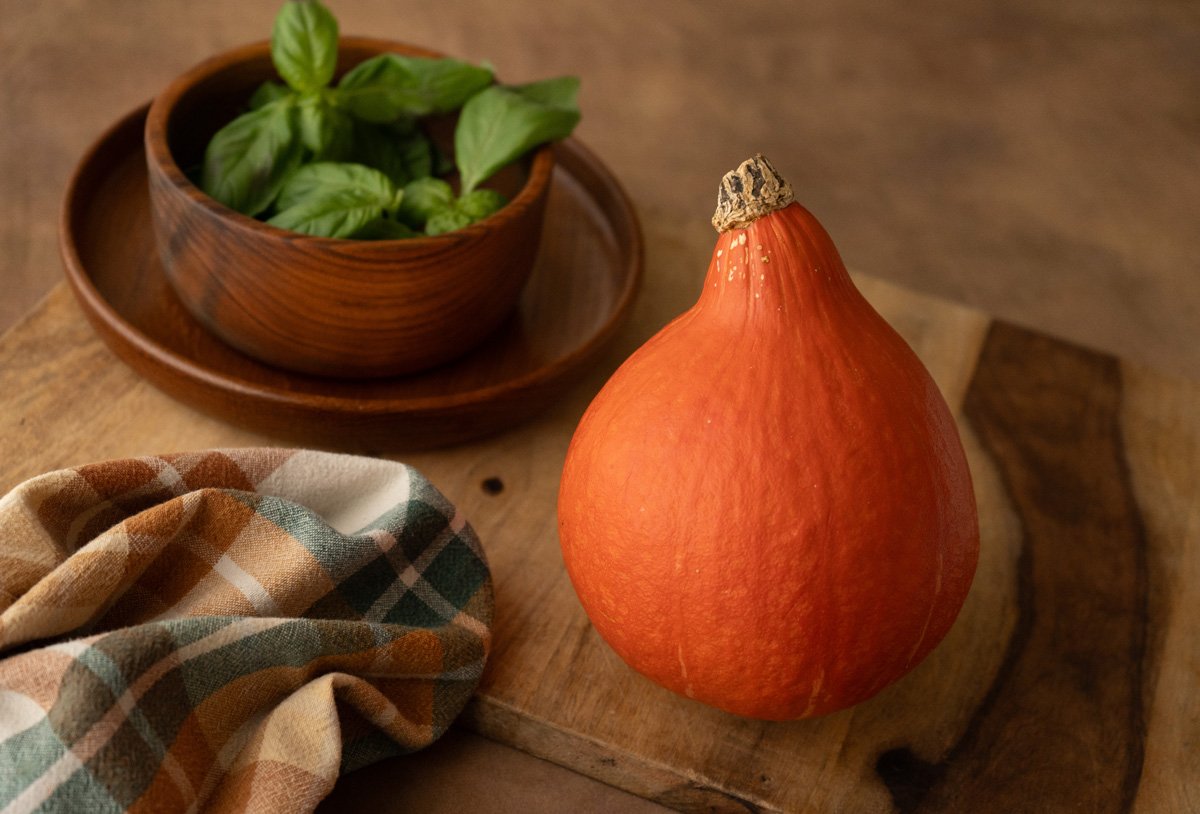
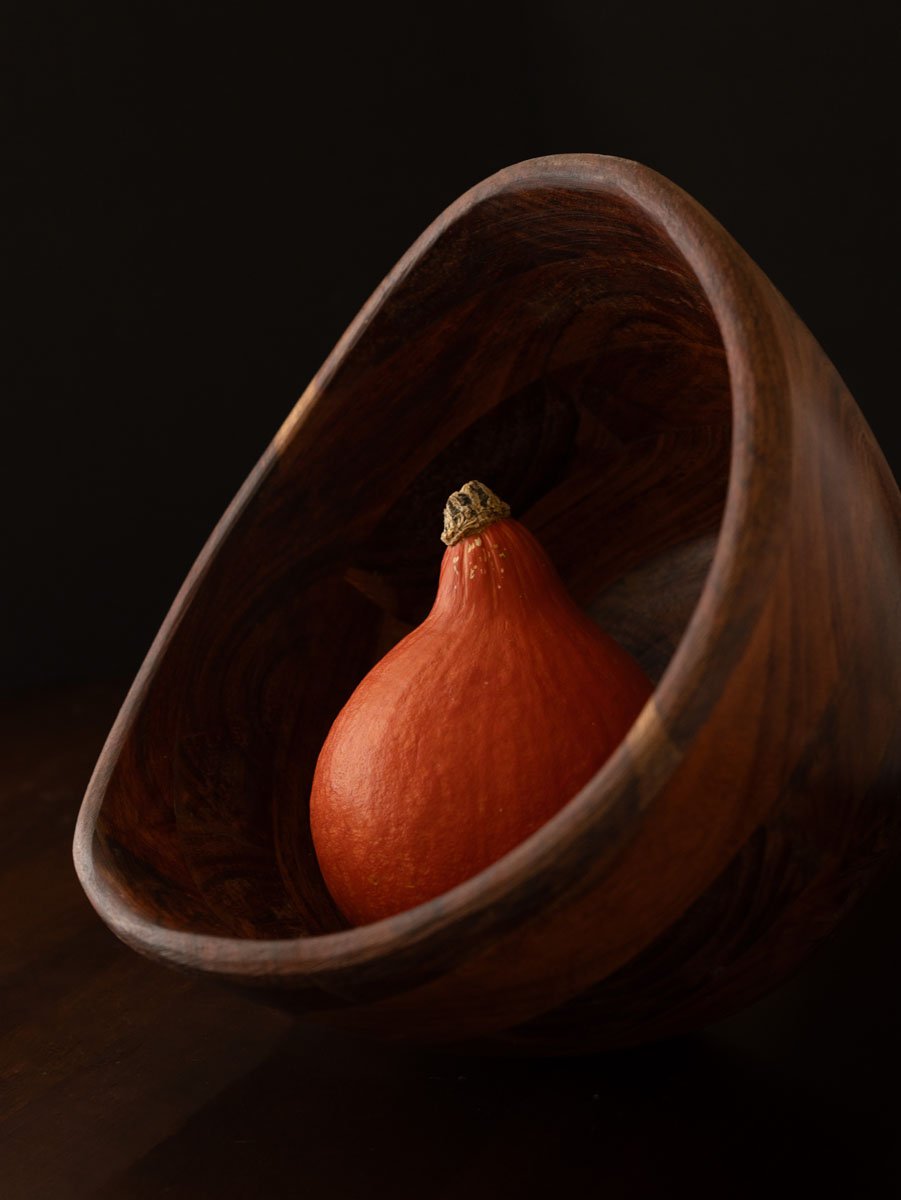
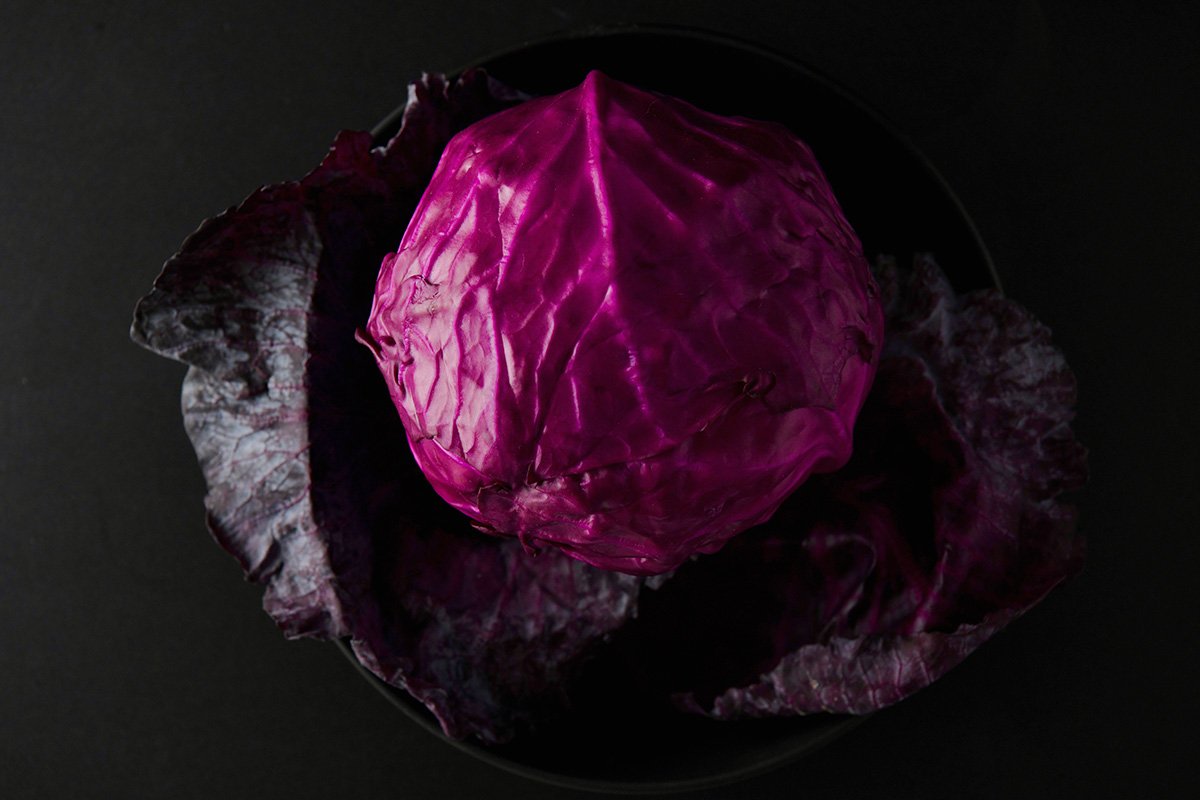
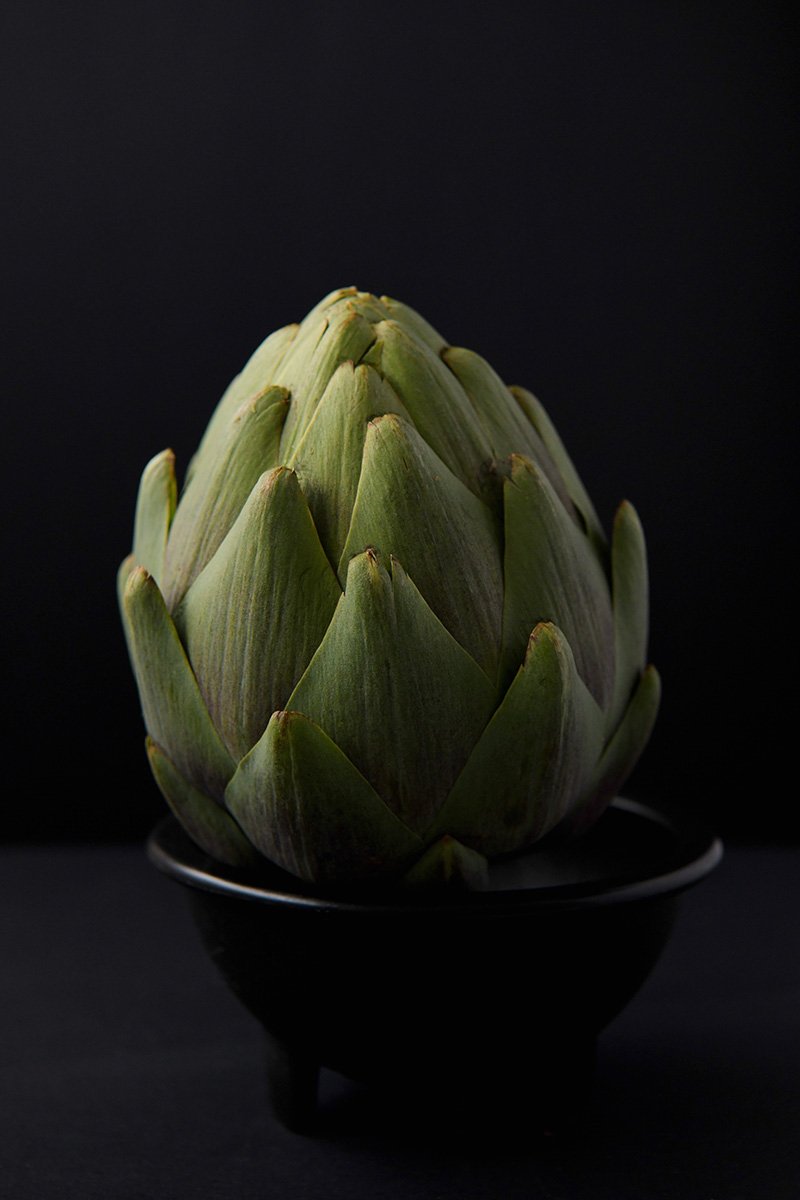
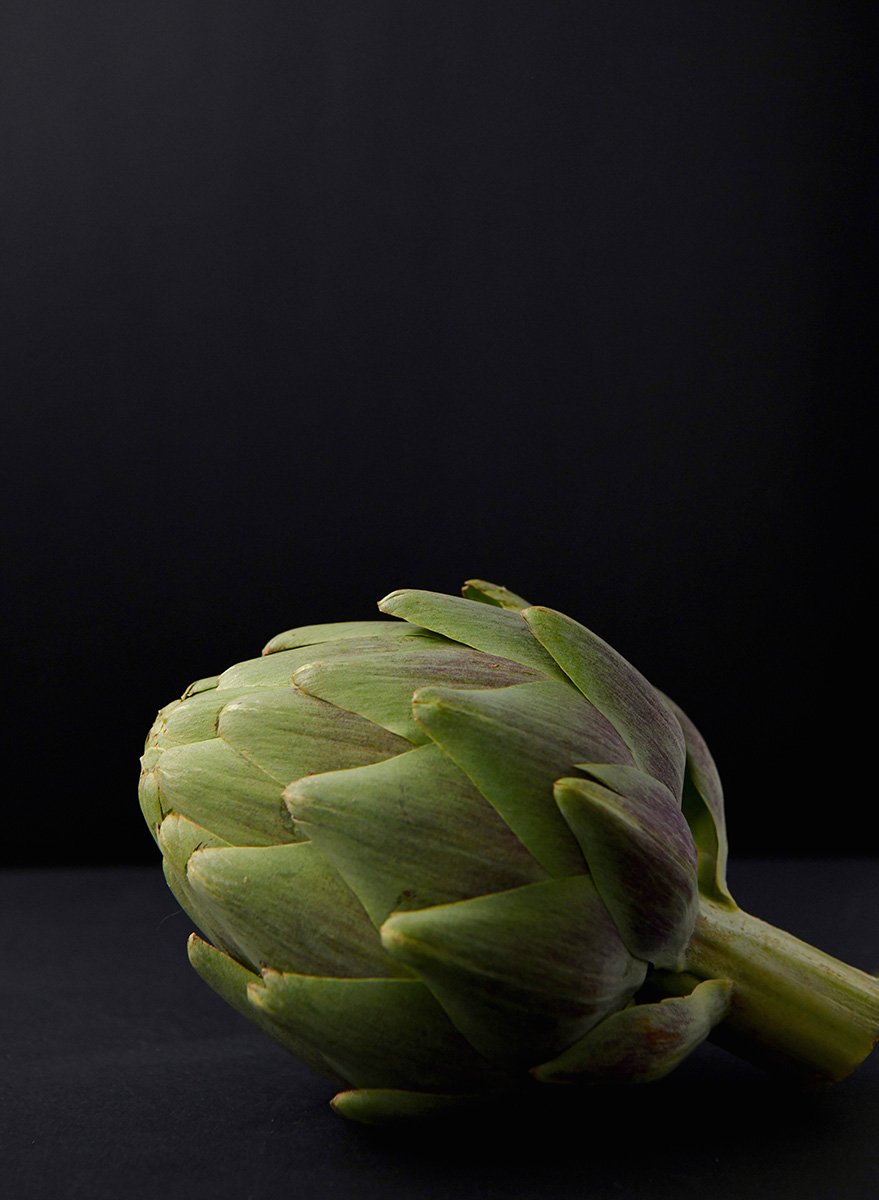
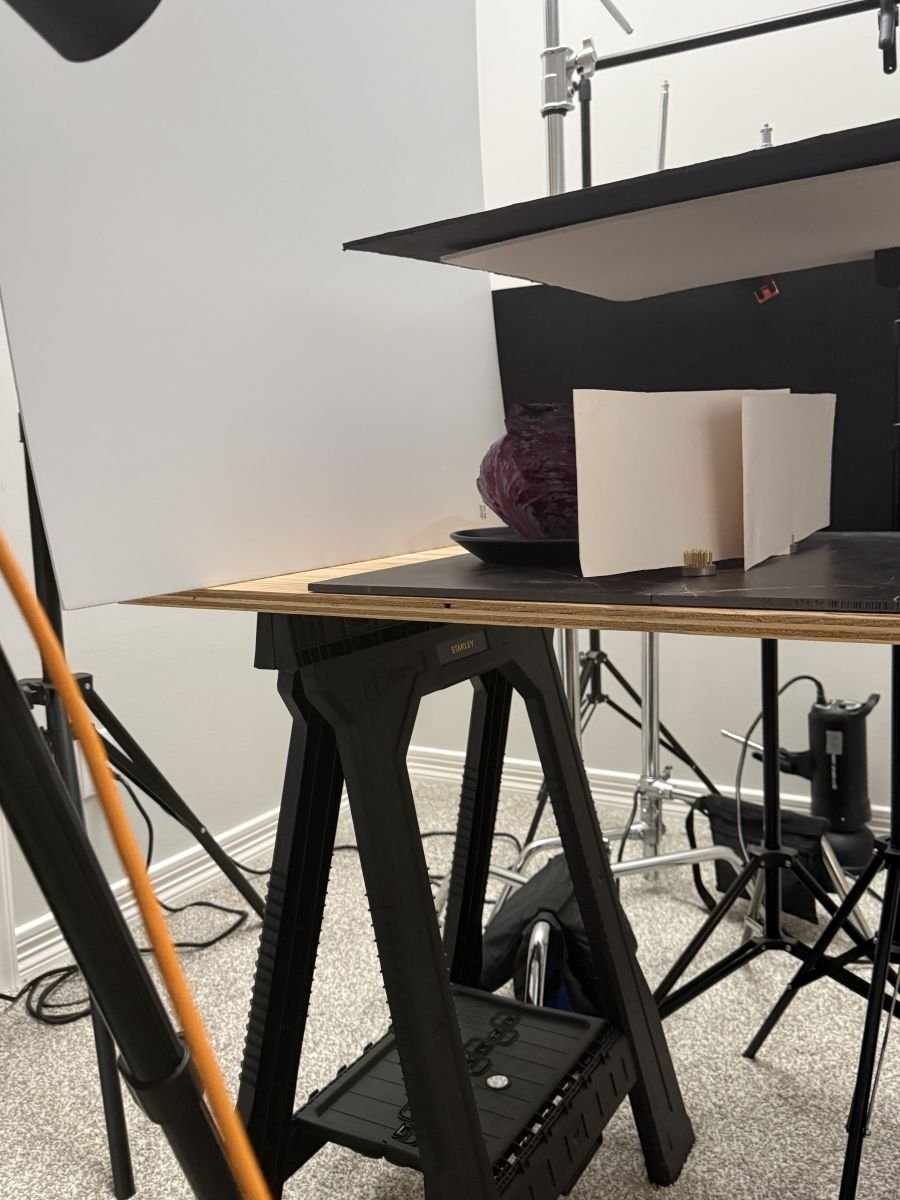
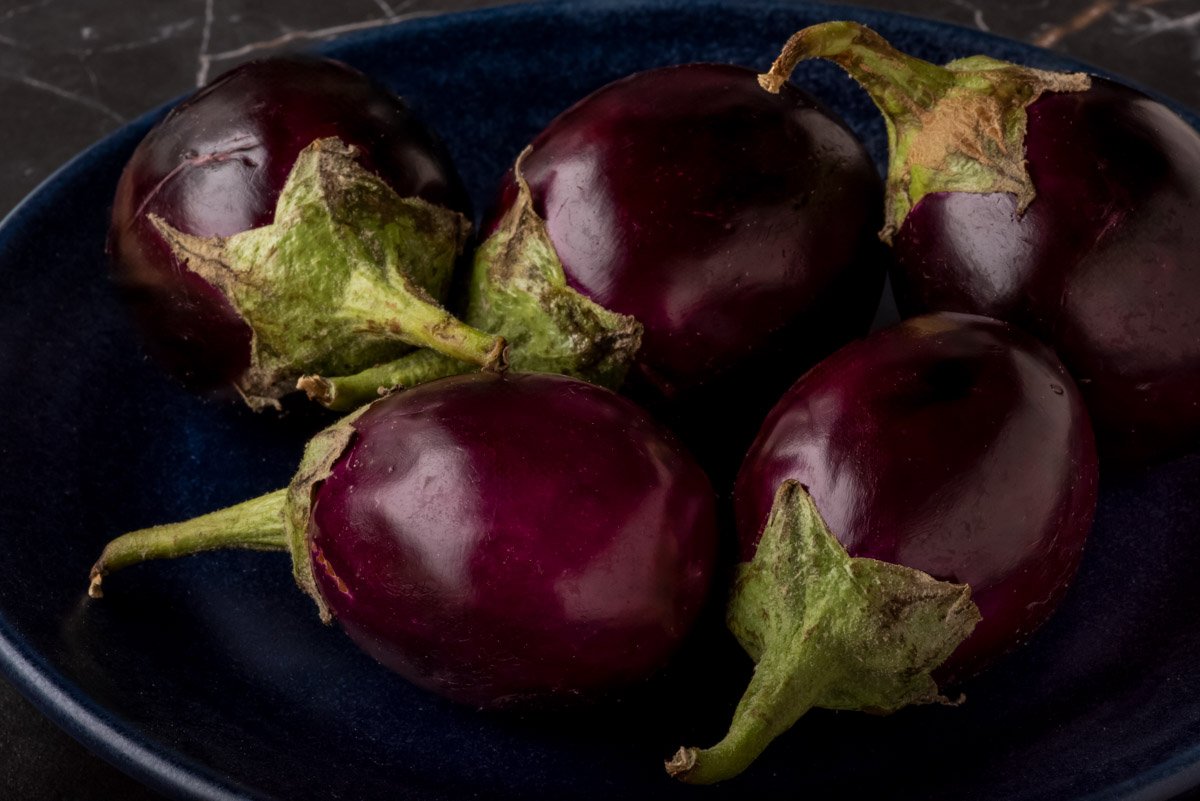
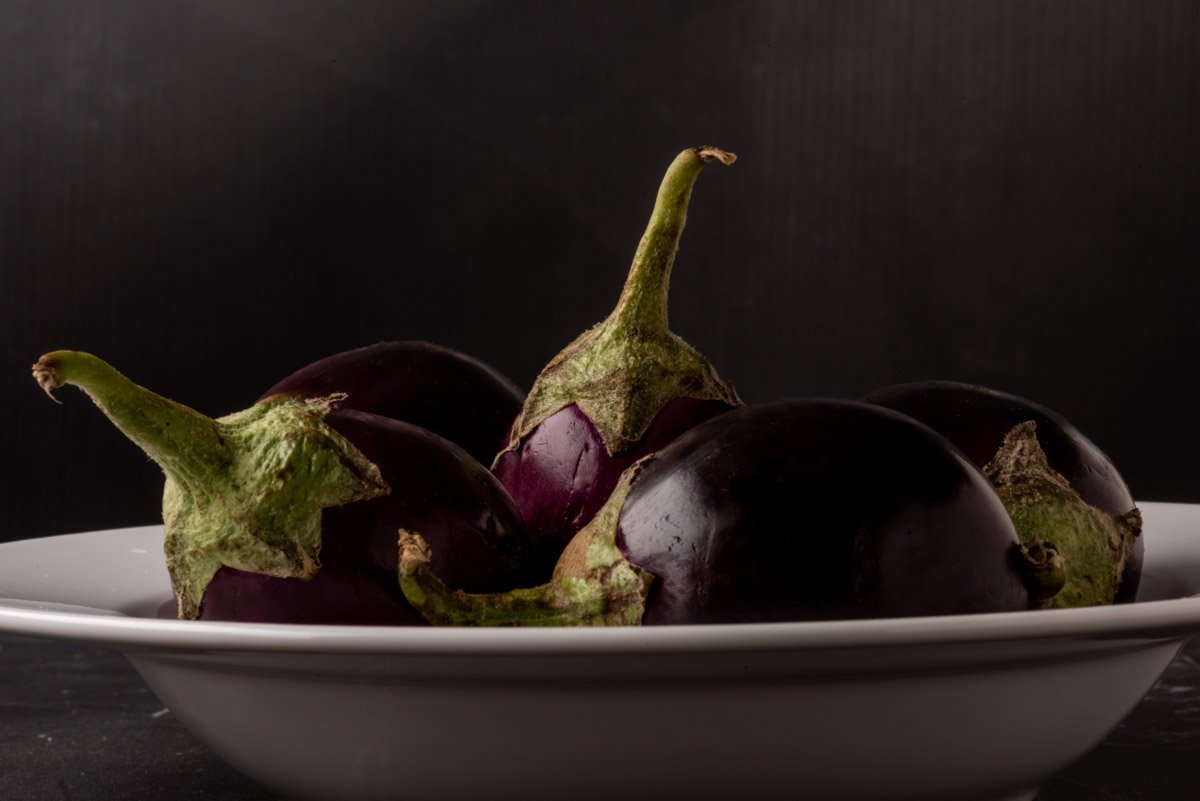
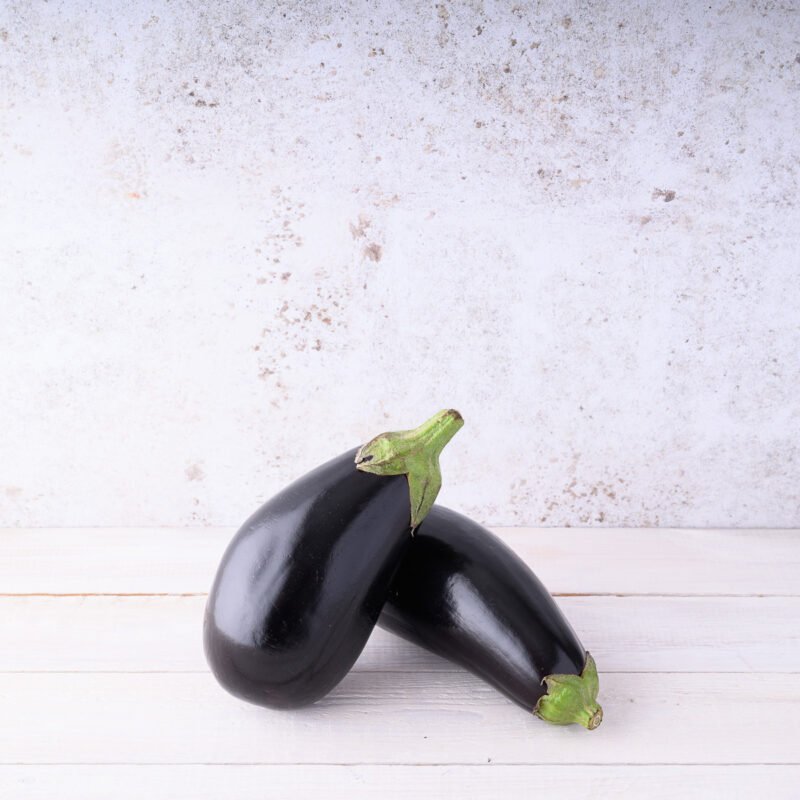
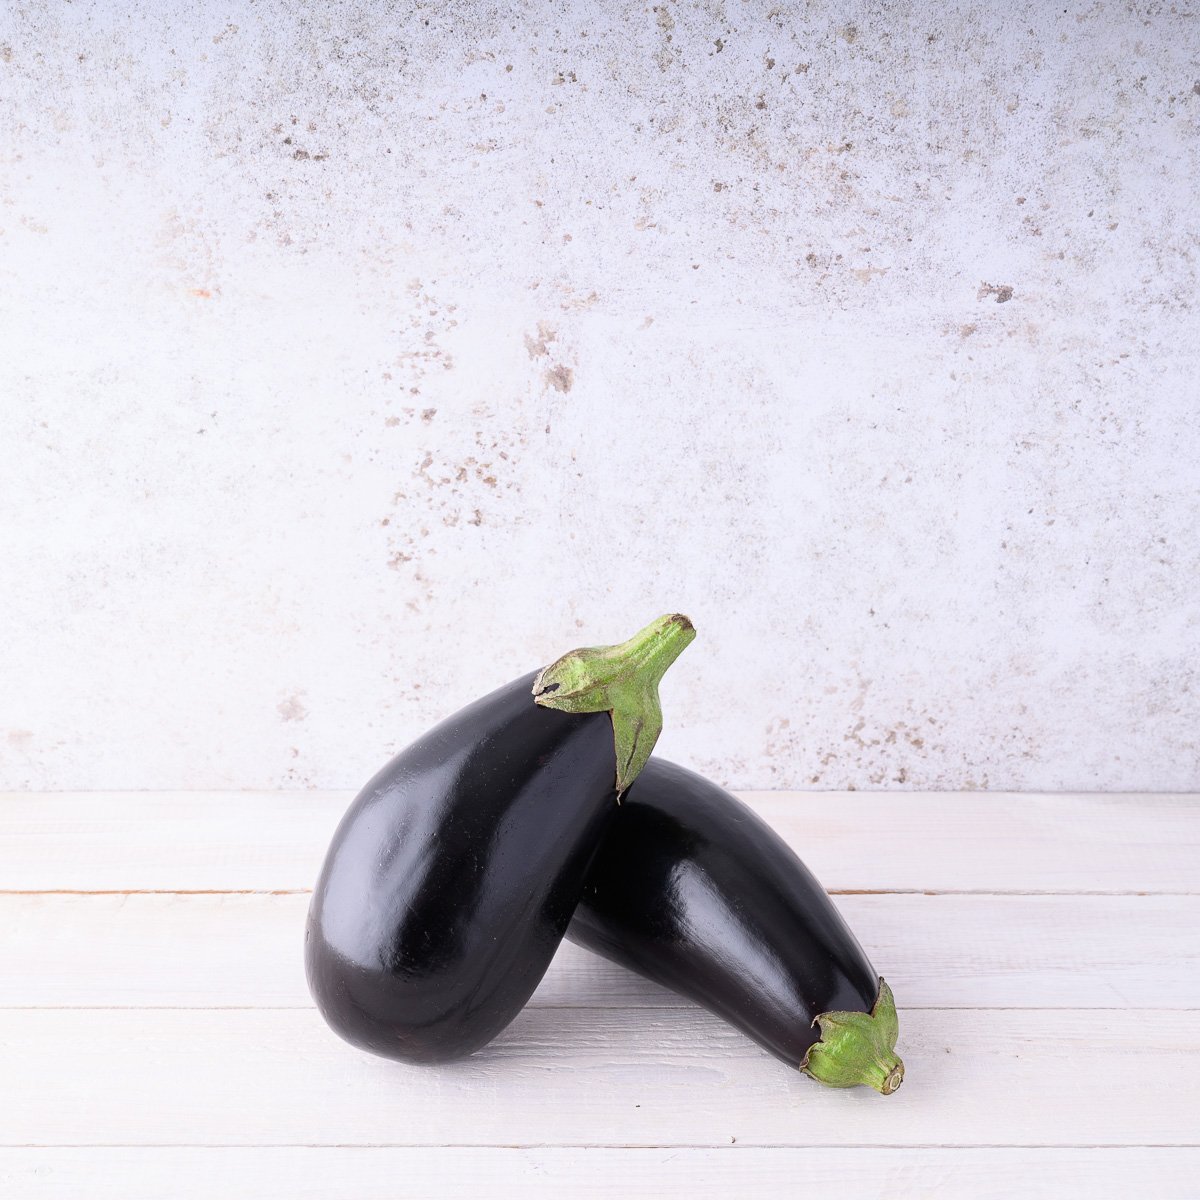
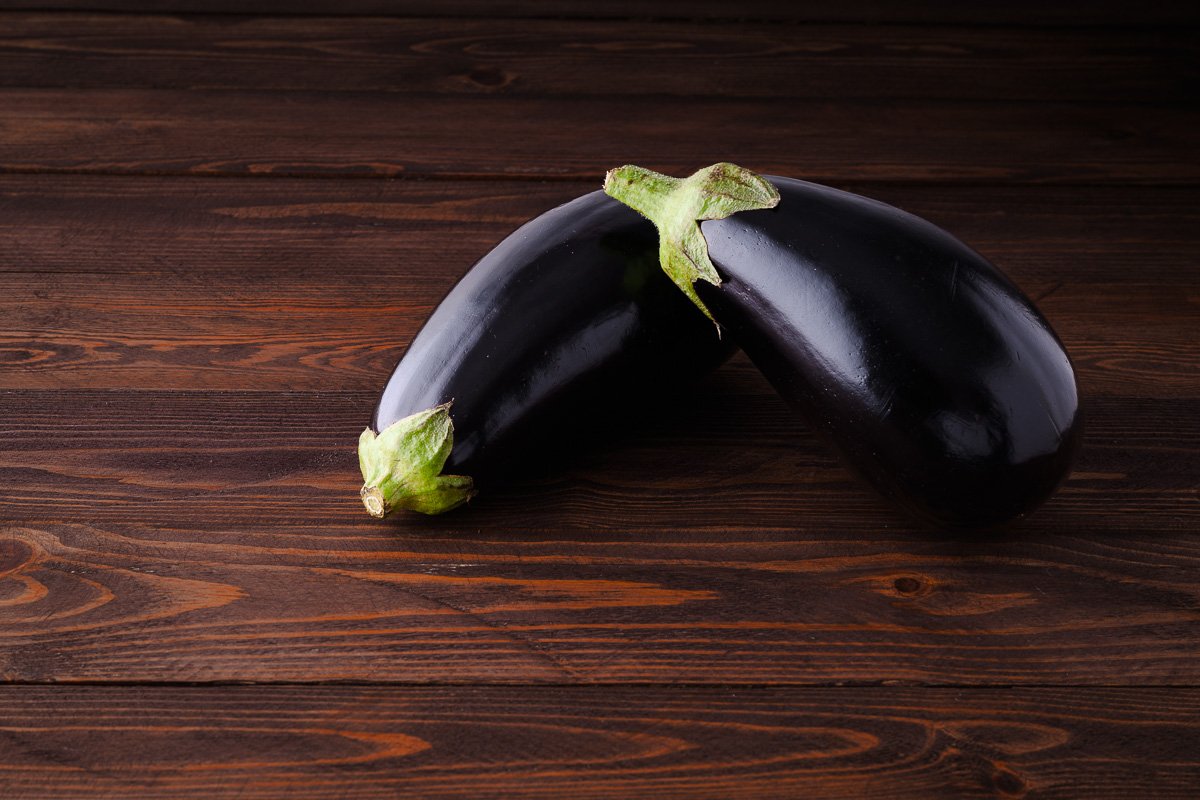
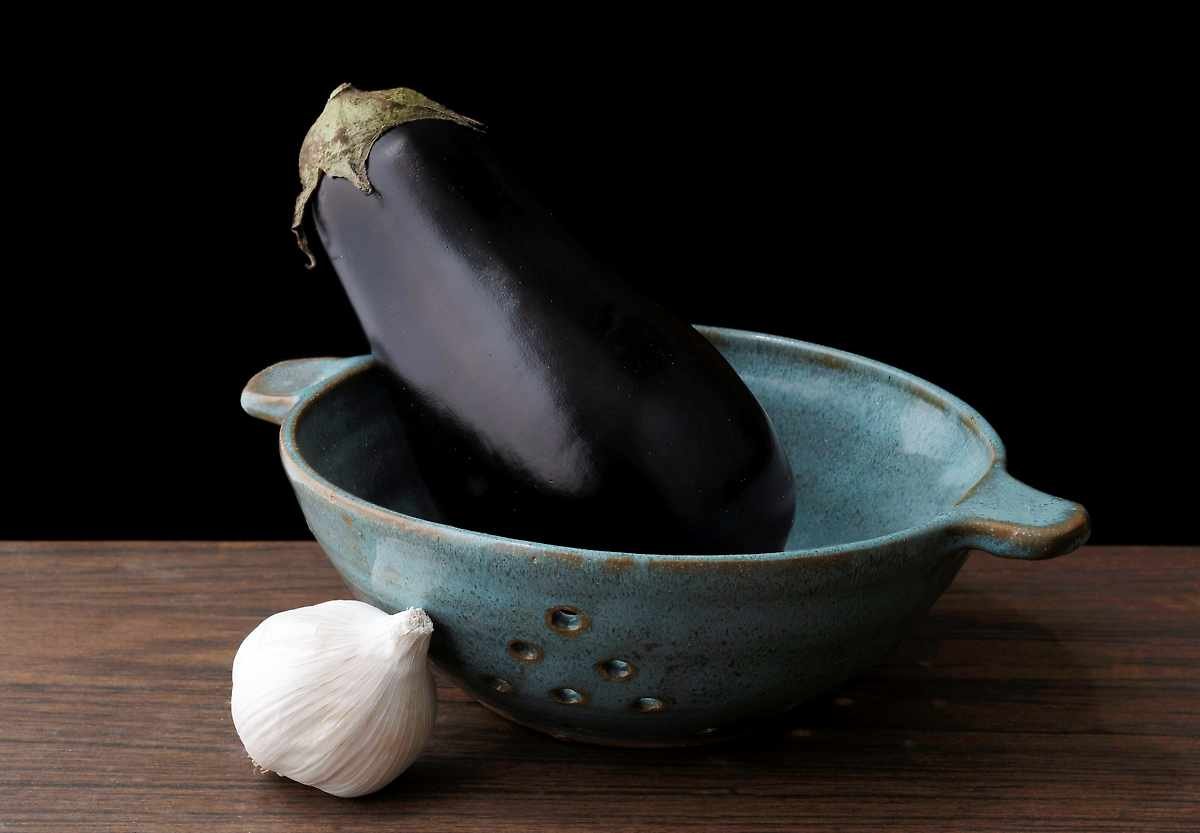
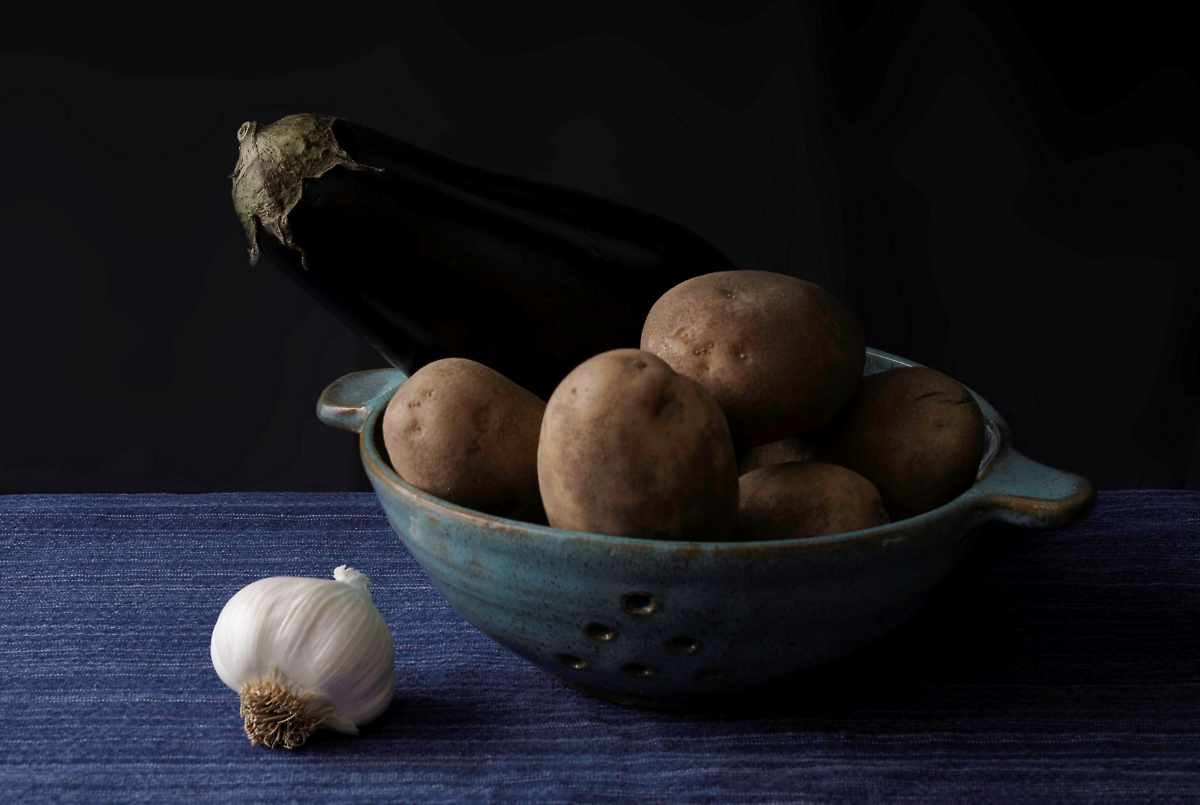
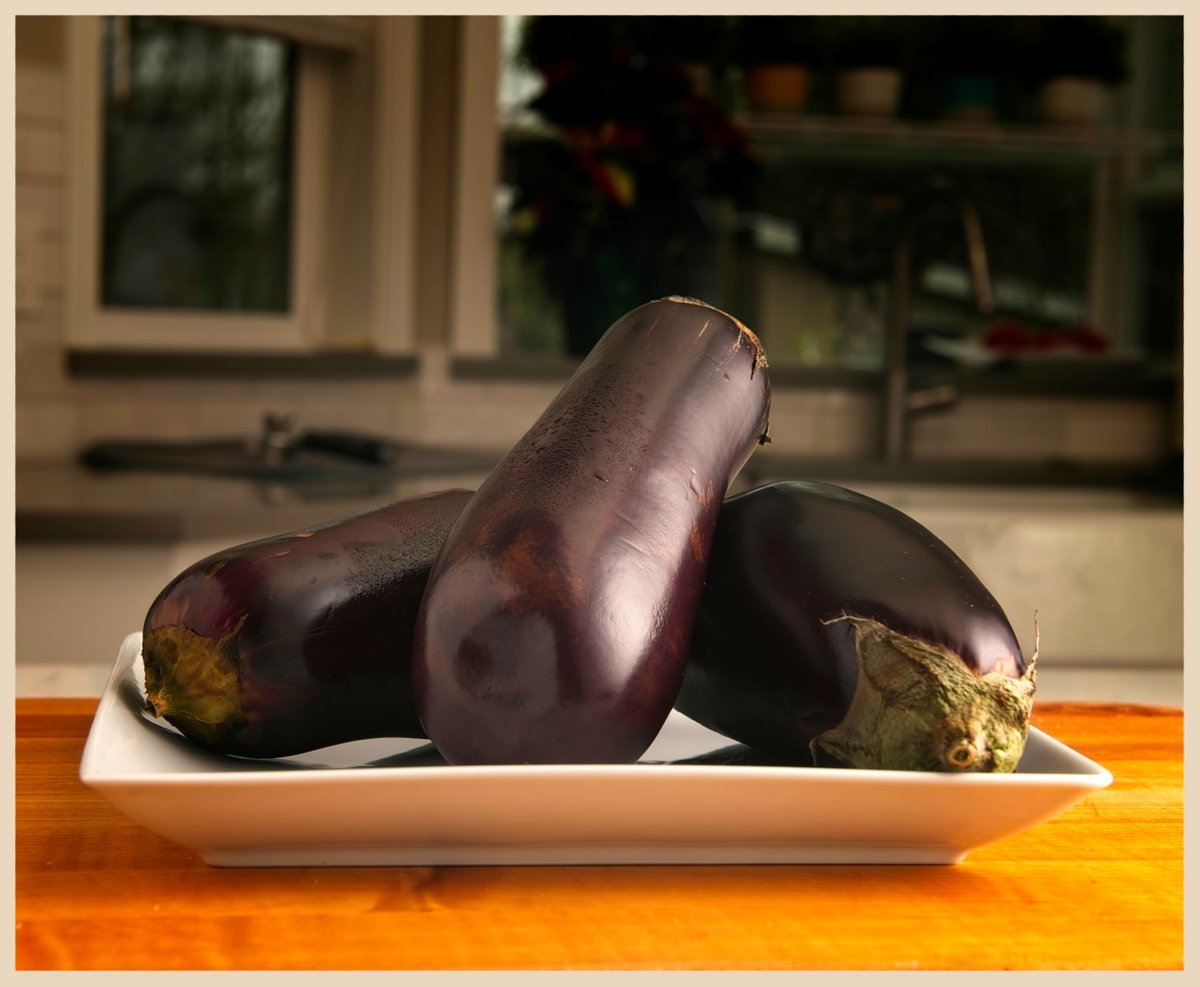
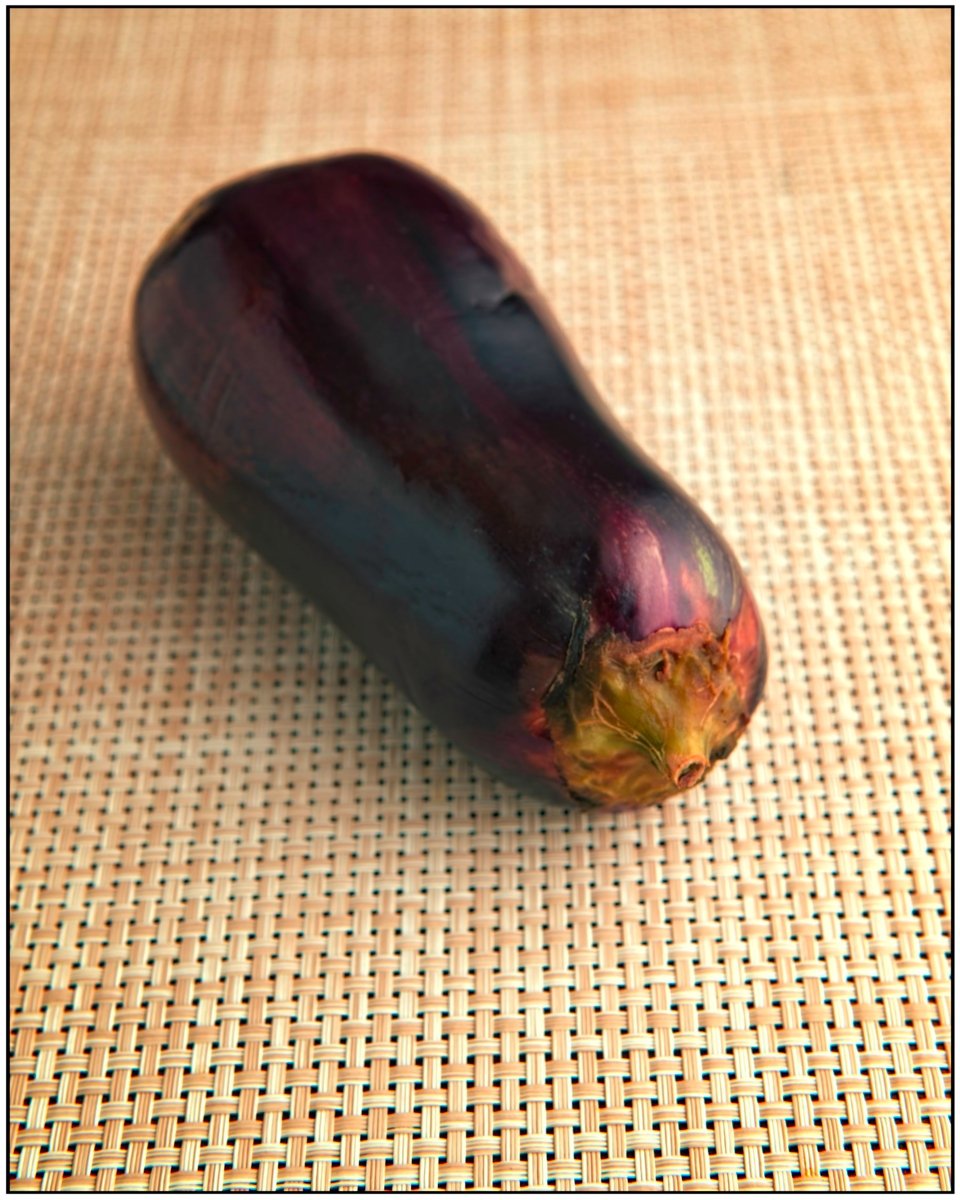
A large vegetable like an eggplant or Leek. Preferably in a bowl. Make the light soft and dreamy, and a second shot with the subject emitting more drama (using negative bounce),
ASSIGNMENT UPLOAD
1. Must not be larger than 1200 pixels on the longest side.
2. Must be .jpg format
3. Include BTS shots
4. File naming: first-last-assignnumber-1.jpg (don-giannatti-1-a.jpg, don-giannatti-1-b.jpg, etc…
5. Be sure to resize phone shots.
[wordpress_file_upload]
What you will need:
- Large White Board (or two taped together)
- Alternate: White Wall
- One or Two lights
- Tabletop
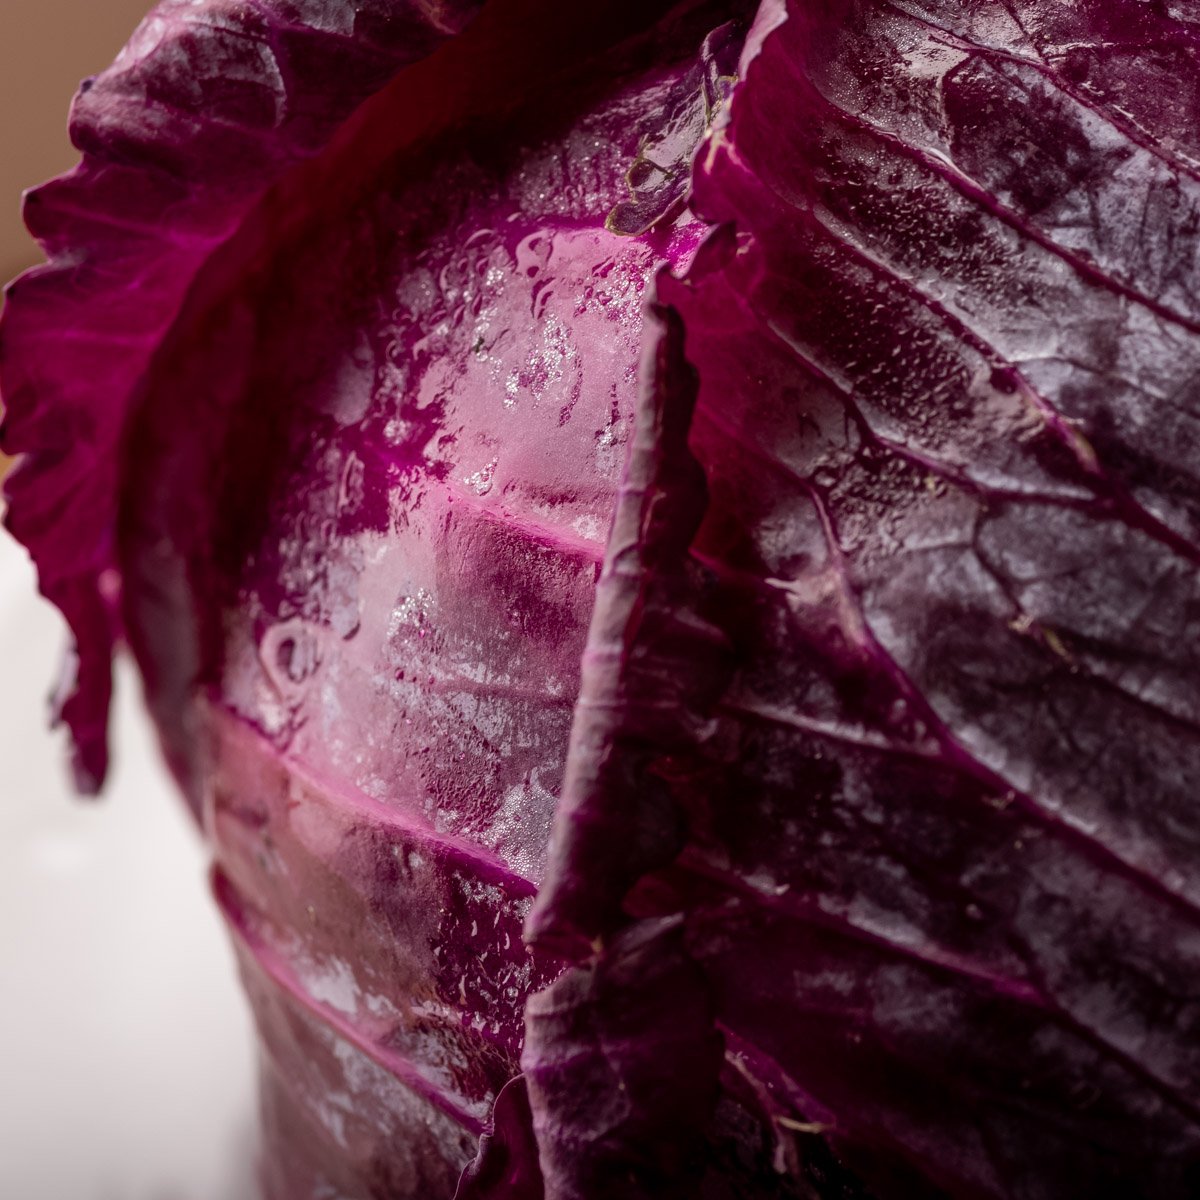
- Vegetable (Like eggplant, Leek, or Cabbage)
- Small 12″x12″ V-card (total 12×24)
- Flag (black card)
- Stand for light and stand for flag.
Resources:
AI TOOLS I USE:
Open AI ChatGPT
Gemini
Claude
GenSpark
Grok
____________________
The Ultimate Guide to Starting Your Creative Business
The Ultimate Guide to Starting Your Creative Business (PDF)
AI Recap
Quick recap
The meeting focused on reviewing and critiquing still life photography assignments, with Don providing detailed feedback on lighting techniques, composition, and post-processing methods. Participants shared their photos taken with different lighting setups, including book lighting and softbox configurations, with Don offering guidance on how to improve highlights, shadows, and color balance. Don emphasized the importance of proper lighting placement and explained various techniques for achieving desired effects, while also recommending resources like Gary Per Wheeler’s book and Terry Heffernan’s work for further learning. The discussion included tips on using Photoshop and Lightroom for post-processing, with Don demonstrating specific tools and techniques to enhance images.
Next steps
- Don: Post the frequency separation video and action download links on the class page for reference.
- LucianaRizzi: Try to purchase Gary Perwheeler’s book via eBay as suggested.
- Inge: Try increasing shutter speed to maximum sync (e.g., 200th or 250th) to reduce ambient light impact during next shoot.
- All participants: Complete the next assignment (still life with flowers, rocks, and twigs on a shiny/gloss black surface, using a tilted screen as a compositional element) by the deadline (next week, before the next meeting).
- Don: Post the next assignment details on the class page by noon tomorrow.
Summary
Photography Techniques and Composition Review
Don reviewed the photos taken by Christine, praising her for the excellent highlight-to-shadow ratios and composition. He suggested minor adjustments in post-processing, such as adjusting green tones and red luminosity in Lightroom. Don emphasized the importance of documenting techniques and making creative choices in still life photography, such as the angle of lighting and the inclusion of reflections.
Book Lighting and Light Control
Don and Christine discussed lighting techniques, particularly focusing on book lighting and the use of black cards to control light placement. Don praised Christine’s portfolio-quality photos and suggested using barn doors to control light reflection. They also talked about the challenges of working in a small space and the importance of light placement to avoid direct reflection on the food.
Photography Lighting Techniques Discussion
Don and Inge discussed lighting techniques for photography, focusing on controlling highlights and shadows. Don suggested adjusting the exposure settings to minimize the impact of ambient light and recommended testing the camera’s ability to capture light at different shutter speeds and apertures. Inge shared her challenges with lighting in a small space and the need to diffuse the board to prevent overexposure. Don praised Inge’s work and provided feedback on focusing and exposure adjustments to enhance the images further.
Camera Sync Speeds and Lighting
Don and the group discussed camera sync speeds, with Steve mentioning his D800’s maximum sync speed of 250. Don advised moving the camera to match this speed. They also talked about the Nikon Knicker mat, with Judy recalling it as her first camera. Don explained its advantages over other Nikon cameras due to its vertical shutter design, allowing for higher sync speeds. The group then discussed lighting techniques, with Don demonstrating how to use a booklight to create soft, diffused lighting. Judy’s photo was critiqued for having the horizon too high, with Don suggesting fixing it in Photoshop to improve composition.
Food Photography Lighting Techniques
The group discussed lighting techniques and photography setups, with Judy sharing her experience of using a single light source to achieve a balanced exposure and highlight details in her food photography. Don emphasized the importance of capturing multiple shots from different angles and distances, particularly for still life photography where setup time is more significant than shooting time. The discussion concluded with Don introducing the concept of frequency separation as a retouching technique for enhancing product and food photography, noting its effectiveness in preserving tone while sharpening details.
Macro Photography Techniques and Tips
Don shared a video tutorial on YouTube for creating watch macros and discussed different techniques for cleaning up macro images. Robinson and Don exchanged tips on using specific actions and tools for macro photography, including using a Tokina 100mm macro lens at f/32 for depth of field. Robinson presented two macro photos, one with a black card background and a white card for additional light, which Don praised for its composition and lighting.
Food Photography Lighting Techniques
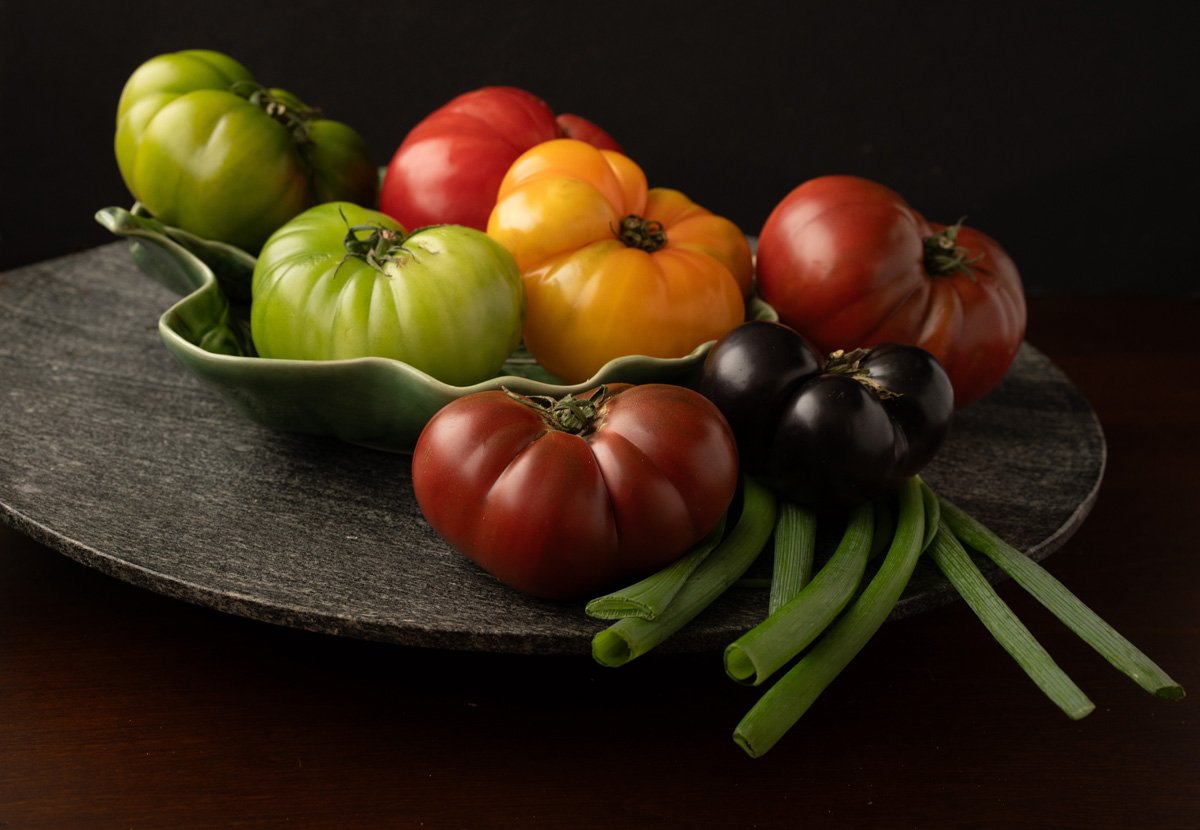
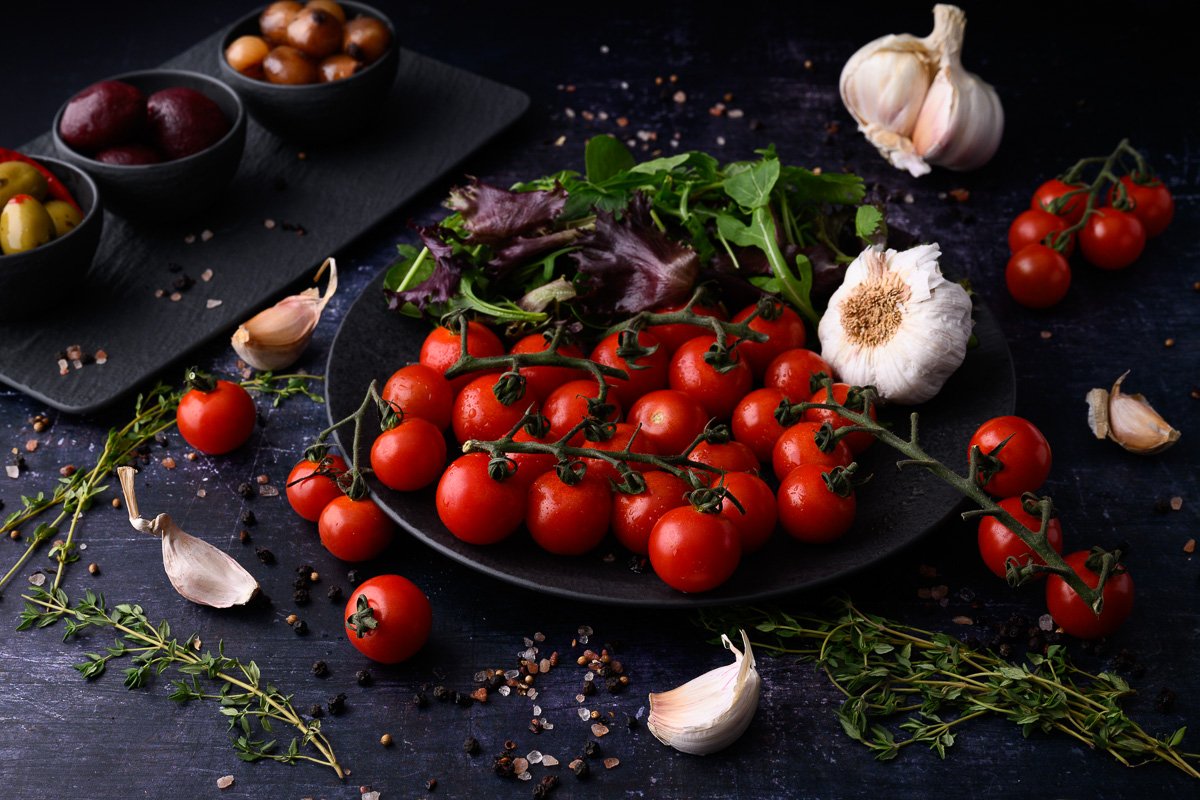
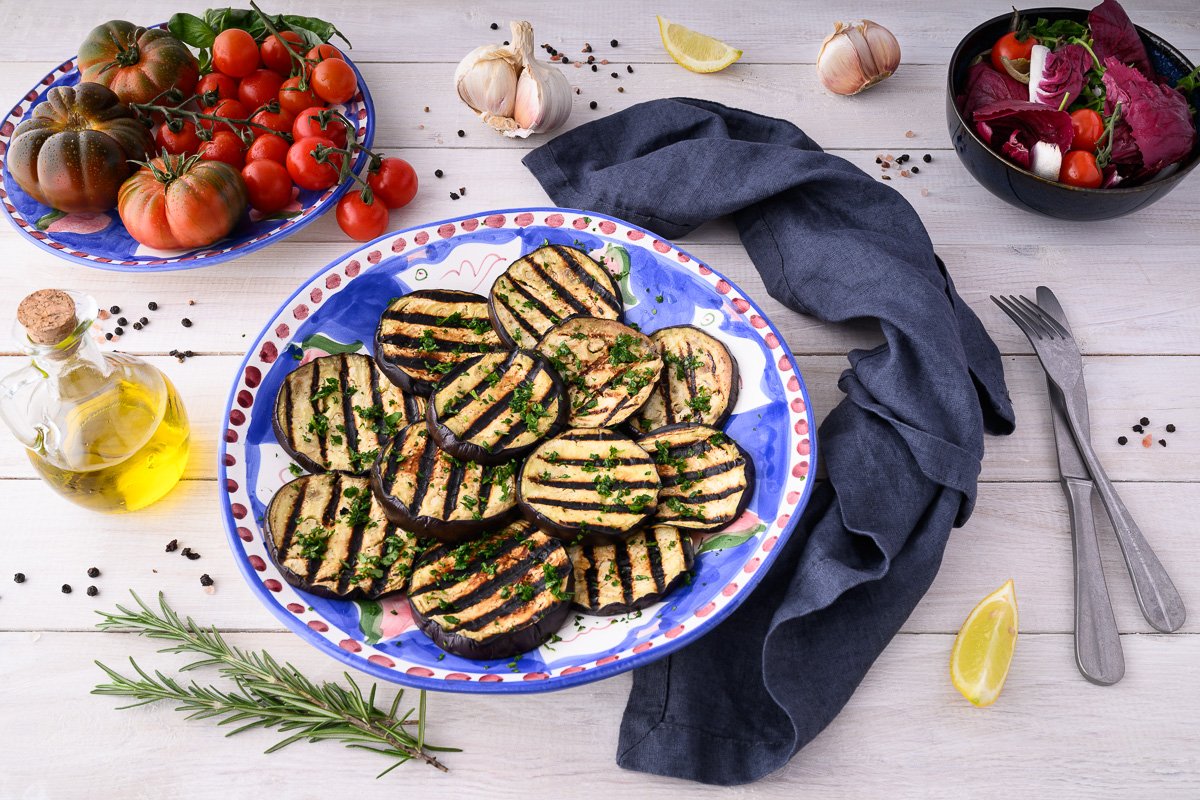
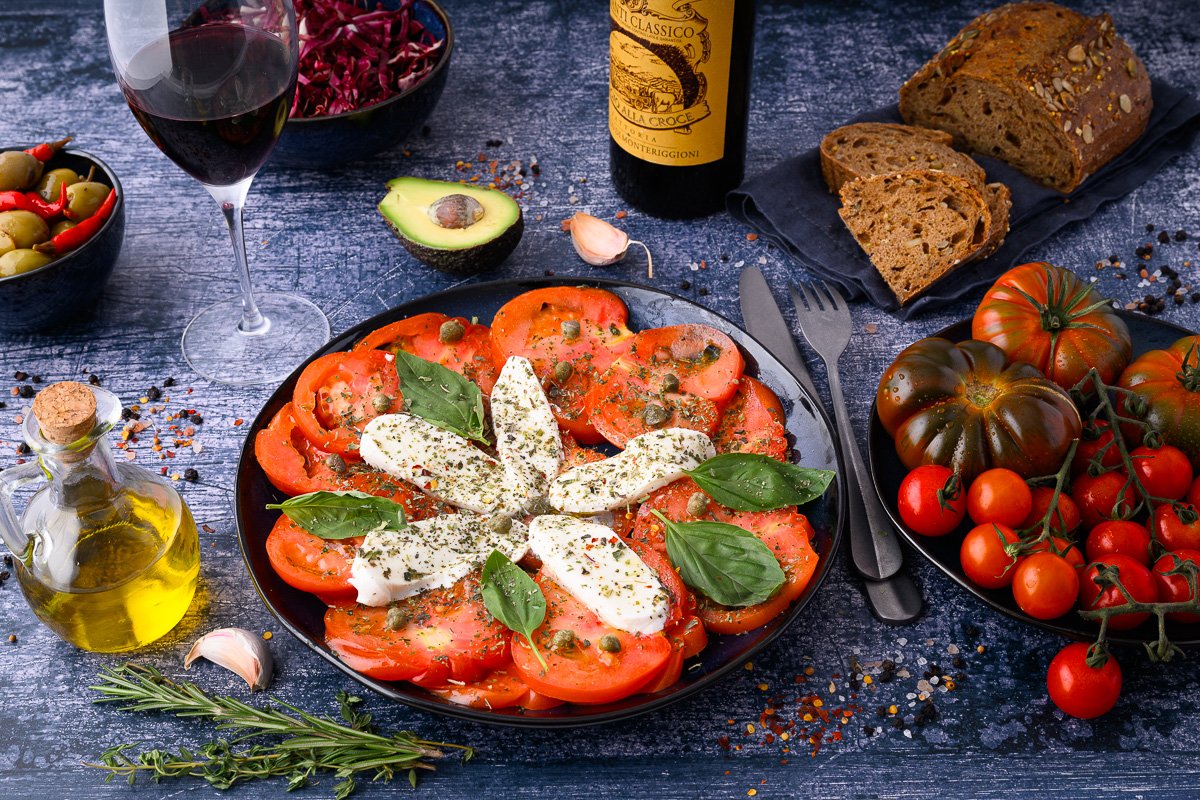
The group discussed lighting techniques for food photography, with Don providing feedback on Luciana’s photos. Don praised Luciana’s use of gradient lighting and composition, particularly the careful placement of elements to create an “ensemble cast” effect without any one item becoming the hero. They discussed the difference between editorial and advertising lighting approaches, with Don recommending both moody and well-lit versions for flexibility. The conversation concluded with Don commending Luciana’s thoughtful composition and balance in her shots.
Luciana’s Photography Setup Demo
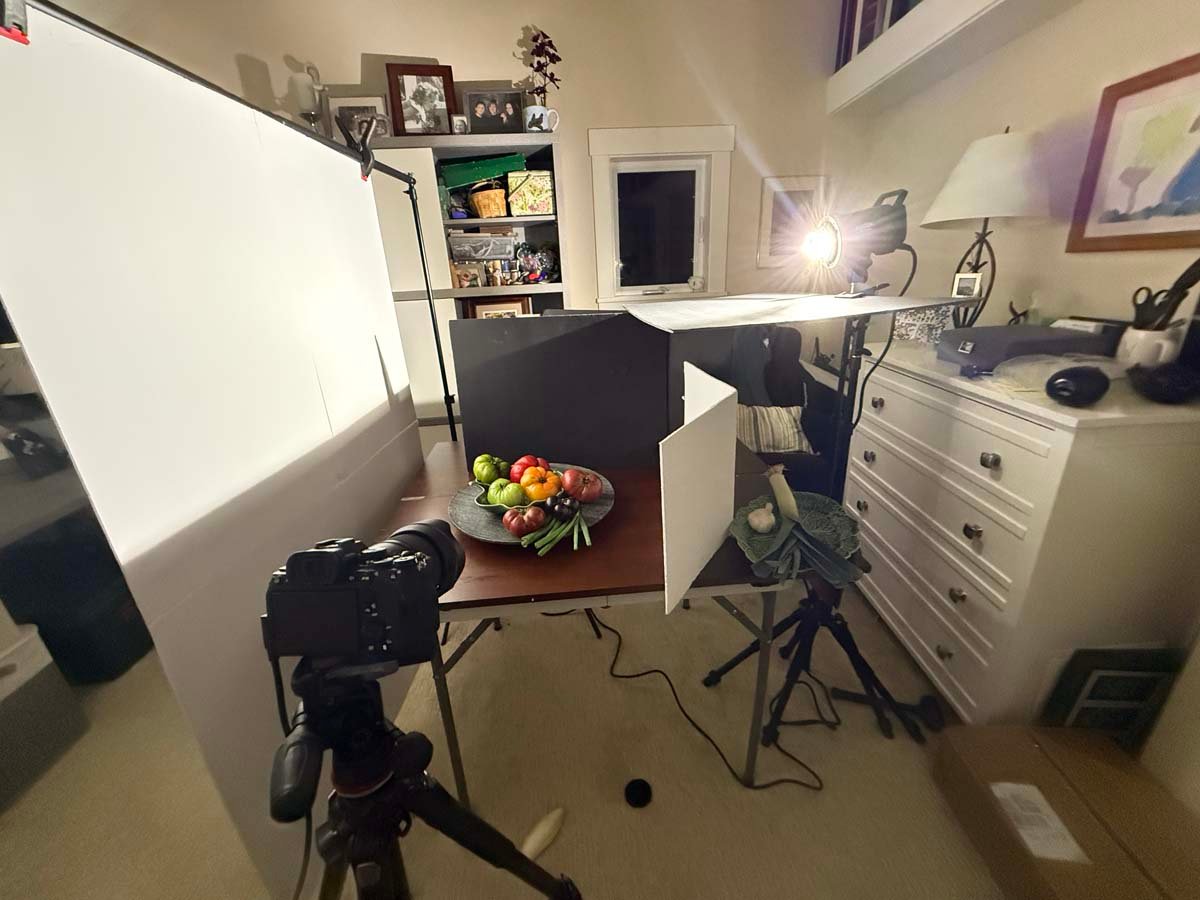
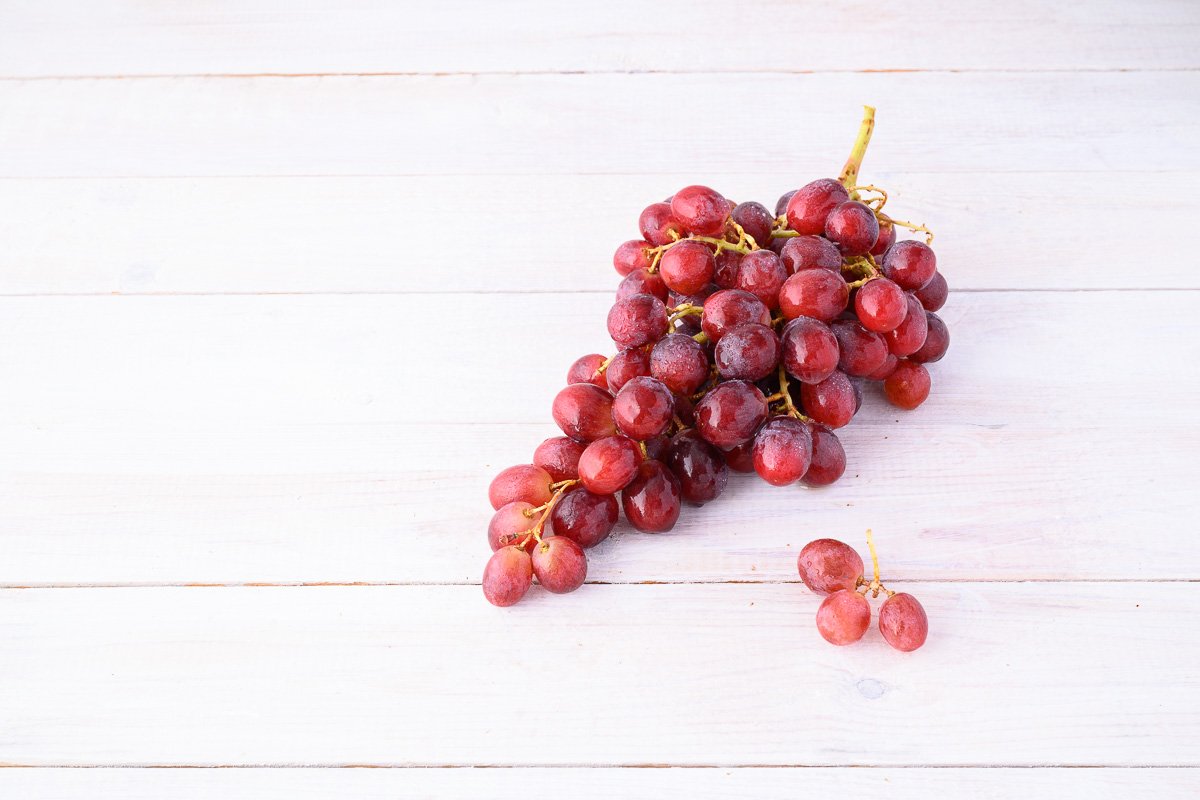
Luciana showed off her impressive photography setup, which included vinyl backdrops, wooden planks, and carefully selected produce. She demonstrated her lighting technique using a book light and explained how she enhances her photos with water sprays to create sparkling highlights. The group admired her beautiful compositions and discussed the quality of her equipment and produce.
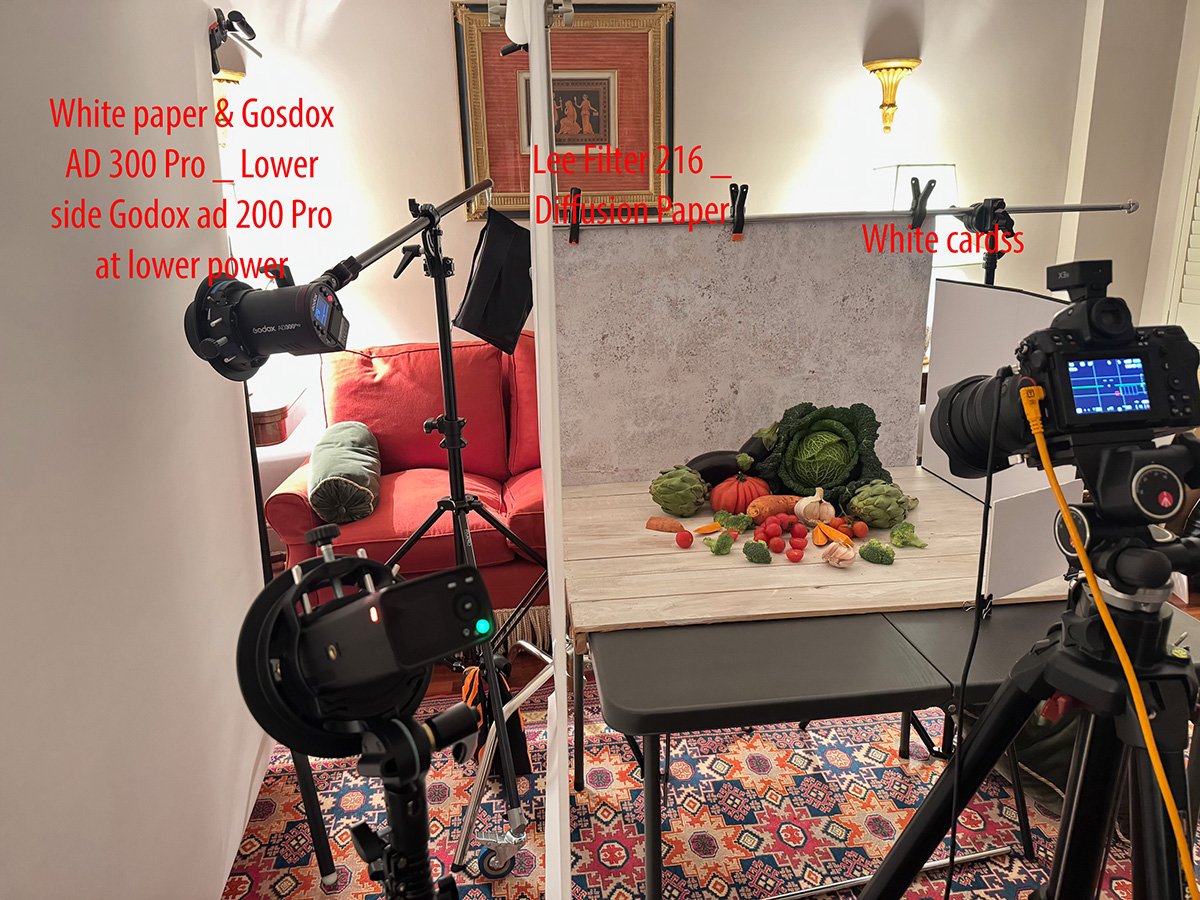
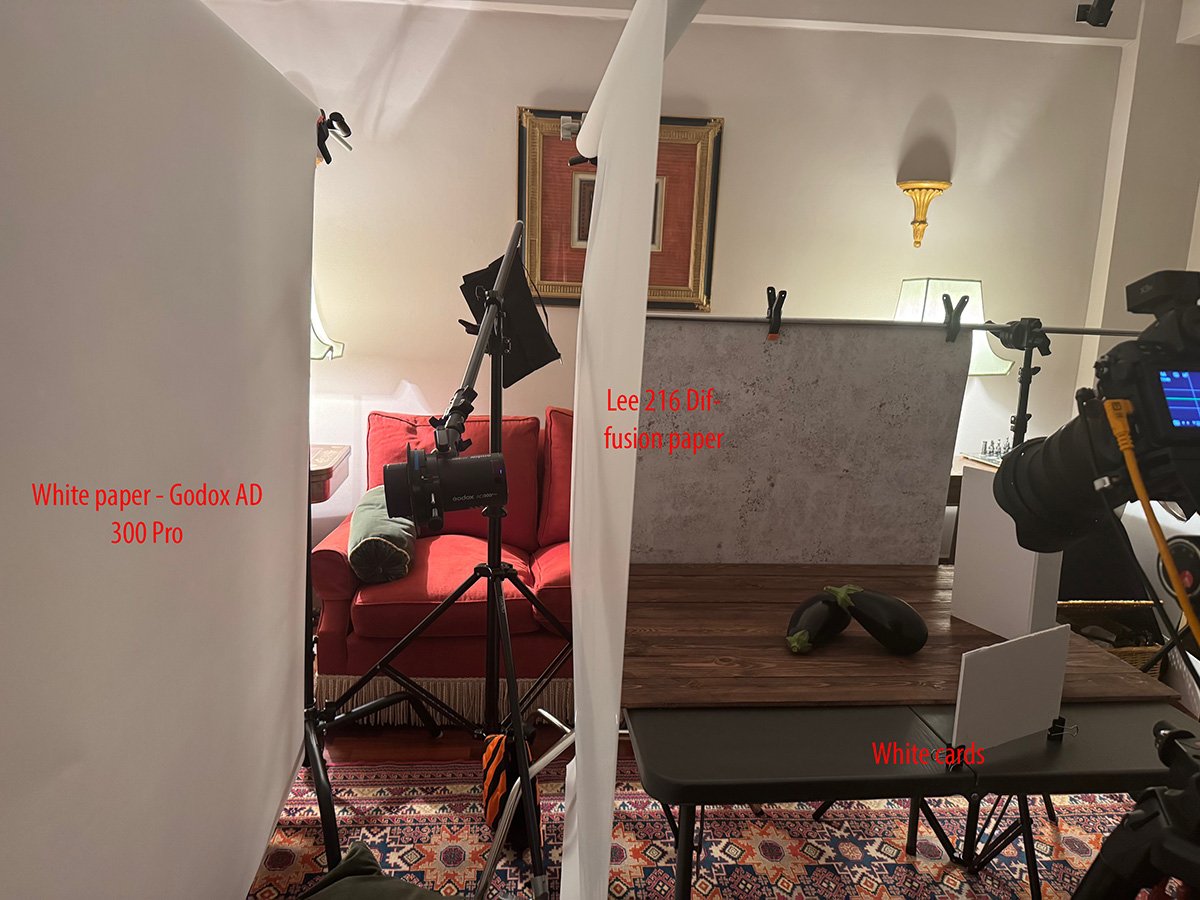
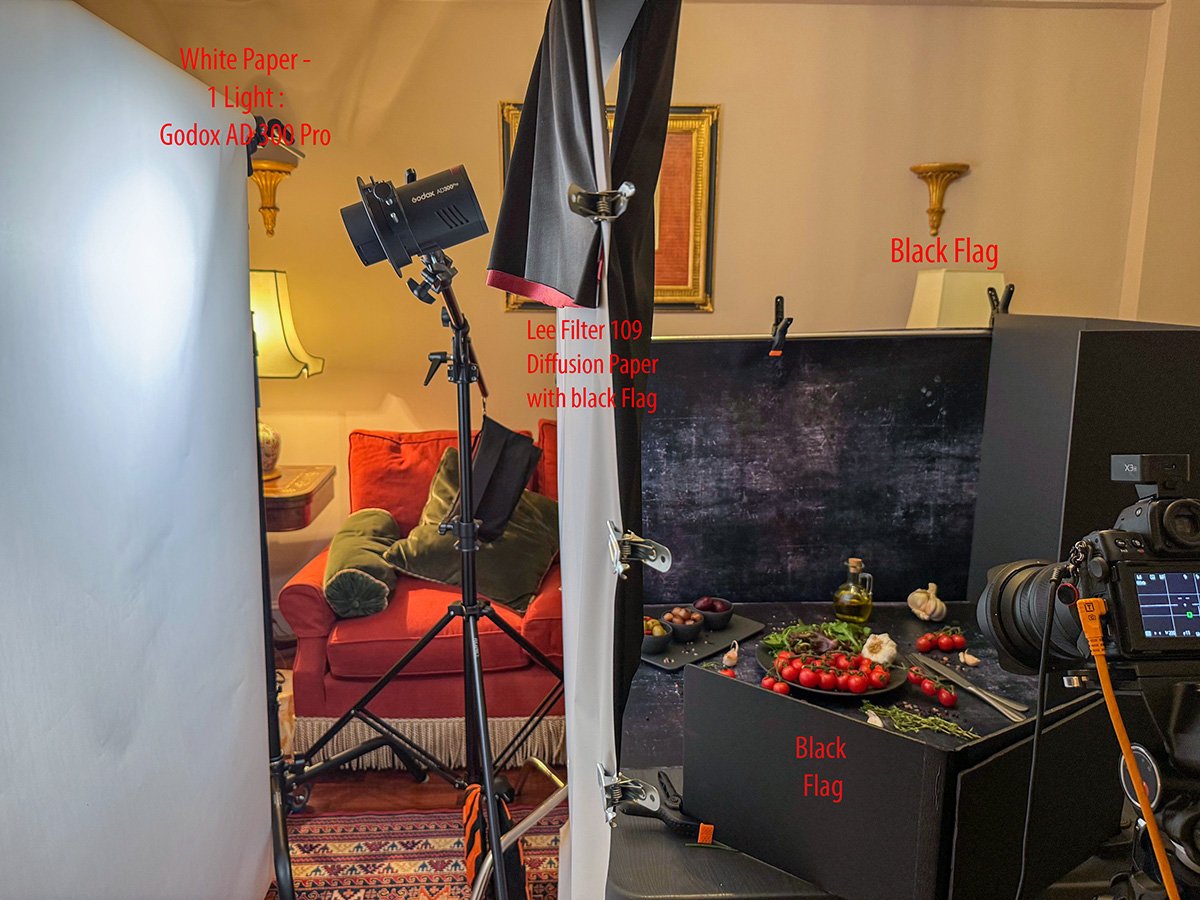
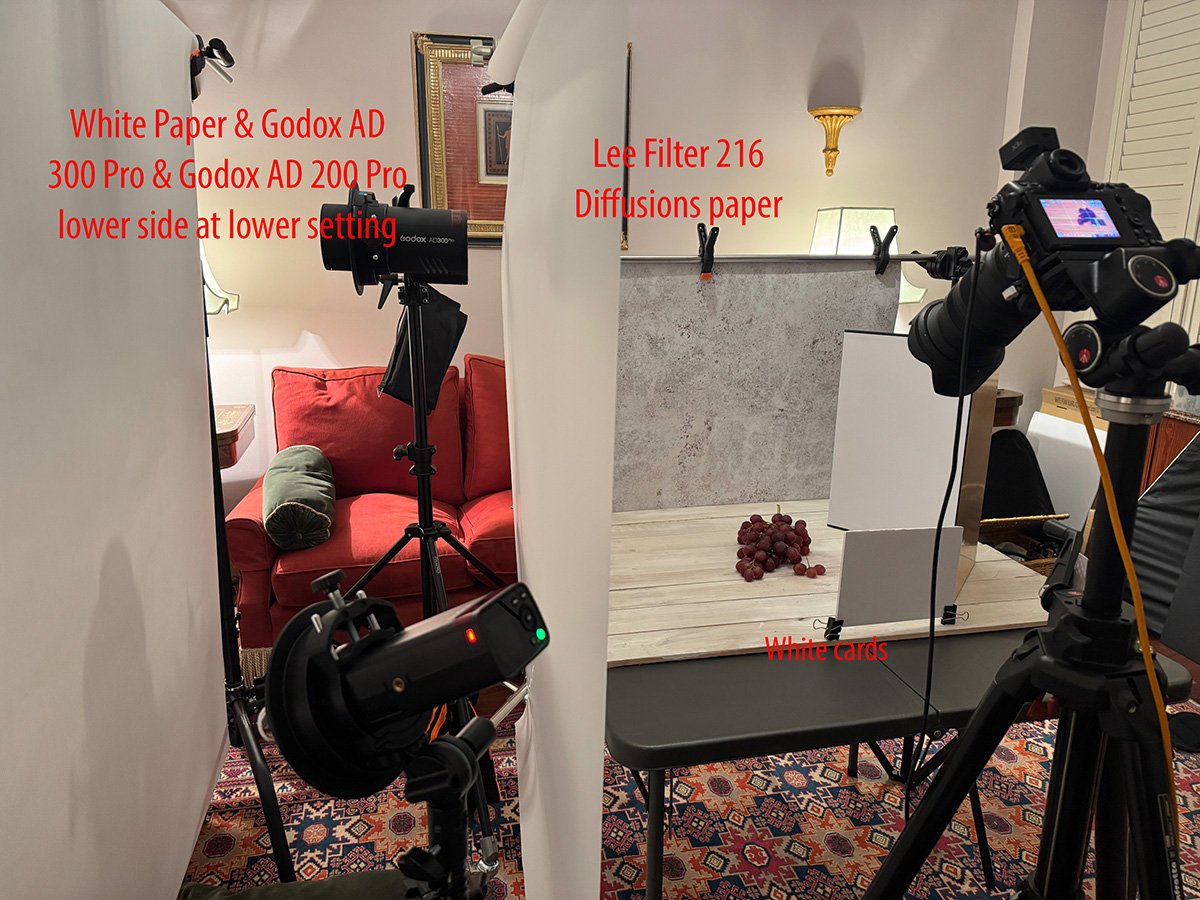
Photography Lighting Setup Discussion
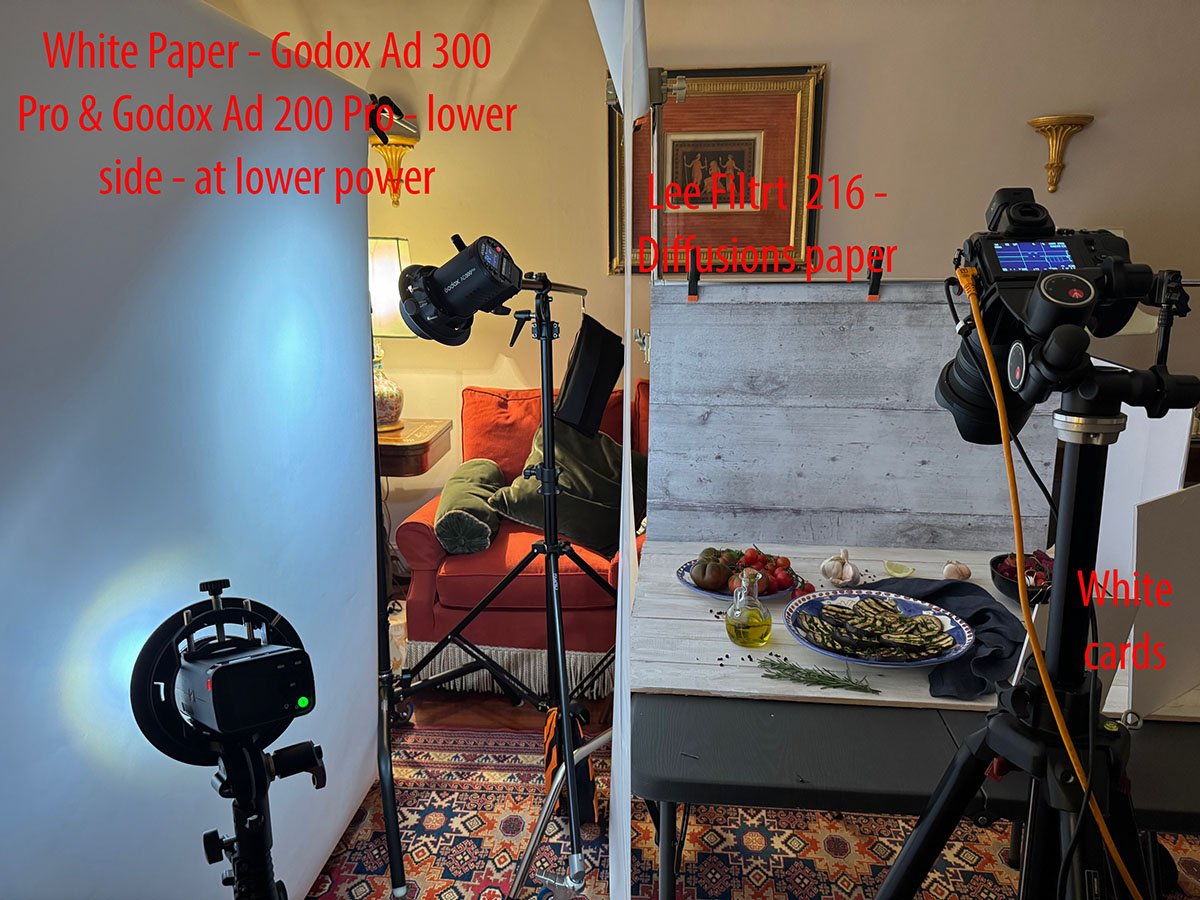
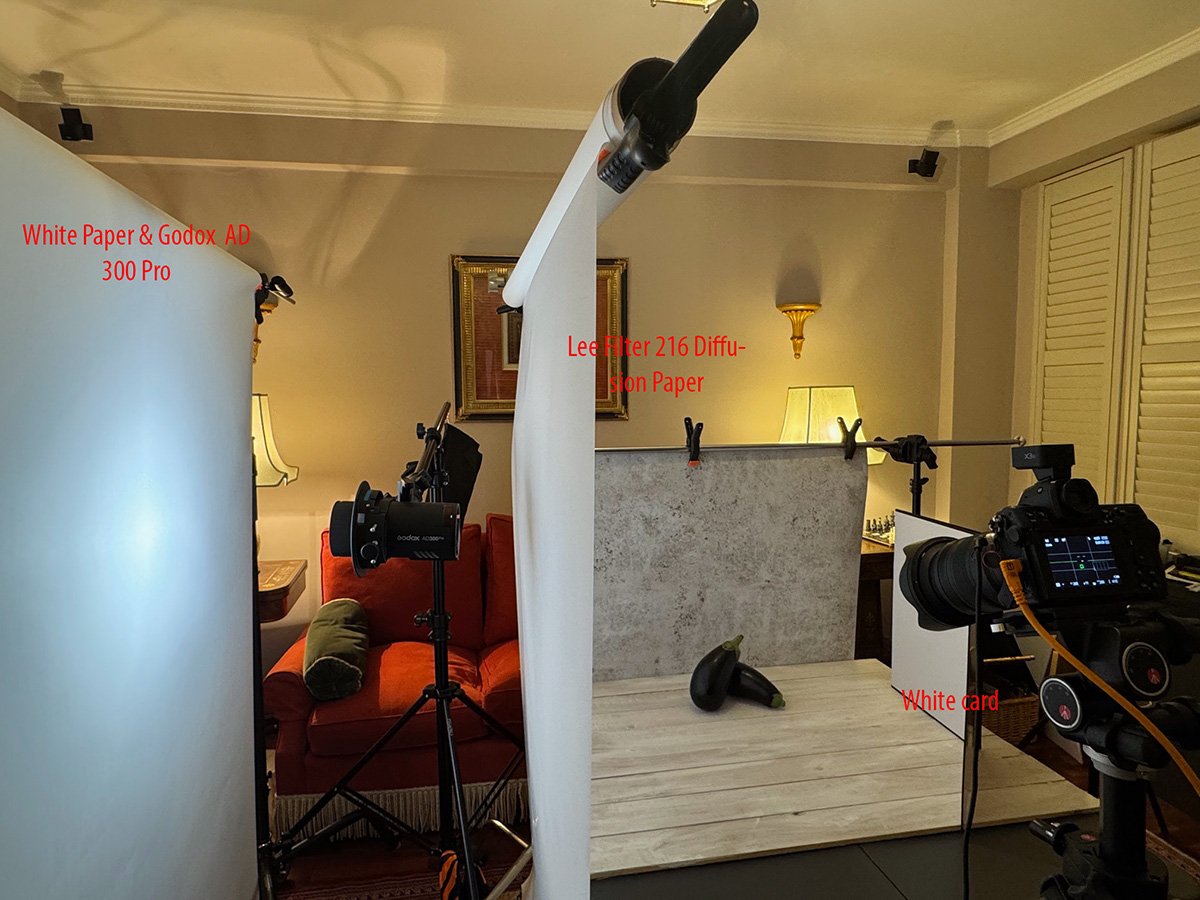
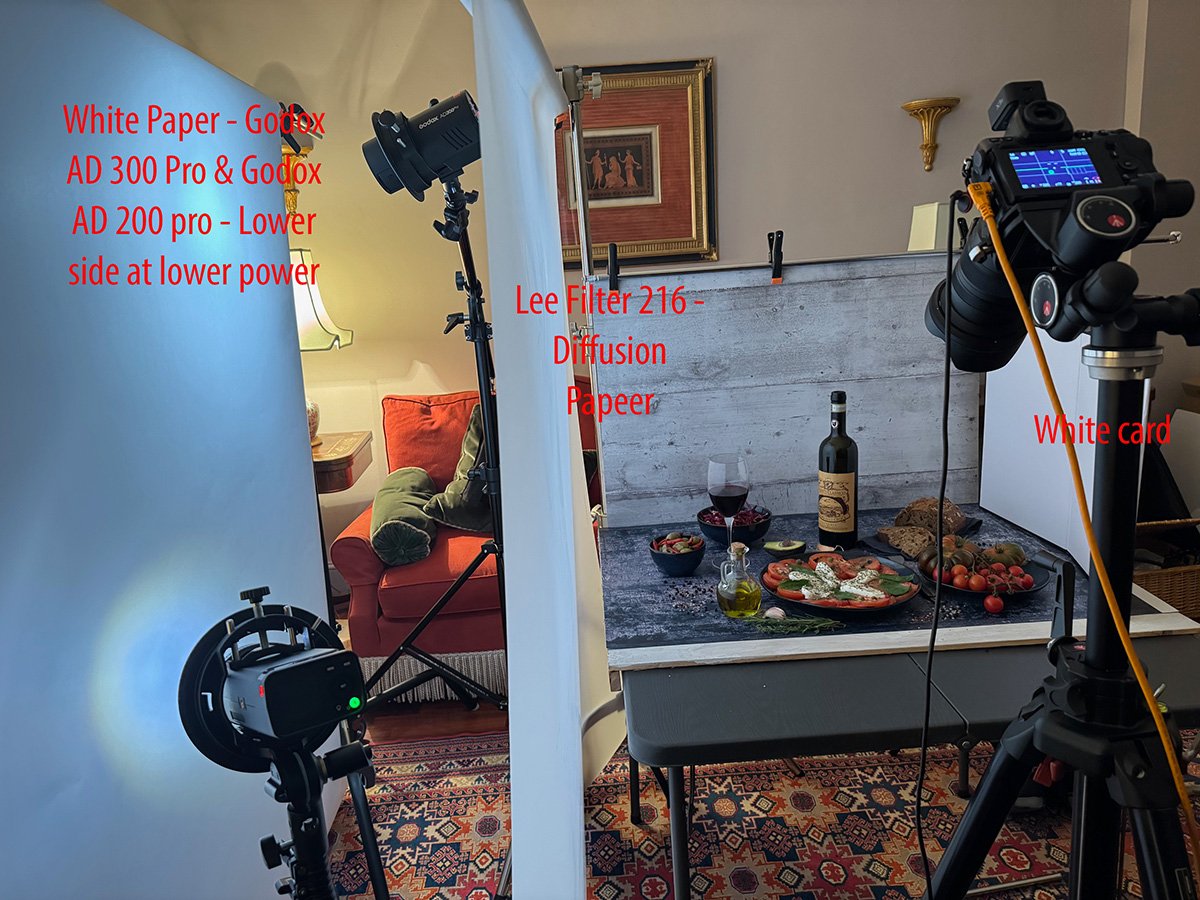
Luciana discussed her lighting setup for a photography project, using two Godox lights: an AD300 as the main light and an AD200 for fill. She maintained a 2-foot distance between the diffusion paper and white paper, while adjusting the AD300’s height to control lighting. Don praised her technique, comparing it to Gary Perwheeler’s simple lighting approach, and explained how a V-flat setup could be used for more controlled lighting. They also discussed the use of black flags to create shadows on shiny objects and the potential effects of adding a reflector to the main light.
Food Photography Lighting Techniques Review
The group reviewed and critiqued food photography shots, with Don providing detailed feedback on lighting techniques and color adjustments. Robert’s moody shot with book lighting received particular praise, while Don suggested Steve adjust his lighting setup to raise the center of the light to reduce harsh shadows. Don also shared a tip about using shower curtains as portable backdrops and explained how to properly tape them to walls without damaging paint.
Photoshop Techniques and Assignment
Don demonstrated how to use Photoshop and Camera Raw to edit images, focusing on techniques like creating masks, using linear and radial gradients, and adjusting color ranges. He emphasized the importance of controlling exposure and saturation while working with JPEGs and raw files. Luciana asked about the assignment requirements, and Don clarified that participants should photograph flowers, rocks, and twigs on a shiny black surface, using reflections as a compositional element. Don also recommended exploring the works of photographers like Terry Heffernan and Gary Per Wheeler for inspiration and suggested finding the Gary Per Wheeler book on eBay to avoid high Amazon prices.
-
- www.LUCIANARIZZIPHOTOGRAPHY.COM
-
- www.LUCIANARIZZIPHOTOGRAPHY.COM
-
- www.LUCIANARIZZIPHOTOGRAPHY.COM
-
- www.LUCIANARIZZIPHOTOGRAPHY.COM
-
- www.LUCIANARIZZIPHOTOGRAPHY.COM
-
- www.LUCIANARIZZIPHOTOGRAPHY.COM
-
- www.LUCIANARIZZIPHOTOGRAPHY.COM
-
- www.LUCIANARIZZIPHOTOGRAPHY.COM
Class Two
