8 WEEK CLASS: NOVEMBER 2025
One Big Beautiful Light: Week Eight
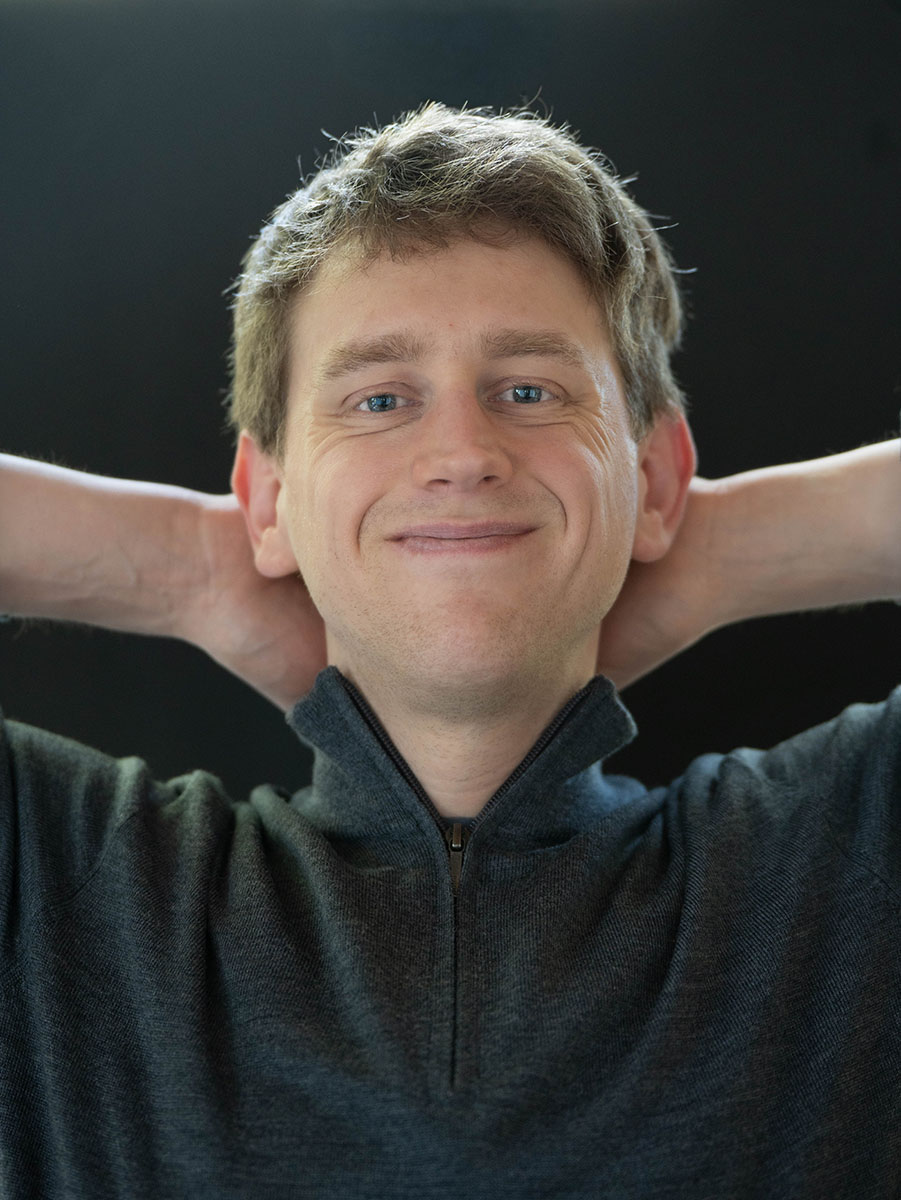
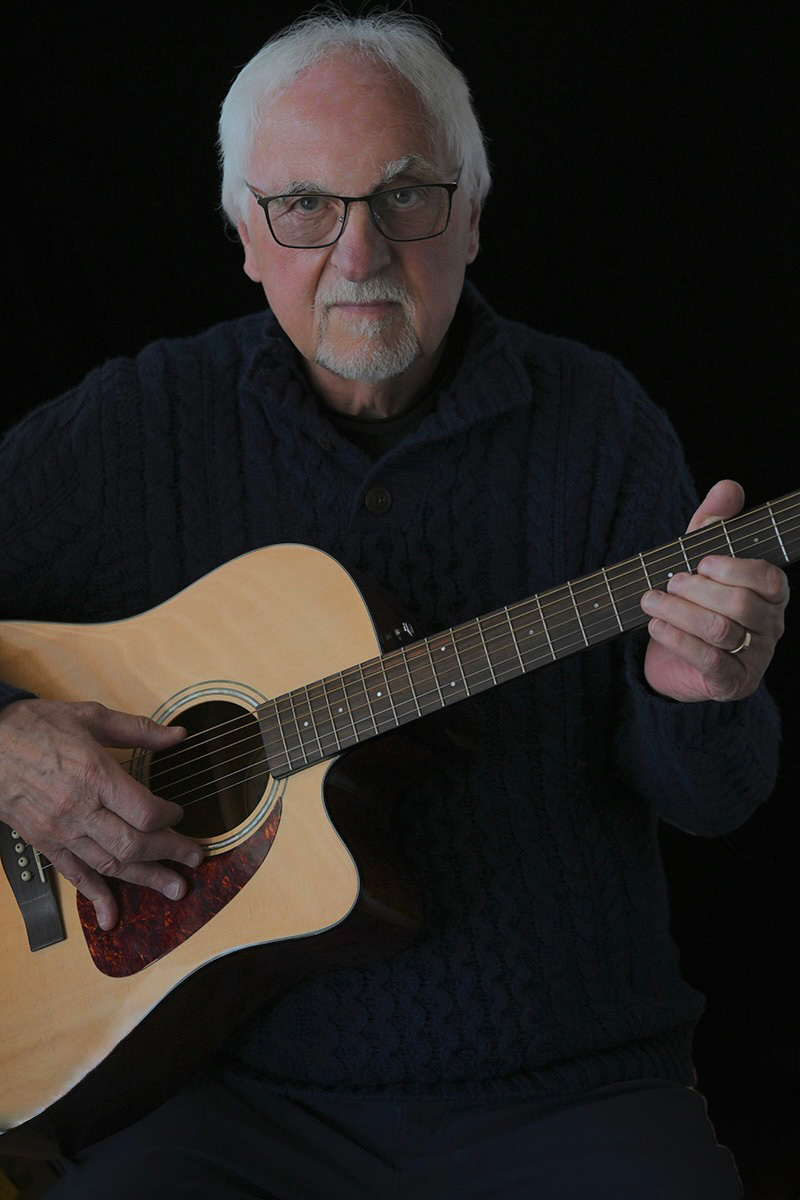
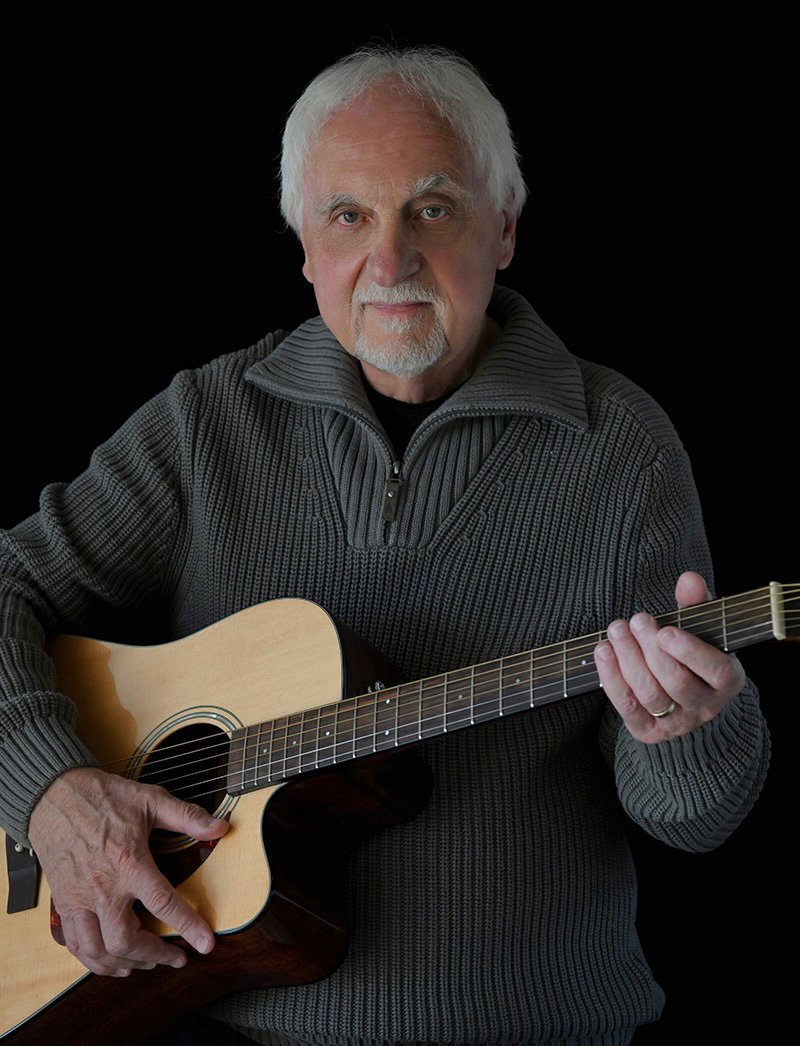
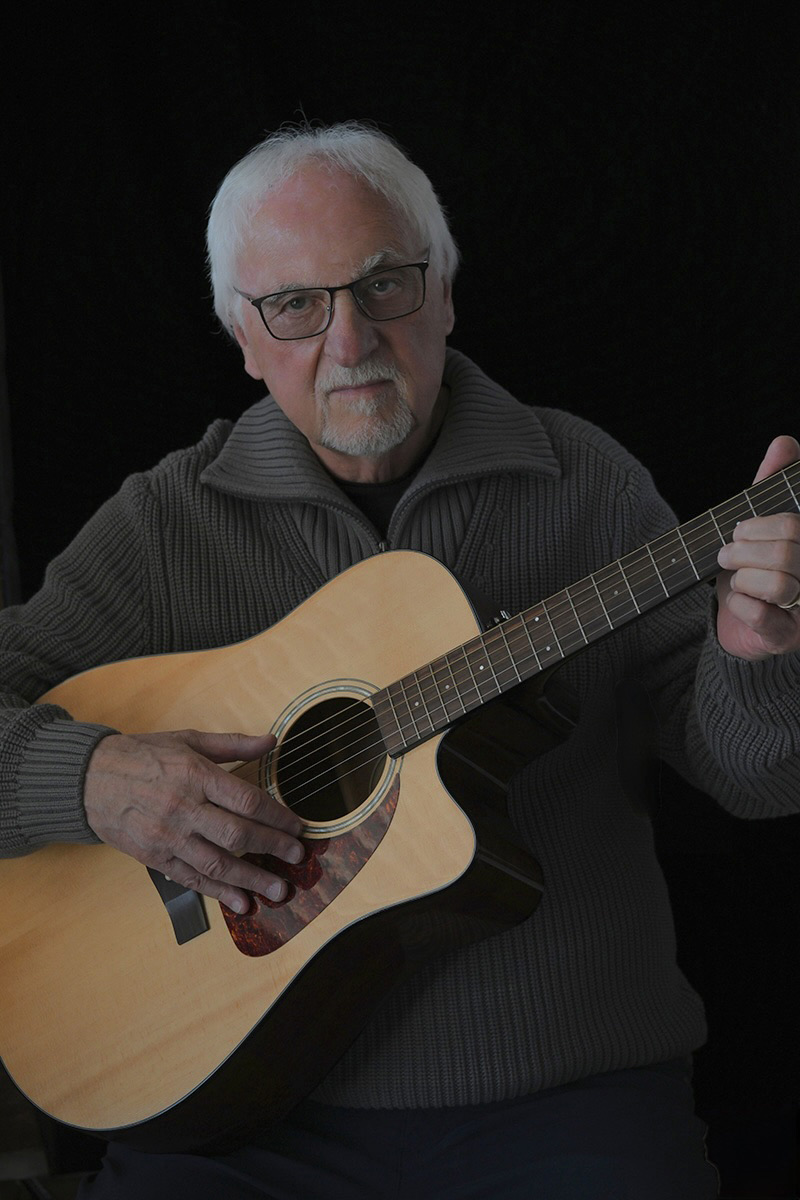
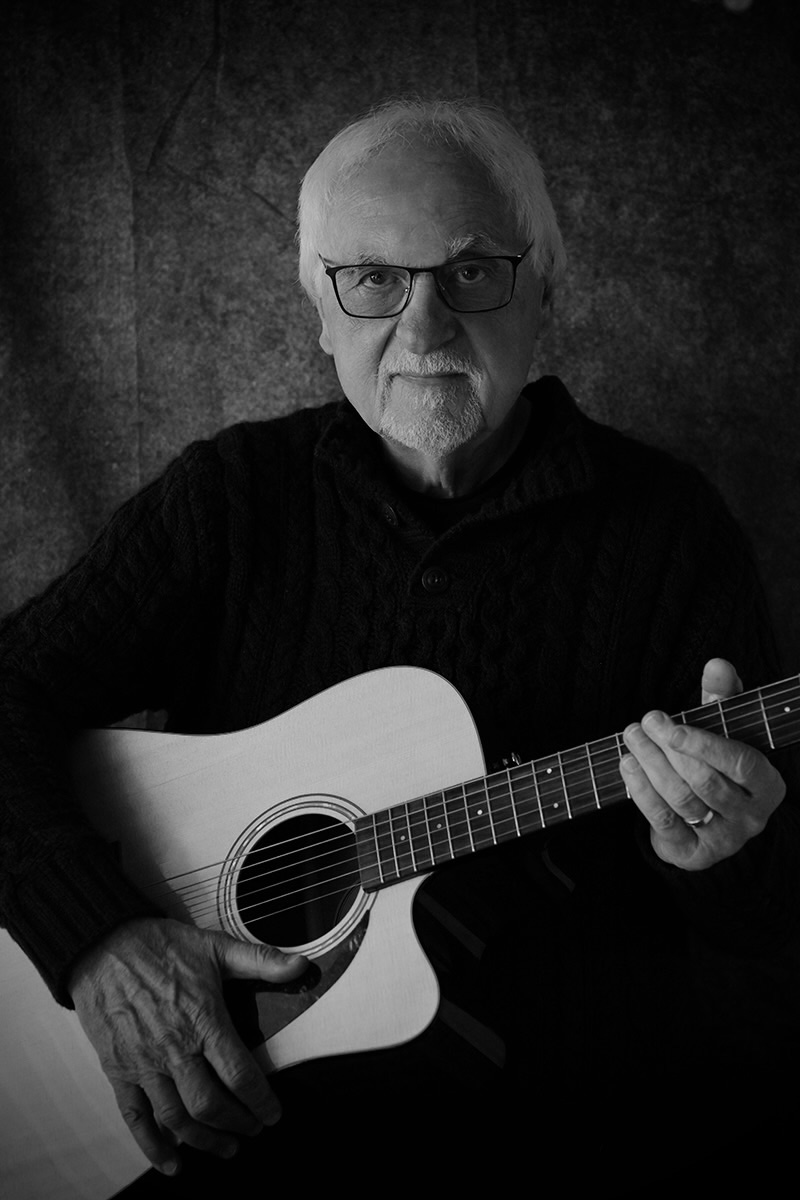
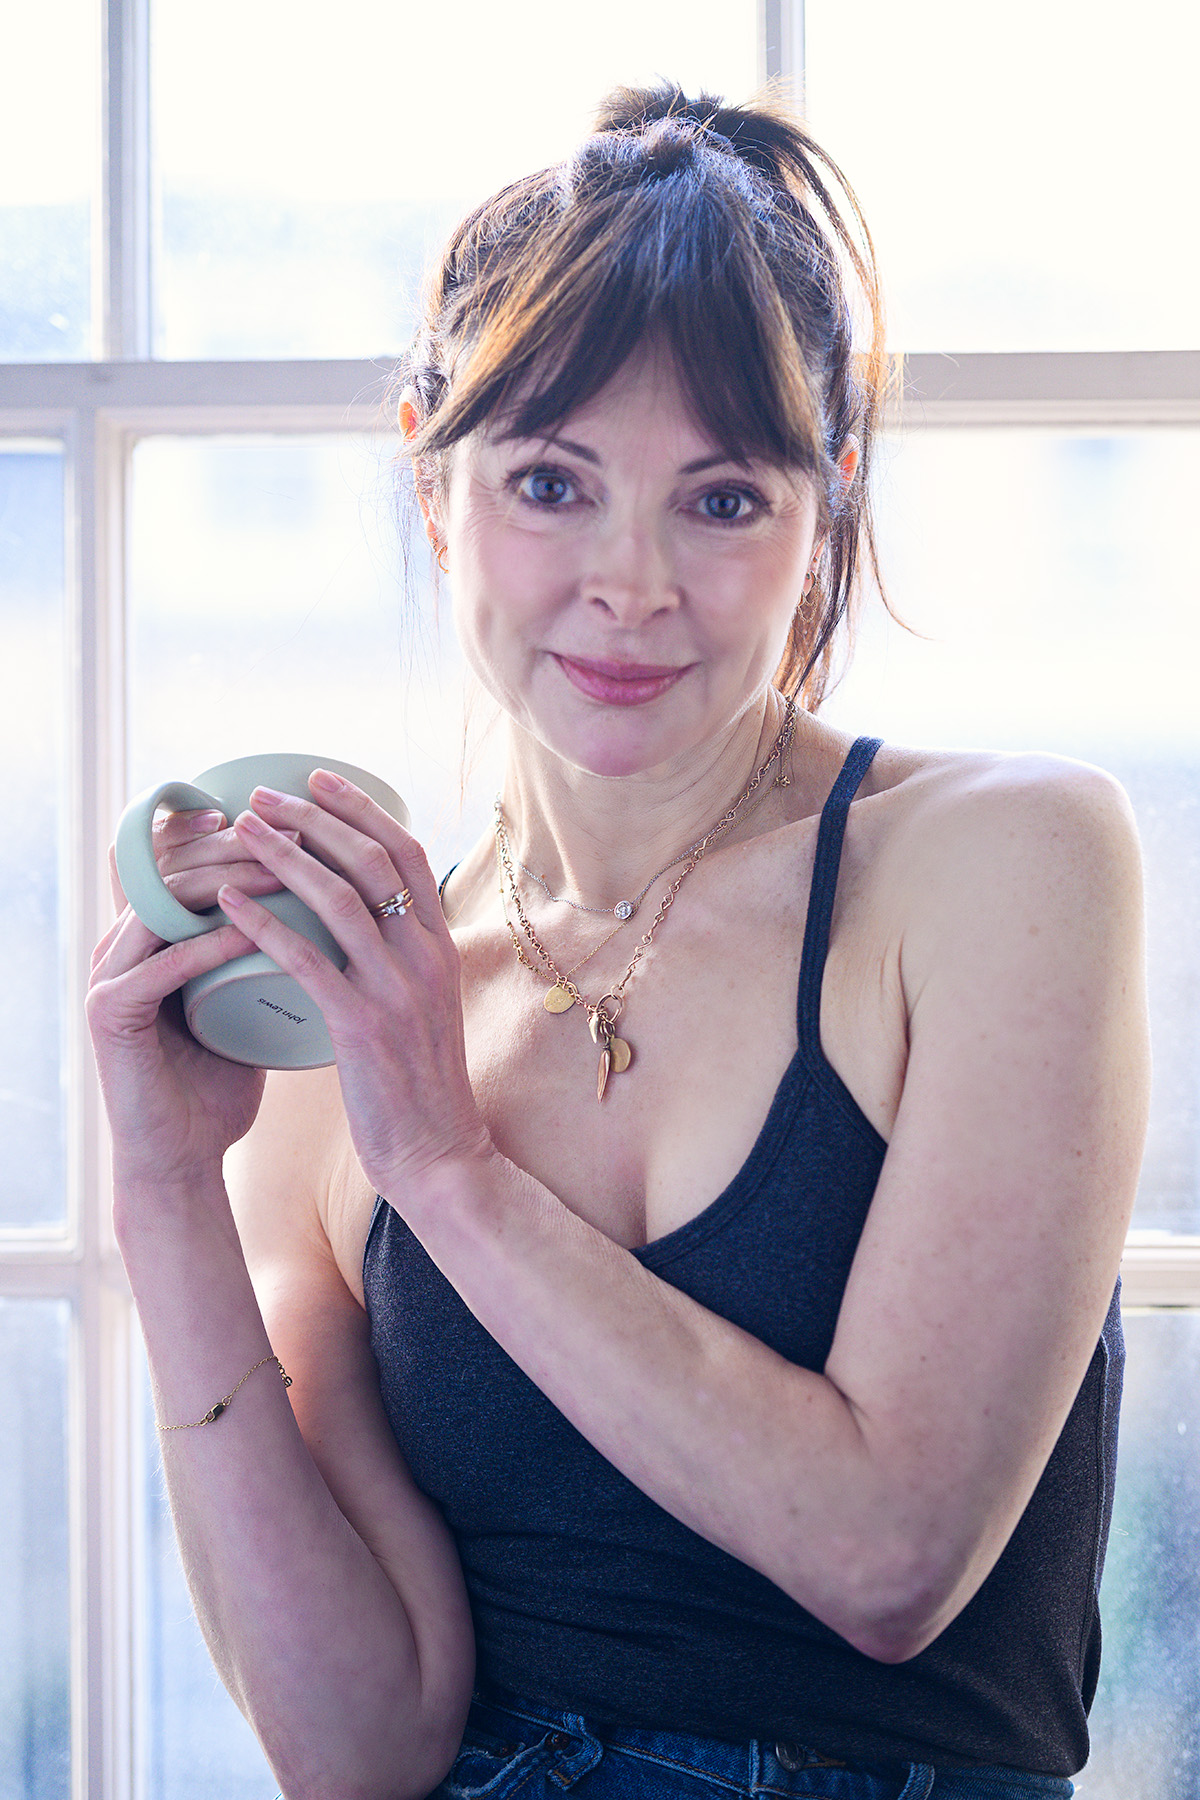
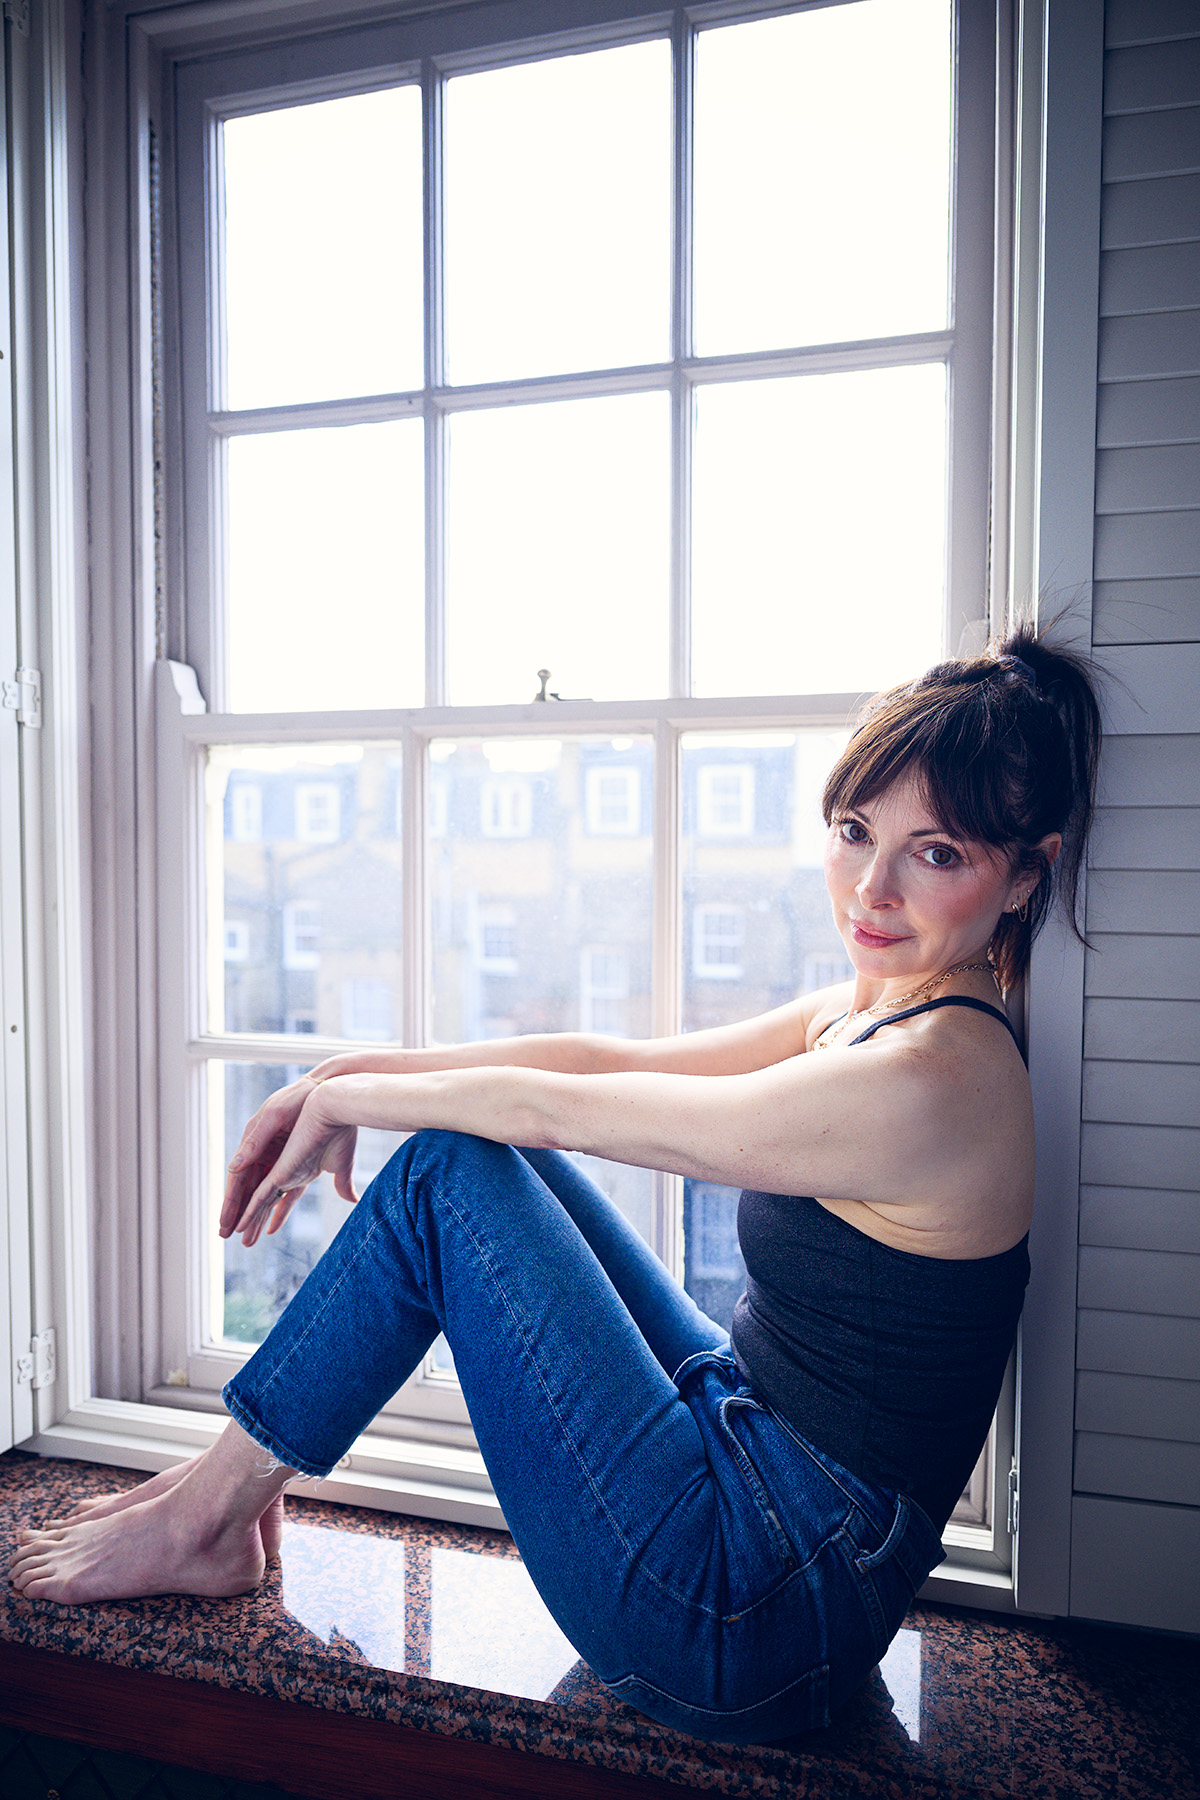
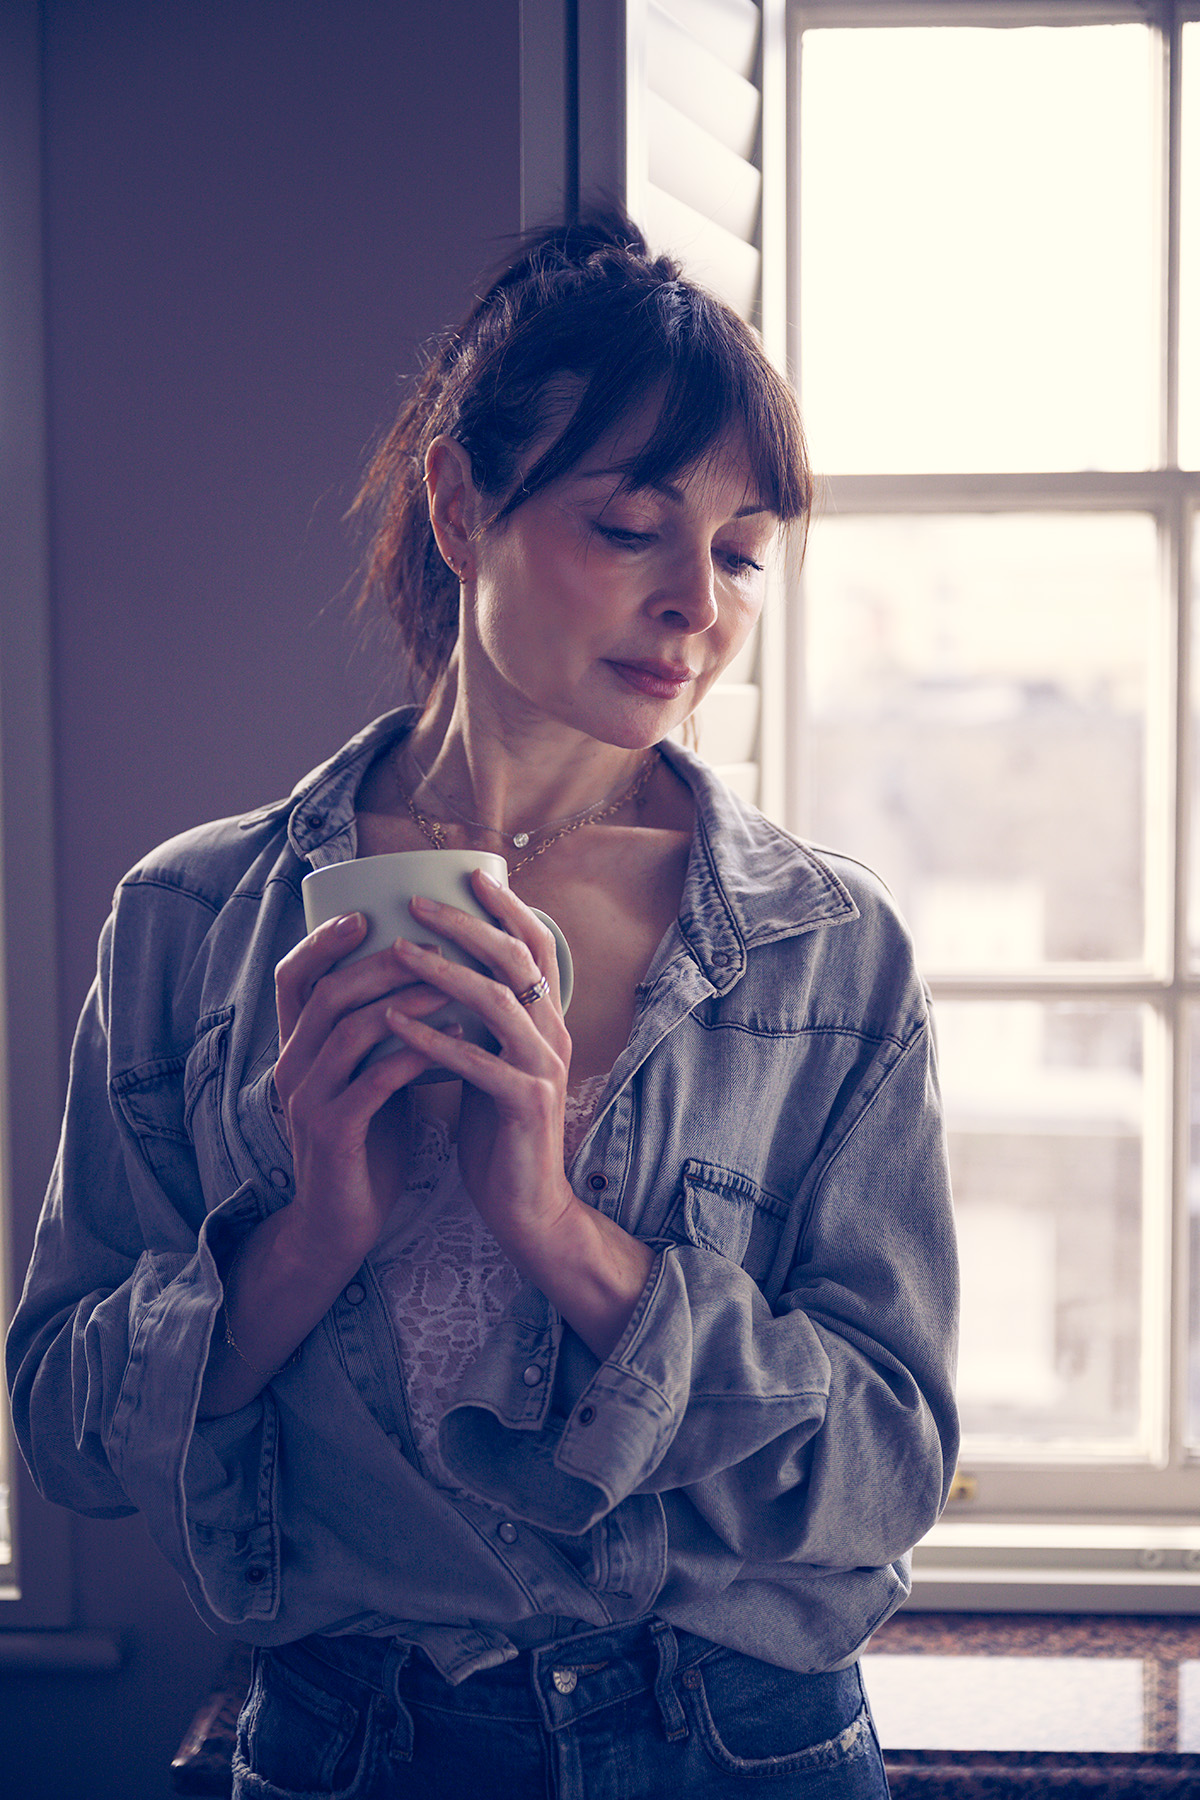
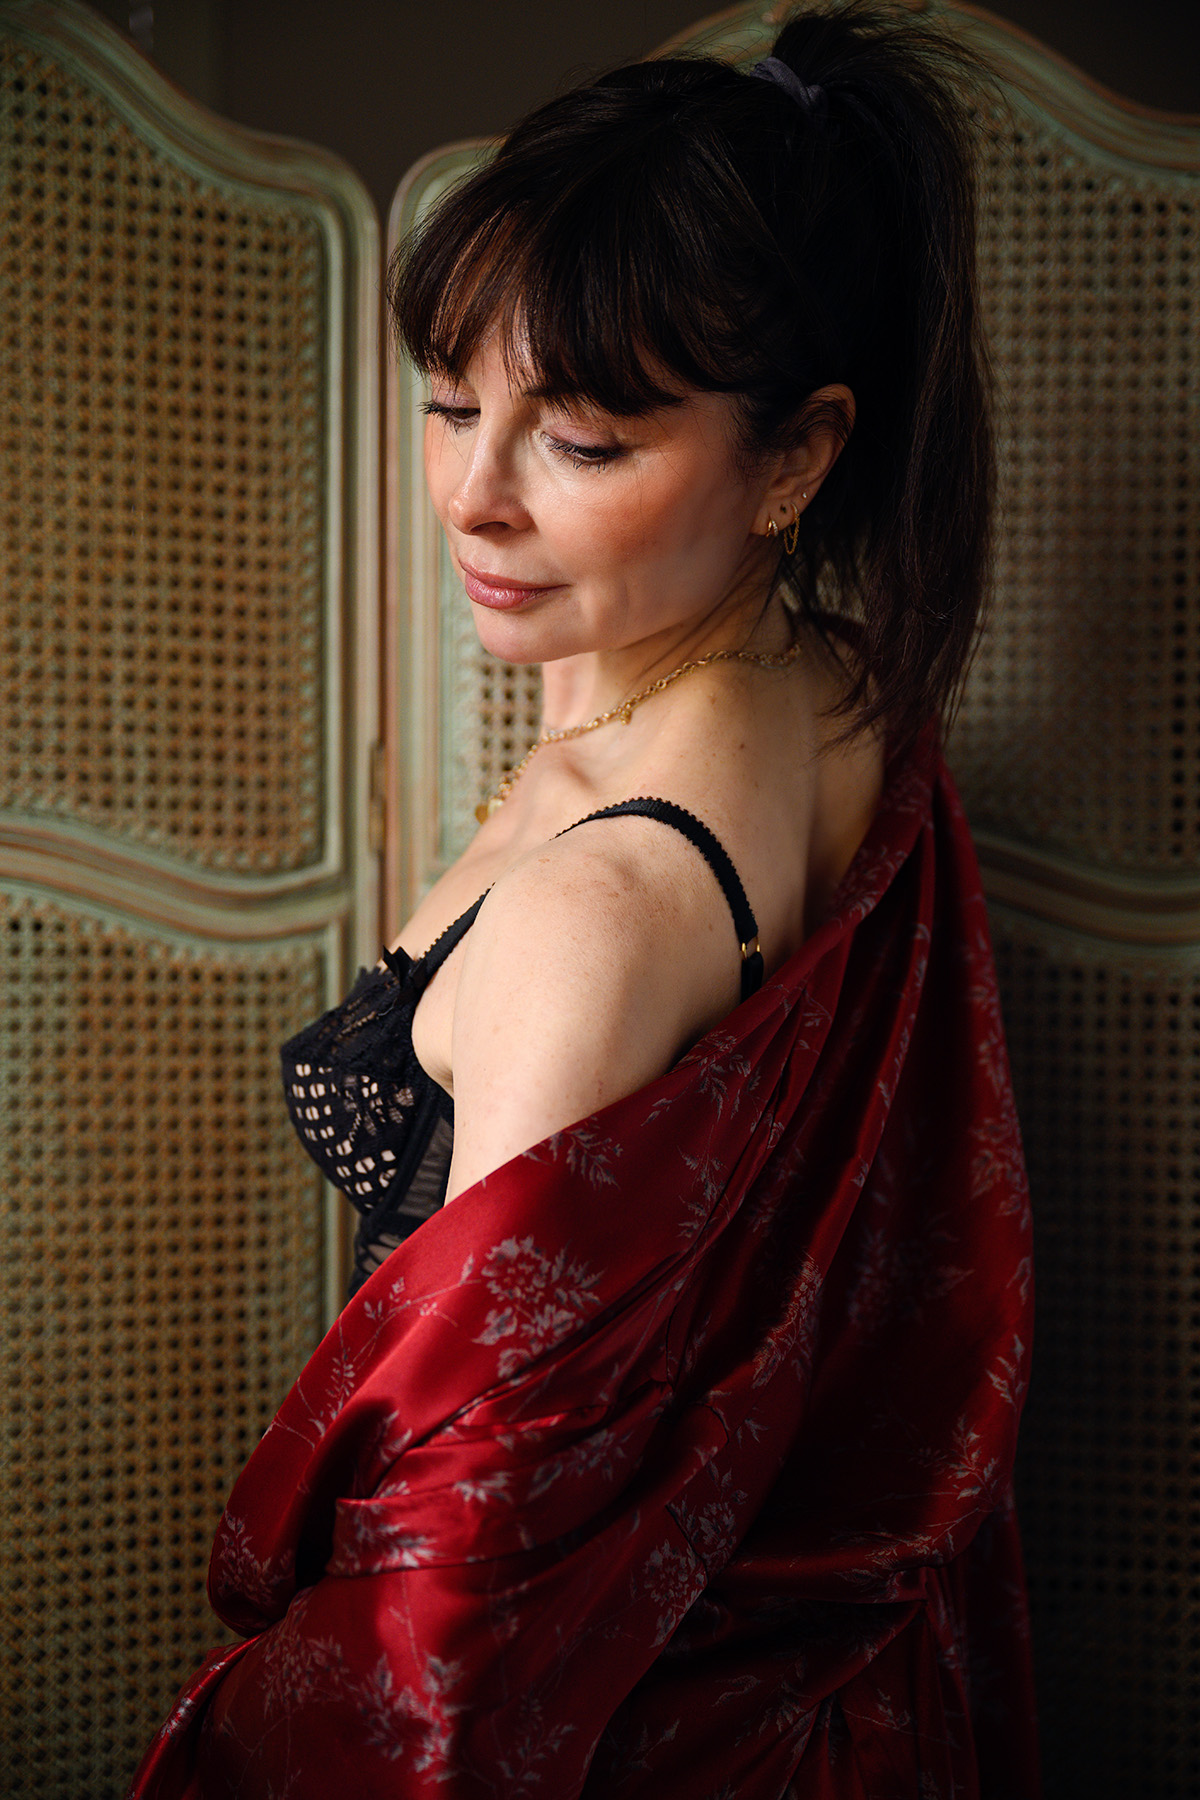
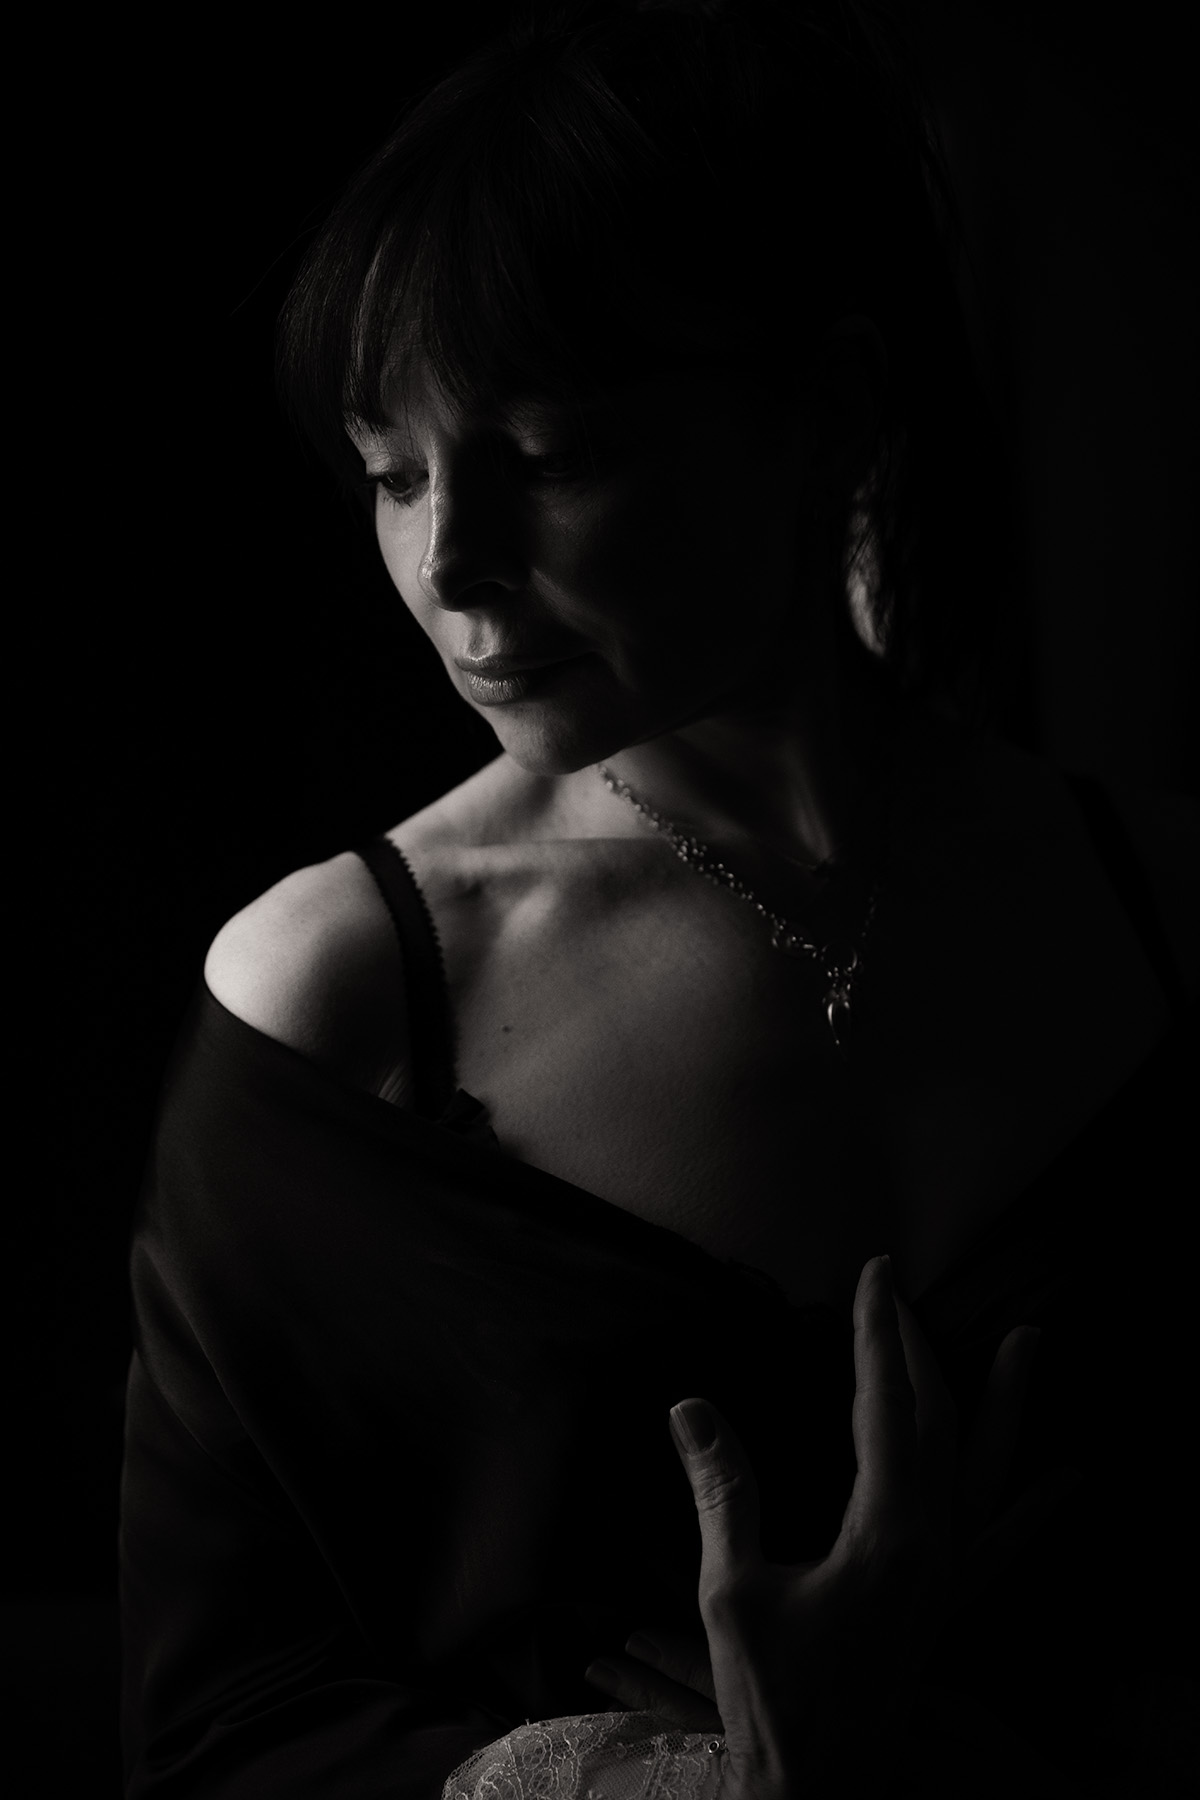
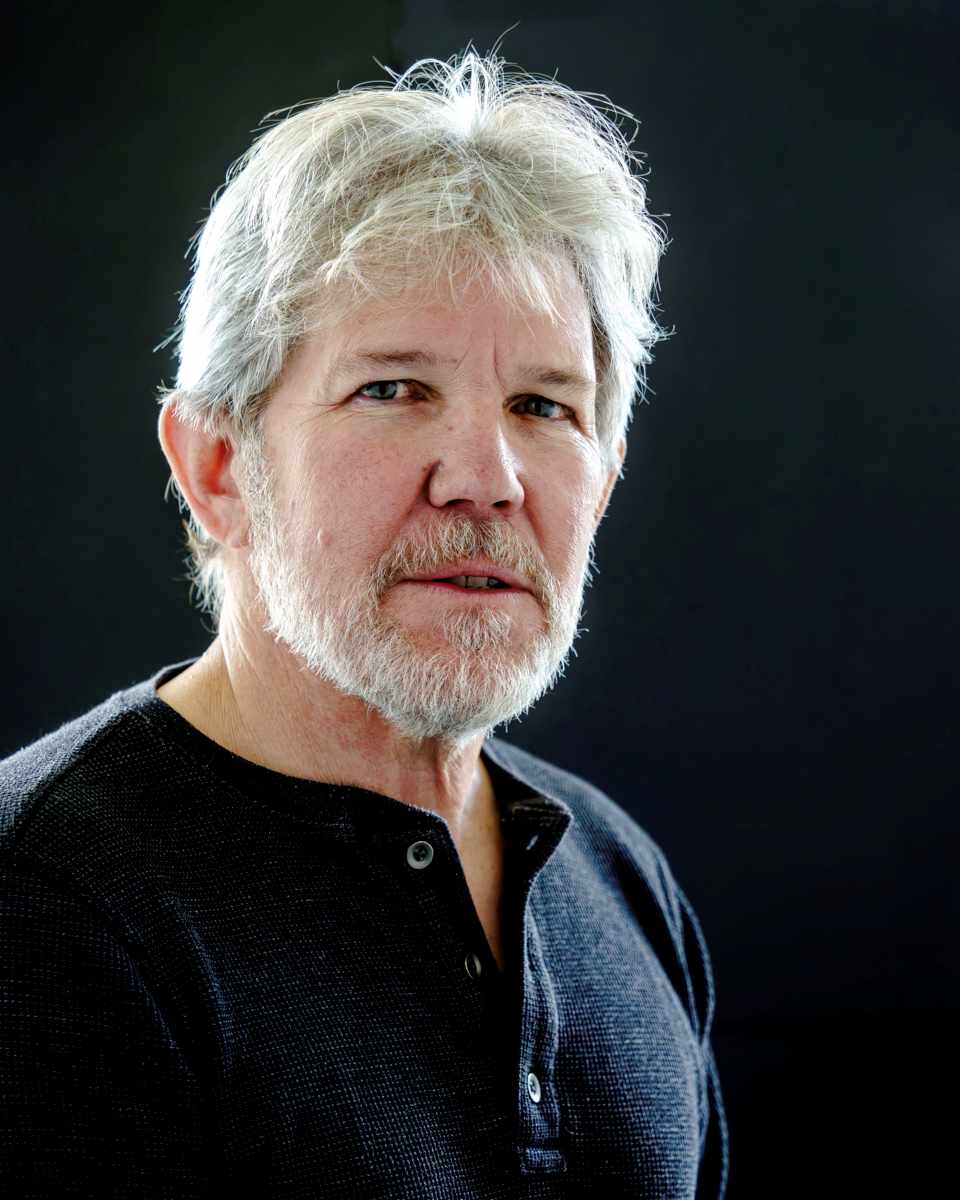
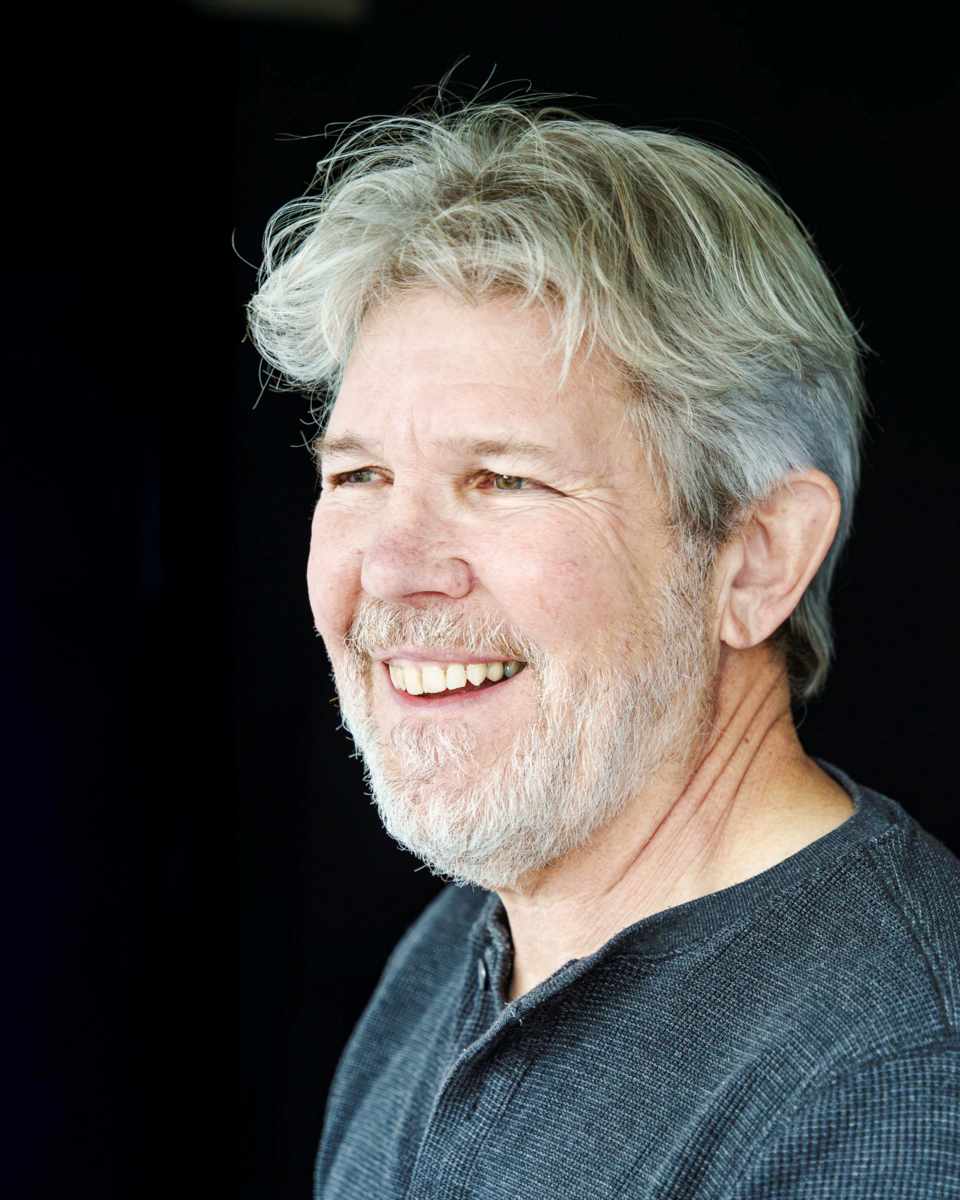
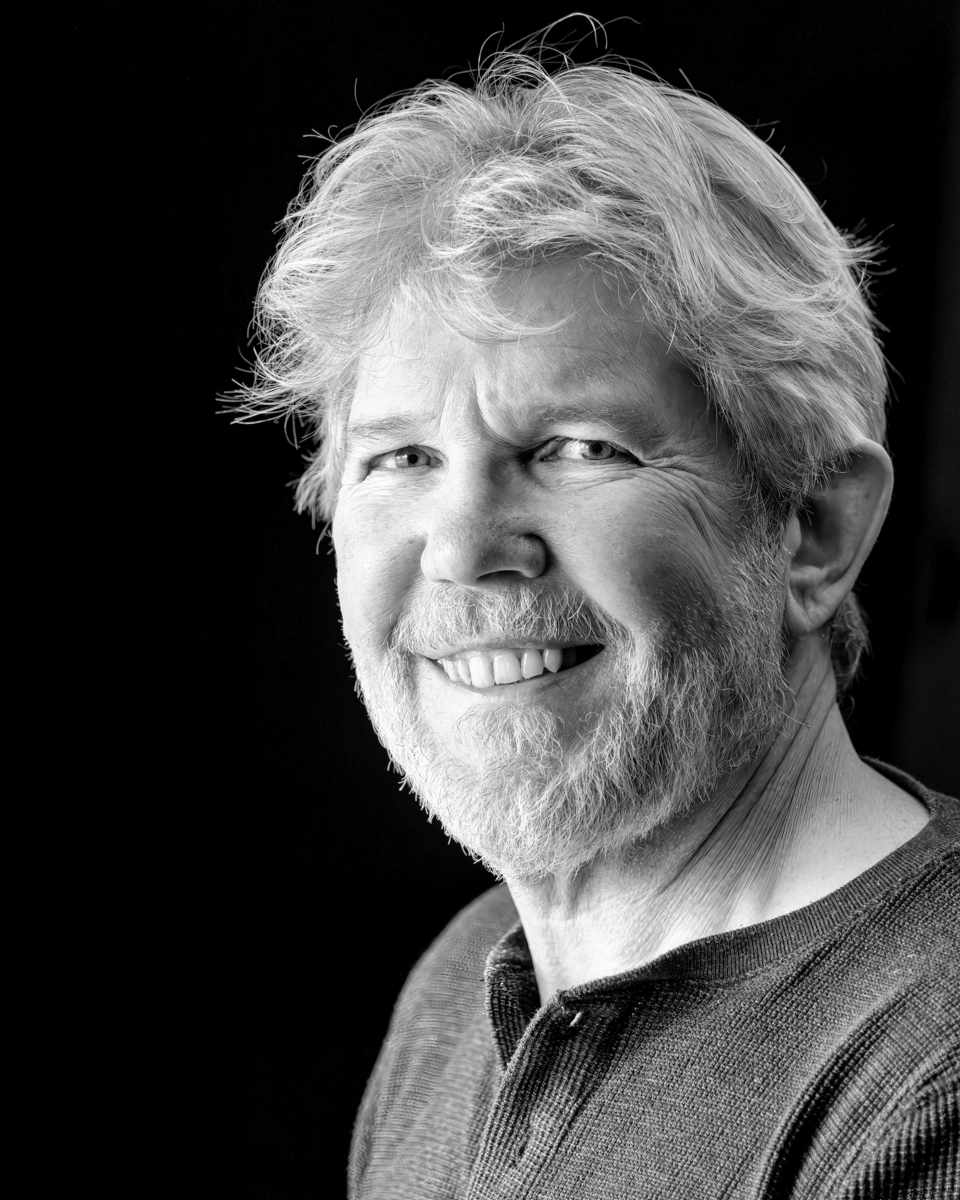
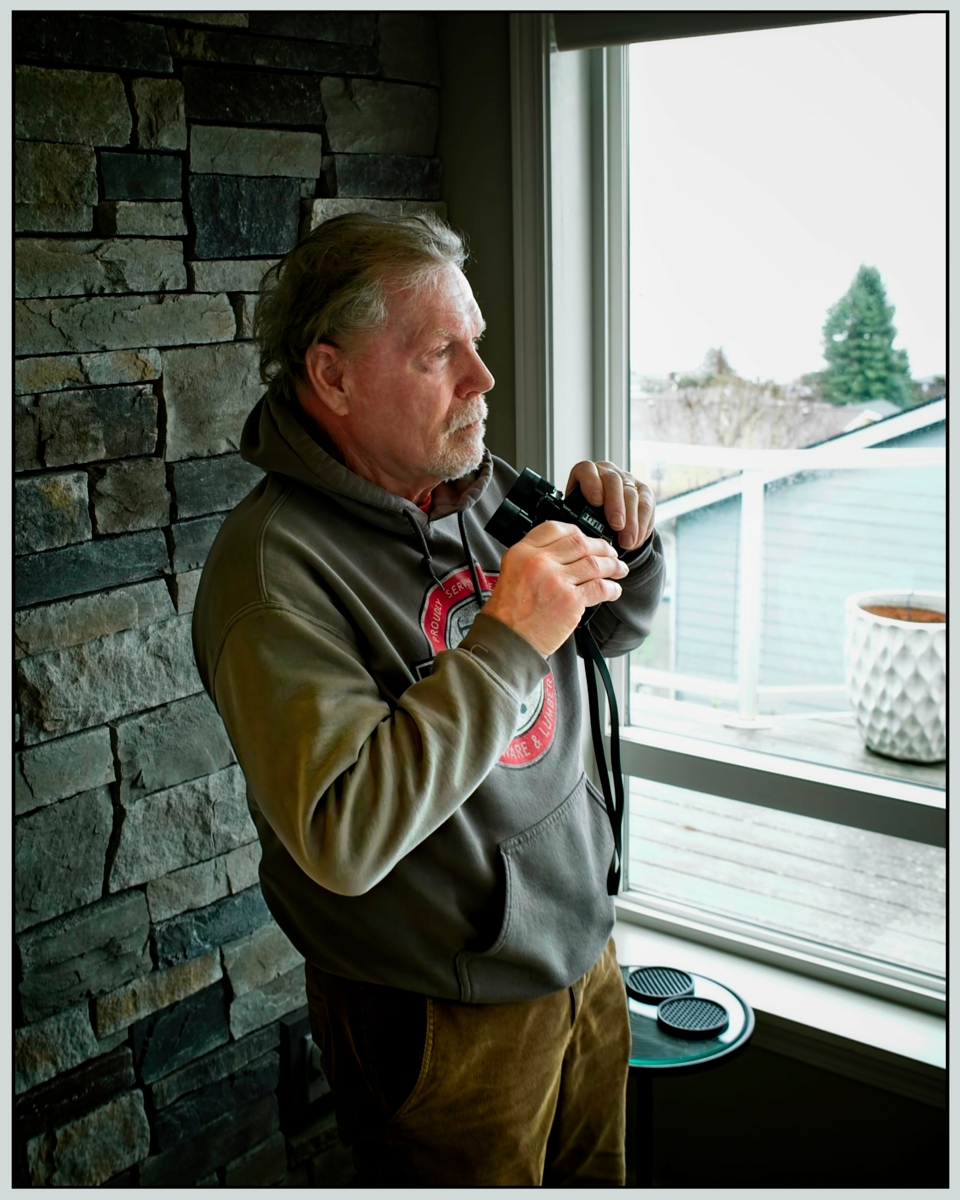
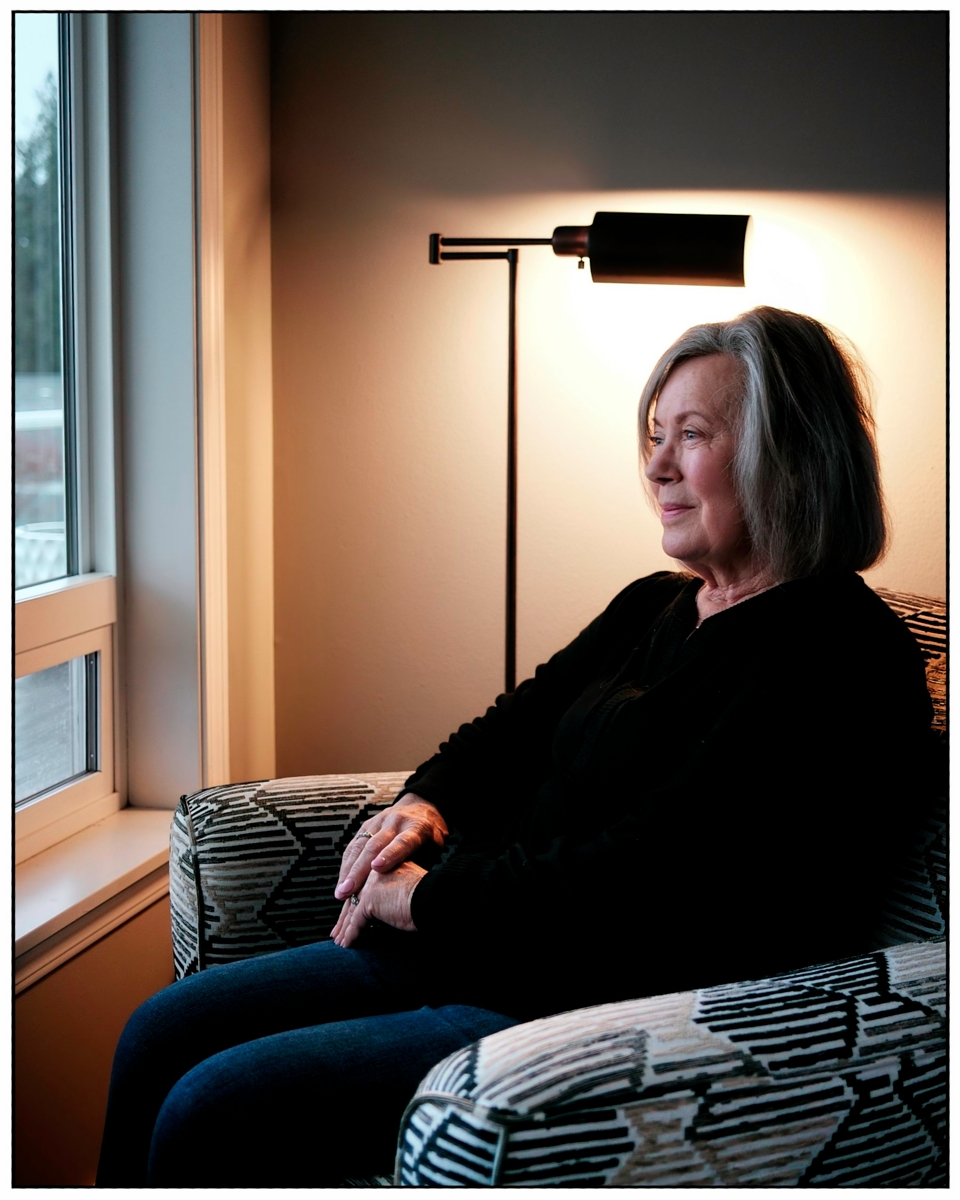
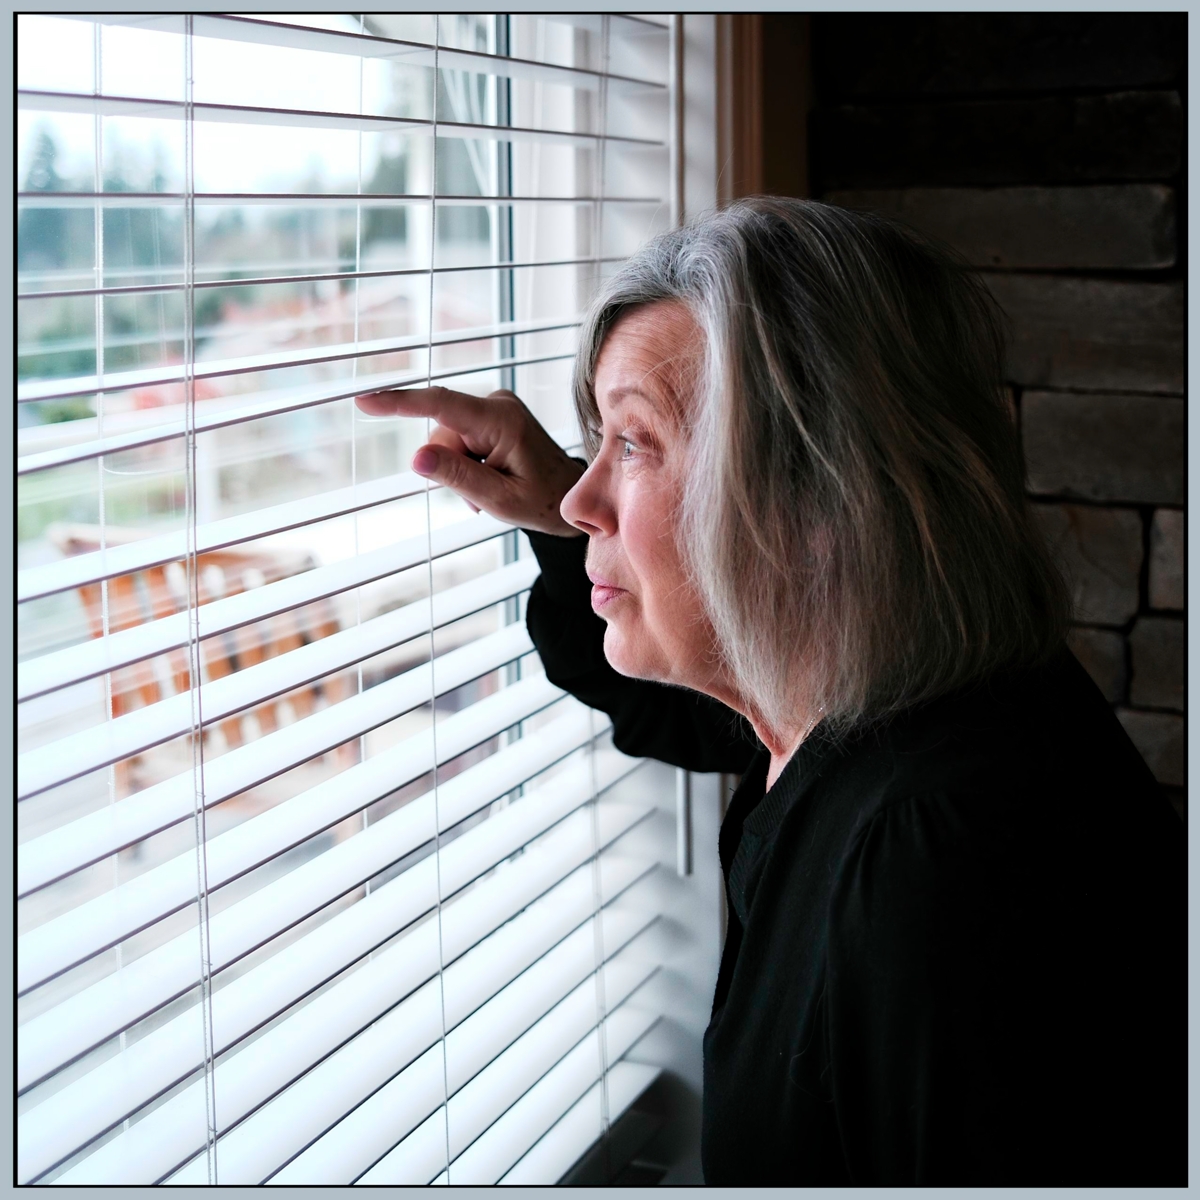
Portraits with One Big Window
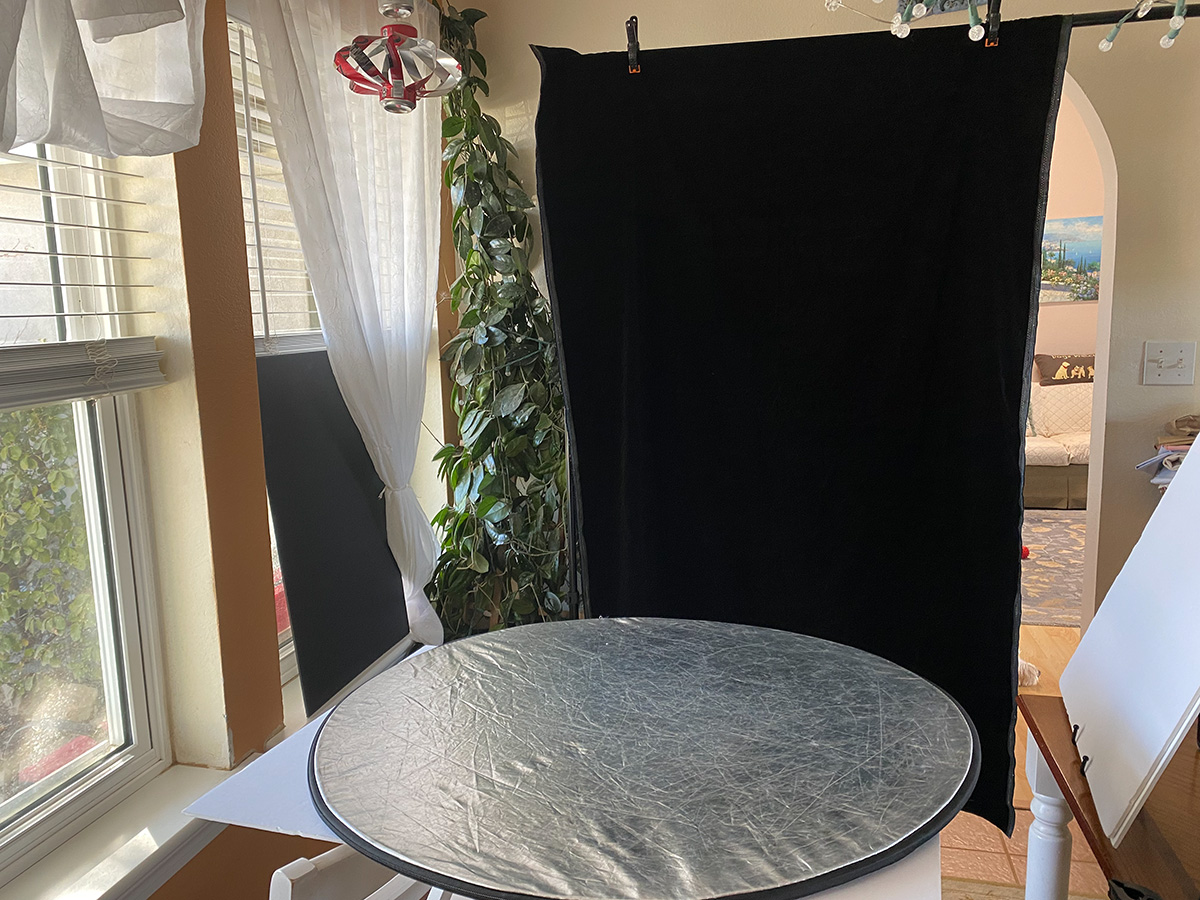
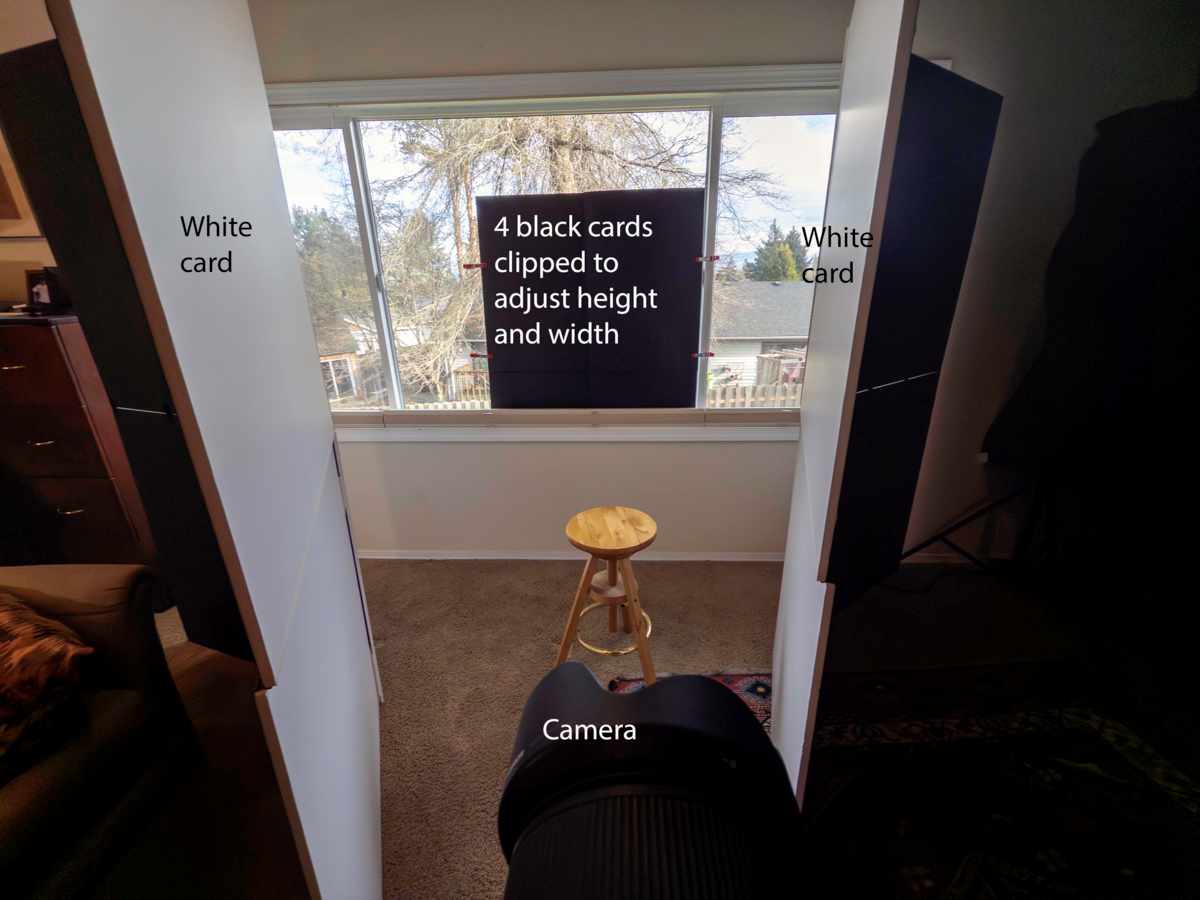
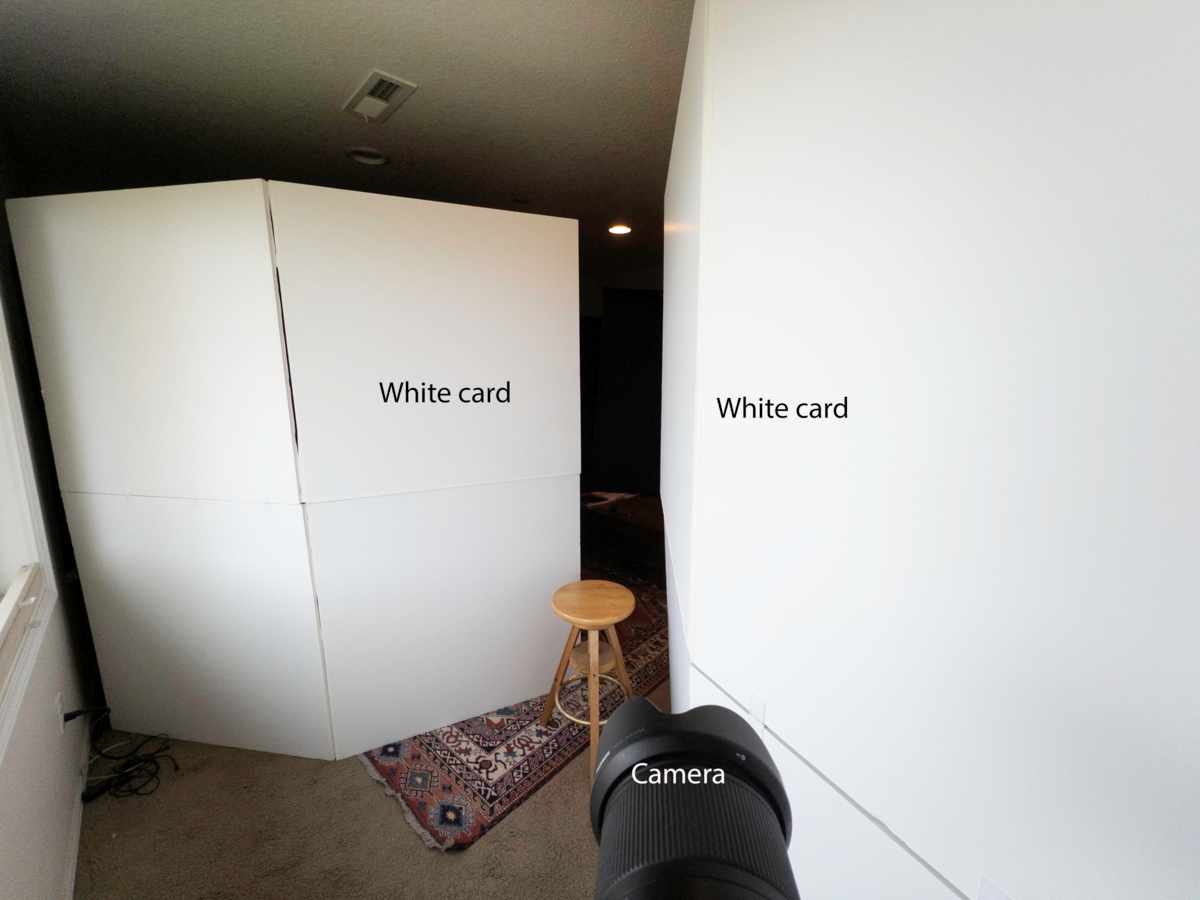
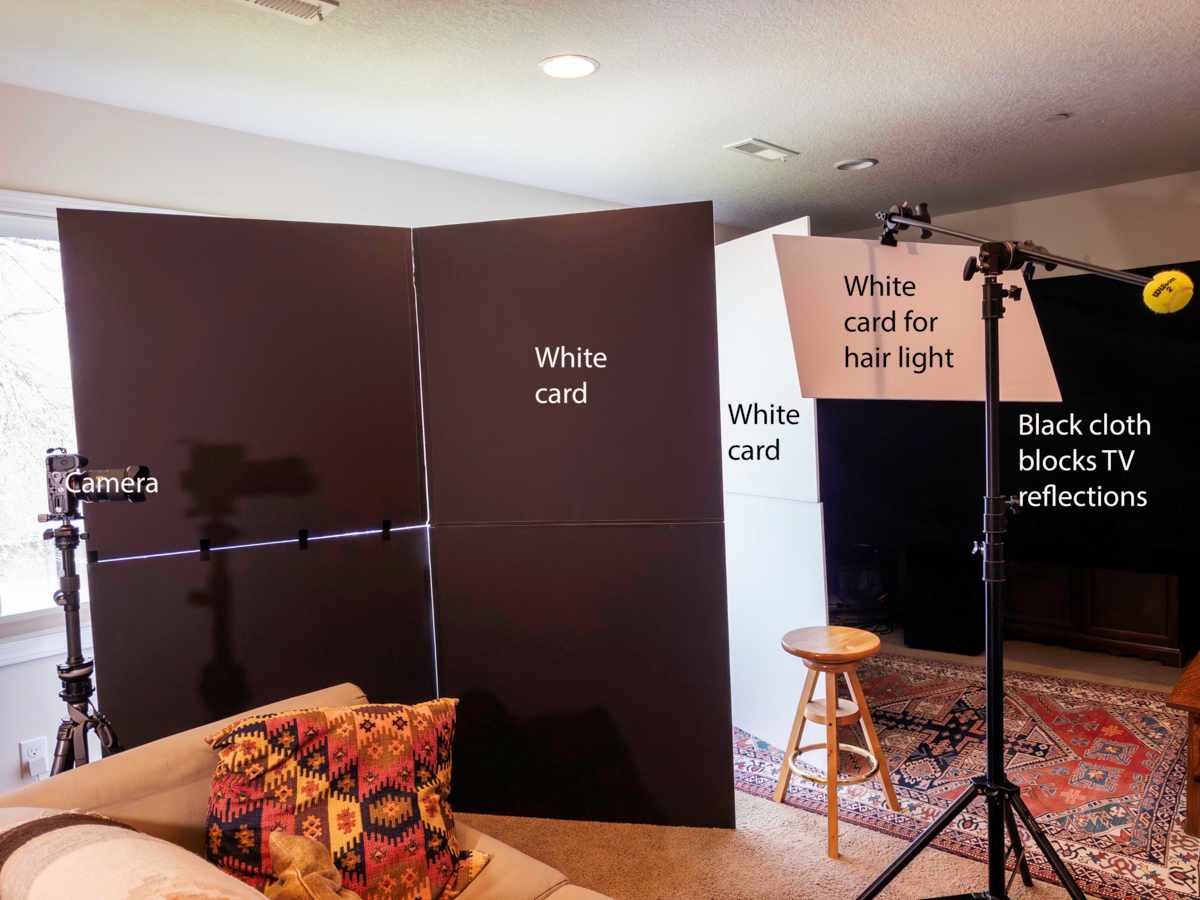
White cards, black cards, and a window… perfect.


Sometimes the window IS the set… heh.
ASSIGNMENT EIGHT:
Show us what you did
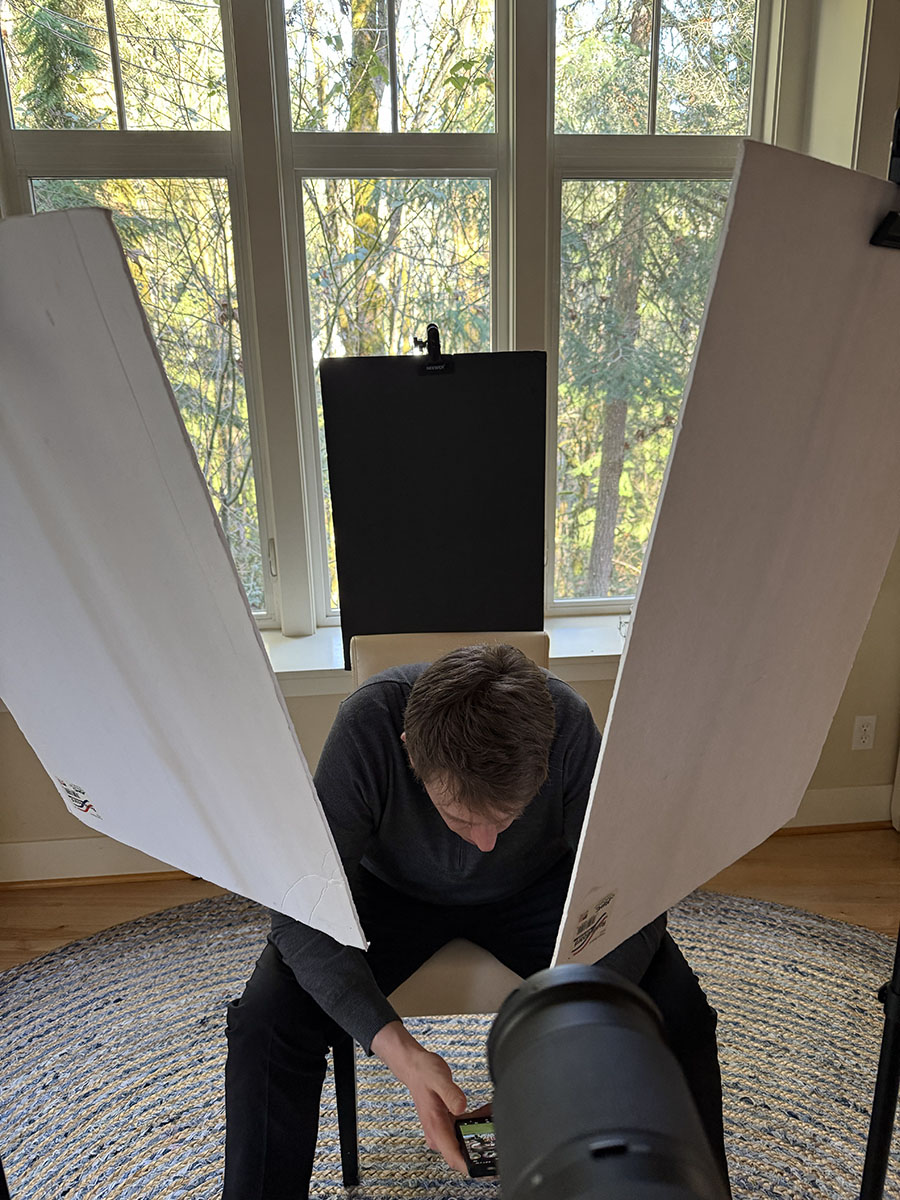
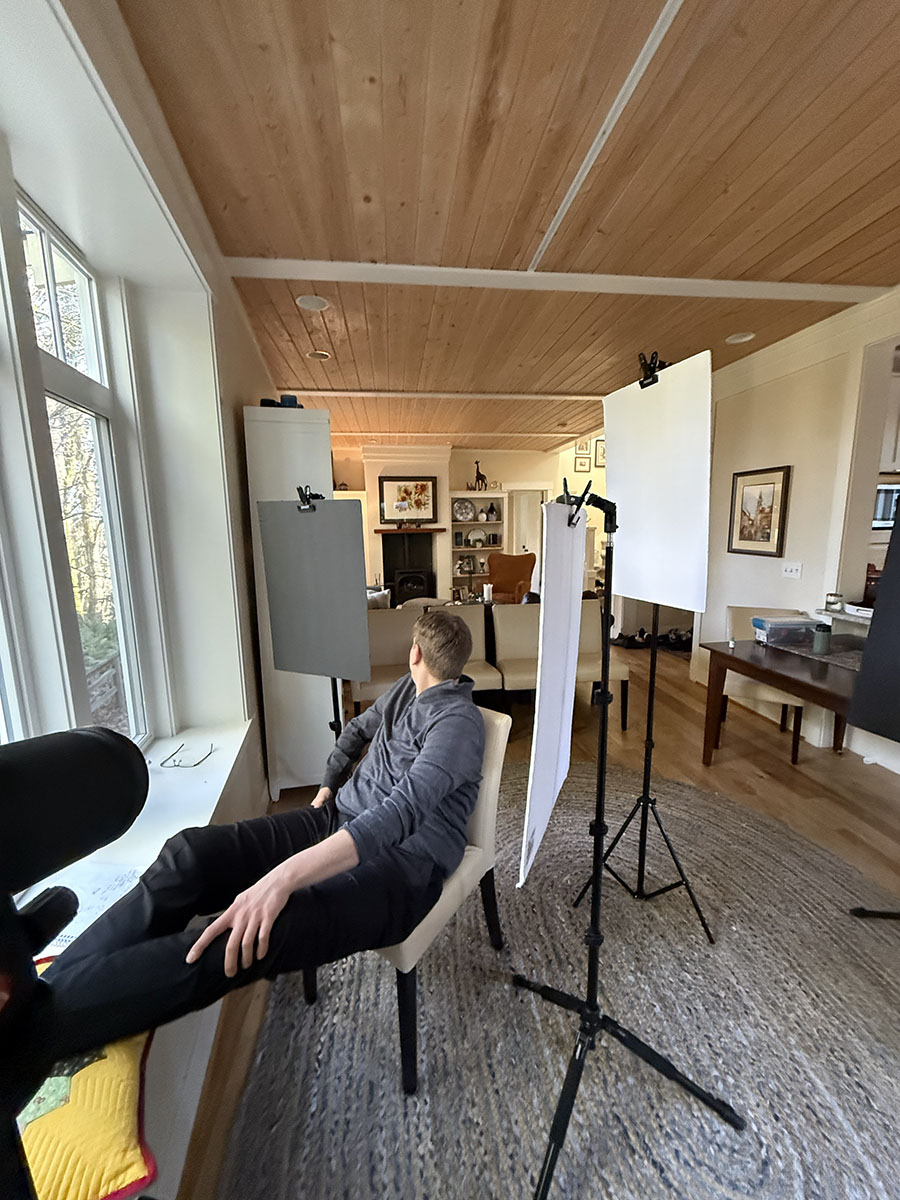
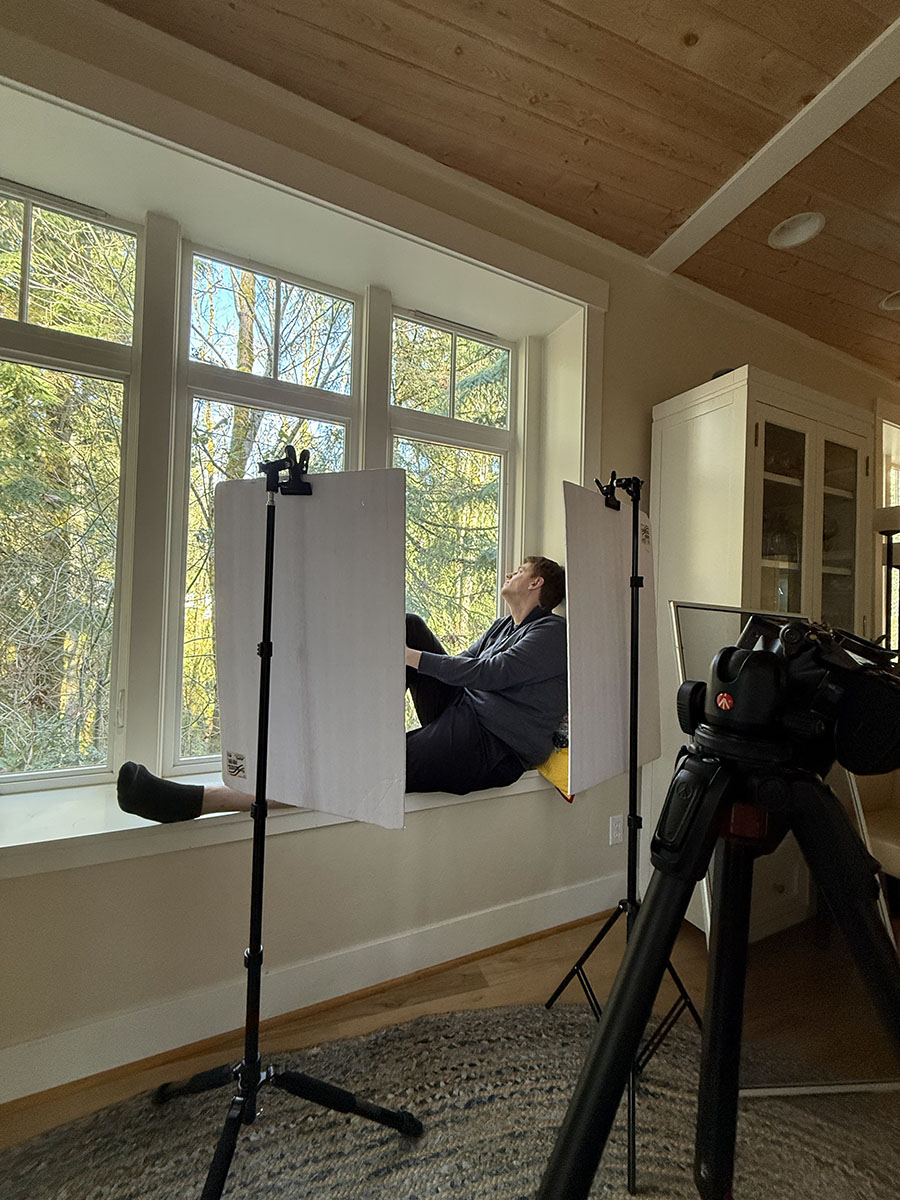
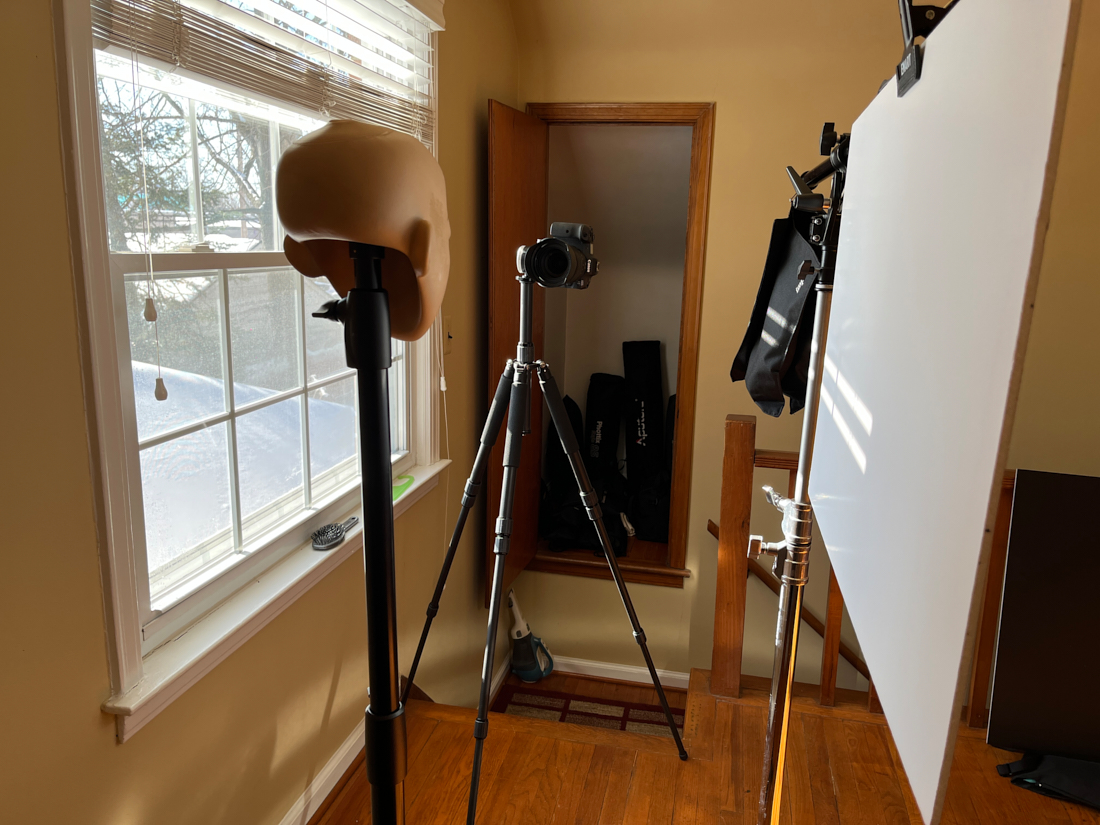
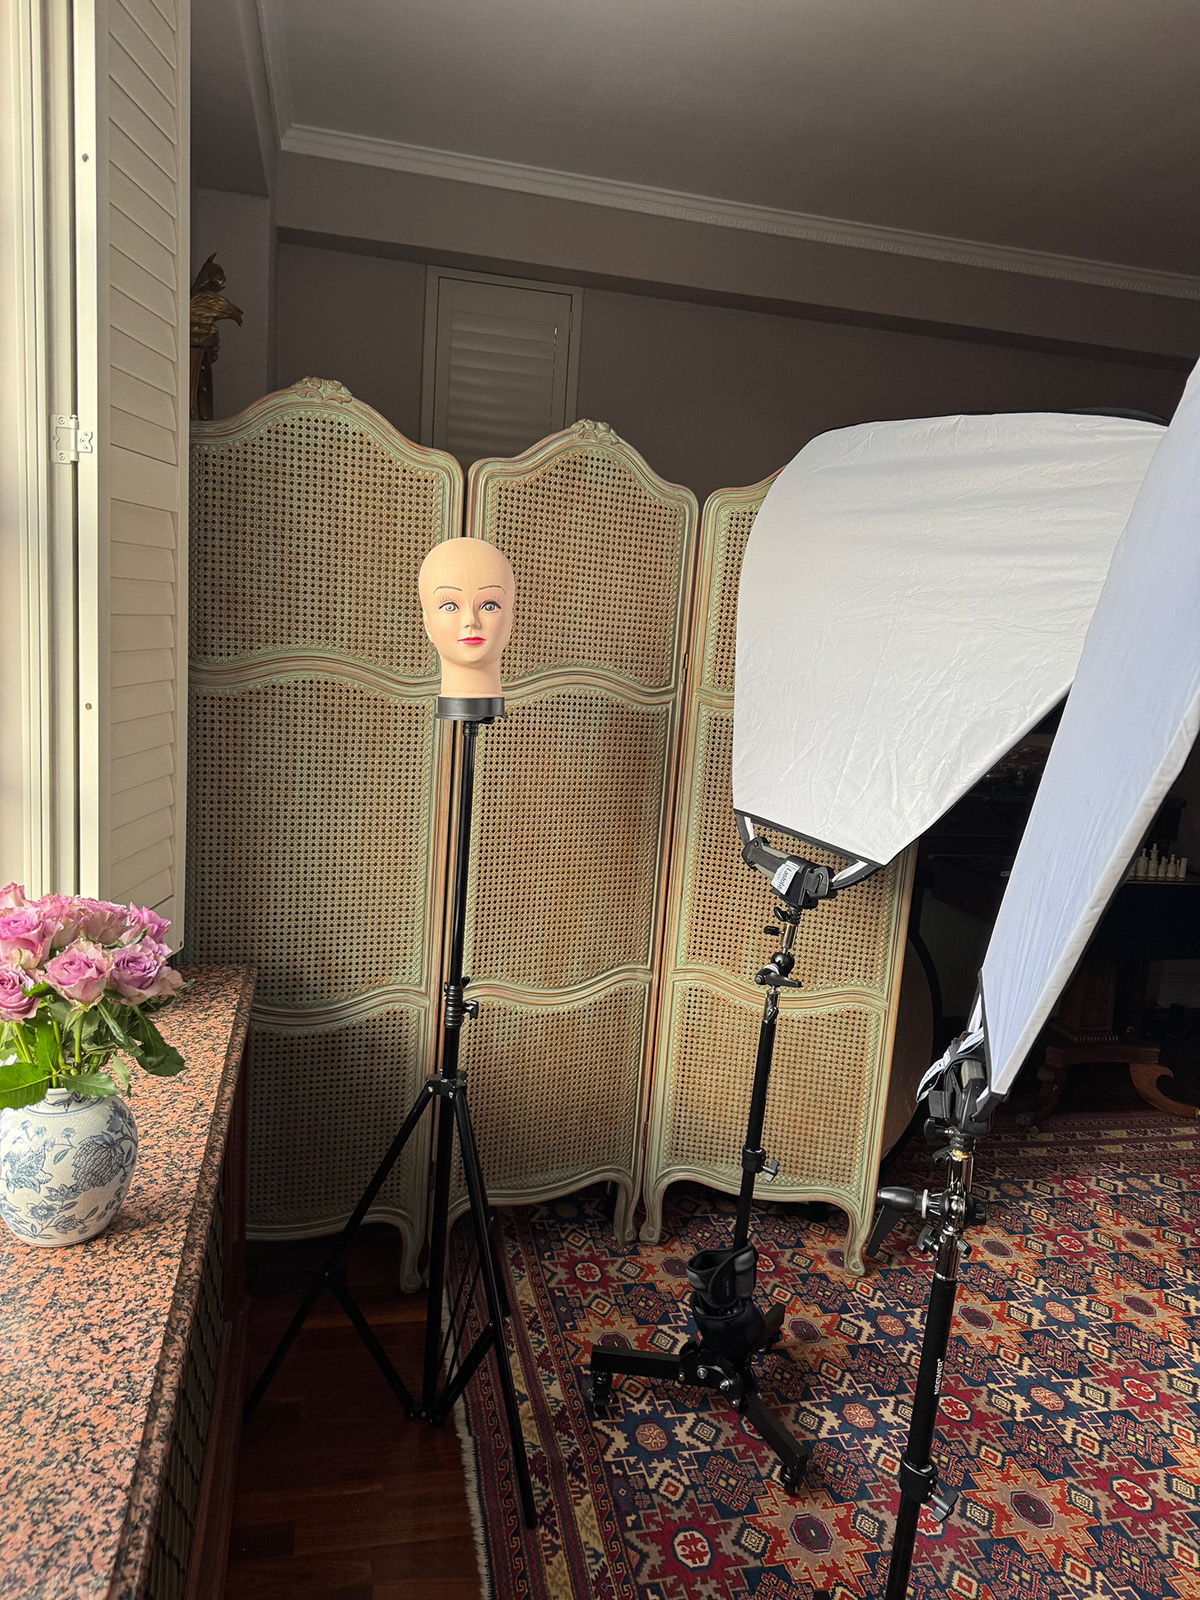
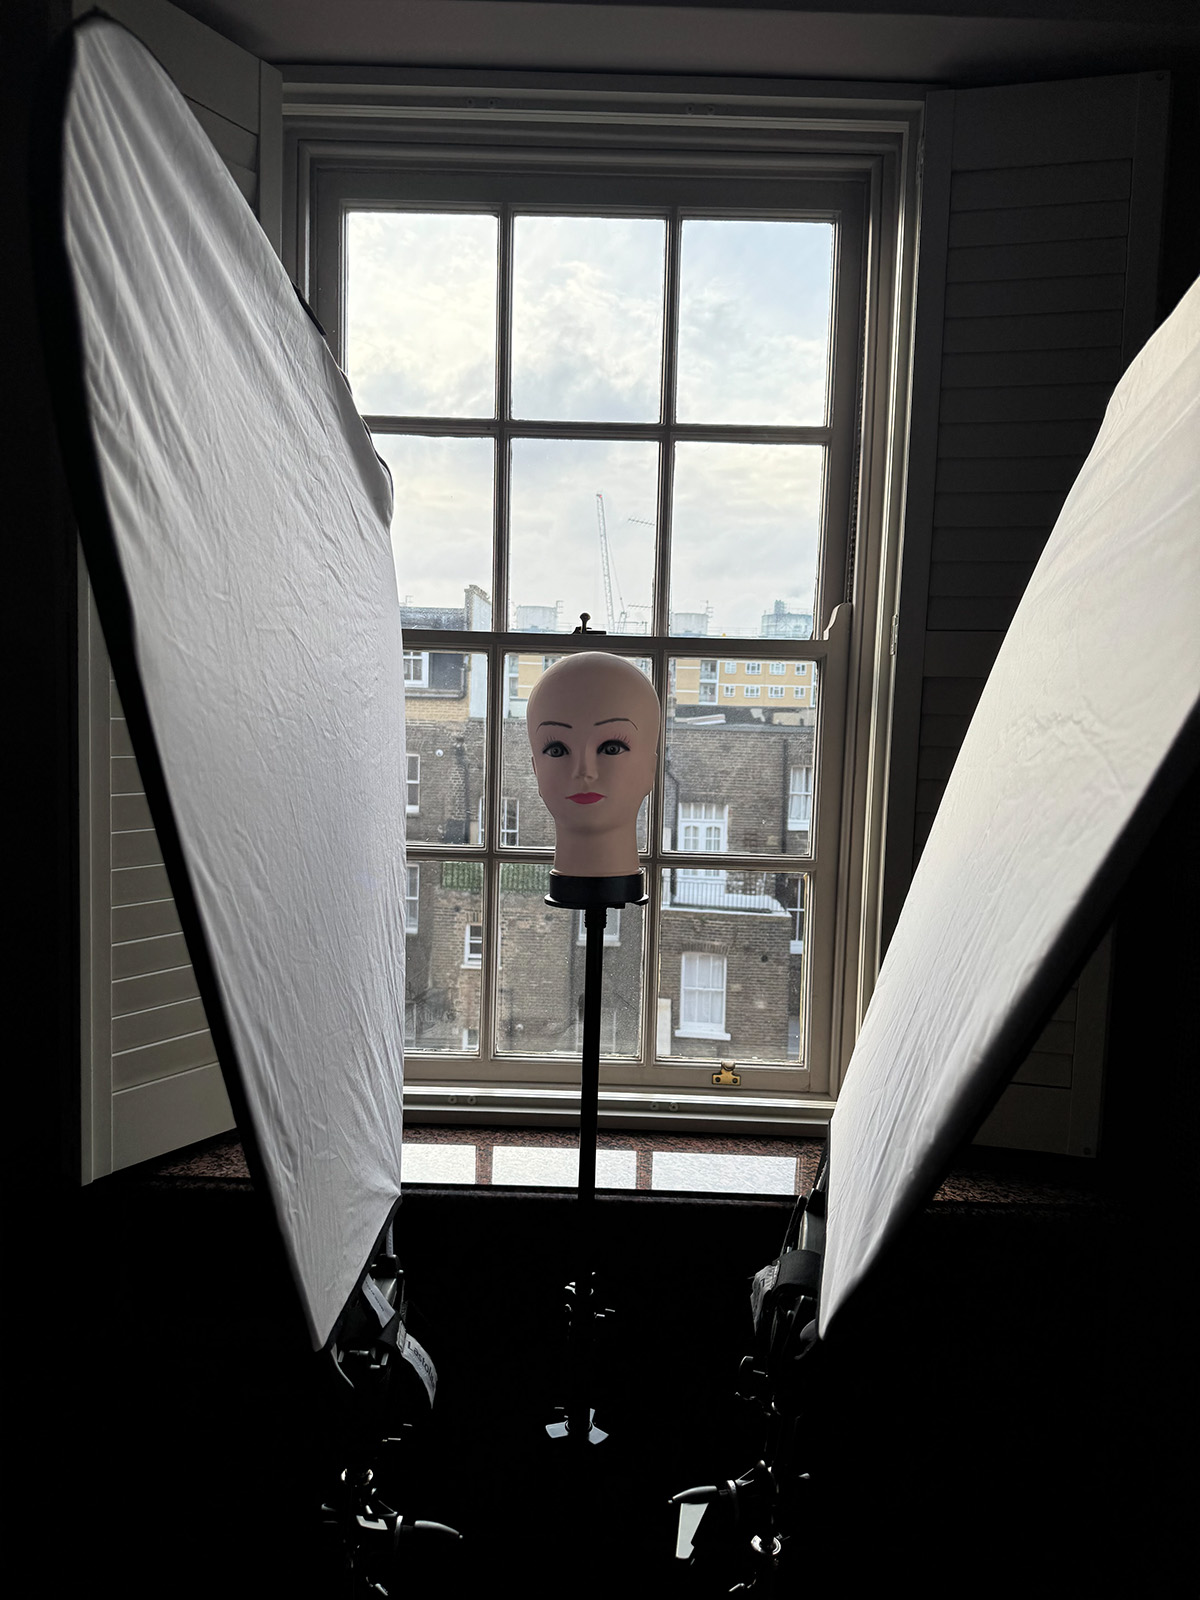
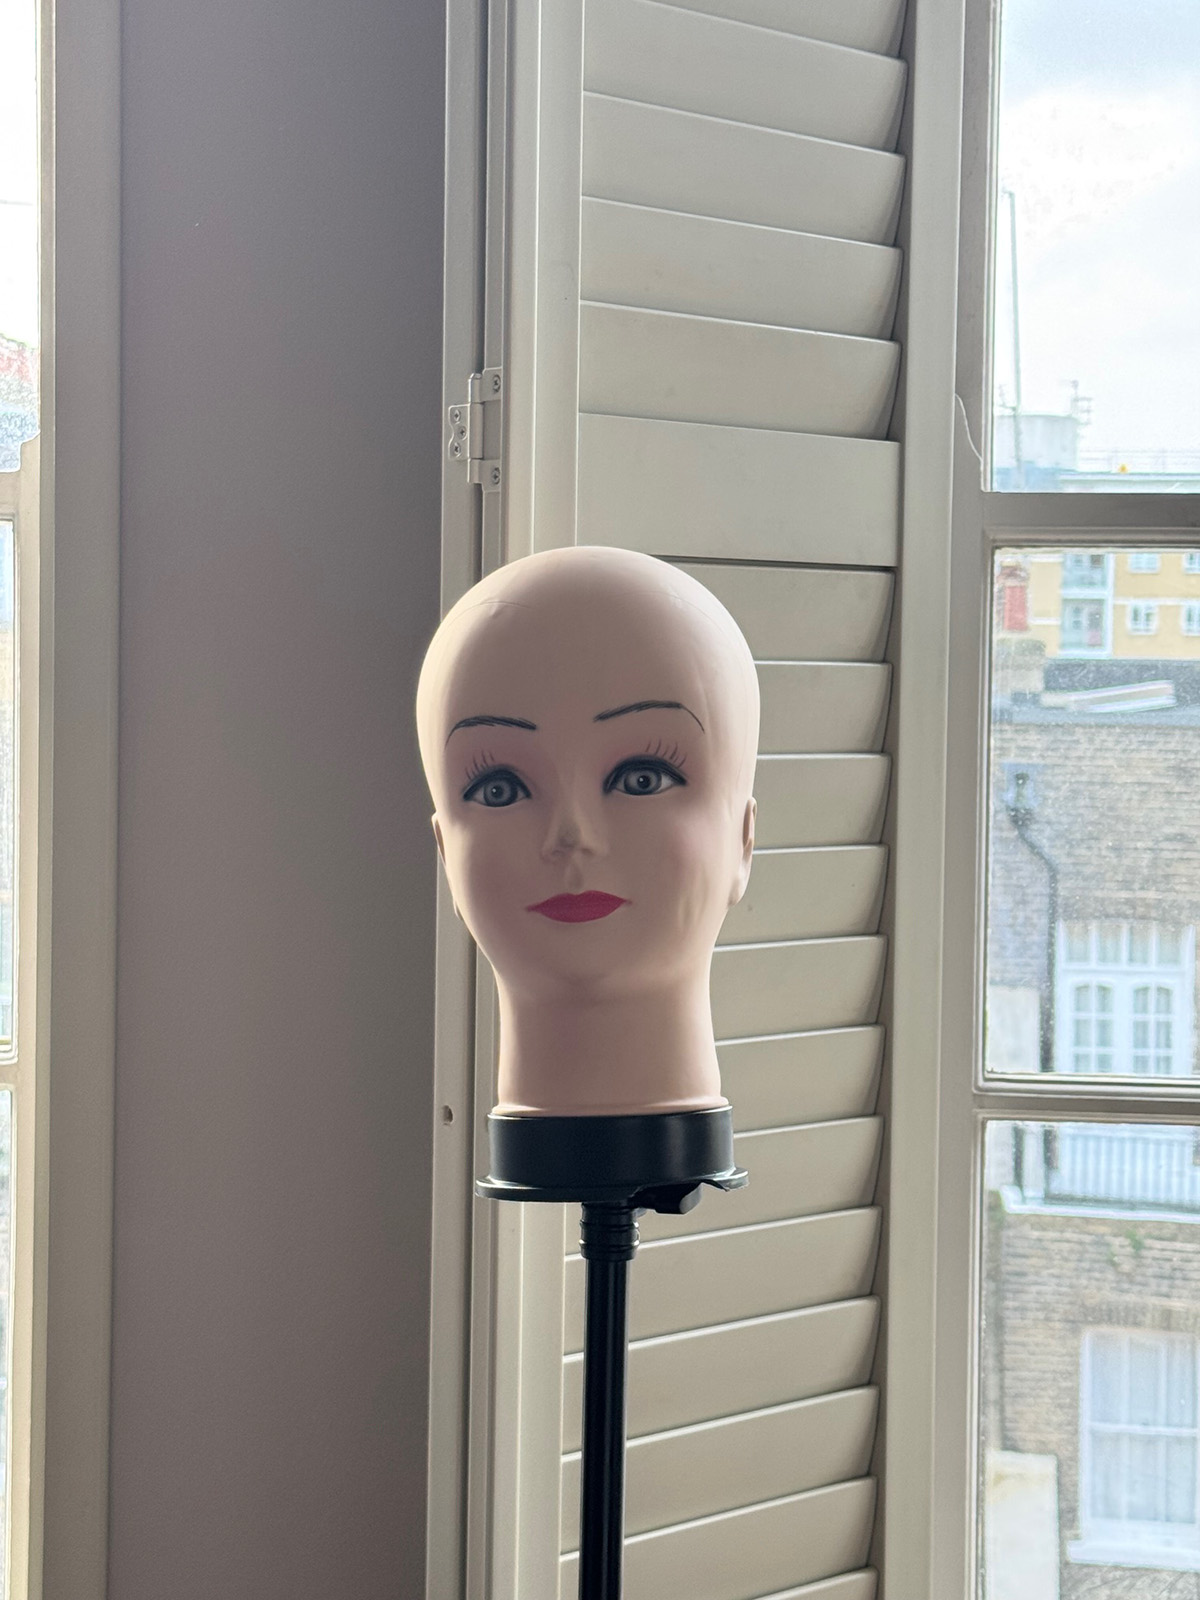
Spemd an hour with a subject, a large window for the light source, your cards (black and white), and sculpt the light on the face. Remember to photograph the setups as you go. Three final images / three setups, please.
Look for a window that does not have direct sun. Northlight is good, shadow outside is fine.
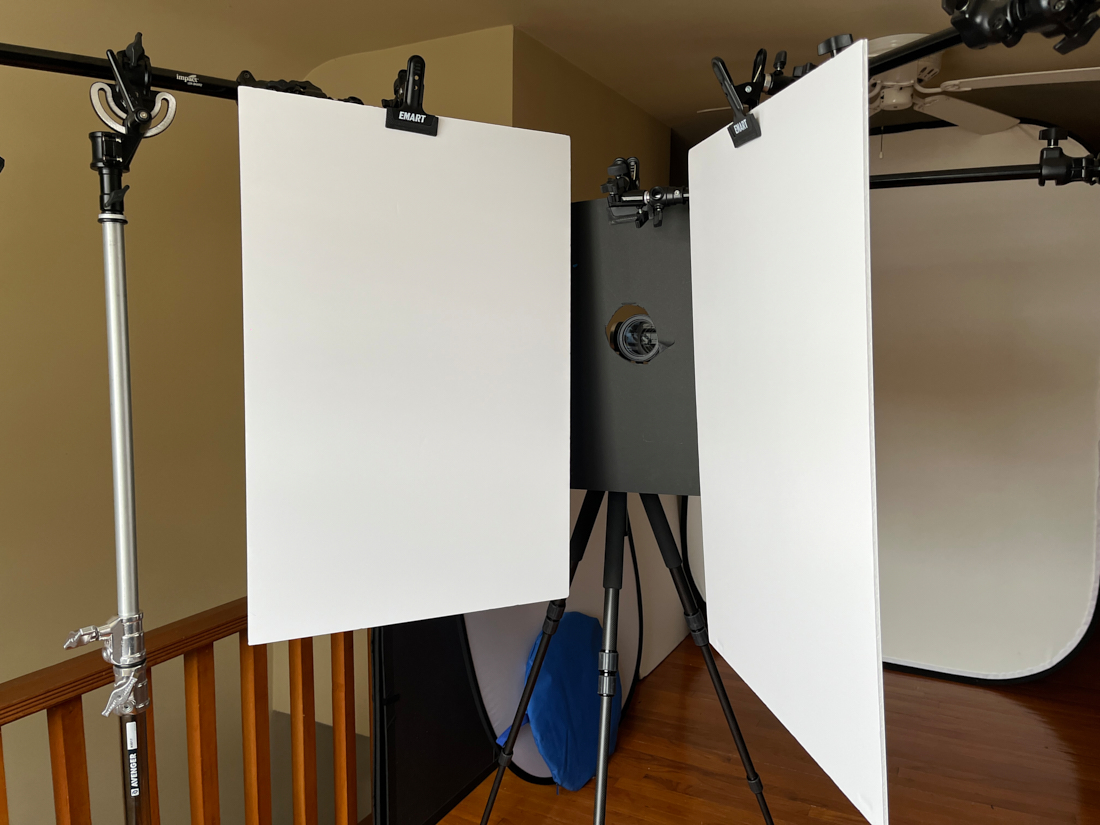
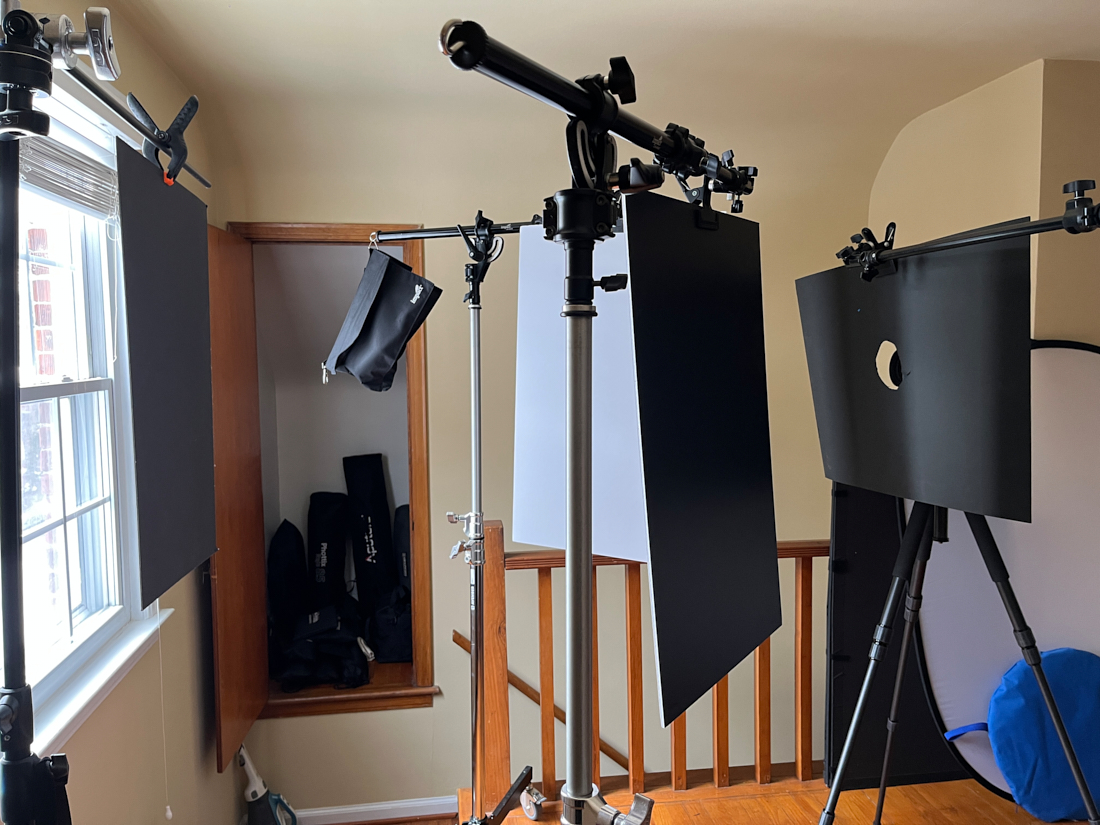
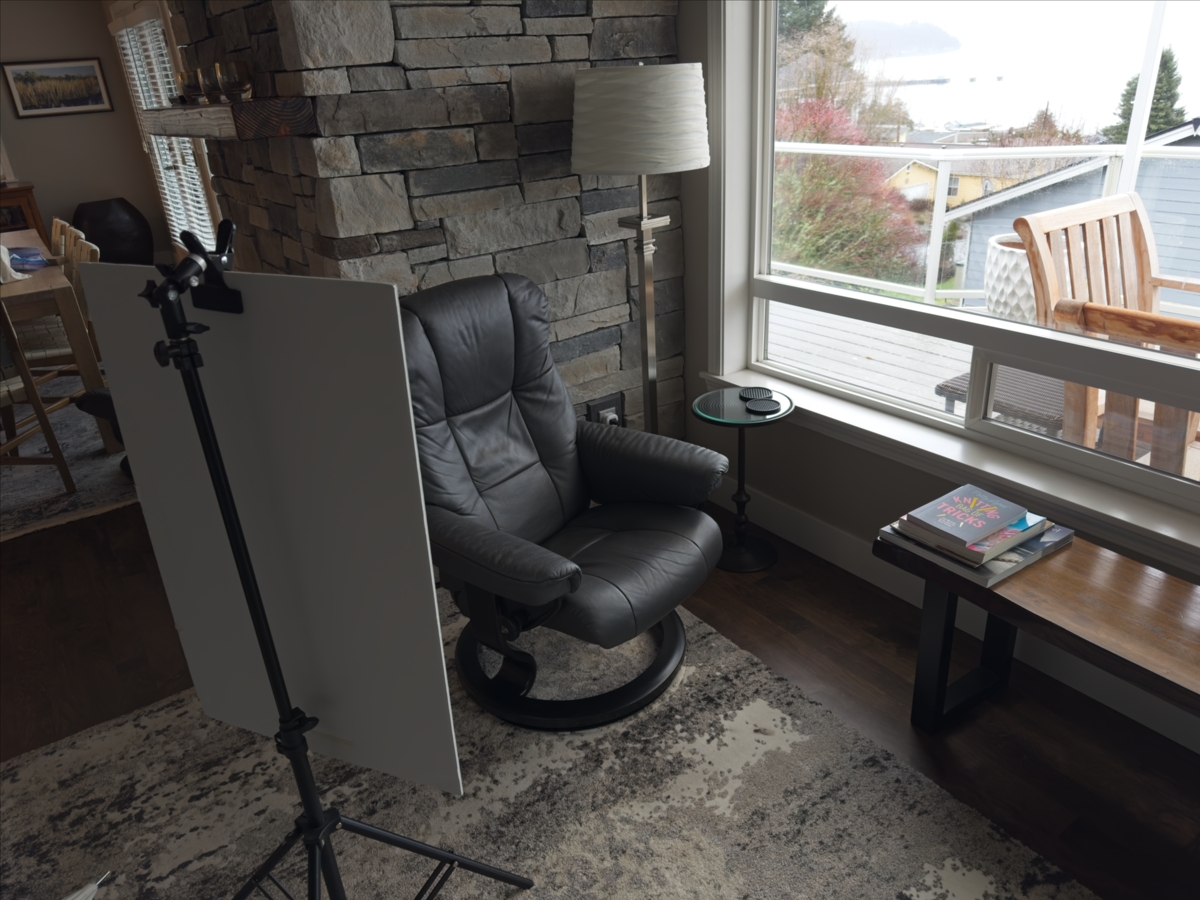
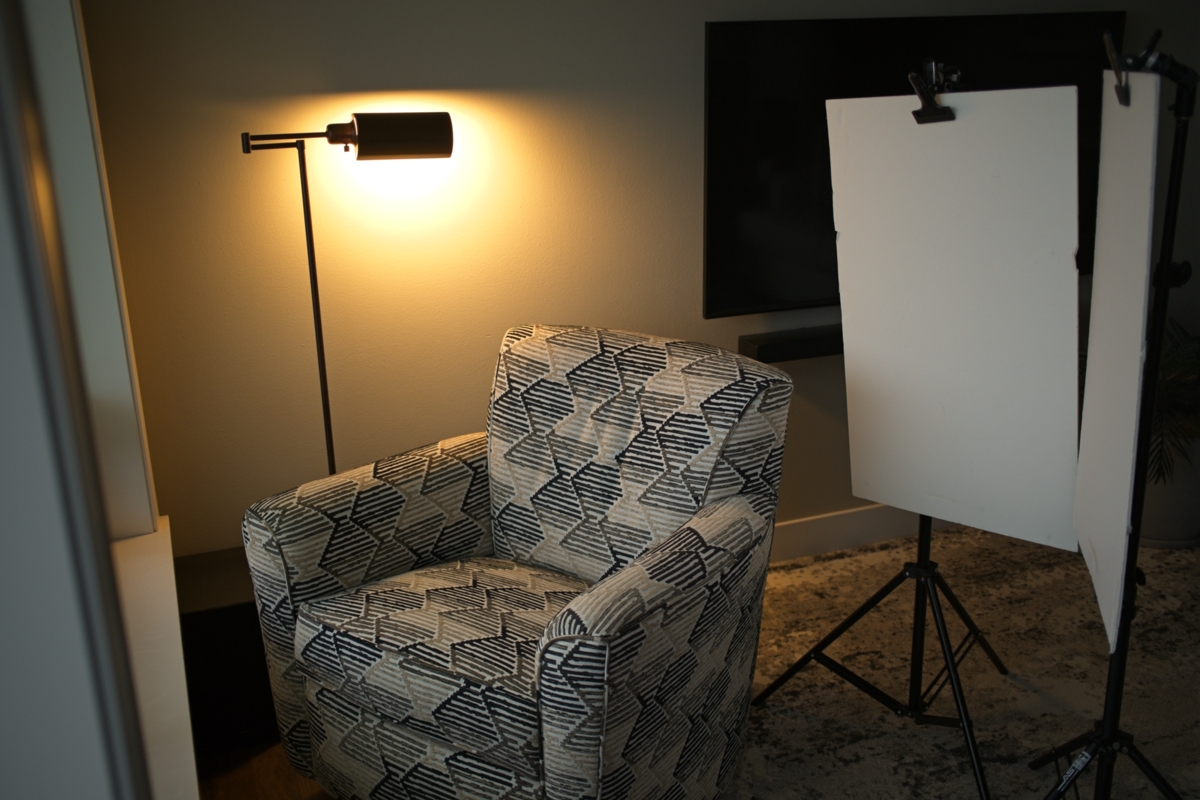
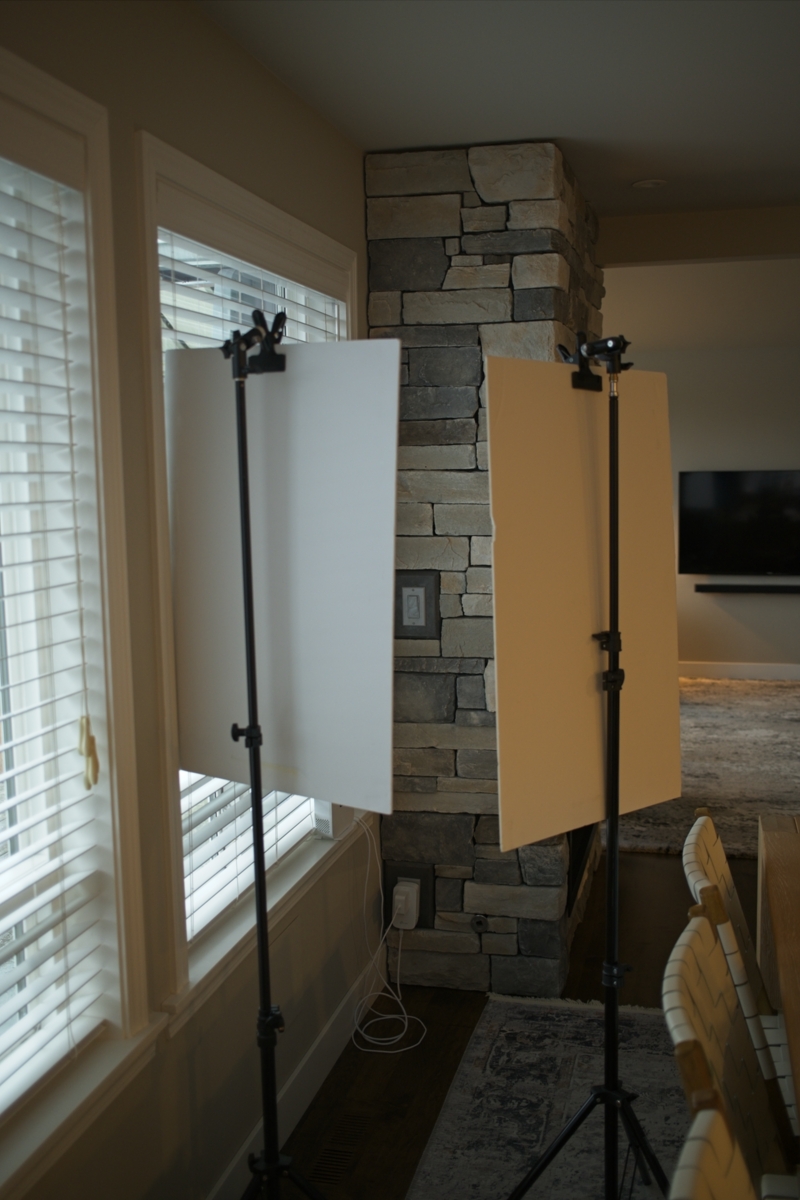
Two stands will hold the cards with A-Clamps will be all you need.
ASSIGNMENT UPLOAD
1. Must not be larger than 1200 pixels on the longest side.
2. Must be .jpg format
3. Include BTS shots
4. File naming: first-last-assignnumber-1.jpg (don-giannatti-1-a.jpg, don-giannatti-1-b.jpg, etc…
5. Be sure to resize phone shots.
[wordpress_file_upload]
What you will need:
- One big window
- Reflector ((2)black and (2)white cards) 36″ by 24″ or close
They must match in size. - Stands, boxes to hold up the reflectors… etc.
- Someone to make photographs of
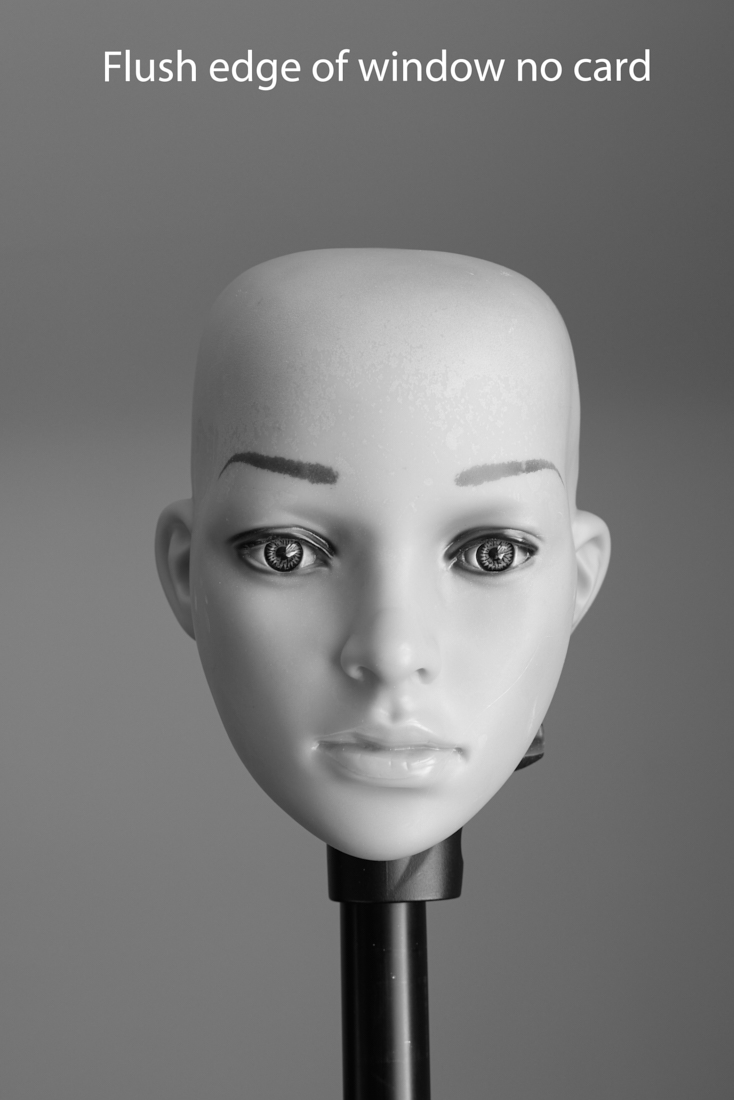
Most people see a window as a simple light source.
We’re treating it like a lighting system.
A few things to add that make one window almost absurdly powerful:
- Distance is your dimmer switch
Move the subject closer to the window and the light gets harder, brighter, more directional.
Move them back and it gets softer, quieter, more cinematic.
Same window. Totally different mood.
Most photographers forget that space is part of the lighting kit. - Height matters more than people think
If the window is high, you get natural top light. That sculpts cheekbones and eye sockets.
If it’s low, it flattens and softens.
Have them sit, stand, or kneel. Watch how the face changes before you touch a card. - Angle creates story
Turn the body slightly away from the window and let the light rake across the face.
Now you’ve got depth.
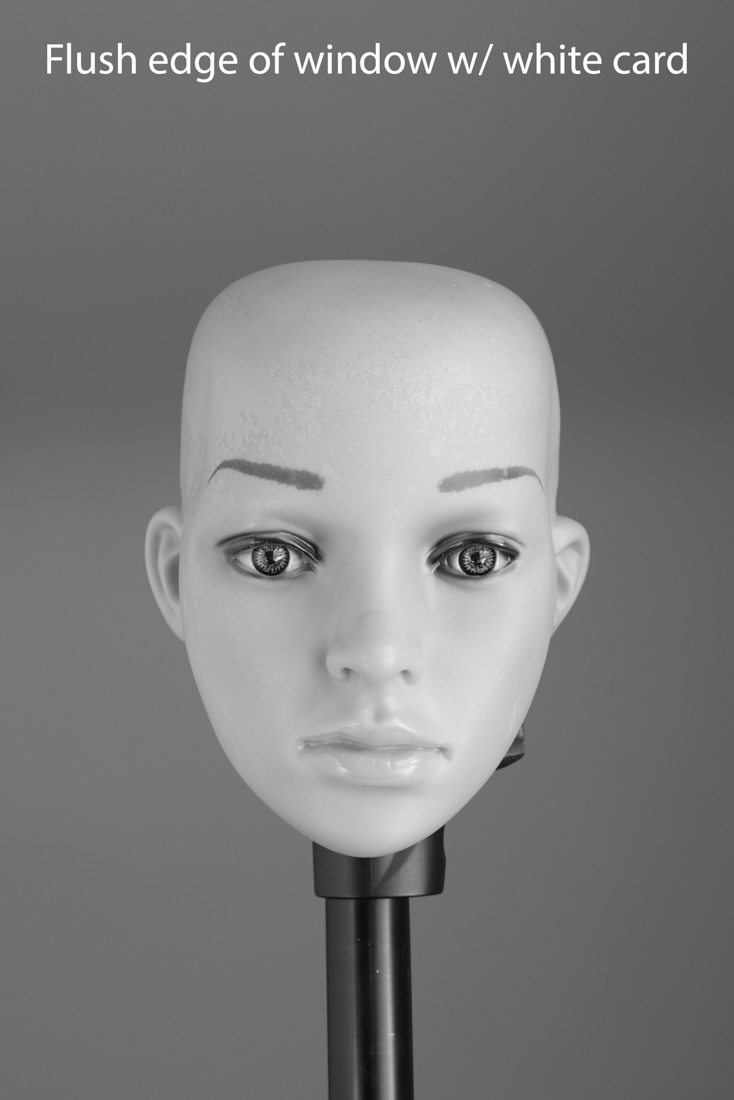
Turn the face back toward the camera with the window still behind them and you’re into Rembrandt territory without trying. - White cards aren’t just “fill”
They’re shape tools.
A big white card low becomes beauty light.
One high becomes forehead control.
One behind the camera becomes confidence light.
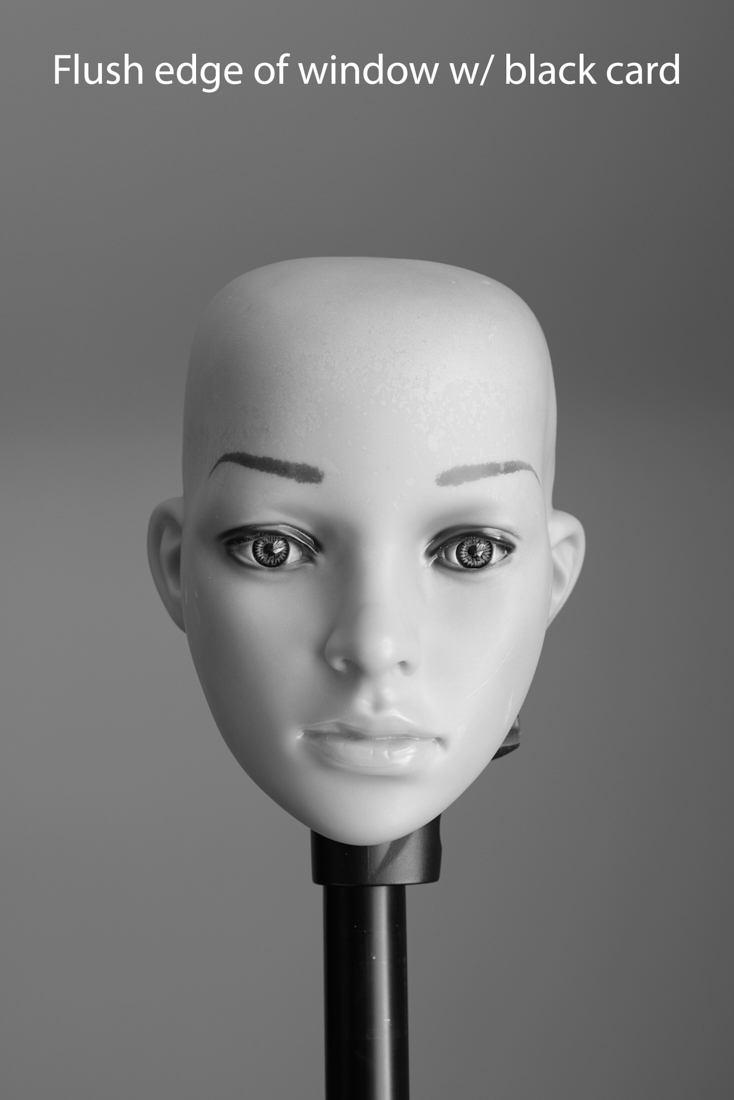
You can build a three-light studio with cardboard and foam core. - Black cards are your secret weapon
This is where most photographers stop thinking like artists and start thinking like technicians.
Black cards aren’t for blocking light.
They’re for drawing lines.
Jawline.
Cheekbone.
Temple.
Neck.
You’re carving a sculpture, not lighting a face. - Backgrounds are light too
That window backlight will blow out a wall, silhouette a curtain, or light-wrap a shoulder.
Put the subject closer to the background and it becomes part of the portrait.
Pull them away and it disappears.
You get control without adding gear. - Fabric is a modifier
Sheer curtain = giant softbox
Blinds = instant pattern
Window frame = natural gobo
No Amazon order required. - Motion adds drama
Have the subject lean slightly forward or turn slowly into the light.
That transition zone is where the magic lives.
Stillness is safe.
Movement is cinematic. - Exposure becomes storytelling
Expose for the face: bright, optimistic, open.
Expose for the window: moody, graphic, editorial.
Same setup. Two different emotional reads. - One window teaches discipline
You stop chasing gear.
You start chasing placement.
You start seeing light, not just using it.
This lighting is almost limitless.
Summer is in the huge guest bath in a villa we rented for some shoot dates in Mexico. There is a half wall of block glass to her left, and a medium tone marble all around her.
The light bouncing off the walls was simply stunning, so of course it is photo time.
All I did was make sure that she was far enough into the room for the window light to wrap around her and light the wall directly in front of the side she was leaning on.
It gave me both, a smooth ‘wrap’ of light and some natural bounce off of the wall.


I shot this portrait of an ASu professor in her home for a magazine. We had very little time as she was expecting a large group of guests.
I decided to not bring in my lights and simply use the ambient that was there.
Behind her is a set of sliding glass doors going out into a well lit yard.
In front of her, and below me, is a set of double doors which we opened to let the light flood in.
I chose to expose for the face as a bit higher than the ambient and that let the natural backlight become even stronger.
I am standing on a second floor landing and the doors are directly below me.
The light was smooth, pretty, and modeled the room with soft
Meeting Notes
Quick recap
The group began by discussing the beautiful mountainous landscape around Santa Fe and sharing photography experiences, including an Ansel Adams workshop and current trips to Yosemite. The main focus was on lighting techniques for portrait photography, with various members presenting their setups using window light, white cards, and reflectors, and receiving feedback from Don on achieving desired effects and post-processing adjustments. The conversation ended with discussions about photography assignments, exposure settings, and focus stacking techniques, along with updates about Don’s home renovation project.
Next steps
- Don: Update and confirm the meeting time for the next session (scheduled for the 14th) and notify participants.
- All participants: Prepare and select your best 5 shots (portfolio presentation) for review at the next meeting (by the 14th).
- LucianaRizzi: Continue editing and prepare images from the recent photo session (approximately 400 images) for delivery to the model next week.
Summary
Mountain Landscapes and Photography Insights
The group discussed the beauty of the mountainous landscape around Santa Fe, including South Mountain and the Sandia and Manzano Mountains. Don shared his experience of an Ansel Adams workshop in Yosemite in 1978, mentioning that Adams was frail and primarily shot from the road using a timer on his watch. Christine, currently on a photography trip in Yosemite, shared her experiences and mentioned that she had been referring people to Don’s classes. The conversation concluded with Don expressing his willingness to answer any questions, though none were explicitly asked.
Lighting Techniques and Creative Freedom
The group reviewed lighting setups, with Christine presenting photos of her son taken with different lighting configurations. Don provided feedback on the lighting techniques used, particularly the placement of white and black cards to create desired effects. He explained how adjusting the distance and angle of the cards could alter the highlights and shadows in the photos. Don emphasized that while there are multiple ways to achieve a desired look, understanding the basics of lighting allows for creative freedom in photography.
Portrait Lighting and Post-Processing
The group discussed lighting techniques and post-processing adjustments for portrait photography. Christine shared her experience with north-facing light and yellow tinges from trees, while Don advised removing unwanted yellow tones to avoid jaundiced appearances. Inge presented a photo taken in a small house with a black cloth backdrop and a silver reflector, which Don praised for its highlights and fill lighting. Don suggested increasing the brightness of the subject’s hair to 2.35 and adjusting contrast to enhance whites.
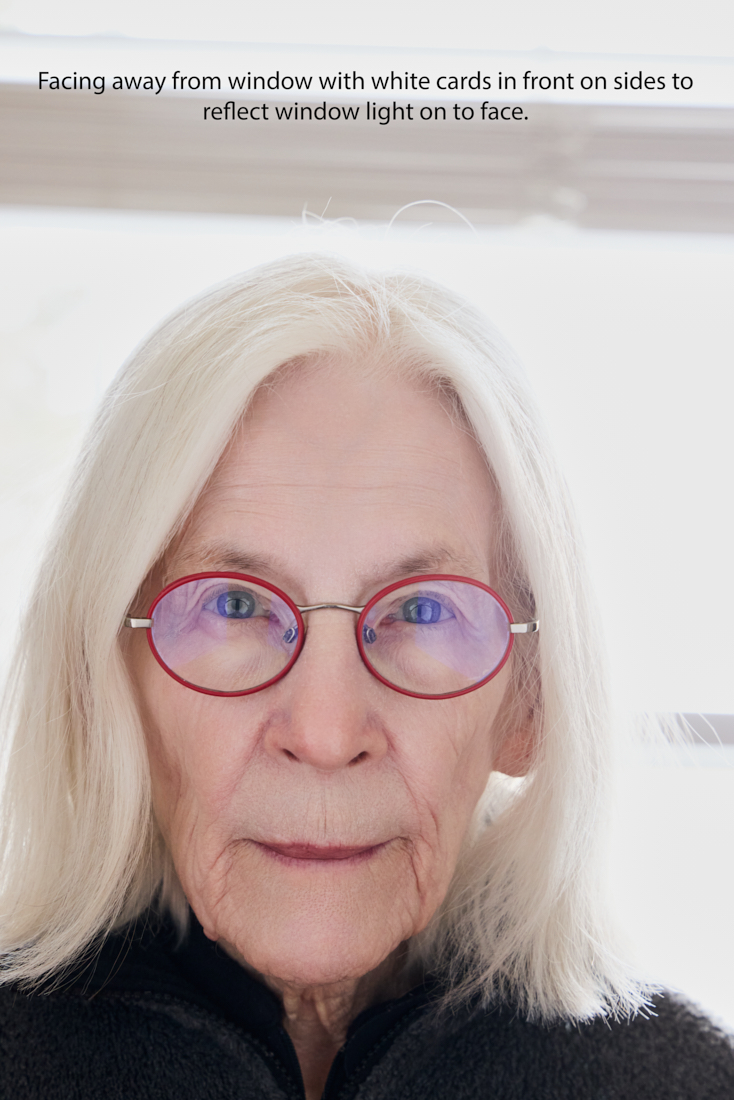
Window Light Portrait Photography Techniques
The group discussed lighting techniques, focusing on Judy’s photography setup using window light and white cards to achieve a natural look. Don praised Judy’s work, explaining how the lighting minimized glare on glasses and softened skin tones, while also noting that similar techniques were commonly used in beauty product advertisements. Judy shared that she used a black card to control flare when shooting through a small hole, and Don emphasized how this simple setup could effectively smooth out skin textures, particularly beneficial for portraits of people with imperfections.
Window Light Photography Setup
Luciana discussed a photography setup involving window light and white cards positioned close to the subject, creating a balanced lighting effect that highlighted the subject’s face. Don praised the lighting and composition, noting the symmetrical face and subtle blue reflection in the hair. Luciana explained she used Photoshop actions and positioned the subject between two windows to achieve the desired effect.
Photography Lighting Techniques Discussion
Luciana presented her photography work, focusing on lighting techniques and equipment used. She discussed using dark and bright field lighting, as well as experimenting with different lenses and settings. Don provided feedback and explanations on lighting concepts, while Judy and Inge offered brief comments. Luciana mentioned she had taken approximately 400 images during a 4-hour photoshoot and was still editing them for the client.
Natural Light Photography Techniques
Luciana shared her photography experiments using natural light, particularly focusing on soft lighting techniques with white cards and window lighting. Don and Steve provided positive feedback, with Don noting the classic lighting approach and its historical significance. The discussion included technical details about shooting conditions, with Don recommending overcast days for soft lighting and Luciana mentioning London’s specific lighting patterns.
Window Light Portrait Photography Setup
Robert demonstrated a successful portrait photography setup using window light and white cards, which Don praised for its simplicity and effectiveness. Robert explained his use of foam core boards and adjustable black cards to control lighting, while Don noted the difference between foam core and matte white boards. The discussion highlighted the versatility of the setup, with Robert showing different configurations including a “tunnel” effect for directed lighting. Steve shared a separate example of morning window lighting with a volunteer subject, though the lighting conditions were less optimal than Robert’s afternoon setup.
Photography Lighting Techniques Discussion
Steve and Don discussed lighting techniques for photography, focusing on using white cards to control shadows and highlights. Steve shared photos of his wife taken in a window-lit setting, and Don provided feedback on improving the lighting setup by bringing the white cards closer and adjusting the exposure to enhance the subject’s hair and cheek details. Don also advised being mindful of tungsten light bouncing off the white cards and suggested using Lightroom to adjust the hair’s brightness if needed.
Steve’s Photography Challenges and Solutions
The group discussed Steve’s photography work, particularly focusing on his recent photos where he had limited time to capture them. Steve shared his challenges with high ISO settings and lighting conditions, and the others offered suggestions including using a tripod and photo merging techniques. Christine and Robert discussed their experience with HDR photography from a Yosemite workshop, where they used multiple exposures to blend sky and foreground elements. Don joined the conversation to share his own approach to HDR landscape photography, noting that subtle blending works best for him.
Photography Assignment and Updates
The group discussed photography techniques, including exposure settings and focus stacking. Don announced an upcoming assignment where participants will showcase their best 5 shots in two weeks, with the exact time to be confirmed and updated. Don also shared an update about his home renovation project, mentioning that doors had been delivered and trim work was nearly complete.