
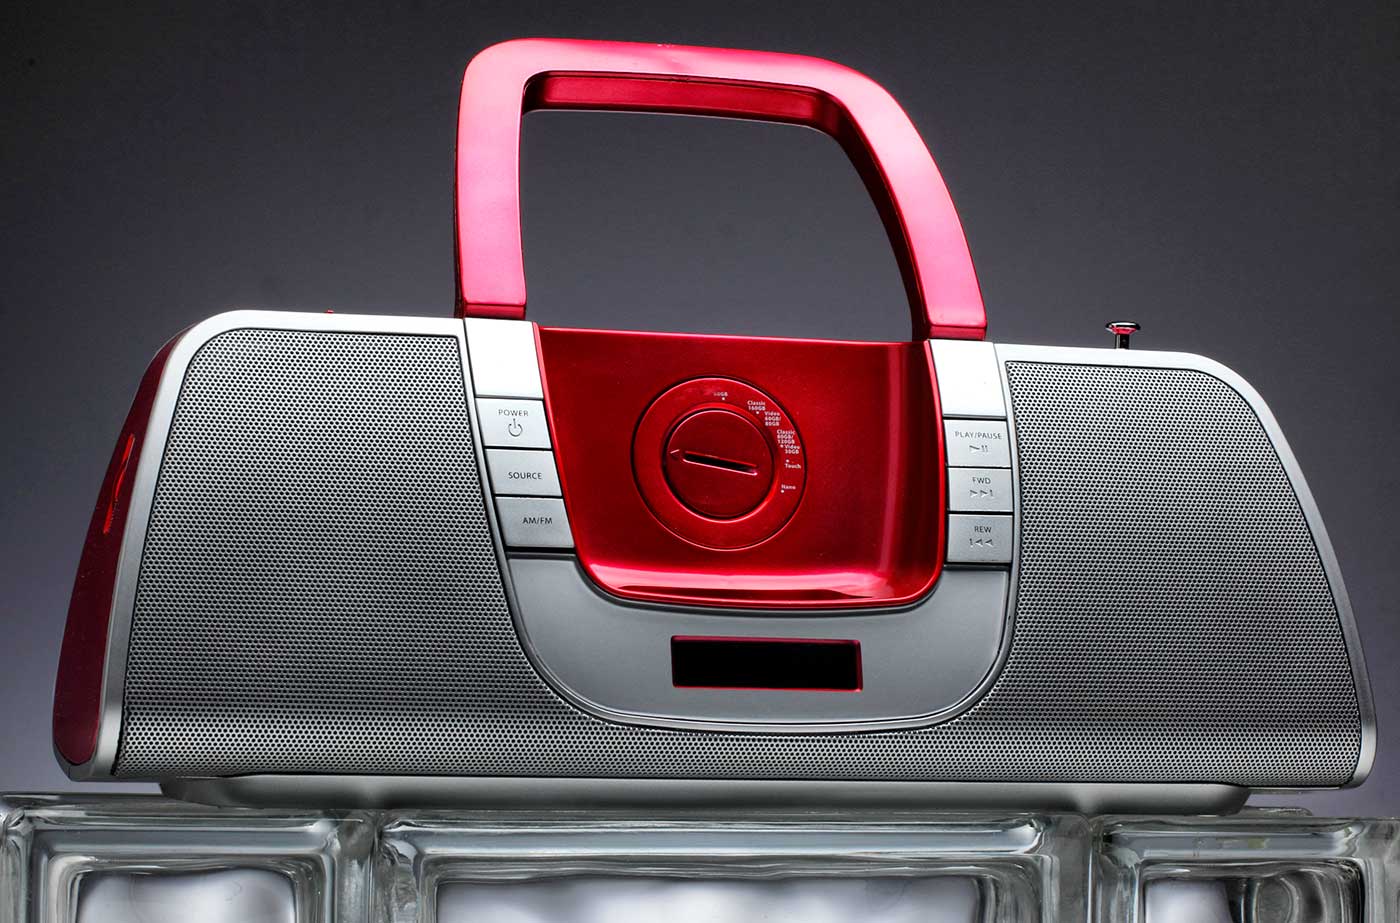
Lighting Principle Number Four: The Angle of the Light to the Subject and the Camera
Law of Physics: Angle of Incidence equals the Angle of Reflection.
This is an axiom that a lot of people hear and repeat without taking careful note of what it means to their photography.
And yet it is one of the most basic and important physical rules of subject centric lighting.
What does it mean and how can we use this to our advantage?
It means that if the light is angled toward a subject, the reflection of that light will be presented back to the camera at the same angle.
Think of the game of billiards or pool. If you hit a ball into the wall at a 30% angle, the ball will come off that wall at a 30% angle. And that completes a triangle. Understanding that triangle is key to making quicker, smarter lighting decisions.
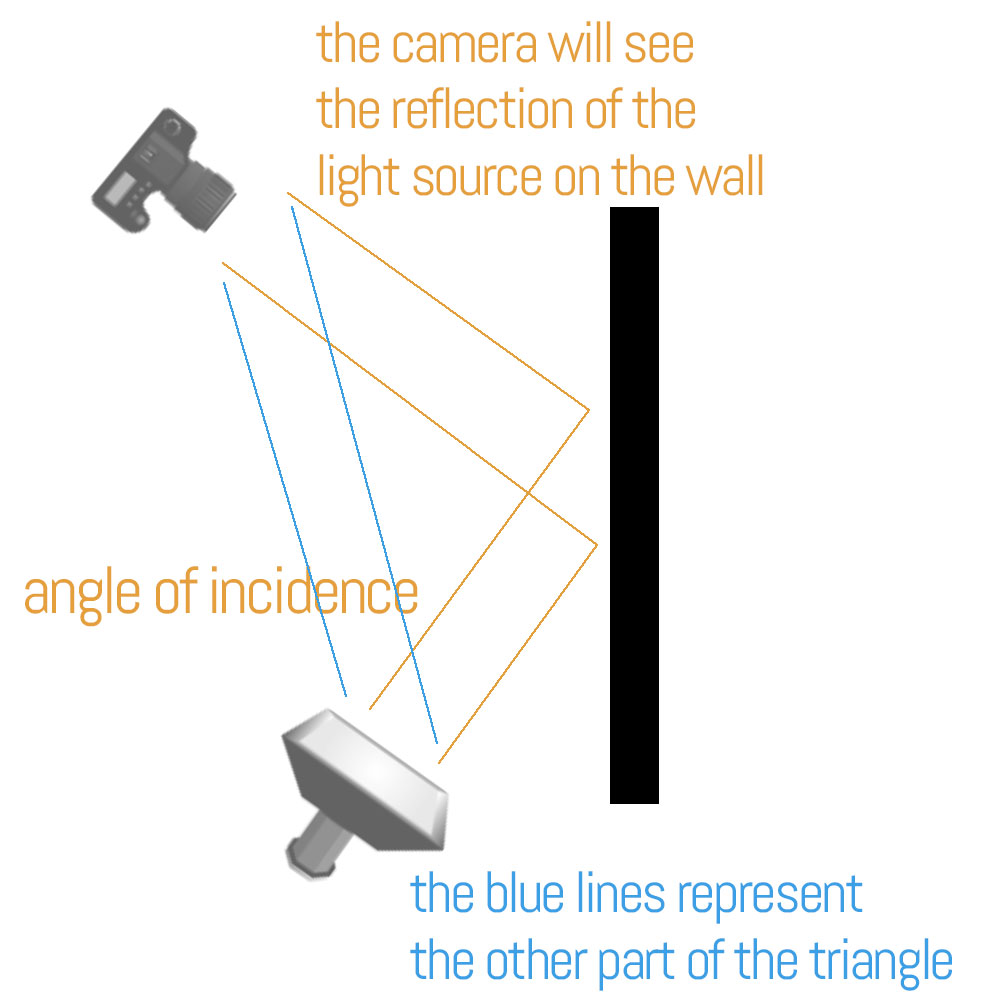
It means that you have to be able to judge the angle of the light as it strikes the subject and understand what that light will do once it strikes the subject. If there is something being reflected in your subject, look at the camera angle from the other side and you will find what it is.
EVERYTHING REFLECTS. EVERYTHING.
Some things reflect more than others, but everything you see is simply the reflection of the light from its surface.
I call it ‘presentation’, and when I discuss lighting, I use the word presentation to talk about how the light looks to the viewer.
Once we realize that the angle of the light source to the subject, and the incident angle of that light source to the subject is going to present to us in ways we can control, lighting becomes so much easier to create.
Think of the way the light strikes hair on a slightly backlit portrait. The reason the hair becomes so much brighter is because it is round in shape, and somewhere on that round, shiny hair is going to be that same angle of incidence that the camera is seeing.
An example.
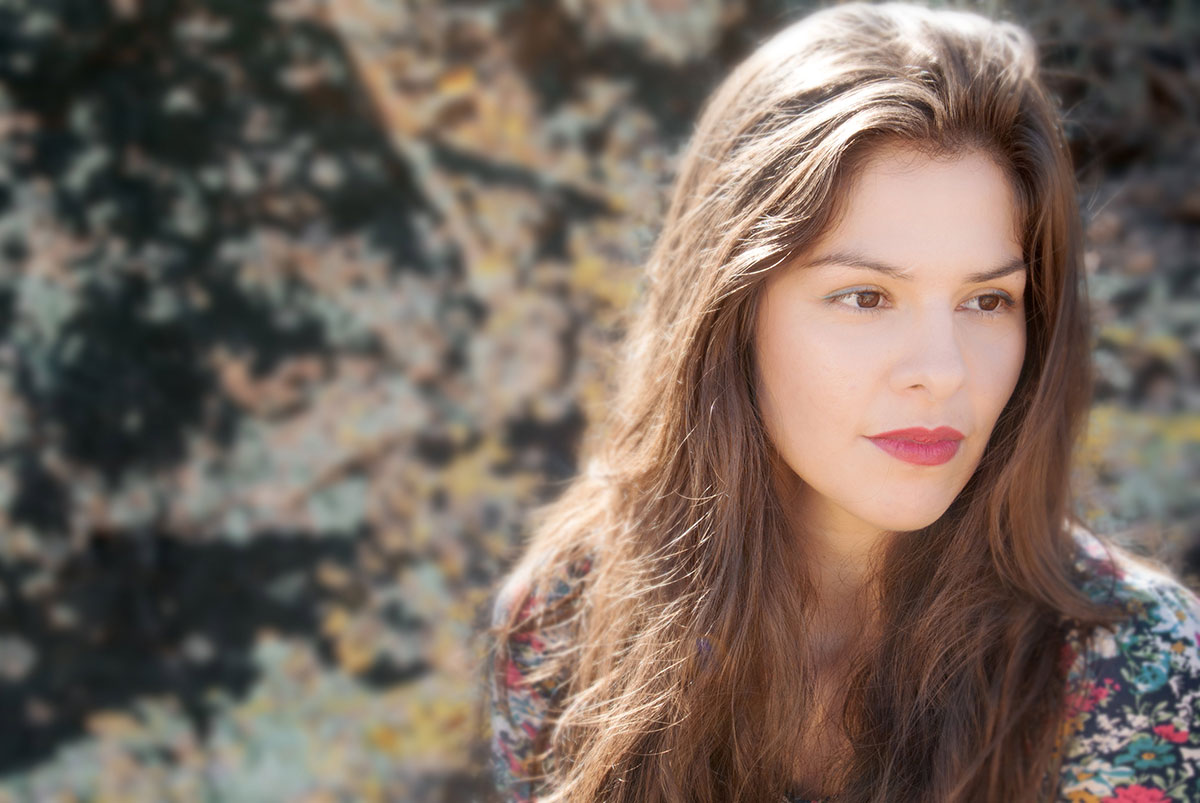
You can see how bright that hair is with the sun shining on it, and each tiny hair reflecting that sun back to the camera.
In the image below, I used a large softbox in order to get a shiny, reflective area off of the wall behind the subject and create a gradient to the background. You can see in the illustration that the angles of reflection come back to the camera on the left side of the model, but not on the right side of the model. The wall is a semi-gloss wall and provides a nice, soft reflection of the light source.
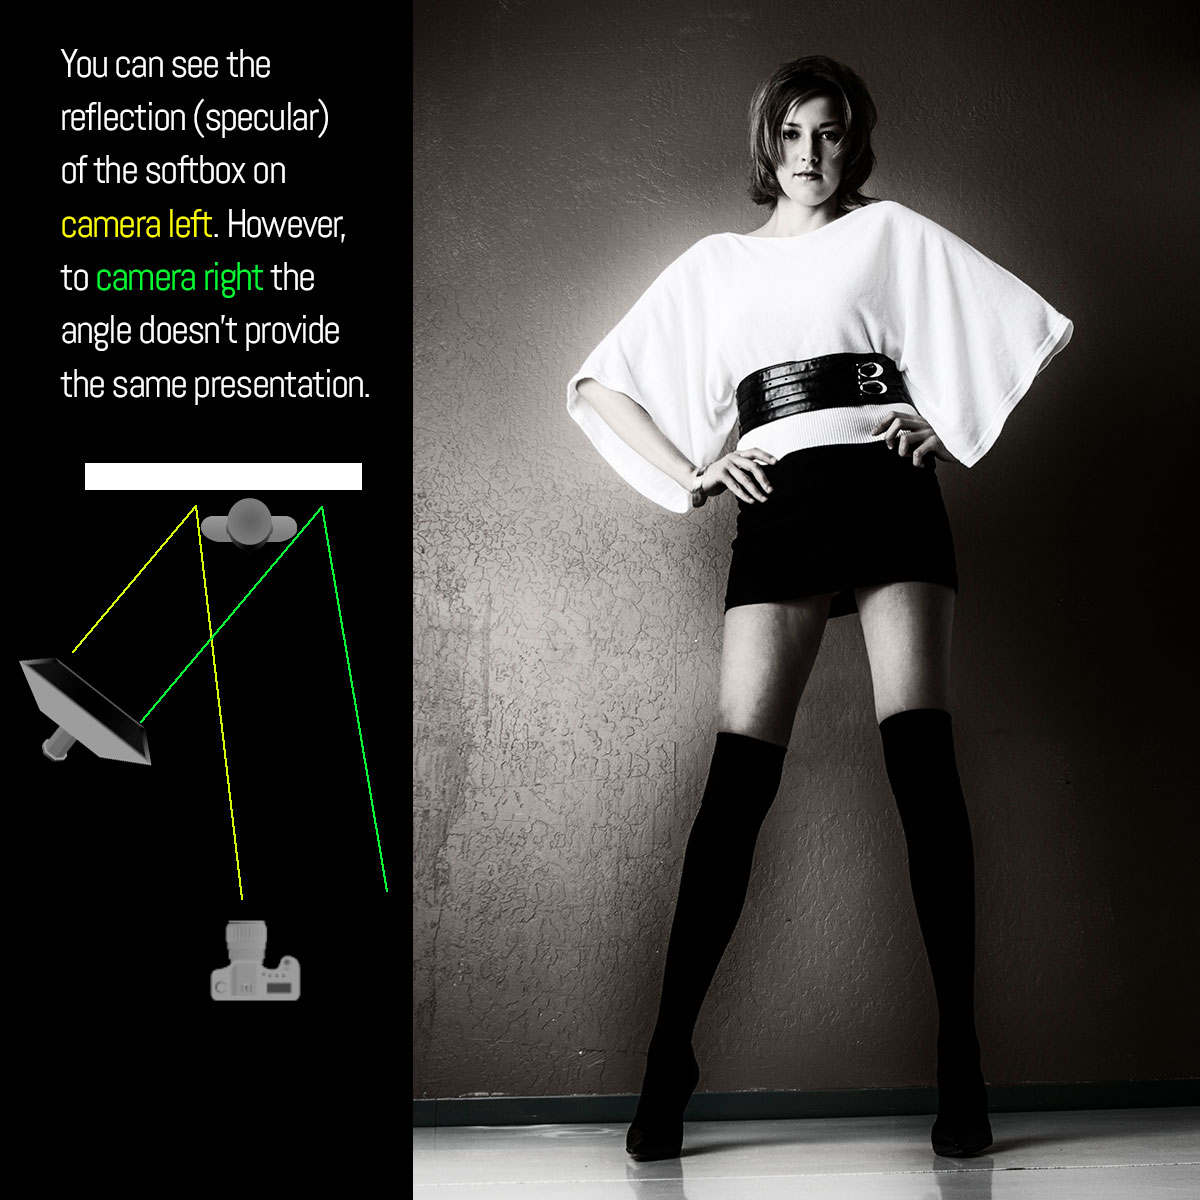
Let’s take a closer look at that triangle that is formed by the light to the subject, the subject to the camera, and the light to the camera.
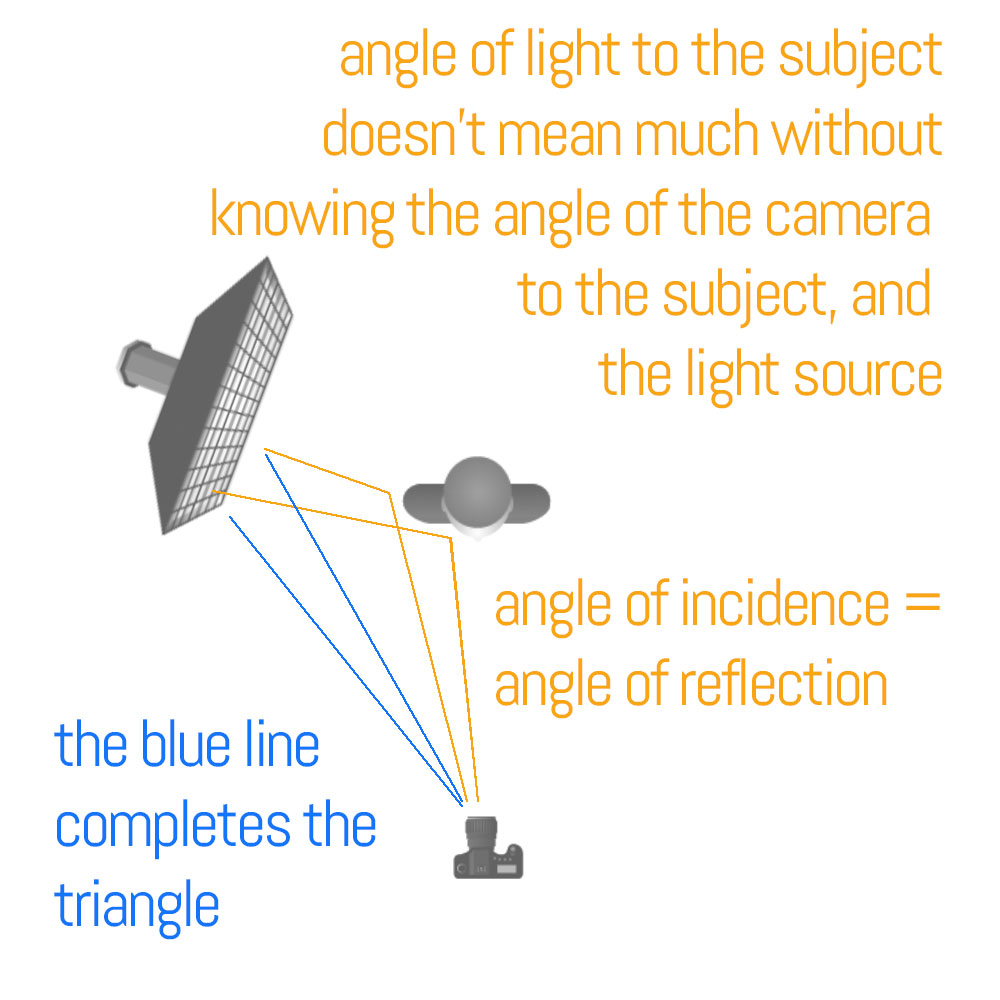
It is being able to see that triangle (shown above with the blue line) and to then visualize the presentation of the light that makes it easier to control. Once you begin to see those angles, and the way they will present back to the camera, lighting can become much more of a finessed technique rather than a flailing exercise.
Let’s talk about direction.
There are three major directions of light and one that doubles as a direction. I will explain.
This is front lighting. The light comes from the side of the camera, and it can be angled quite a bit (90 degrees). The presentation is full angle of incident / angle of reflection, and you can control that fall of incidence by where you place the camera in relationship to the light and to the subject angle.
Front light:
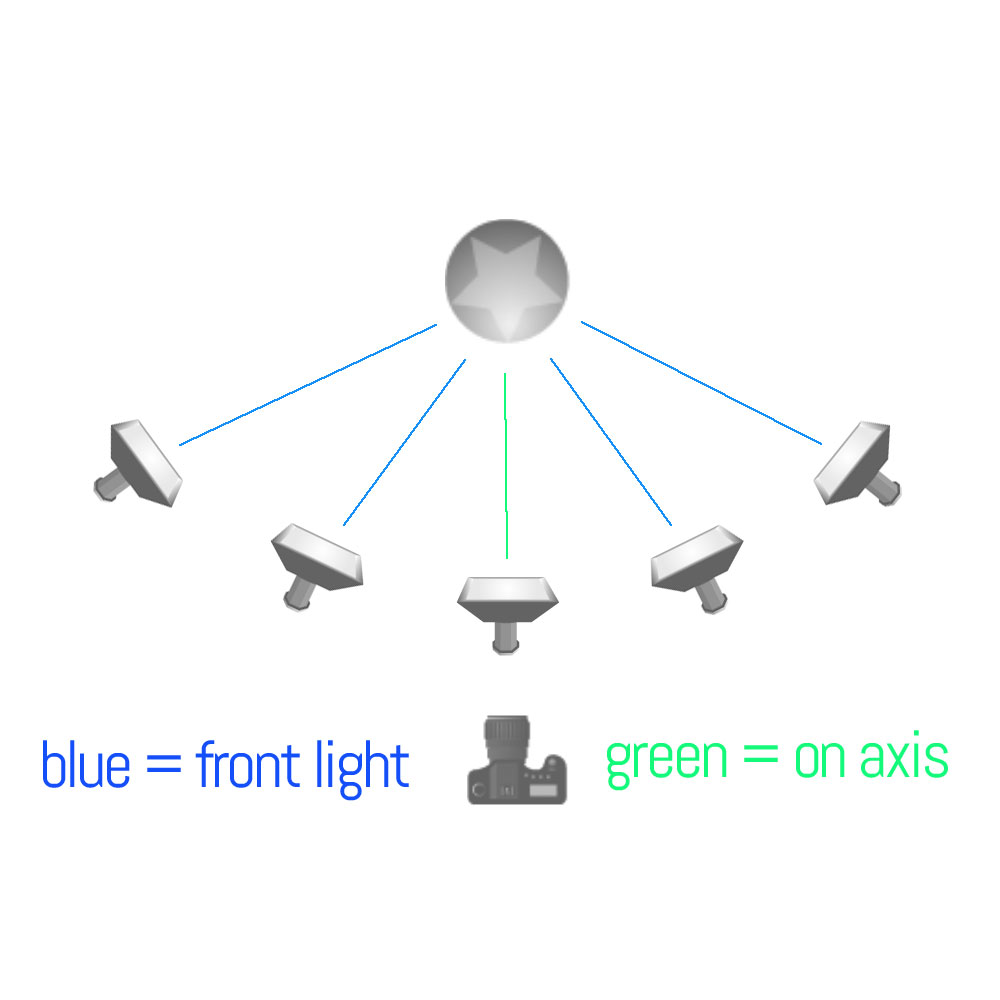
You can see that from right to left there is 180 degrees of placement that will allow you to have front light. There is one point in the middle, however, that is at the same angle as the camera. We call that “on-axis” lighting and is a favorite of beauty and fashion shooters.
On-axis lighting is from the position angle of the camera to the subject, not necessarily at the distance of the camera. That means there is no triangle (horizontally) from light to subject to camera. As you can imagine the reflection is straight back into the camera. A wide, soft light with few shadows.
In the diagram below we see side lighting and backlighting. Side lighting is as its name suggests, directly from the side of the subject creating a 90-degree angle to the camera angle.
When we move the lights farther back from sidelighting, we have backlight. Backlight has all the same angle variations as does the front lighting.
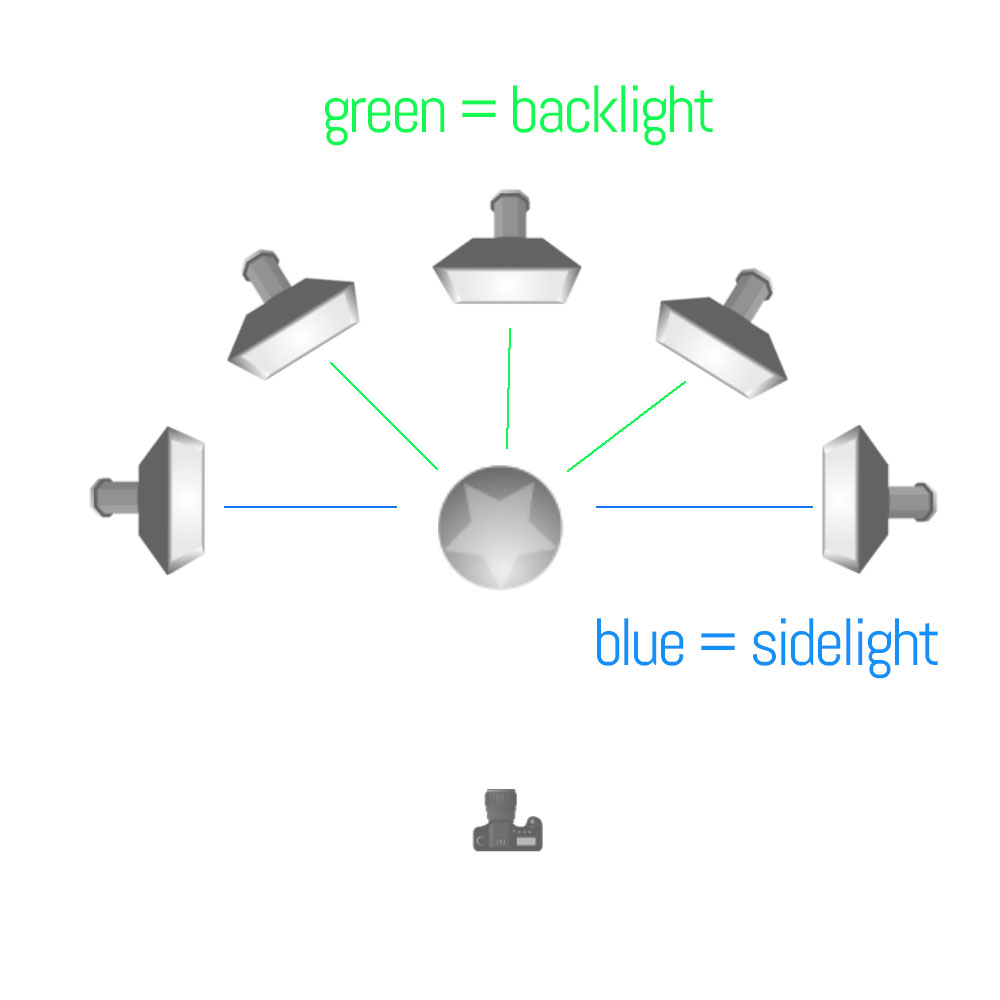
Top lighting from directly above is the same as side lighting if it is at a 90-degree angle to the subject/camera. If it is slightly in front it is front light, and slightly behind it is backlight.
Front Light One
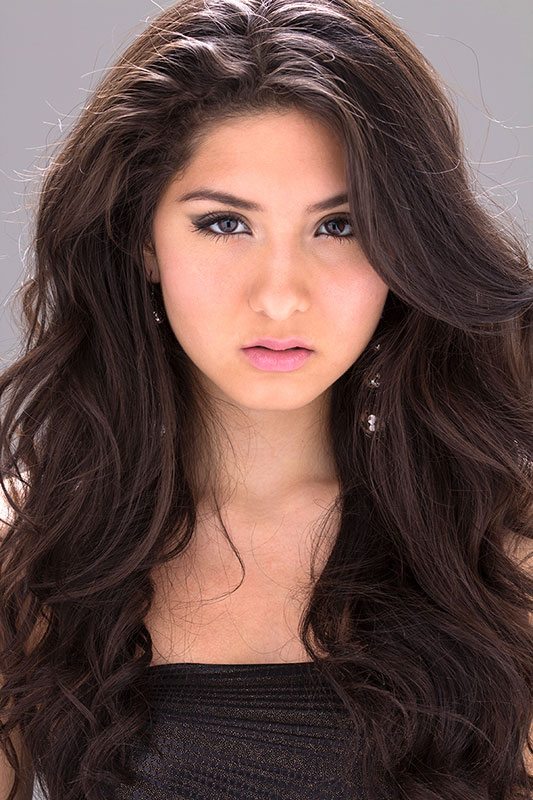
Front Light Two
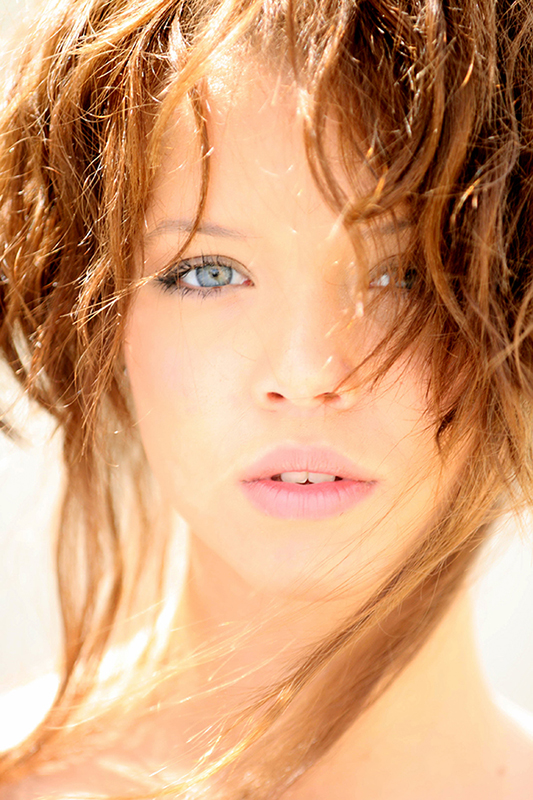
Side Light One
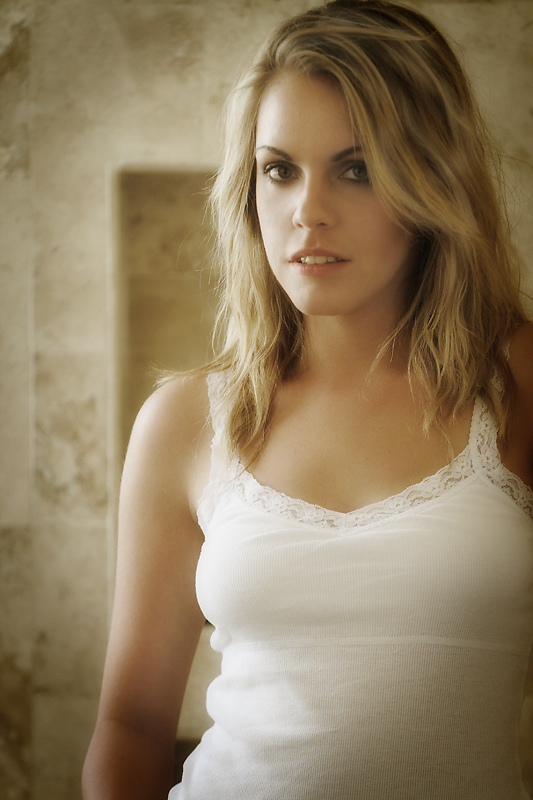
Side Light Two
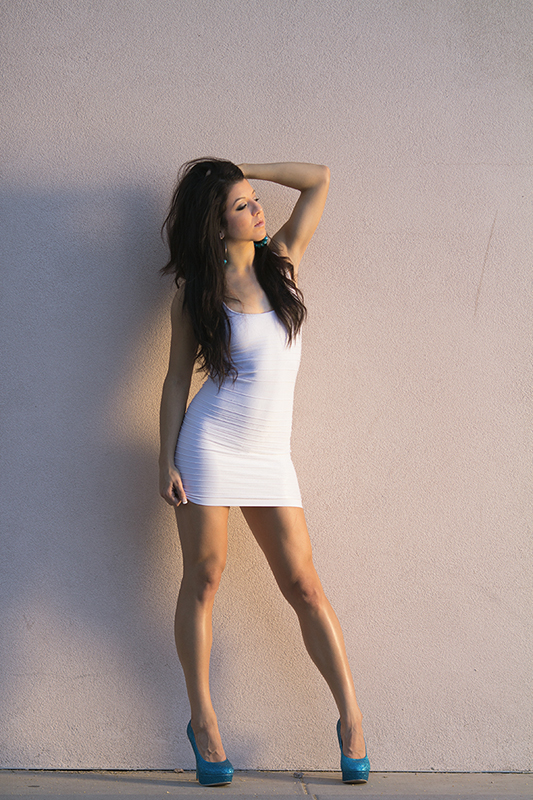
As you can see above, the angle of the light to the subject, and to the camera, makes a big difference when you are working toward making the shot look a specific way.
Let’s wrap it up:
The four different properties of lighting are:
- Size of the light source in relationship to the subject.
- Distance of the light source from the subject.
- Color of the light, and its relationship (if any) to the prevailing ambient.
- Angle of the light source to the subject, and to the camera.
And NONE of them are the most important – they are all equally important. We don’t think of them in an hierarchical way, we think of them in a holistic, symbiotic way. Change one, you may have to indeed change another. Change that one, and you may have to alter two others to make it work for you.
All of this only matters to you if you know what you want your image to look like. Do you want soft light, or do you want hard-edged light? Do you want a mixed light image that looks natural, or do you want to play with color temps in a creative way? If we move our light closer or farther away, what does that do to the look of the image? Do we need to bring out texture, or is a flatter look our goal?
These questions are usually not asked in order in our brains. All of them are asked at the same time, and we react to these creative decisions by utilizing the tools we have for creating them.
And now, with these basics, we can begin to create the images to present OUR vision of the subject in front of our lens.
ASSIGNMENTS:
- Find a subject that allows you to move around it and make images from all the different lighting positions. Do this either early in the morning or late in the afternoon so the sunlight is closer to your head height to the subject.Shoot front light, side light, back light, axis light. Study the images to see how the subject changes in the different lighting positions. Print the images and make notations on how it, and the background, look to you. What changes do you see?
- Using your flash or continuous lights, do the same thing with a subject inside. You can choose something as a still life, or – if you are a people shooter – grab a subject and start moving that light from on-axis to back.Note that when your light is backlight ONLY, the subject is quite dark, possibly even silhouette. You can adjust for that or not – your call. but remember that your adjustments will play the same role as the main light in the angle of light to subject to camera.
Protected: 07 NATURAL LIGHT WORKSHOP MODULE SEVEN
Password Protected
To view this protected post, enter the password below:
Protected: 06-NATURAL LIGHT PORTRAITS MODULE SIX
Password Protected
To view this protected post, enter the password below:
Protected: 06: MARKETING AND PROMO: DESIGNING AN EMAIL CAMPAIGN
Password Protected
To view this protected post, enter the password below:
Protected: 05: MARKETING AND PROMO WORKSHOP: EXECUTING A MARKETING STRATEGY
Password Protected
To view this protected post, enter the password below:
Protected: 04: MARKETING AND PROMO WORKSHOP: DESIGN BASICS
Password Protected
To view this protected post, enter the password below:
Protected: 05: NATURAL LIGHT PORTRAITS MODULE FIVE
Password Protected
To view this protected post, enter the password below:
Protected: 04: NATURAL LIGHT PORTRAITS MODULE FOUR
Password Protected
To view this protected post, enter the password below:
Protected: 03: NATURAL LIGHT PORTRAIT CLASS MODULE THREE
Password Protected
To view this protected post, enter the password below:
Protected: 03: MARKETING AND PROMO WORKSHOP: COLOR MOOD AND BRANDING
Password Protected
To view this protected post, enter the password below:
SKIPPING THE LINE TO A CAREER IN PHOTOGRAPHY
SKIPPING THE LINE!PROJECT 52 CAN HELP JUMPSTART YOUR PHOTOGRAPHY CAREERWe hear all the time about how it is wrong to skip the line, that you have to 'pay your dues' and struggle mightily to get started in an art career.And some of that is true.It isn't an...
Protected: 02 NATURAL LIGHT PORTRAIT CLASS MODULE TWO
Password Protected
To view this protected post, enter the password below:
Protected: 02: MARKETING AND PROMO WORKSHOP: WHY TYPOGRAPHY MATTERS
Password Protected
To view this protected post, enter the password below:
01: NATURAL LIGHT PORTRAIT CLASS MODULE ONE
NATURAL LIGHT PORTRAIT CLASS MODULE ONE One of the most popular and easiest ways to make natural light portraits is to simply use an open sky. Usually, that means working in the shade, or with some sort of backlight. But it should be noted that shade alone is not...

Protected: 01: MARKETING AND PROMO WORKSHOP: WHY DESIGN MATTERS
Password Protected
To view this protected post, enter the password below:

A STUDY IN MINIATURE (2019 SUMMER SCHOOL)
HOW I MAKE THE MINI ME IMAGES BY TAMMY BOGESTRAND The start is usually simply an image or idea that forms in my twisted brain. I should really sketch my ideas, but I never do. I do these totally alone and I don’t have a green screen. Shooting in full sun is never...
TEN SUPER-GOOD PHOTOSHOP, LIGHTROOM, AND NIK TUTORIALS
LEARN TO USE THIS AMAZING SOFTWARE: 10 GREAT VIDEOS: PHOTOSHOP: 4 HOURS: LOTS OF INFO FOR BEGINNER/INTERMEDIATE https://www.youtube.com/watch?v=b-0HekkbdJM WHAT IS NEW IN CC 2019 https://www.youtube.com/watch?v=27RMFuzRvlA ADOBE TRAINING...
Shooting Flying Food (2019 SUMMER SCHOOL)
GET THE PDF OF VIRGINIA'S TUTORIAL HERE.Flying Food BTS (PDF)
A Personal Branding Lifestyle Portrait of a Musician (2019 Summer School)
Personal branding lifestyle shoot for a musician - the complete process from start to finish by Alex Baker, Spain I was asked recently by a friend and long standing client to collaborate on creating a series of curated lifestyle images for her personal brand. She is a...
Module One From Upcoming Free Food Course (2019 SUMMER SCHOOL)
https://www.youtube.com/watch?v=oH9XAKrGMIcFEATURING IMAGES BY THESE PROJECT 52 PRO PHOTOGRAPHERS:ANDERS ERIKSSONCOTY MONTROYJAMES KERNJOHN MCALLISTER
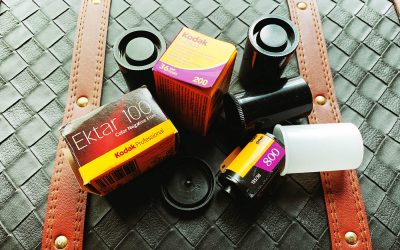
THE LOOK OF COLOR NEGATIVE FILM (C41)
THE VARIOUS COLOR NEGATIVE FILMS AND WHAT THEY LOOK LIKEThese are emulations*, not scans, so they may not be perfect but are very close to the film stock and normal processing.This sample of film stock was taken from the Amazon inventory. These are the films you can...
Learning to Work with Natural Light (2019 SUMMER SCHOOL)
Learning to work with natural lightVirginia LongWhen I first started my photographic adventure with Project 52 I knew nothing about light, the importance of light, or the ways to manipulate it. I didn’t even know you should or could manipulate light. I...
Tech Sheets for Lighting (2019 SUMMER SCHOOL)
SUMMER SCHOOL 2019 CLASS TWO While putting the Lighting Book together (free for subscribers to "In The Frame") I found some tech sheets and thought I may share them here. Some of these techniques are of an older style, but the information is spot on and...
ON THE IMPORTANCE OF COLOR
A compilation of links to Youtube authors explaining the use of color in the cinema.These concepts are also important in the stil photography environment. Being deliberate about your color choices in location, wardrobe, lighting, and composition can...
LIGHTING BOOK (A COMPILATION OF LE TUTORIALS) FOR SUBSCRIBERS
YOURS FREE WHEN YOU SUBSCRIBE Lot's of lighting tutorials with charts, graphics, ideas, examples, and deconstructed images to help you find your own vision using lighting. Yours free when you subscribe to "In The Frame". Also included is the introductory course in...