
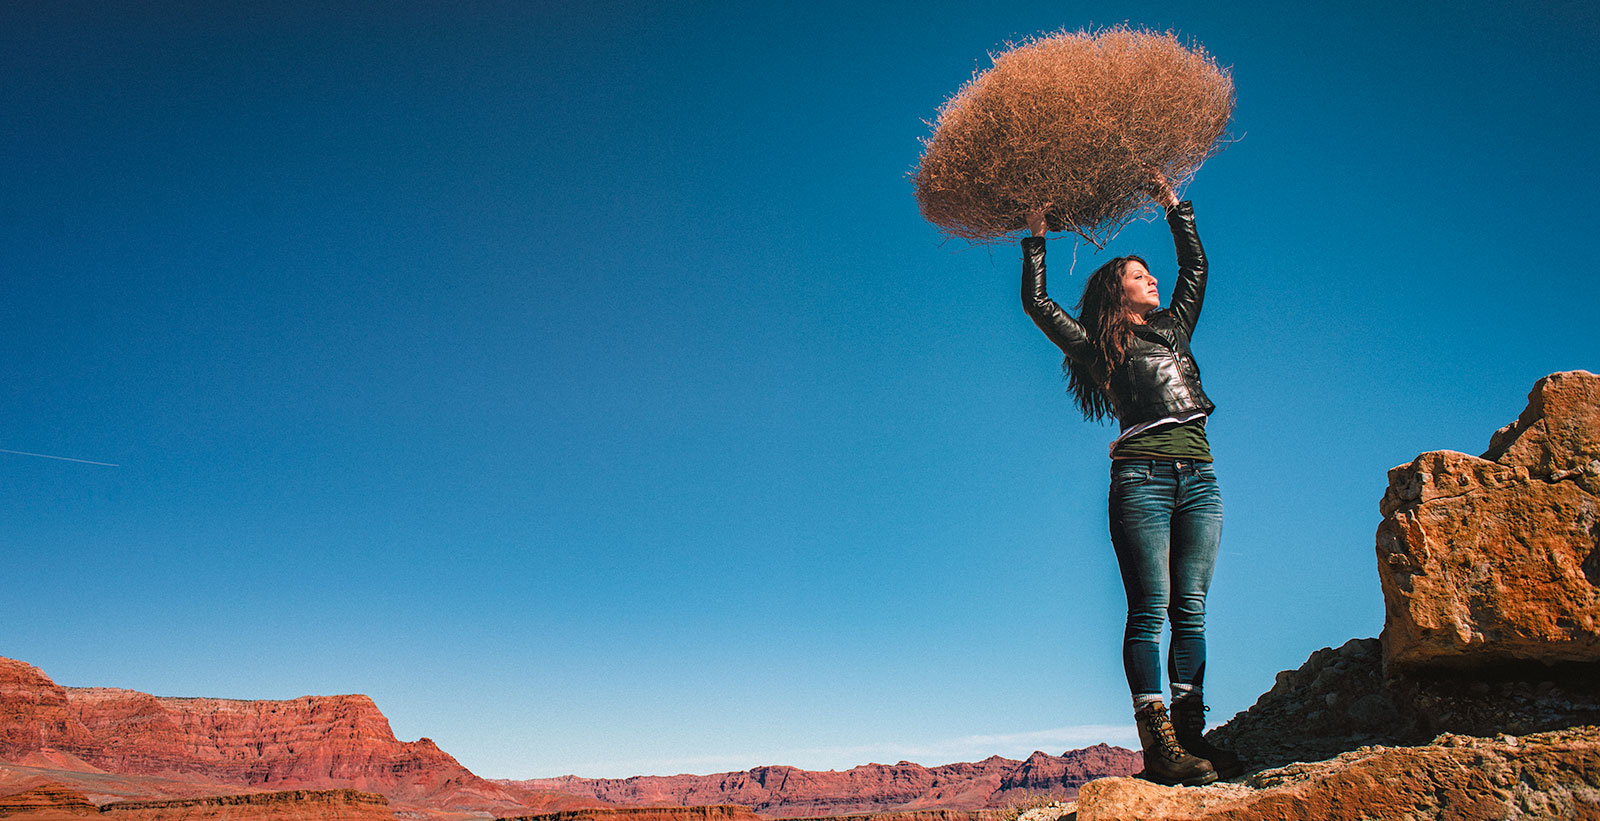
LIGHTING PRINCIPLE THREE: THE COLOR OF LIGHT
We see light usually as a white source, or at least a neutral source.
It isn’t. neutral, it has a color to it and that color can influence all the parts of your image, from shadows to highlights. We don’t see the color of light because our brain changes it to a neutral “white” color as we see it.
Here is a wonderful article that explains the way that the color of light affects your image. Read it now.
When we look at the color of the scene in front of us we can change it globally by changing our color balance in the camera, or using a filter. What “globally’ means is that everything in the photo is changed to the same setting. All the colors are altered by this global change to the color of the light.
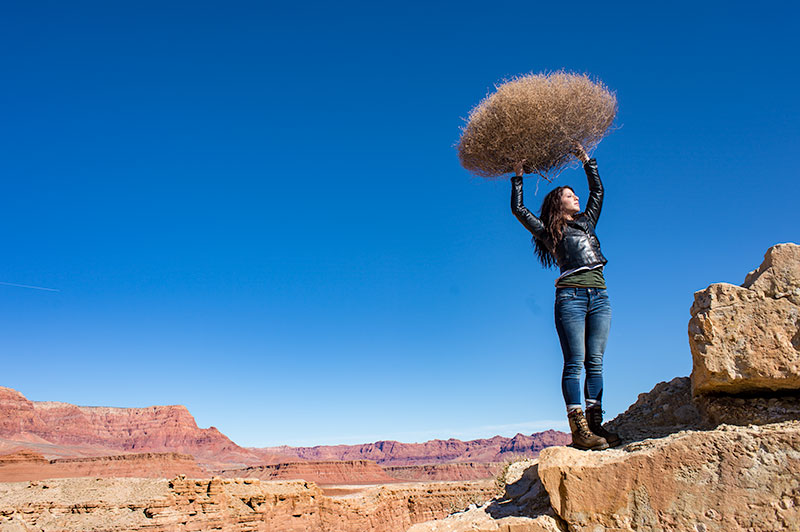
On the left is a photograph taken near Mable Canyon. The sun was quite bright, and there was a bit of warmth to the image because of all the warm browns and oranges of the topography all around us.
This image is as shot. I have applied global changes to the color of the light source so you can see what that does to the image.
Below from left to right:
Daylight / Shade / Tungsten / Flourescent
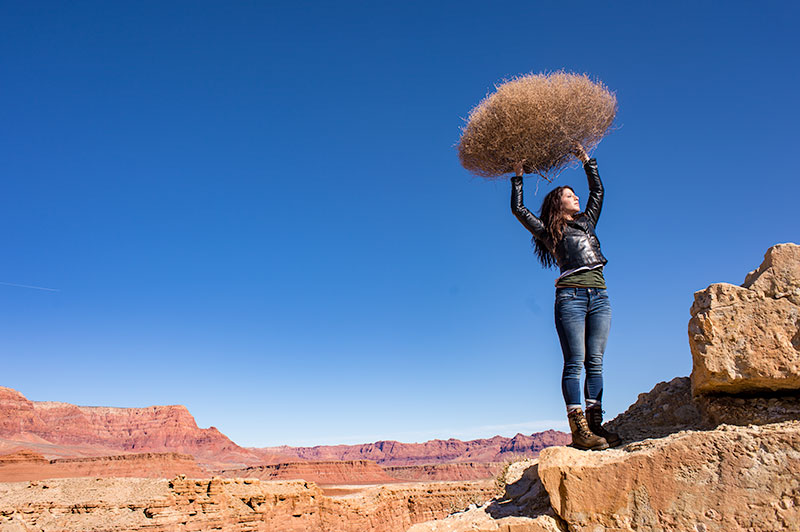
DAYLIGHT
Changing from As Shot to Daylight shows very little difference, although the daylight color balance makes it a bit more warm.
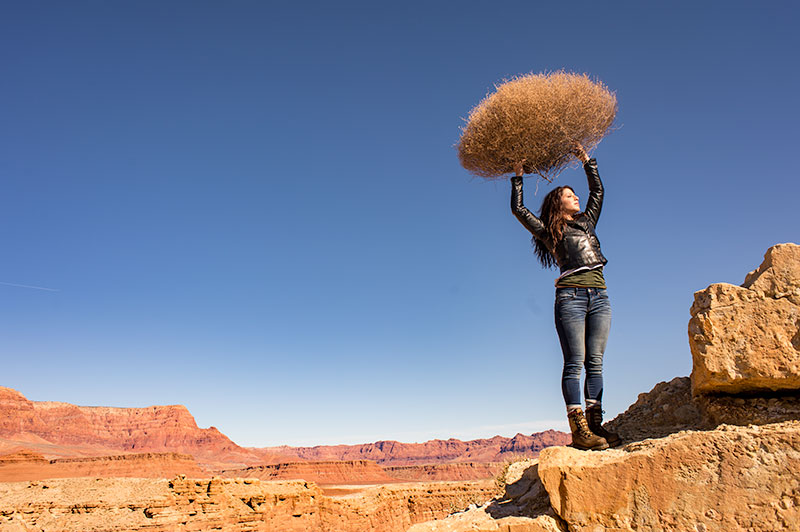
SHADE
Since the color of the light in the shade is a bit more blue, we add some warmth to the overall image to compensate for it. In this shot you can see the global warmth is not going to work because the image was not shot in the shade.
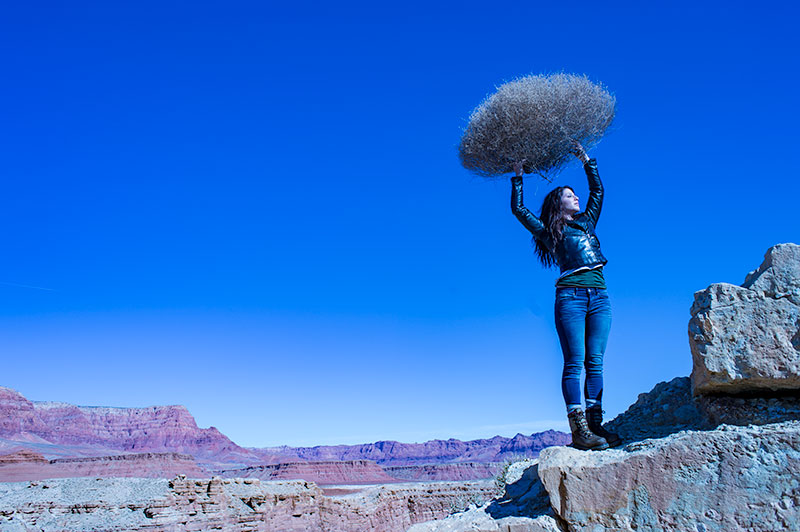
TUNGSTEN
Tungsten light is very orange, so when we apply a tungsten color balance to a shot that is not too orange, we get this very blue looking shot. This is a good reminder of just how ‘warm’ tungsten light is if it takes this much blue to make it correct.
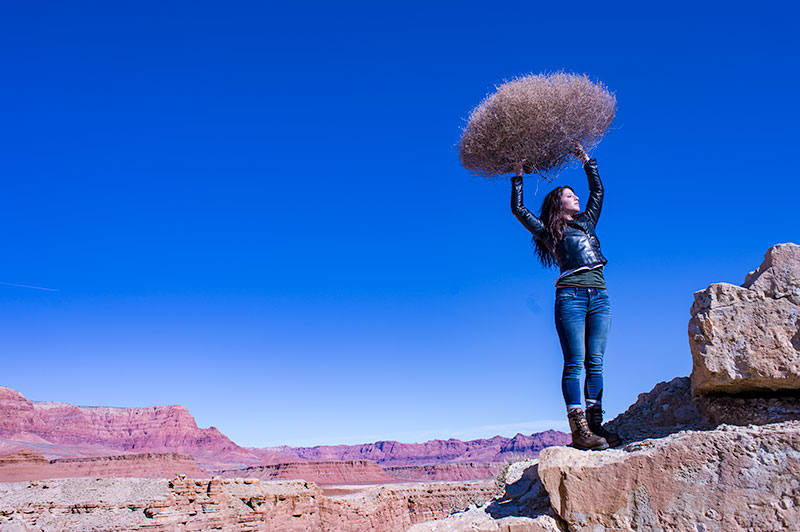
FLUORESCENT
Fluorescent light is blue/green so it makes it difficult to compensate for. In this application of the fluorescent color balance, we can see the sky going a deep blue, while the desert mountains behind become more magenta.
LOCAL LIGHT SOURCE MATCHED TO AMBIENT
Working with a secondary light source that may be a different color presents us with a challenge. We cannot change the image globally because adding a correction to the image to correct for the different light source will affect the entire image.
We must then change the different light source to the ambient (or overwhelming light) in order to ‘balance’ the subject in the ambient setting.
The ambient setting is the overwhelming light that we usually cannot change: the sun, a large warehouse, a home. Bringing in our own lights means we must know how to match what we bring to what is there.
ASSIGNMENTS FOR THIS CLASS:
- Using the color settings on your camera, take the same image with each of them. Shoot with Daylight, Shade, Tungsten, Flourescent at least and do this in places where those colors exist. In other words, shoot some images outside, inside with regular household lamps, and some place that has Flourescent. (NOTE: Many big box stores use a light source known as Mercury Vapor. Mercury Vapor is blue/green so it is very difficult to adequately address. We can add magenta to offset the green, but that turns the blue part of the light to purple. If we address the blue with something warm, we add that to the green part of the light.For Mercury Vapor correction, try “auto” on your camera setting. It is the best I have found for correcting most of that blue/green color shift.
- Using a strobe (speedlight), take a photograph of someone while the sun is going down behind them. Do not alter the strobe setting, just let it keep making the shot as the light turns warmer and warmer. You will then see how “blue” the light source seems coming from the flash.You may have to change the settings as the light gets dimmer, but I think you will see the changes pretty well.
We will be addressing color balance in all of the upcoming classes.
Three Hot Shooters to Watch: Kate Orne, Nick Onken and Jake Chessum
Sometimes the fun of looking at images takes over and you just want to feast your eyes on pictures that amaze, involve, stimulate and motivate. The three photographers here are some of my favorites and I return again and again to their wonderful imagery. In particular...
25 New Images from the Lighting Essentials Pool
Well, the pool keeps gettin'g deeper, ya know. I was perusing it last night and realized how many incredible pics had been added recently. This pool is really rich with excellent photography. I want to build the forum up a bit, and if anyone has questions and such,...
Tech Sheet: Two Speedlights and the Sun for a Dramatic Portrait
Our first Tech Sheet of 2009 is kinda fun. I have been working on getting a client to approve a project I want to do and they did over the holidays. It will be a series of images of athletes and artists in environments that may not be their regular habitat. This image...
Welcome to the Best Year Ever! 2009 Will Rock!
Well, the last year of a strange and rocky decade draws to a close tonight. I know this past year has been an emotional roller-coaster for me as well as a very successful one with the workshops and the business. I hope you will join me in saying 'hasta la vista, baby"...
Real Simple Headshots on Location
Occasionally you may have a situation where you have to do a lot of images in a very short amount of time. These kinds of gigs can be a little disconcerting if you over think them and get caught in a web of setting up and production as time slips ever so quickly by. I...
The First Assignment: Pitfalls and Opportunities
Every photographer has a first assignment. There simply has to be one. The culmination of lots of hard work, a great portfolio and perhaps a little luck and there it is... a job. The first assignments can be very stressful or they can be a thrilling moment in the...
Tech Sheet – 12/19/08: Two Bare Speedlights for Drama
Today's tech sheet looks at using two speedlights for a dramatic headshot. We aren't doing anything really special, although I did modify a Gary Fong diffuser to give me a round light instead of the oblong/square light that a normal speedlight gives off. I wanted to...
One Setup, Two Different Shots (from the Archives)
Well this one is kind of fun. I found this in the archive box and remembered that it was a kinda fun little slide show. This "soundslide" offers a look into how I took a single lighting setup and shot it two ways. I use a big softbox often when I am working with...
25 Excellent Images From the LE Pool
Well, as the year grows to a close, I am happy to see so many wonderful images in the Lighting Essentials Flickr Pool. I went through the last 10 pages or so last night and found these excellent examples of using light to make a shot more interesting. They are all...
ON LOCATION: with Jerry OConnor, Jim Vigileos and Christina
Photographers in Phoenix like dramatic skies. We get so many days in a row of bright, blue that when it gets dark and moody up there some of us grab cameras. My friends Jim Vigileos and Jerry OConnor did that recently and along the way they grabbed Christina to add to...
Modeling the Light: A Model’s Role in Lighting
' Britney Spears "Kill the Lights! Don't be scared, make a move, see me now" A model has a role in lighting? What? Unheard of? Crazy? Not so much. A model has to do more than smile prettily and pose, she has to be aware of her environment, from the objects in place to...
One Light for a Highly Reflective Item
A simple product shot can sometimes present a lot of challenges for the photographer not used to thinking about reflected specular lighting. In this shot, the product is practically lit with specular reflection. There is very little direct light on the Hard Drive...
An Editorial Portrait Assignment on a Short Schedule
There are occasions when you need to work very, very fast and still deliver a shot that makes both client and subject happy. These types of shoots can be frustrating and challenging, but it keeps the adrenaline going and when it results in an image that everyone...
December 2008 Lighting Essentials Desktops
Here they are... a day late, but here nonetheless... Lighting Essentials Free Desktops. This time I will explain a little about the lighting so you can get some brain exercise as well as some fun desktops for your monitor. NOTE: Our schedule for the first half of next...
Let’s Do Some Lighting Today… (from the Archives)
Today's update is one from the archives, but it is still a great post you will enjoy. Even includes a 16 minute video... bad audio, but you will get the ideas from the shoot. We are doing better audio for our next releases, but this is what it is. I would like to take...
Shooting on the Beach with Two Speedlights and the Sun
This is a simple shoot that can have some very nice nuance as you work two speedlights into a shot with the sun as back/side light. Using two sources a bit apart can cause multiple shadows, so you have to be very careful to make sure they are not a problem. For this...
Cleveland Rocks: Dispatch From Beside Lake Erie
Thanks Cleveland. You guys made our last workshop of 2008 a great success. And that wasn't an easy job. Rain, thick clouds, wind, sleet, snow and temperatures that our desert bods were simply not used to didn't deter anyone from digging in and having a blast. We had a...
Tech Sheet 2, November 2008: Two Light Portrait
This weeks Tech Sheet features one of my favorite portrait techniques. In this shot I am using it as a bright, poppy front light with a very pronounced back "spray" light. It is an easy setup with lots of room for customization and personalization. It can be done with...
Clamshell Lighting for a Glamourous Headshot
Well we are back from the Cleveland workshop and it was amazing. Bright sun and clear skies were a super benefit... for someone somewhere... we had rain, wind, snow, rain, wind and cold. At least for Bri and I coming from the desert... We left Cleveland at about 28...
Using a Single Softbox with a Shiny Card for Headshots
Sometimes you just want a simple image, a headshot or a 3/4 image that has a very direct light to show the skin color, open the eyes and bring some vivid highlights to the person. I like the big softbox and how it can simply wash the person with a clean, bright light...
First “Tech Sheet” and Assignment.
We are so excited about the new series we are starting... the "Tech Sheet" series. We will do one every two weeks and they will be uploaded on the first Friday and the third Friday of each month. Those months with an extra Friday will find an extra Tech Sheet. The...
Sun, Fun and Dancin’: November’s Free Wallpapers
A day or three late, but here nonetheless. All feature the lovely Briana who has a new calendar out on dancing called, appropriately enough, "Dancin' " You can see her site here. Before heading over to get to them, take a look at some of the recent posts if you missed...
Some Recent Workshop Images
Photo by Gary. As the workshops wind down for the year, there is a sense of excitement growing for the next season of Lighting Essentials workshops. Some changes are in order, and some tweaking of the workshop's standard fare is also coming along. We are looking to...
Something to Think About: Should Photography be Easy?
As I write this I am about 34,000 feet over Colorado heading to Atlanta to teach a seminar. I have a question that keeps popping to the fore in my thoughts. (NOTE: I posted this article to a forum on Flickr immediately after it was written. I want to share it with the...