
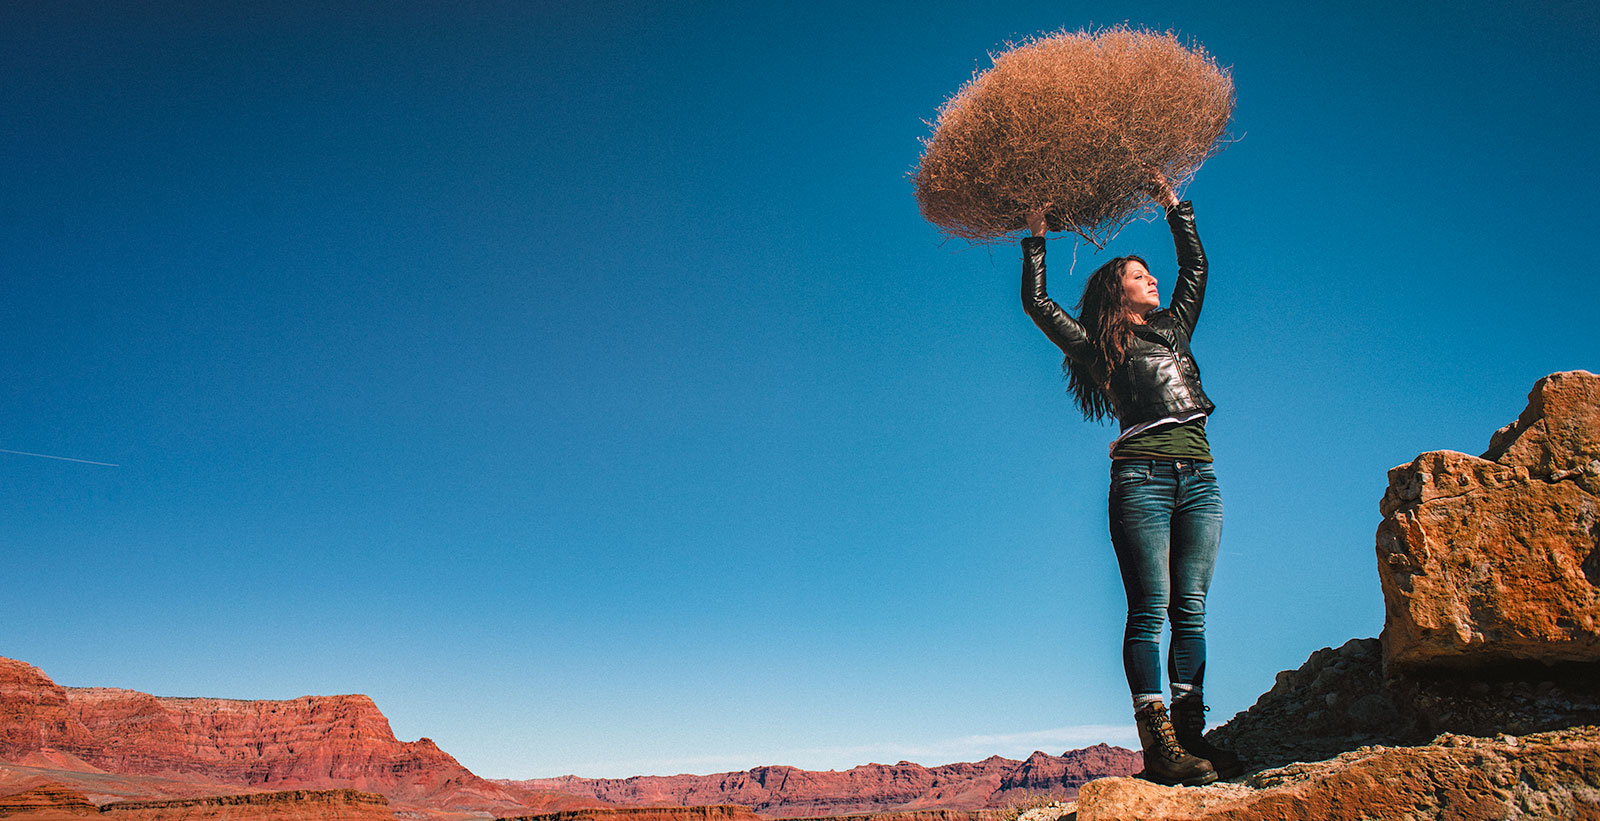
LIGHTING PRINCIPLE THREE: THE COLOR OF LIGHT
We see light usually as a white source, or at least a neutral source.
It isn’t. neutral, it has a color to it and that color can influence all the parts of your image, from shadows to highlights. We don’t see the color of light because our brain changes it to a neutral “white” color as we see it.
Here is a wonderful article that explains the way that the color of light affects your image. Read it now.
When we look at the color of the scene in front of us we can change it globally by changing our color balance in the camera, or using a filter. What “globally’ means is that everything in the photo is changed to the same setting. All the colors are altered by this global change to the color of the light.
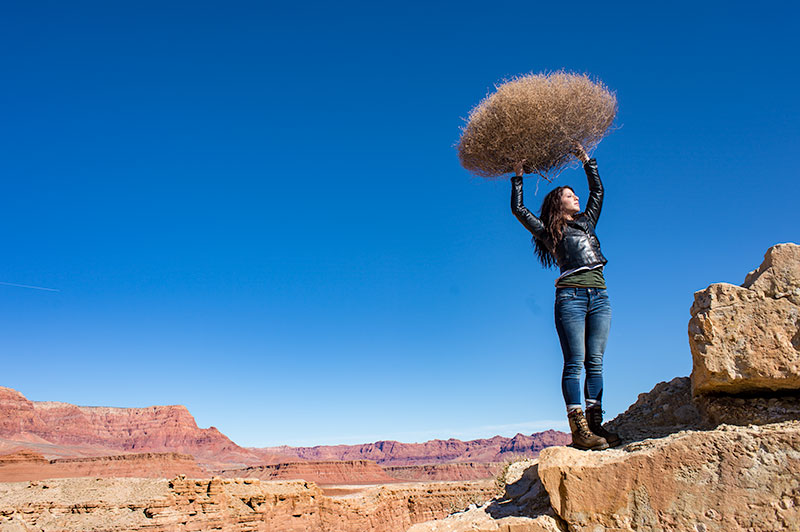
On the left is a photograph taken near Mable Canyon. The sun was quite bright, and there was a bit of warmth to the image because of all the warm browns and oranges of the topography all around us.
This image is as shot. I have applied global changes to the color of the light source so you can see what that does to the image.
Below from left to right:
Daylight / Shade / Tungsten / Flourescent
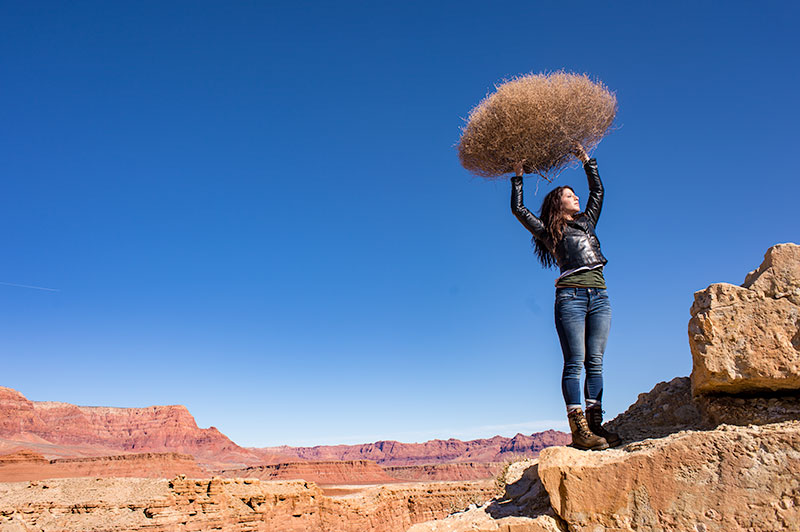
DAYLIGHT
Changing from As Shot to Daylight shows very little difference, although the daylight color balance makes it a bit more warm.
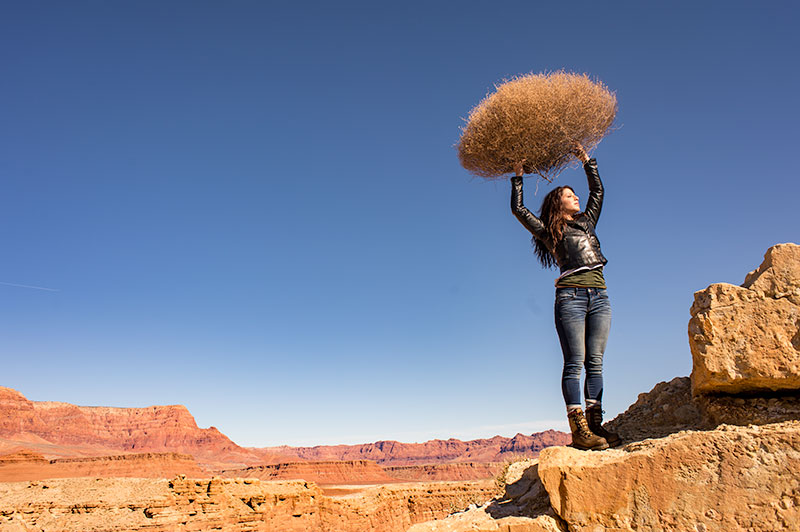
SHADE
Since the color of the light in the shade is a bit more blue, we add some warmth to the overall image to compensate for it. In this shot you can see the global warmth is not going to work because the image was not shot in the shade.
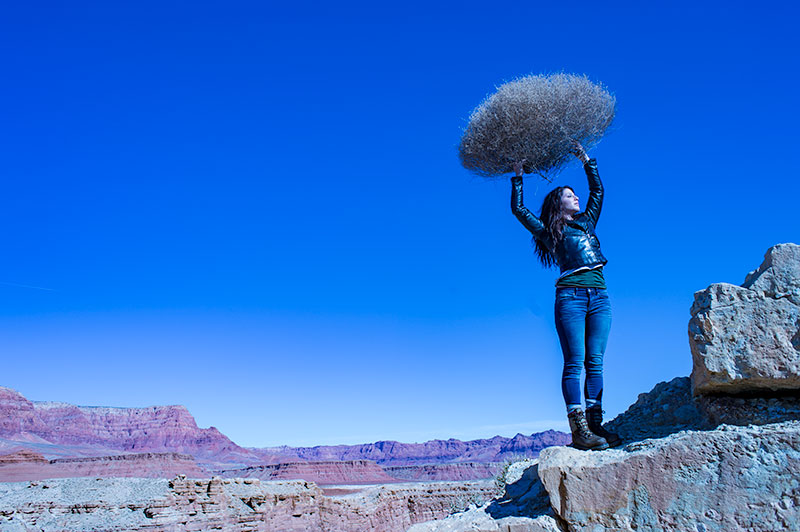
TUNGSTEN
Tungsten light is very orange, so when we apply a tungsten color balance to a shot that is not too orange, we get this very blue looking shot. This is a good reminder of just how ‘warm’ tungsten light is if it takes this much blue to make it correct.
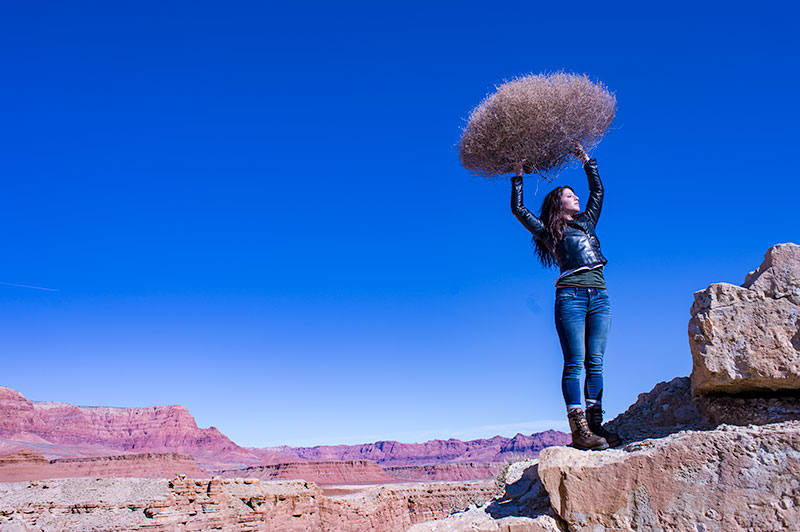
FLUORESCENT
Fluorescent light is blue/green so it makes it difficult to compensate for. In this application of the fluorescent color balance, we can see the sky going a deep blue, while the desert mountains behind become more magenta.
LOCAL LIGHT SOURCE MATCHED TO AMBIENT
Working with a secondary light source that may be a different color presents us with a challenge. We cannot change the image globally because adding a correction to the image to correct for the different light source will affect the entire image.
We must then change the different light source to the ambient (or overwhelming light) in order to ‘balance’ the subject in the ambient setting.
The ambient setting is the overwhelming light that we usually cannot change: the sun, a large warehouse, a home. Bringing in our own lights means we must know how to match what we bring to what is there.
ASSIGNMENTS FOR THIS CLASS:
- Using the color settings on your camera, take the same image with each of them. Shoot with Daylight, Shade, Tungsten, Flourescent at least and do this in places where those colors exist. In other words, shoot some images outside, inside with regular household lamps, and some place that has Flourescent. (NOTE: Many big box stores use a light source known as Mercury Vapor. Mercury Vapor is blue/green so it is very difficult to adequately address. We can add magenta to offset the green, but that turns the blue part of the light to purple. If we address the blue with something warm, we add that to the green part of the light.For Mercury Vapor correction, try “auto” on your camera setting. It is the best I have found for correcting most of that blue/green color shift.
- Using a strobe (speedlight), take a photograph of someone while the sun is going down behind them. Do not alter the strobe setting, just let it keep making the shot as the light turns warmer and warmer. You will then see how “blue” the light source seems coming from the flash.You may have to change the settings as the light gets dimmer, but I think you will see the changes pretty well.
We will be addressing color balance in all of the upcoming classes.
Are You Using Emotional Lighting?
I am restless. Unsettling so. I am finding myself wondering aloud what the point is of the image in front of me. Is it to delight? Is it to show my how sharp the lens is? Is it to make me see something I may not have usually seen? Is it to show me how many lights the...
See Ya, 2009… Looking Toward 2010 With Excitement
Well, here we are. The last year of a decade filled with innovation and stagnation, amazing highs and devastating lows. We enter the second decade of the 2000's in 365 days. A year of endings and beginnings, 2010 may be a defining year in so many photographers...
8 Essential Sites for Emerging Professional Photographers
A recent posting elsewhere with "5 Essential Photography sites" or whatever, didn't sit well with me. I don't consider a vendor an essential. My vendor may be essential to me, but they are not essential to you. I found the list rather dreadfully full of vendors. So I...
Introducing the New Category: Rants & Raves
Time for a new category here on LE. I want to share a lot of things with you all, but it needs to be done on a near daily basis. And that causes some problems with how the longer posts get distributed. The "Rants & Raves" pages may appear daily, with the longer...
42 Wonderful Images from the LE Flickr Forum
Well, we enter that last week before the holiday week. That is the week between Christmas and New Years. Another fun post of images from the Lighting Essentials Flickr Pool. Some of the best Flickr photography around. And speaking of that forum, I have decided to kick...
Pittsburgh Overview: A fun and challenging workshop
Well, this was the second to last workshop for 2009 and it had its own challenges. The weather wanted to be a problem, and we were unsure of out talent pool. Talent was wonderful and the weather... while being a little stubborn on Sunday, finally opened up and gave us...
Branding Your Photography Business: A Realistic View
Branding Your Photography Business: A Realistic View Brand. Branding. Words that we hear a lot about. “Brand Yourself†we hear from some quarters. “We specialize in Branding†we hear from others wanting to sell their expertise. And consultants want us to...
Stay Fresh, Stay Current, Stay Visible: by Daron Shade
Daron Shade introduces CMS (Content Management System) and discusses how it benefits photographers greatly to have a website that they can manage themselves. Far more than keeping the portfolio fresh with uploaded images, a full CMS gives photographers greater impact...
Images from the Toronto LE Workshop
Hi, and welcome to Lighting Essentials, a place for photographers. I do believe that is the first time I have used a welcome, and it had to be done. I guess. Stats show that I am getting new people all the time. Actually I was a bit surprised at all the people who are...
It’s All About Me! Photographers ‘About Me’ Pages
Creating an "About Me" page can be quite a challenge for photographers. What should be included? How should it read? First person or third person voice? Should there be a client list or should it be separate. Well, let's take a long look at a lot of those questions....
A Passion for the Image
37,000 feet over the Great Plains of these wonderful United States and I find myself drifting off a bit, as the days have been long and nights short lately. The workshops are the most fun I have had in a long time, and they keep me pretty busy. As well, time must be...
33 Wild and Wonderful Images from our LE Flickr Pool
Image by Don Fadel. Hey... it's been a while. Sorry 'bout that. I have been traveling so dang much that it has been a little hard to get to the site... but I have really got a lot of stuff ready to go. The last few weeks included Boise, Toronto and this weekend it is...

Using a Light Meter and “Placing” the Photographic Exposure
“Breaking Out” as a Professional Photographer: Daron Shade
Daron Shade presents a really well written article about 'Breaking Out' and Breaking In to the world of commercial photography. Another of our "Going Pro" series. I hope you enjoy them. Today finds me in Boise, Idaho. The day after a fantastic workshop weekend here....
44 Terrific Images from the Lighting Essentials Flickr Pool
COVER PHOTOGRAPH BY MATTHEW DUNN We have another inspirational post from the Lighting Essentials Flickr Pool. 44 terrific images that hopefully will inspire you. I love looking through that pool whenever I have a few minutes. Take your time, and as always, the images...
Posing and Lighting: The Synergy and Concept. Guest Post by Eduardo Frances
This morning finds me in Boston. It's cold and overcast, but our goal is to have a terrific workshop. And we will. Eduardo Frances is our guest columnist this morning. He hails from El Salvador and I have profiled him on the site here. I am sure you will enjoy this...
Staying Natural in Front of the Lens: Model Behavior
Briana Shaker adds a new article on having fun and getting the job done. It is good reading for photographers and models alike. More after the jump as they say. I want to take a few minutes and let everyone know how much I appreciate the great emails and comments you...
Gear… OK, Let’s Discuss Gear. Photographic Tools That I Like
I get a lot of questions about gear at the workshops and by email. I have lots to say about gear, but I am not a gear-head. I love gear that helps make my work easier, and couldn't care less about cost or prestige. If something works well I like it. And if it isn't...
Marketing and Good Karma: Guest Post by Daron Shade
Hi everyone. I am in the midst of the Mexico workshop, and a little behind on my gear post. It was mangled in my DB and I have retrieved it fine, but there are some issues with the images. Watch for it in a day or so. In the meantime, my bud from Tucson, Daron Shade,...
Five Things To Do To Land Assignment Photography
As we begin to work toward our new focus on Lighting Essentials, I want to discuss some truths that go along with this business. Some are probably truths for most any business, and some are narrowly within the creative realm of endeavors... but all are nearly...
10 Nifty, Excellent Excuses for Failing at Photography
After being actively involved with photographers of all types for quite a long time, I have met successful shooters and those who have not made it. There are a gazillion excuses for failing at this business. (And a few reasons as well. But excuses are different than...
An Interview with Daron Shade, Tucson Photographer
Daron Shade is a Tucson, Arizona photographer. We have a great interview here and a few of Daron's photographs to enjoy. But first an update on some changes here at Lighting Essentials. For quite a while I have been working to find my voice and deliver the kind of...
24 Photographs That Rock: From the LE Flickr Pool
Cover Shot by Megan. Wow. It has been a while since I posted. My apologies and an explanation. 1. I had decided to move from my little studio to one that has more space to shoot and in a location that I like better. More on that later. 2. I had the flu. Yeah... the...
Natural Light Portraits from Seattle
The Seattle workshop was amazing. We had a great time and made some amazing images. Using the facilities of SPA, we were able to do several setups. And the models, stylists and hair artists were off the chart. Incredible styling, hair that was spectacular and a dozen...