
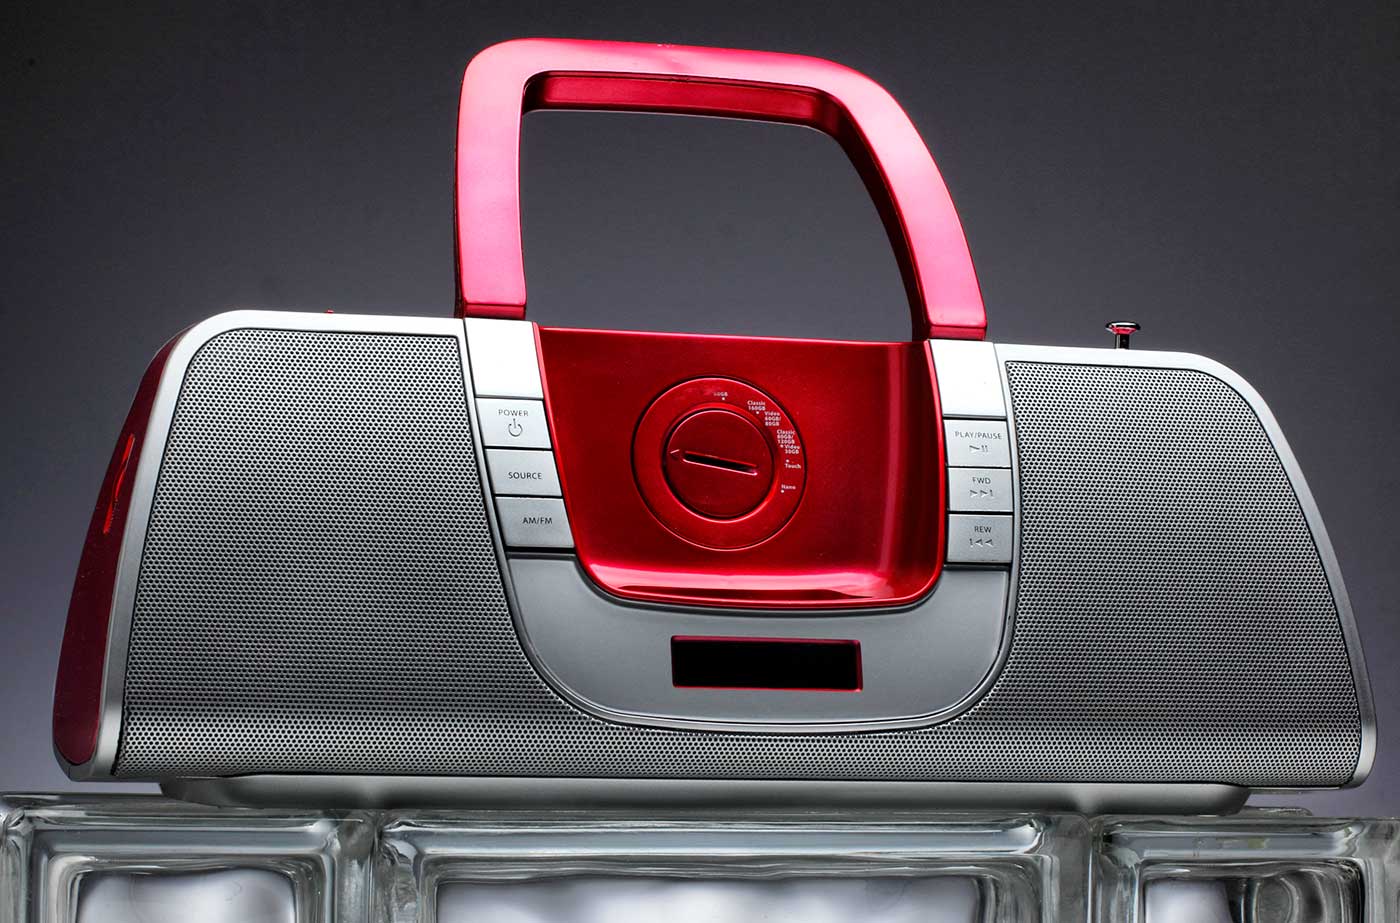
Lighting Principle Number Four: The Angle of the Light to the Subject and the Camera
Law of Physics: Angle of Incidence equals the Angle of Reflection.
This is an axiom that a lot of people hear and repeat without taking careful note of what it means to their photography.
And yet it is one of the most basic and important physical rules of subject centric lighting.
What does it mean and how can we use this to our advantage?
It means that if the light is angled toward a subject, the reflection of that light will be presented back to the camera at the same angle.
Think of the game of billiards or pool. If you hit a ball into the wall at a 30% angle, the ball will come off that wall at a 30% angle. And that completes a triangle. Understanding that triangle is key to making quicker, smarter lighting decisions.
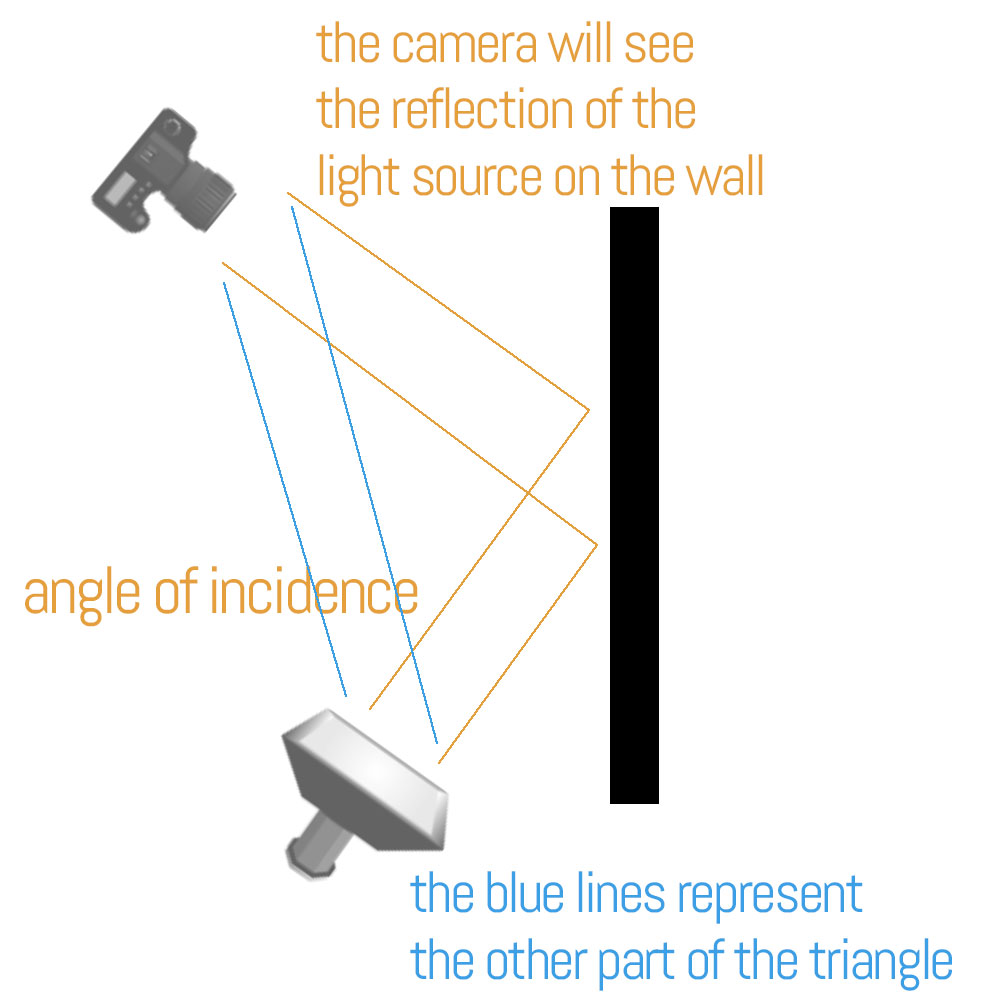
It means that you have to be able to judge the angle of the light as it strikes the subject and understand what that light will do once it strikes the subject. If there is something being reflected in your subject, look at the camera angle from the other side and you will find what it is.
EVERYTHING REFLECTS. EVERYTHING.
Some things reflect more than others, but everything you see is simply the reflection of the light from its surface.
I call it ‘presentation’, and when I discuss lighting, I use the word presentation to talk about how the light looks to the viewer.
Once we realize that the angle of the light source to the subject, and the incident angle of that light source to the subject is going to present to us in ways we can control, lighting becomes so much easier to create.
Think of the way the light strikes hair on a slightly backlit portrait. The reason the hair becomes so much brighter is because it is round in shape, and somewhere on that round, shiny hair is going to be that same angle of incidence that the camera is seeing.
An example.
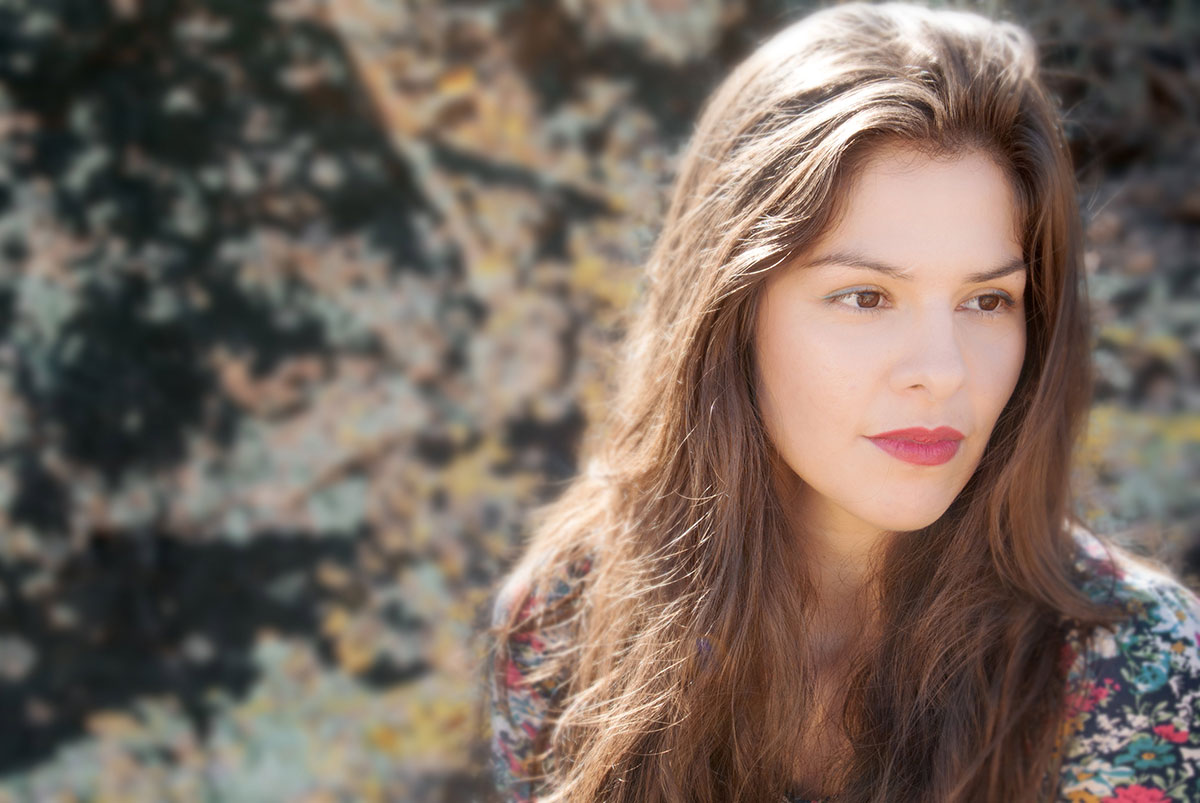
You can see how bright that hair is with the sun shining on it, and each tiny hair reflecting that sun back to the camera.
In the image below, I used a large softbox in order to get a shiny, reflective area off of the wall behind the subject and create a gradient to the background. You can see in the illustration that the angles of reflection come back to the camera on the left side of the model, but not on the right side of the model. The wall is a semi-gloss wall and provides a nice, soft reflection of the light source.
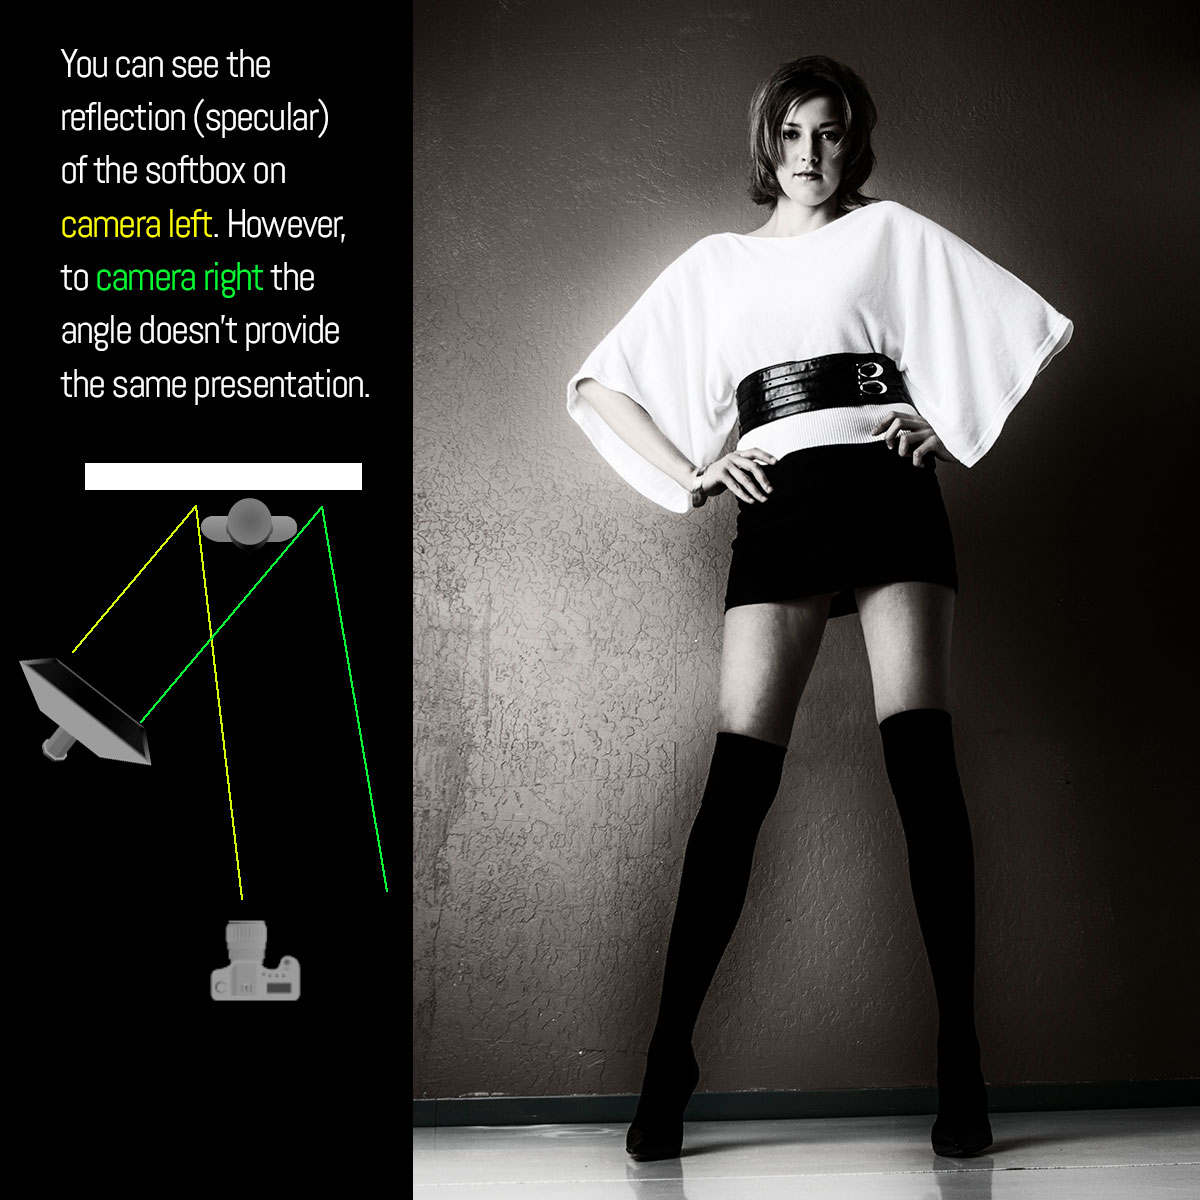
Let’s take a closer look at that triangle that is formed by the light to the subject, the subject to the camera, and the light to the camera.
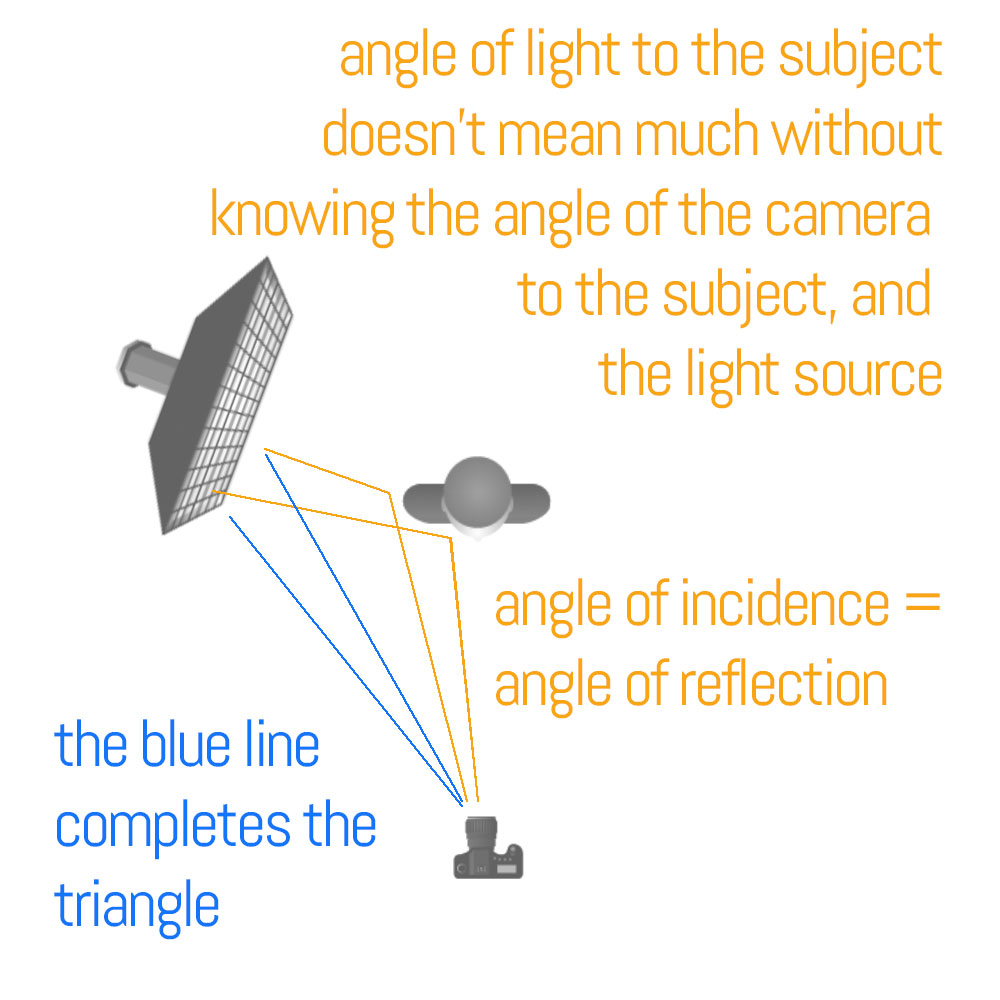
It is being able to see that triangle (shown above with the blue line) and to then visualize the presentation of the light that makes it easier to control. Once you begin to see those angles, and the way they will present back to the camera, lighting can become much more of a finessed technique rather than a flailing exercise.
Let’s talk about direction.
There are three major directions of light and one that doubles as a direction. I will explain.
This is front lighting. The light comes from the side of the camera, and it can be angled quite a bit (90 degrees). The presentation is full angle of incident / angle of reflection, and you can control that fall of incidence by where you place the camera in relationship to the light and to the subject angle.
Front light:
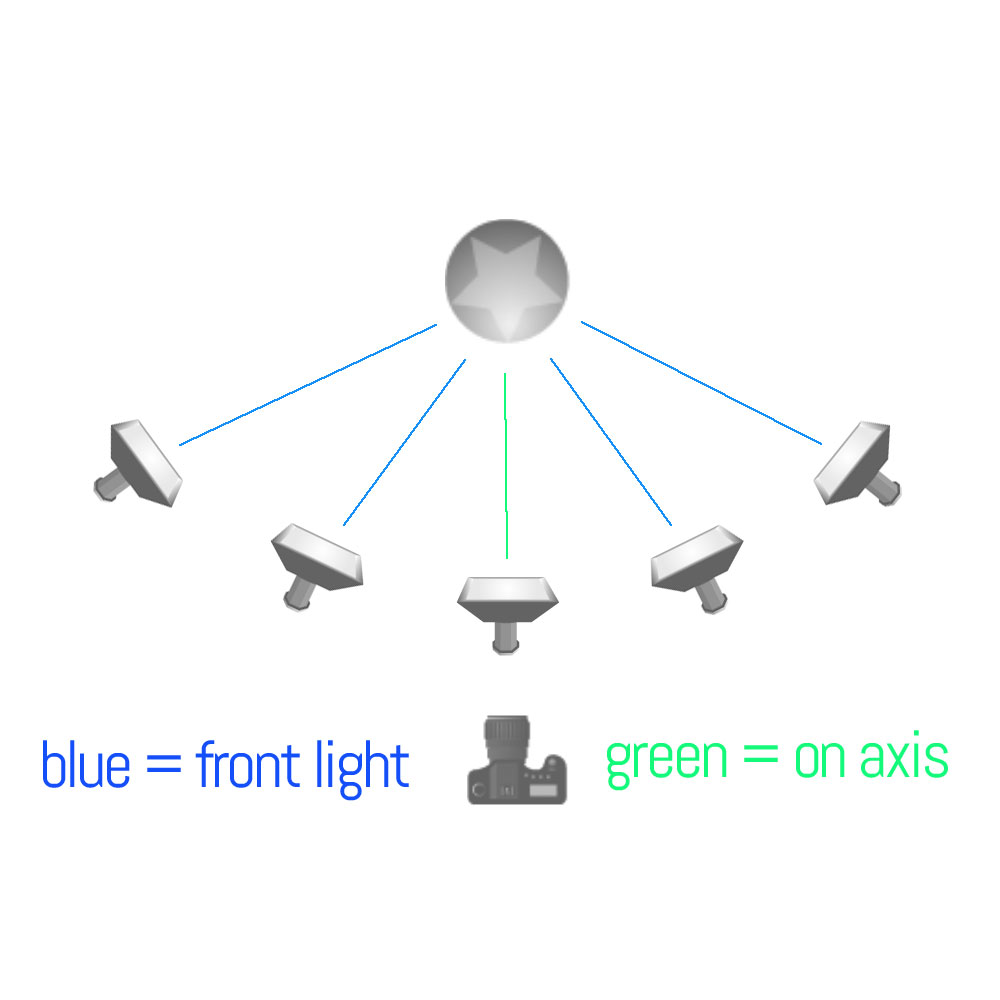
You can see that from right to left there is 180 degrees of placement that will allow you to have front light. There is one point in the middle, however, that is at the same angle as the camera. We call that “on-axis” lighting and is a favorite of beauty and fashion shooters.
On-axis lighting is from the position angle of the camera to the subject, not necessarily at the distance of the camera. That means there is no triangle (horizontally) from light to subject to camera. As you can imagine the reflection is straight back into the camera. A wide, soft light with few shadows.
In the diagram below we see side lighting and backlighting. Side lighting is as its name suggests, directly from the side of the subject creating a 90-degree angle to the camera angle.
When we move the lights farther back from sidelighting, we have backlight. Backlight has all the same angle variations as does the front lighting.
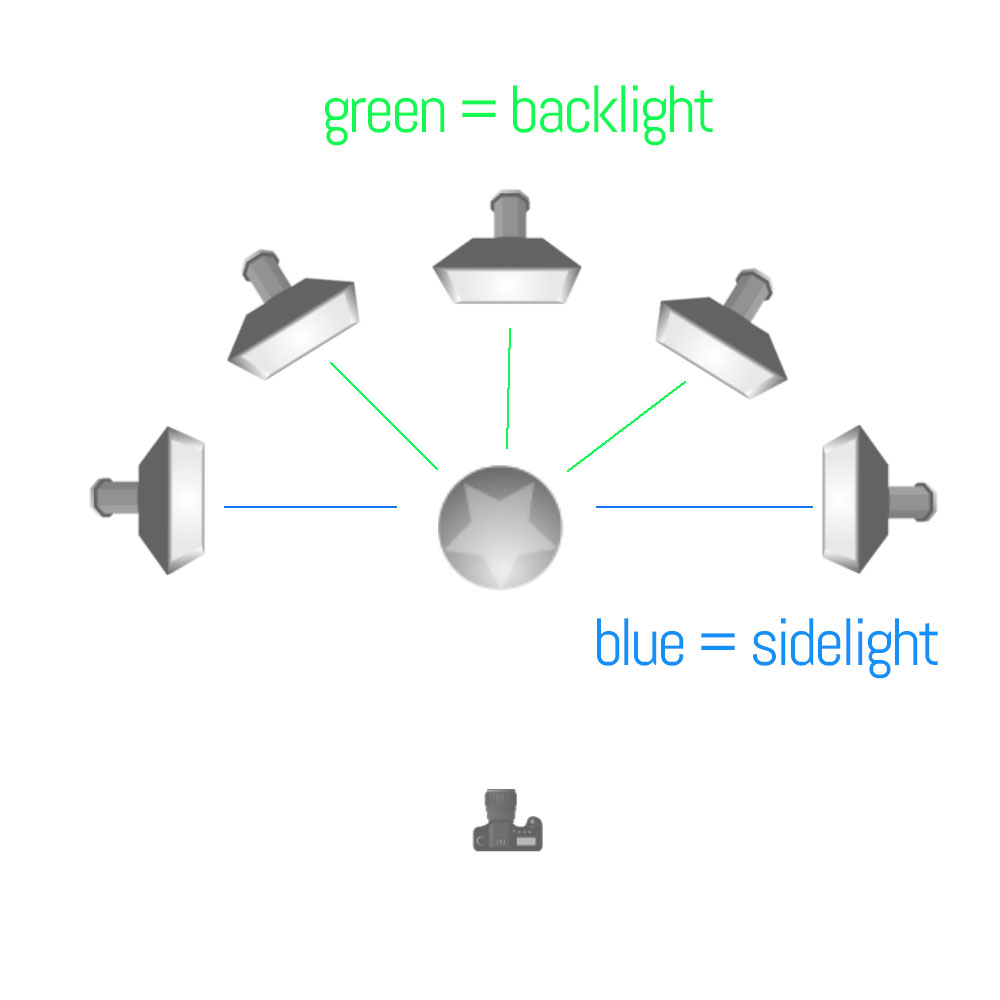
Top lighting from directly above is the same as side lighting if it is at a 90-degree angle to the subject/camera. If it is slightly in front it is front light, and slightly behind it is backlight.
Front Light One
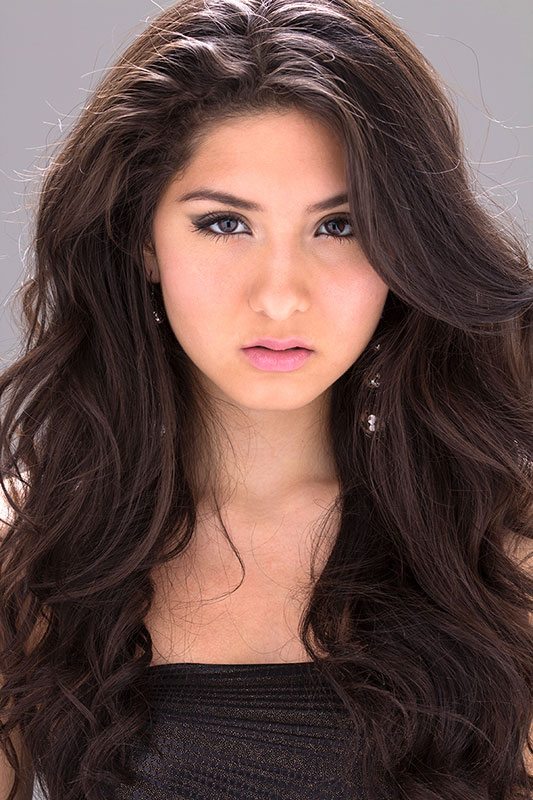
Front Light Two
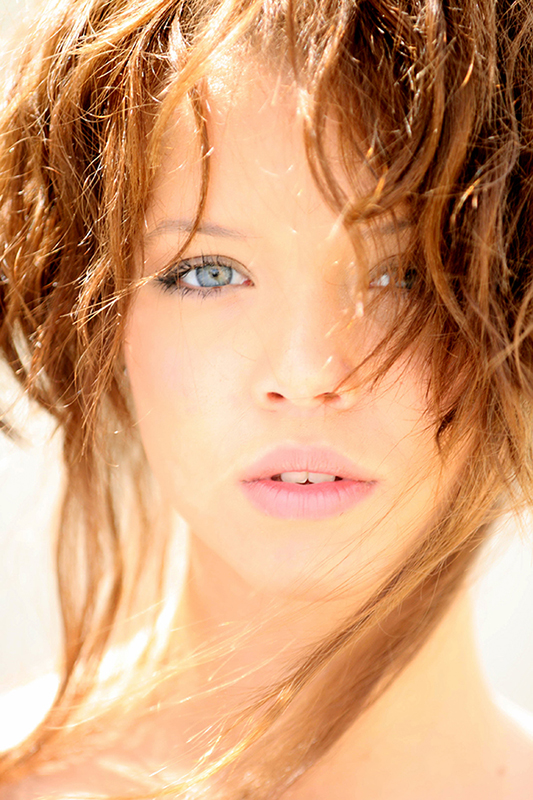
Side Light One
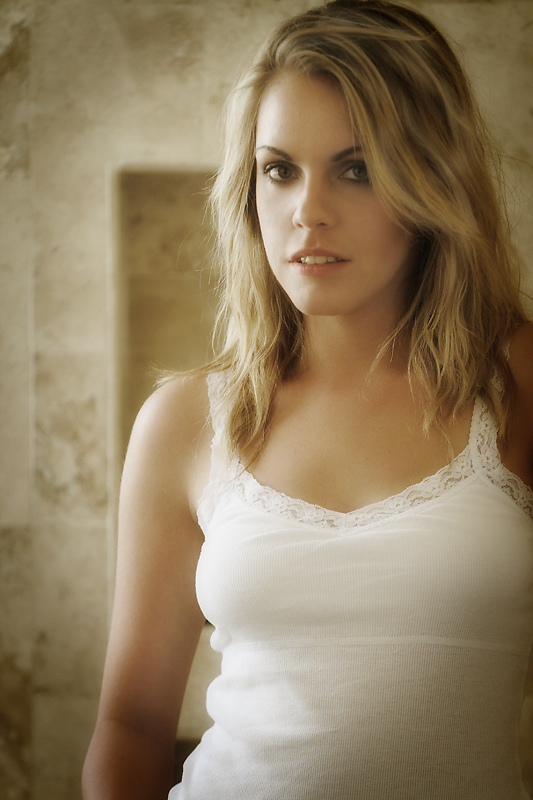
Side Light Two
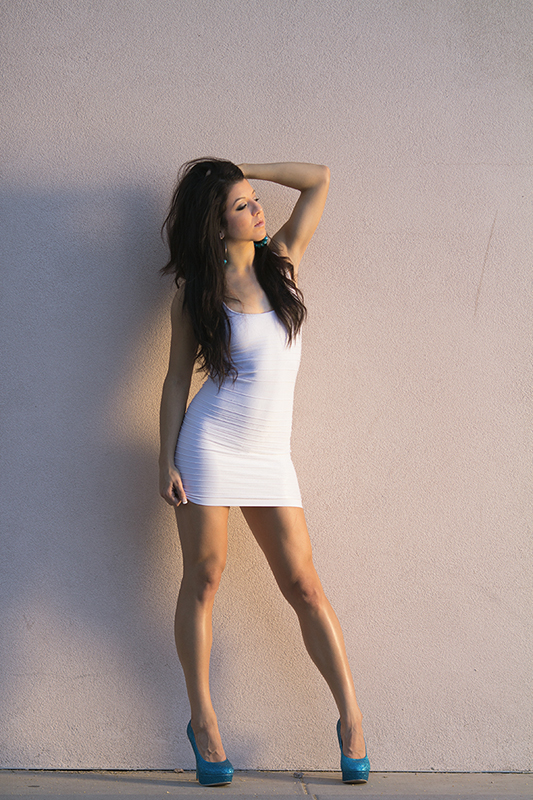
As you can see above, the angle of the light to the subject, and to the camera, makes a big difference when you are working toward making the shot look a specific way.
Let’s wrap it up:
The four different properties of lighting are:
- Size of the light source in relationship to the subject.
- Distance of the light source from the subject.
- Color of the light, and its relationship (if any) to the prevailing ambient.
- Angle of the light source to the subject, and to the camera.
And NONE of them are the most important – they are all equally important. We don’t think of them in an hierarchical way, we think of them in a holistic, symbiotic way. Change one, you may have to indeed change another. Change that one, and you may have to alter two others to make it work for you.
All of this only matters to you if you know what you want your image to look like. Do you want soft light, or do you want hard-edged light? Do you want a mixed light image that looks natural, or do you want to play with color temps in a creative way? If we move our light closer or farther away, what does that do to the look of the image? Do we need to bring out texture, or is a flatter look our goal?
These questions are usually not asked in order in our brains. All of them are asked at the same time, and we react to these creative decisions by utilizing the tools we have for creating them.
And now, with these basics, we can begin to create the images to present OUR vision of the subject in front of our lens.
ASSIGNMENTS:
- Find a subject that allows you to move around it and make images from all the different lighting positions. Do this either early in the morning or late in the afternoon so the sunlight is closer to your head height to the subject.Shoot front light, side light, back light, axis light. Study the images to see how the subject changes in the different lighting positions. Print the images and make notations on how it, and the background, look to you. What changes do you see?
- Using your flash or continuous lights, do the same thing with a subject inside. You can choose something as a still life, or – if you are a people shooter – grab a subject and start moving that light from on-axis to back.Note that when your light is backlight ONLY, the subject is quite dark, possibly even silhouette. You can adjust for that or not – your call. but remember that your adjustments will play the same role as the main light in the angle of light to subject to camera.
Interview: Jason Scott Montoya: Path of the Freelancer
I had the pleasure of interviewing Jason Scott Montoya about his upcoming book, Path of the Freelancer. The book is a deep dive into the world of freelancing. The book is available for pre-order now at Amazon. Path of the Freelancer is available in soft cover at this...

Protected: FPCN Webinar, February 25, 2017
Password Protected
To view this protected post, enter the password below:

Personal Sports Equipment: Five Examples of Lighting
The assignment was to shoot personal sports equipment (non-team sports). The photographers gave us some very nice shots, and the ways they came up with them really rock. Rainie Mills gave us a workout box with an example of its use. The key element in her image was to...

Protected: FPCN Webinar, February 18, 2017
Password Protected
To view this protected post, enter the password below:
07: Assignment Seven: An Architectural Photo of a Church
The client wants to see something special for his new PR work for a local church. The image should not have any cars in the parking lot and light MUST be on the front of the church. The client is suggesting a very early morning shot (or sunset if the light is better...
PROJECT 52 2017: A NEW BEGINNING
PROJECT 52 HAS BEEN A LAUNCHPAD FOR HUNDREDS OF PHOTOGRAPHERS OVER THE PAST 5 YEARS. THE TRADITION CONTINUES WITH A REBOOT. ENROLLMENT STARTS SOON. SIGNUP HERE FOR NOTIFICATION.
SPROUTS!!! Love ’em or hate ’em?
The assignment was to shoot Brussel's Sprouts. Anyway you want. Some people do not like Brussel's Sprouts, and some people love Brussel's Sprouts. Couldn't find anyone who was ambivalent to them. Either love 'em or hate 'em. The image above is by Karen Green who...

Behind the Image: Nicole Fernley
Nicole shot these images for the Still Life Class. The idea was to shoot a portrait and a landscape of the same image to see how the subject matter changes in the POV of the camera. She wanted a very soft, natural feel to the light. The photo at the top shows the...
Protected: FPCN Webinar; February 11, 2017
Password Protected
To view this protected post, enter the password below:

06: Assignment Six; A glass of wine on location
This shot cannot be done in a studio, the client would prefer it be done on location. Snow is good. Desert is good. Trees are good. It's all good because their tagline is "It's Always a Good Time for a Good Wine" (Please drink responsibly means probably not while...

05: Assignment Five: Industrial Magazine Cover
This is a fun assignment. An art director needs a cover shot for an industrial trade magazine. Which industry? Whichever industry you choose – but it is industrial. Mechanical… build stuff! The gig can be one of three approaches. People: This shot would be a worker,...
Protected: FPCN WEBINAR: JANUARY 28, 2017
Password Protected
To view this protected post, enter the password below:
04: Assignment Four: The Game of Chess
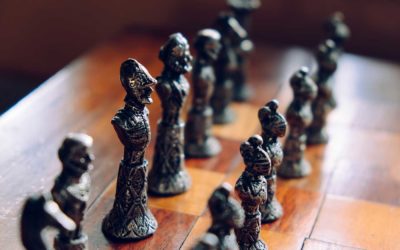
CHESS as a Business Strategy We read about chess masters. There are movies made about chess and those who play. An esoteric, and definitively challenging game of wits and skill. Like business. Your assignment this week comes from a business magazine (Forbes, The...
10 Black and White Portraits That Look Like Film
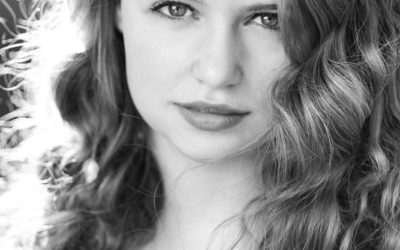
From some of the students in the 8 Week Black and White Class comes this selection of ten images that really look like film and paper. The assignment was to make sure the image was designed to look as though it was shot as a black and white, not simply a converted...

Daily Critique / Image Review: 1-17-17
This is an ongoing feature of Lighting Essentials, a Place for Photographers. We will be looking at images on a consistent basis. The images will all be work from my 8 Week Workshops or Project 52 Pros. These critiques will be short, but very informative and full of...
03: Assignment Three; Environmental Portrait
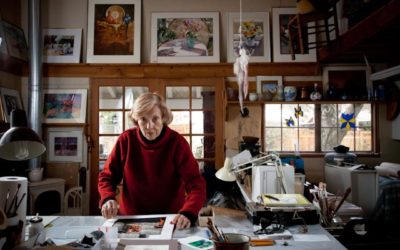
OK… time to shine. This must be a photograph in which the subject inhabits about 25% of the image. There is not much specifics to this assignment. After the difficult magazine assignment shoot, it is time to relax and make something fun. Here is a Google page of...
Daily Critique / Review
This is an ongoing feature of Lighting Essentials, a Place for Photographers. We will be looking at images on a consistent basis. The images will all be work from my 8 Week Workshops or Project 52 Pros. These critiques will be short, but very informative and full of...

Behind the Image: John Mcallister
This is a new feature on Lighting Essentials. We take a look at images and how they were made. We will be doing these posts as often as possible, and if you follow along you will get a heavy dose of instruction in lighting, composition, and the finesse of solving...

02: Assignment Two: The Incredible Egg
"THE INCREDIBLE EDIBLE EGG" Yeah... it is a popular headline, but that is what the client wants. The Design Company is located out of your area, but wants you to shoot this because you have been consistently marketing to them with great work. A local restaurant supply...
Daily Video 1
https://www.youtube.com/watch?v=4qgZiWveuBc
01: Lighting Class: Light Principle One: The Size of the Light Source
Let's look at light and the four principles of how light works. First up, the size of the light source in relation to the size of the subject. Imagine looking out the window at the front yard and without seeing the sky knowing whether it is sunny or cloudy. We do...

Assignment 1, P52 LE Edition, Portraits for Newspaper
Assignment Number One: Brief: A local newspaper has annexed an adjoining town when its newspaper folded up shop. The in-house creative at the paper wants to make a splash in the area by featuring some of its residents exclaiming happiness and joy that they can now get...
02: Lighting Class: Light Principle Two: The Distance of the Light Source
DISTANCE OF THE LIGHT SOURCE FROM THE SUBJECT The second principle of light is the distance of the light source from the subject. One thing for sure, if it is artificial light, the distance of the light source from the subject can change the size relationship, but...
03: Lighting Class: Lighting Principle Three: The Color of Light
LIGHTING PRINCIPLE THREE: THE COLOR OF LIGHT We see light usually as a white source, or at least a neutral source. It isn't. neutral, it has a color to it and that color can influence all the parts of your image, from shadows to highlights. We don't see the color of...