
DISTANCE OF THE LIGHT SOURCE FROM THE SUBJECT
The second principle of light is the distance of the light source from the subject.
One thing for sure, if it is artificial light, the distance of the light source from the subject can change the size relationship, but there are other things that happen as well.
With artificial lights, one of the most important rules is The Inverse Square Law.
And it can be kinda scary that one. First, it’s a law. That seems pretty definite. And of course it has something to do with math – ‘squared[. But the word INVERSE? What the heck is that?
Let’s not sweat that right at the moment.
Let’s just acknowledge it for what it means to us.
Essentially, the Inverse Square Law (ISL) means that the farther the light is from the subject, the less bright it will appear. We know that, right. The closer we get to a light source, the brighter the reflectance of that source from whatever we are bringing close to the light.
Say you are in a very dark room, and there is only one small light in the corner. You are desperately trying to read the calory count on your small bag of Cheetos but it is way too dark where you are. Well – simple, we take the Cheetos bag over to the light and as we get close to the light, we can instantly read that we are never allowed to eat Cheetos again.
Now that is way too simple for any rule, or LAW, especially one that concerns math and something called Inverse.
The ISL is a way of measuring that light fall off and it shows us that there is actually a formula to how much that light falls off. Formulas are great. They are like systems. We can use them over and over to achieve the results we need.
This formula is way simpler than the name implies:
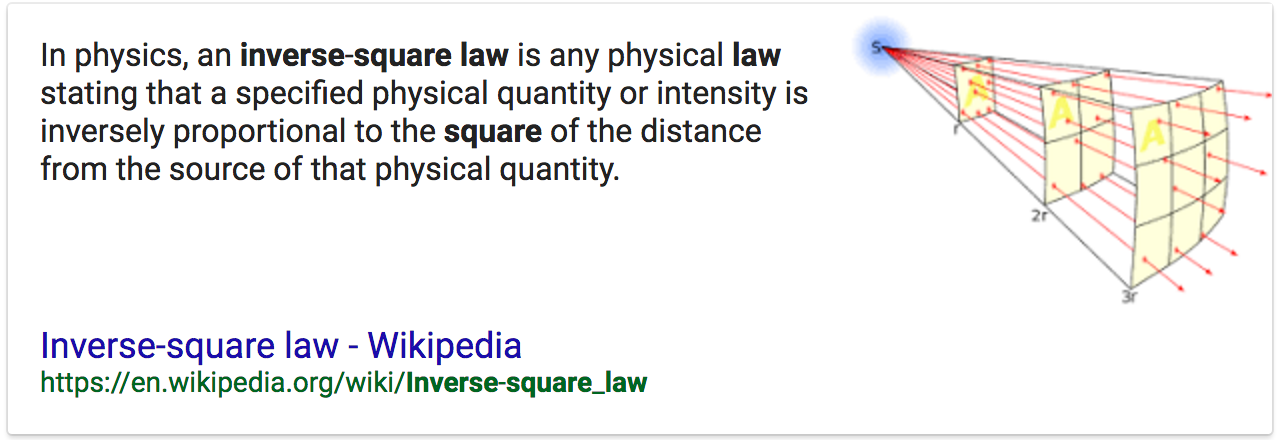
As you can see in the illustration above, at twice the distance the light has to cover four times as much space making it four times less powerful.
Four times less = 2 stops less in f-stops.
So if the light was f-8 on your subject at 4 feet, and you moved the light back to 8 feet, the amount of light on the subject would now equal f-4. If you started at f-4 at 8 ft and moved the light in to 4 ft it would be f-8.
What if instead of moving the light from 8 ft to 4 ft you decided to move it in 6 ft? Well, that would be half way between f-8 and f-4… f-5.6.
Now look at what happens when we apply the rule to a set of distances.
THE IMPORTANCE OF KNOWING RECIPROCALS
A reciprocal is simply understanding the relationships between all the numbers we throw around in photography.
F-stops, shutter speeds, ISO – all work hand in hand with each other to make the image with correct (for you) exposure. Changing any one of these three will necessitate a change in one of the others to compensate.
Let’s look at ISO:
f-4 / 1/125 @ ISO 100
If we change that to ISO 200 one of those above will have to change. Either the f-stop or the shutter speed. Since the ISO is now one stop more powerful, we either have to change to f-5.6 or change the shutter speed to 1/250. Both of these changes have the affect of decreasing the exposure setting one stop due to increasing the ISO by one stop.
Simply knowing the basics of one set will make it easy for you to re-configure for a new set.
I use ISO as my constant. In this case, I will use the settings of Sunny 16 (f-16 at 1/ISO).
ISO is 100 for these reciprocals.
f-16 @ 1/100
f-11 @ 1/200
f-8 @ 1/400
f-5.6 @ 1/800
f-4 @ 1/1600
f-2.8 @ 1/3200
These are committed to rote memory.
Changing the ISO compels me to make associated changes in these figures. If the ISO goes faster, I simply change the f-stop OR shutter speed to correlate to the amount of change in ISO. If the changes go out of the range of my camera, I will change one first, then catch up the other.
Example:
The light is getting a bit low, and I want to shoot with a shutter speed that allows me to hold the camera still. I take a meter reading and find that at ISO 100, my exposure for that shot is f-4 @ 1/15. Well, that aint’a gonna work for me handheld.
So first I decide that f-4 should be f-5.6 because of some Depth of Field issues (which moves the shutter speed down to 1/8), so that means I will have to move the ISO one stop for that aperture change to:
f-4 / ISO 100 @ 1/15 to f5.6 / ISO 100 @ 1/8 (reciprocal, one less stop in shutter speed to correlate with additional stop in aperture.
f-5.6 / ISO 200 @ 1/15
f-5.6 / ISO 400 @ 1/30
f-5.6 / ISO 800 @ 1/60
Learn your reciprocals for faster and more accurate decisions in the field.
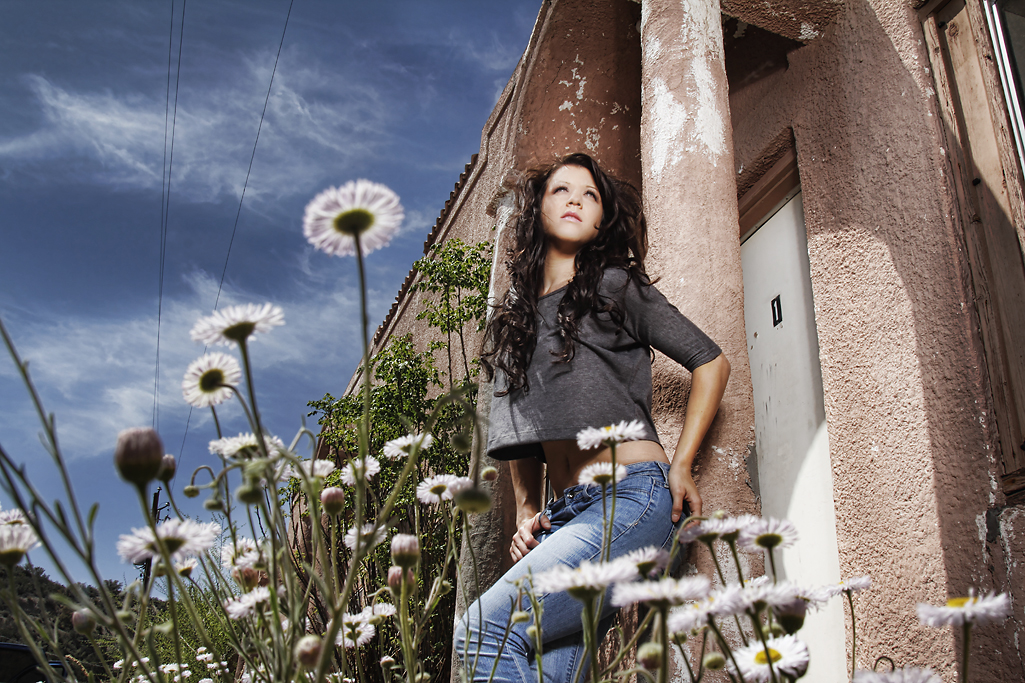
Bri in Miami.
I didn’t want the old building to go too dark behind her so I moved her next to the column. This gave me the ability to move the light in close to her, and let the background fall off fast – but retain the light and the texture right around her so she didn’t ‘pop’ out and look too overly lit.
This is a 4ft softbox with a Profoto 300 WS head and a single diffusion panel in the softbox. It is just above camera viewpoint in this shot – very close to her. You can see the light falling off as it reaches her knees.
I wanted the shot to appear somewhat realistic and not “strobed” so a careful blend of one stop over the ambient was chosen.
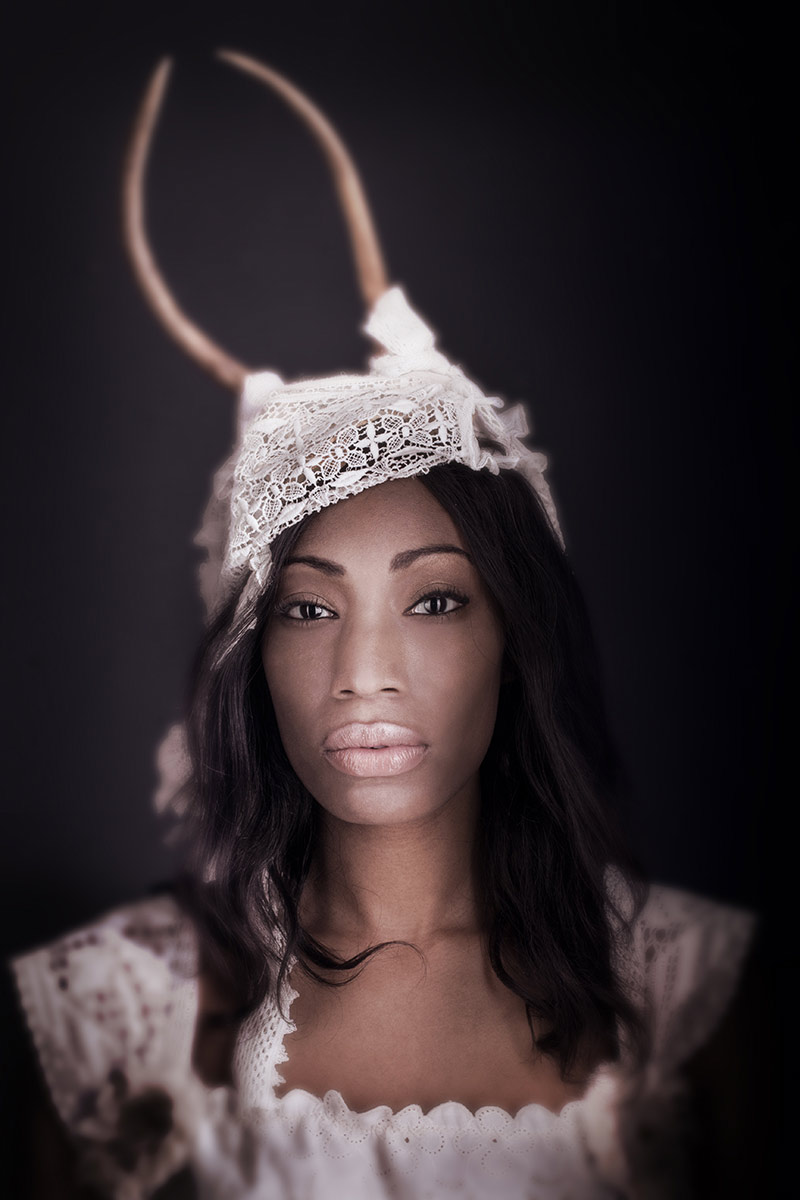
Ivy in the Studio.
My studio had bright white walls in a cove. I didn’t want this image to be on a white background so I moved Ivy far enough away that the light on her had no effect at all on the white wall behind her. It was simply way too underexposed to render at all.
Controlling the exposure through the Inverse Square Law is one of the more important tools you will have at your disposal.
And get this – it doesn’t cost a penny.
ASSIGNMENTS FOR THIS CLASS:
- Using a light source of your own: (studio strobe, speedlight, continuous light) place the light close to the subject and then move the subject AND light source closer to and farther back from a single background. Notice how the image presents itself as you go closer to the background with your subject and light, and what happens when you take subject and light farther away.
- Place camera and background at a fixed point. Then move your subject into the f-16 and make an exposure. Move back to f-11, then f-8, f-5.6, f-4 and if you can f2.8. What happens to the background as you move the subject closer to it and adjust exposure.
- Build your string meter. See below.
Find a piece of good, smallish rope. Clothesline will do nicely.
Put your light on a stand, and run the string straight out from the flash. The flash should be set at 1/8 power if possible. Not full. It should be on “normal” zoom setting neither on telephoto or wide angle.
- Using a meter and a remote flash trigger, find the exposure point for f-4 by going down the rope and aiming the ambient light meter dome directly at the strobe. Keep going until you find the point where f-4 is noted on your meter.
- Using a knot or marker, note that point as f-4.
- Now find the middle of the rope and note it with knot or marker.
- Between the end of the rope and the middle (left side) put a knot or mark in the middle of that area.
- Between the middle of the rope and the end to the right put a knot or marker
- On the right side, now find the middle between the end and the first mark, and knot it or marker
You now have simple rope meter that will be incredibly accurate in all situations.
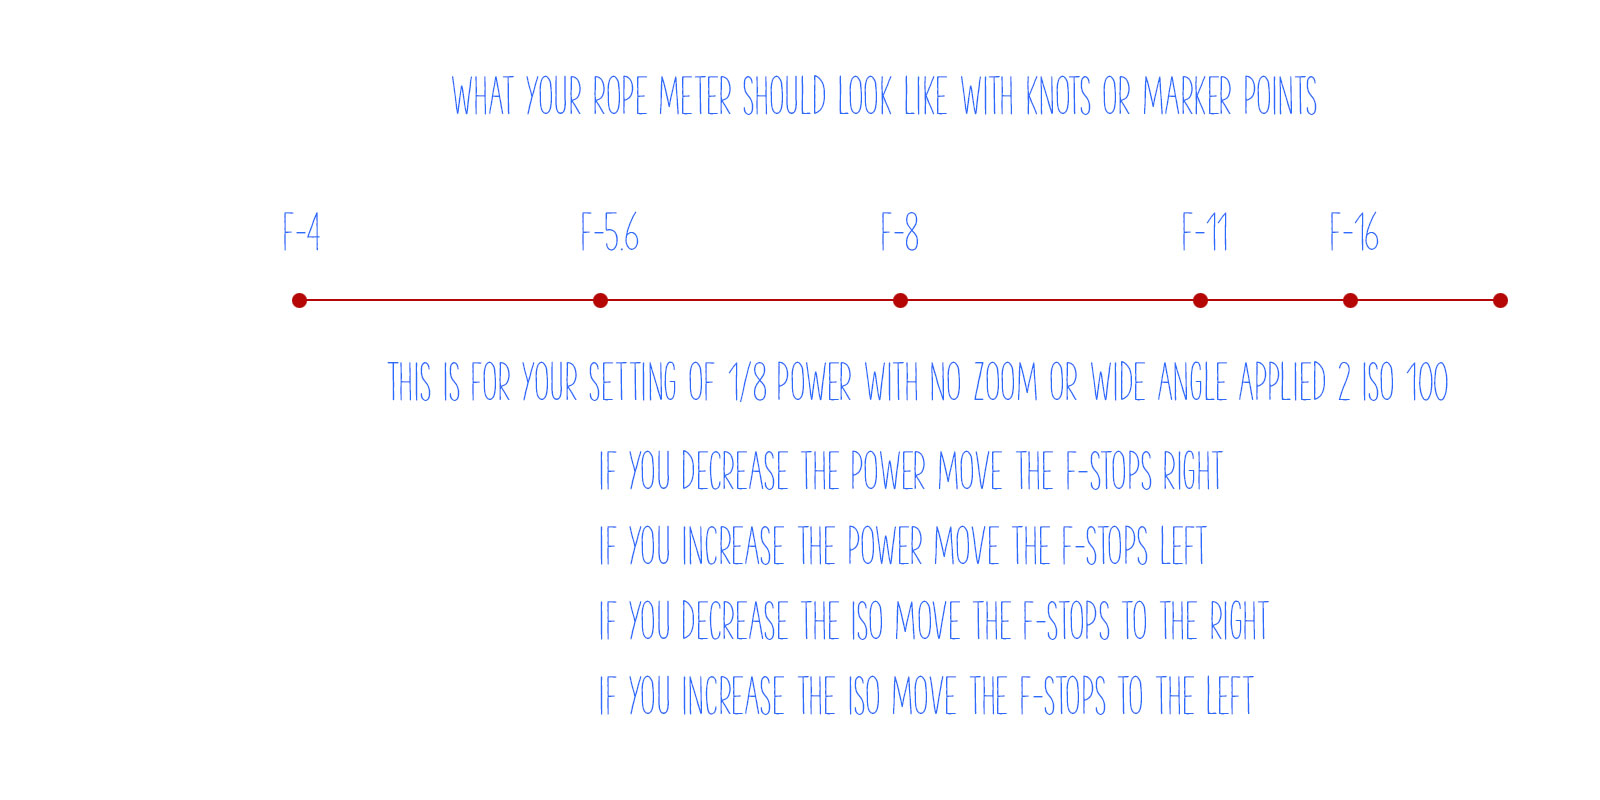
Finding f-4 is the most important part. Use a lightmeter for best results.
If you want to use a gray card, make sure it is at a very slight angle to the light source so it will not have a specular for the camera to see (the reflection of the light source). Shoot at f-4 until you find the distance that will render a single line of pixels in your histogram dead center. That is perfect exposure of a gray card.
Of course, you must fill the lens with the gray card, no extraneous stuff in the viewfinder – just the gray card.
Using the Sun for A Hairlight: Some Variations
The sun is a wonderful light source as we all know. It provides hard, direct light, diffused light, bounce light... heck, it's an allover lighting machine. There are many ways to use the sun for main light and fill, but today we are going to look at a few ways to use...
Make Your Own Reality to Add Drama
There are times when the light you have doesn't match the light you want. The drama of moody skies are rendered useless if they are overexposed and the muddy, dark skin tones of heavily overcast days can make the most competent Photoshop Guru moan in agony. What to...
Shooting Food On Location – With a Twist
My client called and needed a job turned around right away. Her client needed their entire menu shot for some collateral and web materials and the previous shooter had not been able to do what they needed. The images had to be attractive enough for menu use, arty...
Performance Over Posing: Part One
It’s Second Nature: Now, for me, performance is second nature. It’s at the roots of my craft and my nature. Now, it’s not always a good performance. Sometimes it’s downright cheesy, but… it’s often different than what others expect. (A few photogs out...
Using Lighting and Posing to Create the Effect You Want
Light can be the most important part of a photograph, but the model and her pose aren't far behind. You all recognize my friend Briana. We went on a shoot a few weeks ago to show some different posing ideas for her upcoming DVD and some lighting things for mine....
Lighting Essentials July Desktop Calendars
Here are two new desktop calendars for you. A sporting model out to set the land speed record, and Briana in the tropics on a mysteriously dark evening. Either one you choose, your July calendars are more fun with Lighting Essentials. More content to follow quickly,...
Muse or Inspiration: The Model’s Role (Pt2)
Muse in the Studio - A Brief “How to†Guide:(part two of two parts) Okay, enough philosophy, let’s make this simple. Here are a few things I “feel†when I’m modeling. Yes, “feel.†I don’t go and think about these steps when I’m modeling… I just...
Muse and Inspiration: The Model’s Role
A Two Part Article By Briana Shaker Part I What is a muse? The romantic poets knew. The ancient Greeks did as well. Now it's time for models and photographers alike to learn. Quite simply, the muse is she (or he) for whom the artist creates or in whom the artist finds...
The Rigorous World of Macro Beauty Shots
Coming in this close can be a nightmare for the unsuspecting. Makeup must be perfect, hair perfect, every nuance of light has to fall to give the feeling of fresh and natural. And the skills in the toolset must be honed very tightly. It goes without saying that...
Hey, We Got Freebies Too!
Yes... we got free stuff. Who can't use a great desktop calendar? And when it features a lovely model like Briana, you can't go wrong. We have two June, 2008 calendars available in many desktop sizes. I will also give a lighting tutorial for each of the images after...
Natural Light Headshots: Keeping it Simple
In Mexico we had wonderful white Casitas to stay in courtesy of the Las Palmas Resort. They provided some remarkable shooting areas as well as natural light bouncing off all the white walls and railings. I personally love natural light for all kinds of portraiture,...
Dramatic Backlight on a Sunny Day
At the Mexico workshop we decided to do some morning shots on the Beach. Precilla and Jazmin wanted to do this hat shot and I thought it would be fun to use the dramatic sky as a compositional element. I had left my meter back at the casa and didn't want to walk back...
Even If the Sun Don’t Shine…
We were out the door fairly early, and the sky was slightly overcast. Briana had wanted to do this shot for the entire Florida trip and here it was the last day. I really wanted to get it for her. The sun didn't have any plans on cooperating though. I wanted the...
Using Light to Create Drama On Location
Briana and I were stuck in a small, hot and very mundane room while the thunderstorm unleashed lightning and torrential rain all over Anna Maria, Florida. She playfully challenged me to do a shot in the space that was, well, simply awful. I looked at the set she...
Manipulating Natural Light with Simple Tools
There are times when the natural light is simply so gorgeous you have to shoot it. And there are times when the natural light is very nice, but something can be done to make it a bit more, well, perfect. We are going to look at 4 examples of using modifiers to create...
Blending Strobe and Daylight for a Natural Look
This shot of Briana was taken at the New York City workshop and uses a method of flash and ambient controlled to look somewhat natural. Blending the two for portraiture can be very attractive and give the image a more natural look. We used the ambient light from...
Sometimes The Location is Not As Good As Promised.
We were walking up to the Hudson River and the light was glaring, too hazy to make out much and with little natural fill. The surroundings offered little in the way of background or texture and overall it was a disaster of a place to shoot at that moment in time....
Direct Sunlight Portraiture for Dramatic Effect
There is something beautiful about sunlight. It has a feeling that is so warm and natural and it can make people seem to almost glow. I love it so when I saw it happening in a studio in Detroit, I knew I wanted to take advantage of it. Briana had been posing for some...
Subtractive Lighting: Creating Drama with Contrast
There are times when you want to create more contrast in an image... mitigate the reflections or make sure that the shadows are as deep as possible. These situations can occur with natural lighting, but in the studio you may have to add a bit more to the shot to...
Scenes From a Workshop: Detroit, April 6, 2008
The Detroit workshop was a smashing success. The students all had a great time, we had wonderful models who worked really hard to make the images special, even braving cold wind to do it. Lynne's studio is a really smart little place in downtown Pontiac, and she...
One Flash and One Fill Card on Location
Getting really nice, soft light on location can be a challenge. Too often photographers use their naked flashes for fill and end up with something more harsh than they expected. Using a flash to fill in ambient light can be far more subtle and rewarding. For this shot...
Welcome to April: A March Review
March was a tough month for us as we moved the site from a traditional web site to a WordPress backend. We are starting to feel pretty good about it. It meant a loss of visitors for a few days and we lost our statistics for 4 days, but it is obvious we have reached...
Shooting Earrings Without a Net: Guest Post by Josh Targownik
On a recent popular forum post, Los Angeles photographer Joshua Targownik posed a challenge. Faced with the following job he wanted to figure the best and fastest way to get the job done. He also wanted to get some killer lighting on the product to make it really pop....
One Light Setup with Two Versions of the Light
Yesterday I shot Jordan for her mom's Irish Step Dancing Wig catalog. Today we got together for some pics just for her. This was the first time she had shot without a wig on... so it was a lot of fun. I have known Jordan since she was about 9, so it was also fun to...