
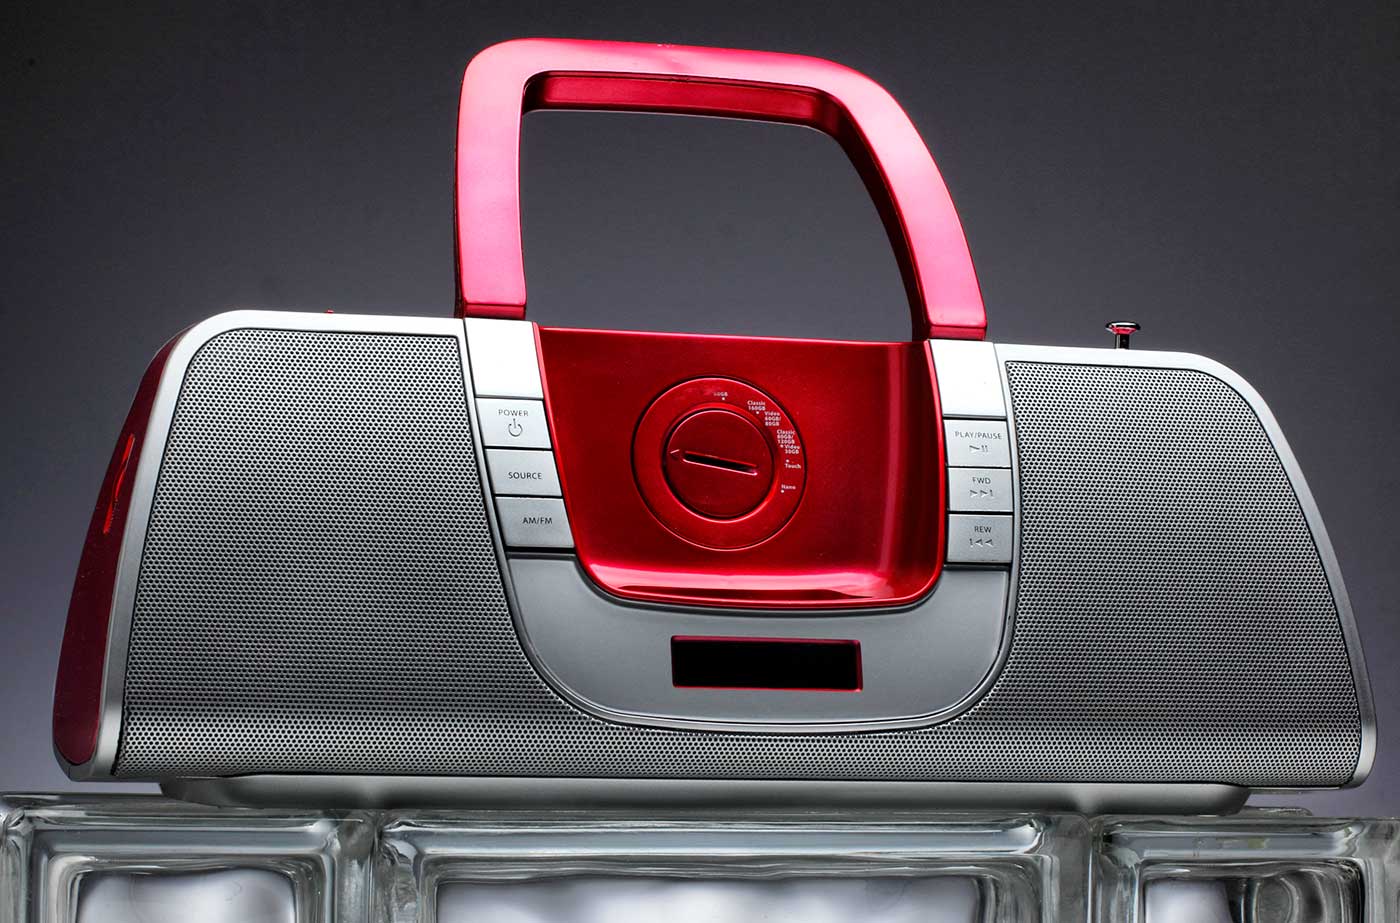
Lighting Principle Number Four: The Angle of the Light to the Subject and the Camera
Law of Physics: Angle of Incidence equals the Angle of Reflection.
This is an axiom that a lot of people hear and repeat without taking careful note of what it means to their photography.
And yet it is one of the most basic and important physical rules of subject centric lighting.
What does it mean and how can we use this to our advantage?
It means that if the light is angled toward a subject, the reflection of that light will be presented back to the camera at the same angle.
Think of the game of billiards or pool. If you hit a ball into the wall at a 30% angle, the ball will come off that wall at a 30% angle. And that completes a triangle. Understanding that triangle is key to making quicker, smarter lighting decisions.
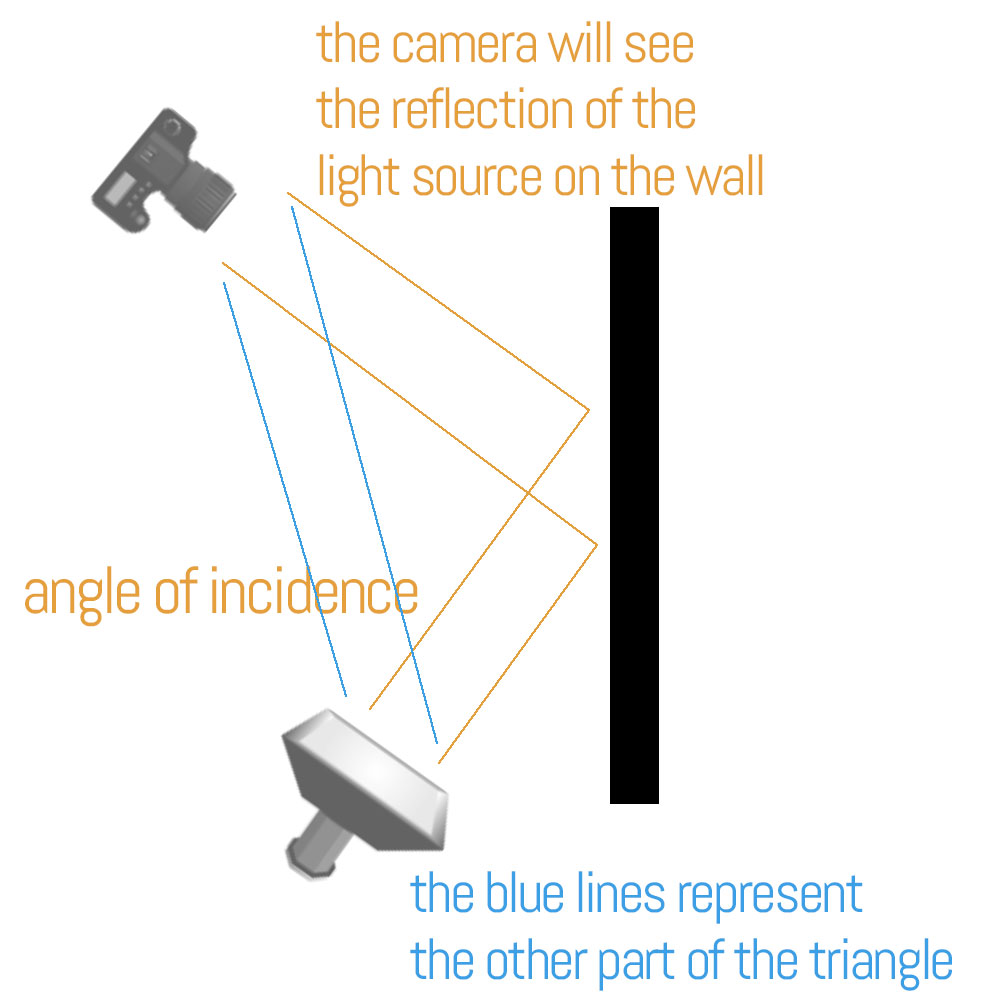
It means that you have to be able to judge the angle of the light as it strikes the subject and understand what that light will do once it strikes the subject. If there is something being reflected in your subject, look at the camera angle from the other side and you will find what it is.
EVERYTHING REFLECTS. EVERYTHING.
Some things reflect more than others, but everything you see is simply the reflection of the light from its surface.
I call it ‘presentation’, and when I discuss lighting, I use the word presentation to talk about how the light looks to the viewer.
Once we realize that the angle of the light source to the subject, and the incident angle of that light source to the subject is going to present to us in ways we can control, lighting becomes so much easier to create.
Think of the way the light strikes hair on a slightly backlit portrait. The reason the hair becomes so much brighter is because it is round in shape, and somewhere on that round, shiny hair is going to be that same angle of incidence that the camera is seeing.
An example.

You can see how bright that hair is with the sun shining on it, and each tiny hair reflecting that sun back to the camera.
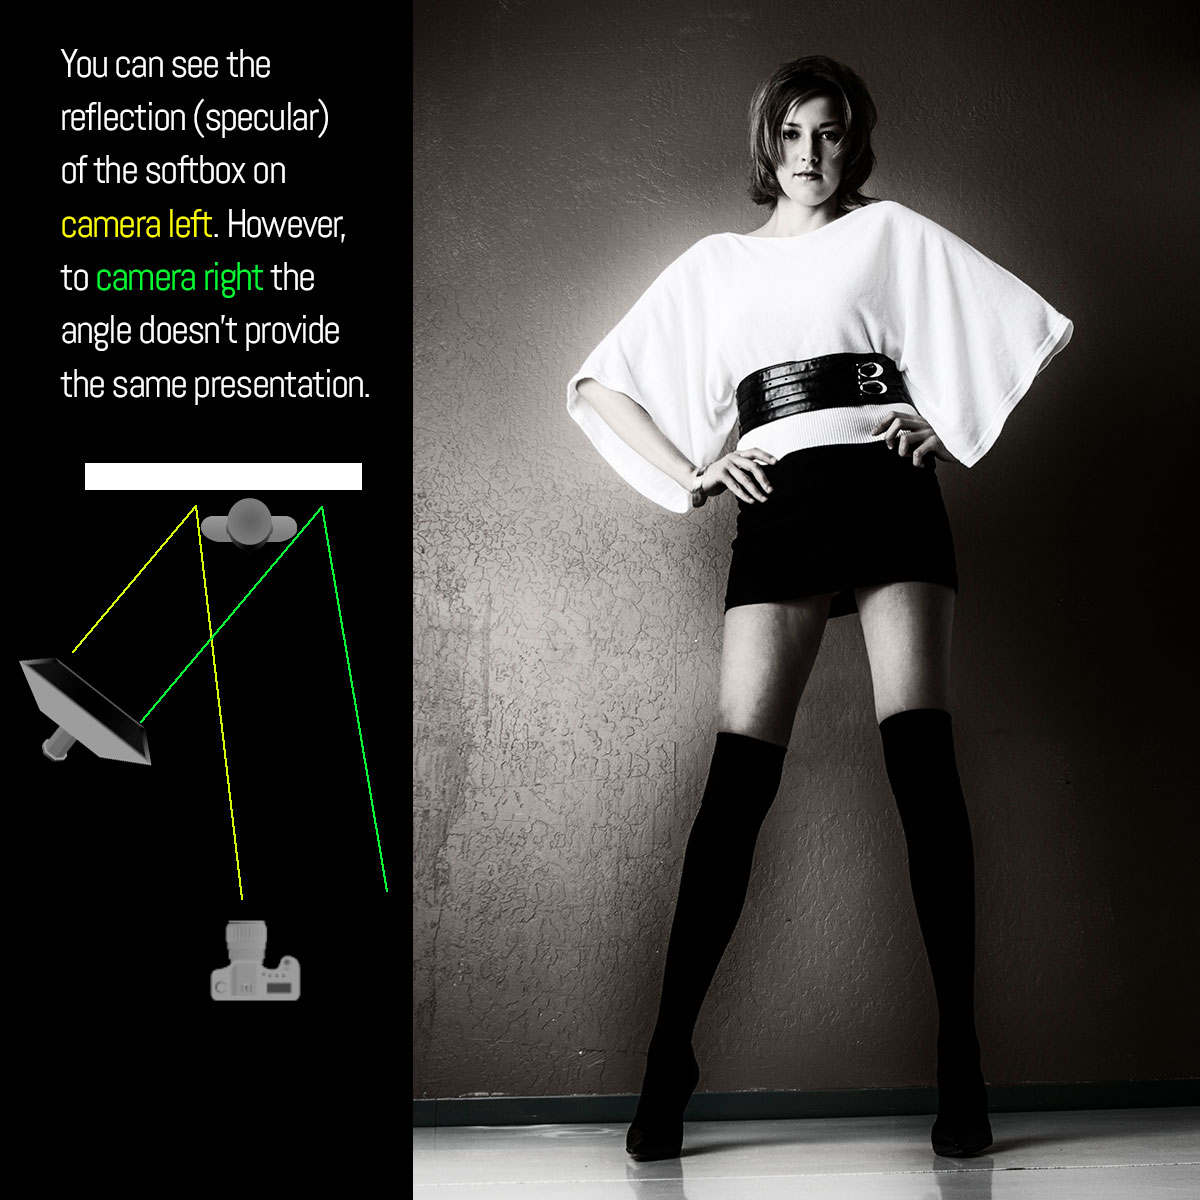
In the image below, I used a large softbox in order to get a shiny, reflective area off of the wall behind the subject and create a gradient to the background. You can see in the illustration that the angles of reflection come back to the camera on the left side of the model, but not on the right side of the model. The wall is a semi-gloss wall and provides a nice, soft reflection of the light source.
Let’s take a closer look at that triangle that is formed by the light to the subject, the subject to the camera, and the light to the camera.
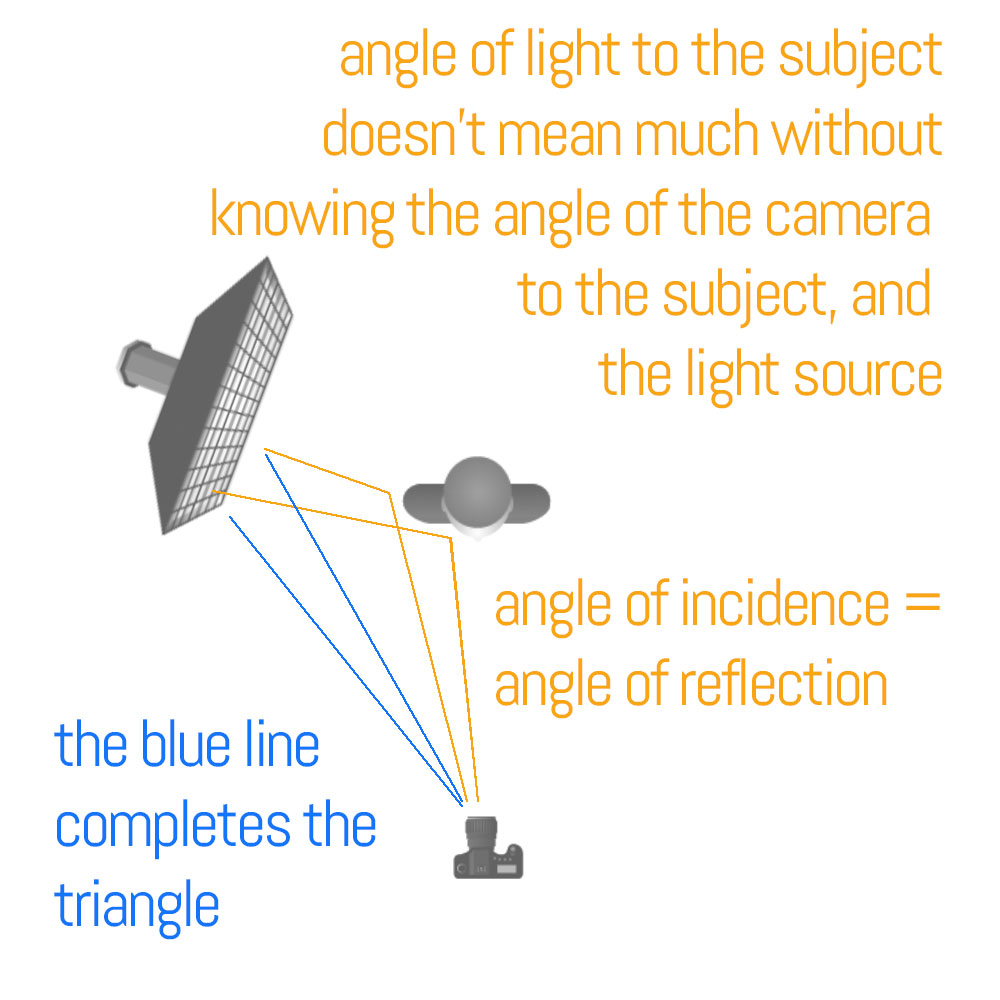
It is being able to see that triangle (shown above with the blue line) and to then visualize the presentation of the light that makes it easier to control. Once you begin to see those angles, and the way they will present back to the camera, lighting can become much more of a finessed technique rather than a flailing exercise.
Let’s talk about direction.
There are three major directions of light and one that doubles as a direction. I will explain.
This is front lighting. The light comes from the side of the camera, and it can be angled quite a bit (90 degrees). The presentation is full angle of incident / angle of reflection, and you can control that fall of incidence by where you place the camera in relationship to the light and to the subject angle.
Front light:
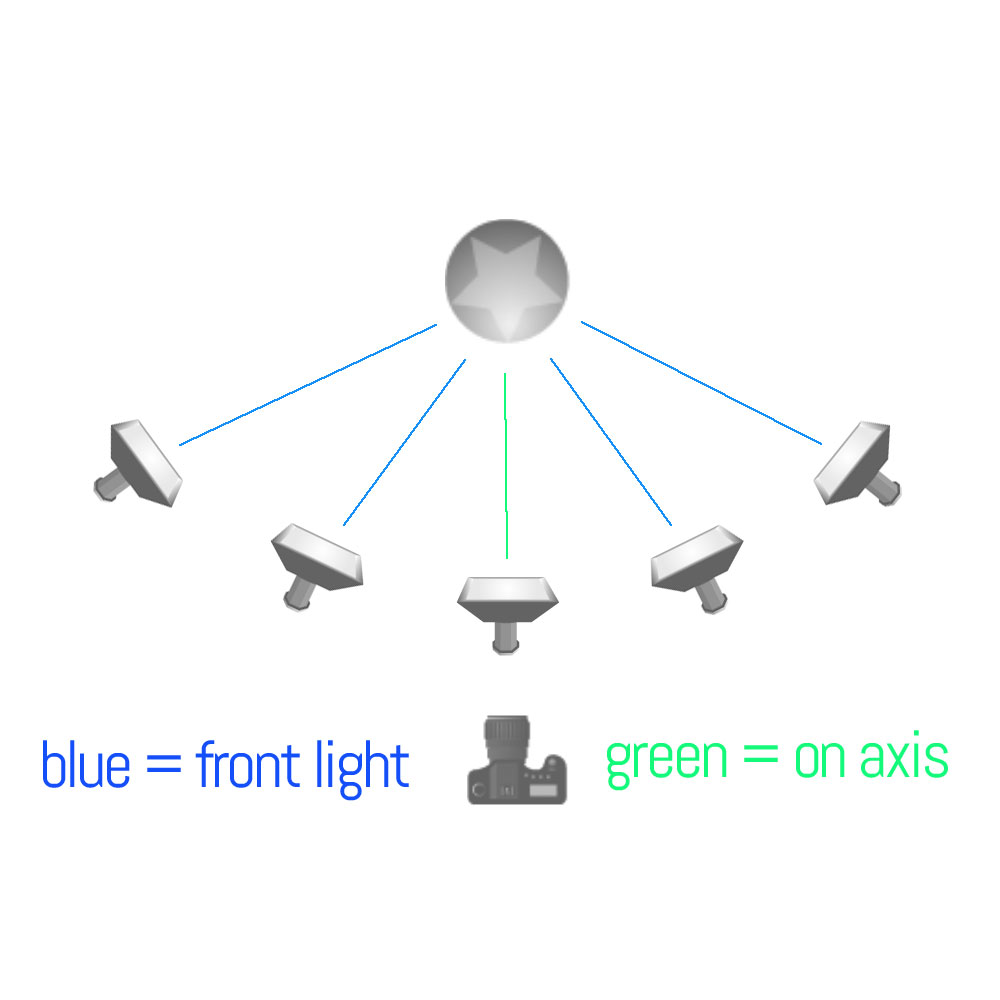
You can see that from right to left there is 180 degrees of placement that will allow you to have front light. There is one point in the middle, however, that is at the same angle as the camera. We call that “on-axis” lighting and is a favorite of beauty and fashion shooters.
On-axis lighting is from the position angle of the camera to the subject, not necessarily at the distance of the camera. That means there is no triangle (horizontally) from light to subject to camera. As you can imagine the reflection is straight back into the camera. A wide, soft light with few shadows.
In the diagram below we see side lighting and backlighting. Side lighting is as its name suggests, directly from the side of the subject creating a 90-degree angle to the camera angle.
When we move the lights farther back from sidelighting, we have backlight. Backlight has all the same angle variations as does the front lighting.
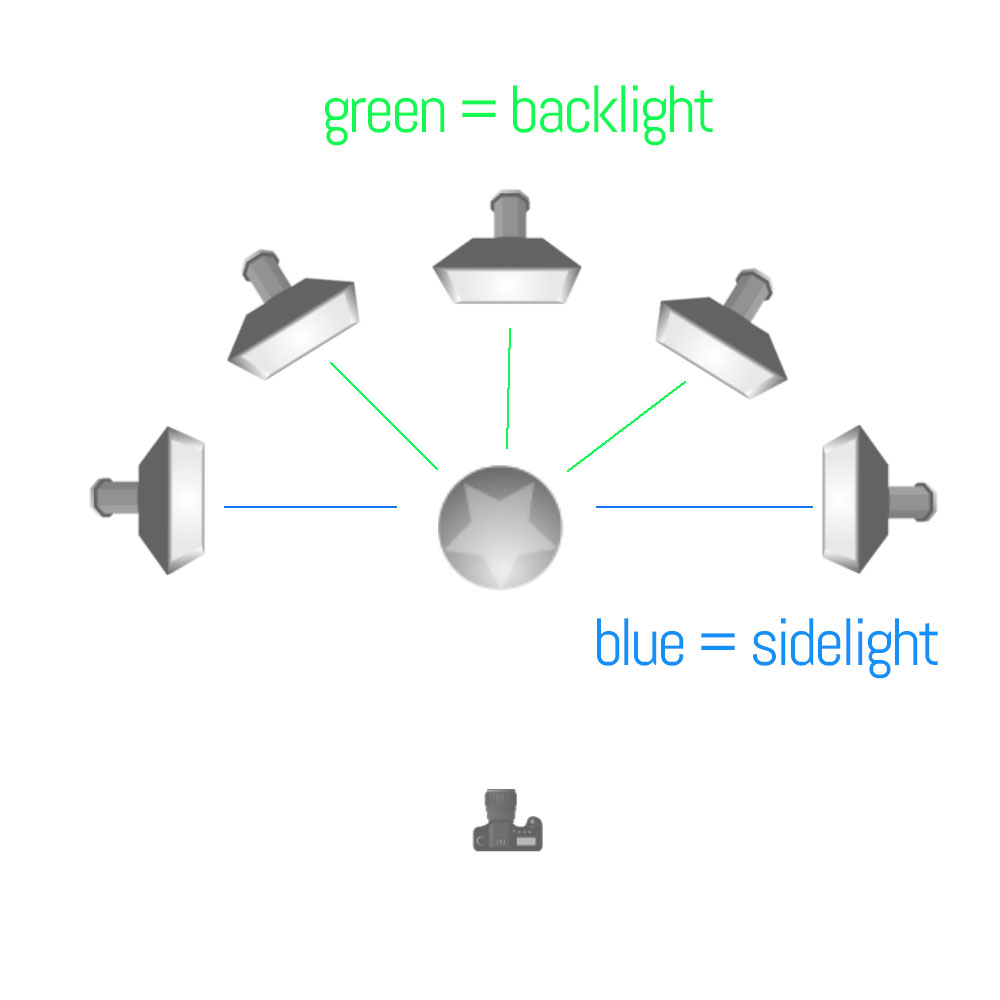
Top lighting from directly above is the same as side lighting if it is at a 90-degree angle to the subject/camera. If it is slightly in front it is front light, and slightly behind it is backlight.
Front Light One
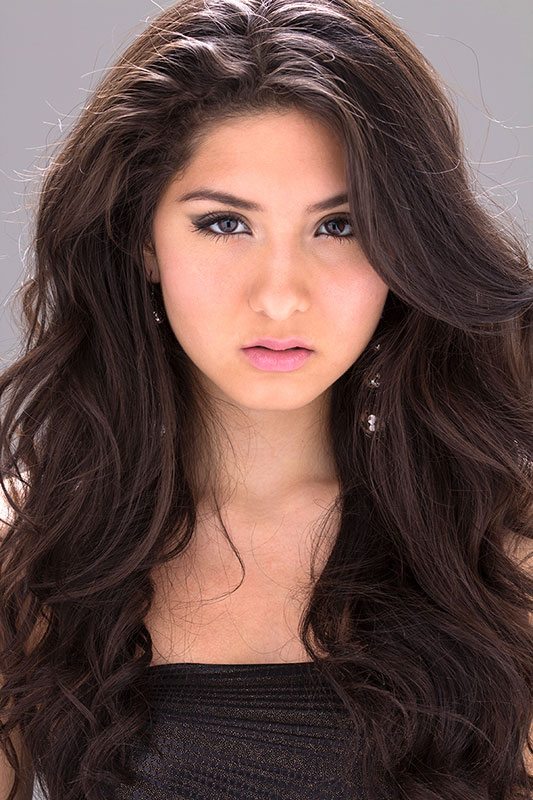
Front Light Two
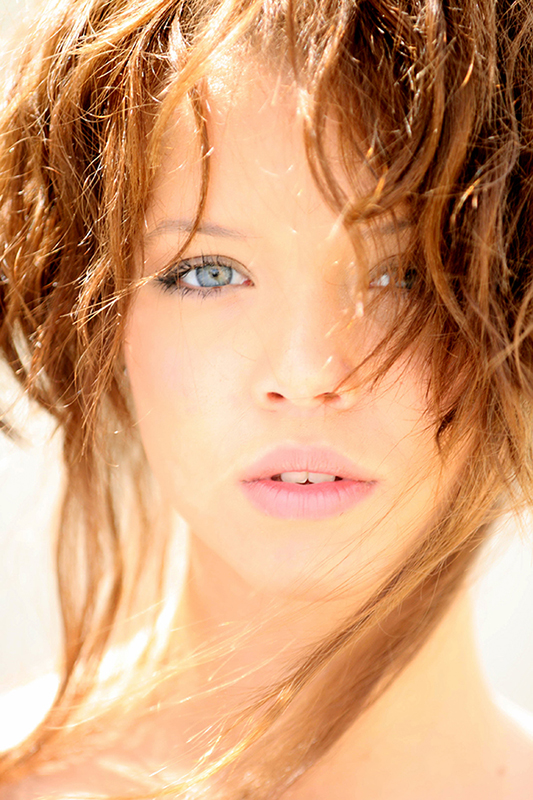
Side Light One
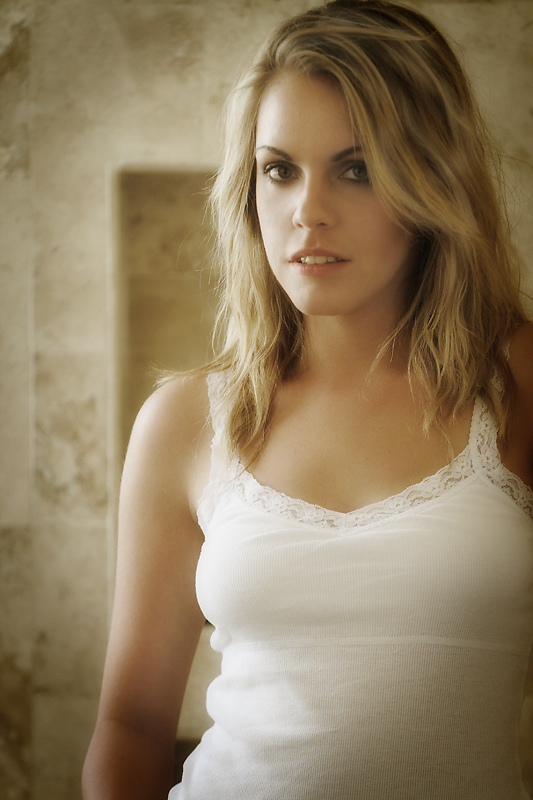
Side Light Two
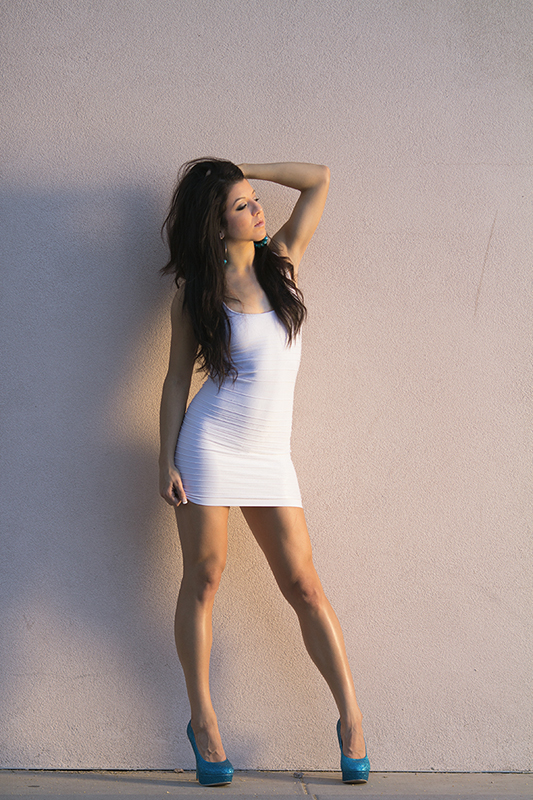
As you can see above, the angle of the light to the subject, and to the camera, makes a big difference when you are working toward making the shot look a specific way.
Let’s wrap it up:
The four different properties of lighting are:
- Size of the light source in relationship to the subject.
- Distance of the light source from the subject.
- Color of the light, and its relationship (if any) to the prevailing ambient.
- Angle of the light source to the subject, and to the camera.
And NONE of them are the most important – they are all equally important. We don’t think of them in an hierarchical way, we think of them in a holistic, symbiotic way. Change one, you may have to indeed change another. Change that one, and you may have to alter two others to make it work for you.
All of this only matters to you if you know what you want your image to look like. Do you want soft light, or do you want hard-edged light? Do you want a mixed light image that looks natural, or do you want to play with color temps in a creative way? If we move our light closer or farther away, what does that do to the look of the image? Do we need to bring out texture, or is a flatter look our goal?
These questions are usually not asked in order in our brains. All of them are asked at the same time, and we react to these creative decisions by utilizing the tools we have for creating them.
And now, with these basics, we can begin to create the images to present OUR vision of the subject in front of our lens.
ASSIGNMENTS:
- Find a subject that allows you to move around it and make images from all the different lighting positions. Do this either early in the morning or late in the afternoon so the sunlight is closer to your head height to the subject.Shoot front light, side light, back light, axis light. Study the images to see how the subject changes in the different lighting positions. Print the images and make notations on how it, and the background, look to you. What changes do you see?
- Using your flash or continuous lights, do the same thing with a subject inside. You can choose something as a still life, or – if you are a people shooter – grab a subject and start moving that light from on-axis to back.Note that when your light is backlight ONLY, the subject is quite dark, possibly even silhouette. You can adjust for that or not – your call. but remember that your adjustments will play the same role as the main light in the angle of light to subject to camera.
Hey Amazon… REALLY? Are You Kidding Me?
WHAT THE FUCK?. "On March 18, 2014 Amazon Technologies, Inc. (an operating subsidiary of Amazon.com, Inc.) obtained a United States Patent (8,676,045) for a “Studio Arrangement” and a “method of capturing images and/or video.” ibook-store-widgetMany photographers will...
My Favorite Film Cameras and Film Choices
We do so many cool things in P52 and this idea is one a lot of the photographers are picking up on. We are going to have a fun little 'assignment' to shoot 24 frames of film in May. Just 24... but we want all of them to be 'good shots'. What started as a one shot per...
“Air” by Meggan Joy Trobaugh
At the Project 52 2014 group, the assignment was "Air". There were many wonderful submissions. This one by Meggan Joy Trobaugh was exceptional I thought. She carefully planned out the work and made the elements for the final work with a previsualized image already in...
A Fall Workshop in the Canyons Announced
The workshop is a blast. We all pile into a large, comfortable van and head off to Northern Arizona. Our first night is in Flagstaff, then off to the reservation lands of the Navajo, Vermillion Cliffs, Marble Canyon, Kaibab Plateau and more. We spend an afternoon and...
“Black Angels” – An Assignment for a CD Cover
This week the Project 52 PROS for 2014 are working on an CD album cover for a faux assignment. The music is George Crumb's "Black Angels" for Electric String Quartet. It is very challenging music. The students for this morning's Friday class really knocked it out of...
A Life, A Lifetime, and a Tie
John Thomas Banta had over 200 ties. Most were bold, loud, occasionally whimsical and always hard-to-miss. In short, they were very much like him. He dressed for occasions, often wearing his wildly interesting ties. And he lit up the room with his presence. He was a...
Is Giving One’s Images Away for Free a Brilliant Marketing Move?
... or a very very bad idea? Trey Ratcliff (Lost in Customs) has always given his images away on the Non-Commercial Creative Commons License. What is new today is his link to grab ALL of his favorite 500 images for free and download them in full high res form. See...
“What Should Photographers Charge in 2014?” – A Discussion with Rosh Sillars
My bud Rosh Sillars' recent article on "What Should Photographers Charge in 2014?" really hit home with me and a lot of my Project 52 PRO's. Pricing and figuring out what to charge is always a very difficult part of starting a photo business, and Rosh takes a very...
Shooting a Beer with Rui Bandeira
We have so many talented people in the Project 52 PRO group. Meet Rui Bandeira. He shared this shot with my last night and I knew I had to share it with you all. Here is Rui: "Hi, I had 3 goals for this shot: 1) it had to be fresh and make the viewer desire to drink...
Photoshop Repair: Bri in the High Desert
I like to play around in Photoshop a lot, and when I do I am going to start sharing what I do with my Project 52 Pros. And anyone else who wants to know what I do. I am not putting myself out there as a Photoshop Guru by any stretch of the imagination. I am simply...
WHY I AM CHUCKING ALL MY GEAR AND RETURNING TO SAND PAINTING AS MY VISUAL MEDIUM.
I have always loved sand. When I was a kid I would play in it, except when mum let the cat play in it first, and then it smelled sort of like my little brother, but... I digress. Cameras are obsolete. We hear every day about this new gizmo and that new gizmo, and how...
Project 52 Summer Group Opens For Registration
More Information on this page.
Book Ideas: “What If…”
What if. What if you created a magazine instead of a book? Told a story or two in the magazine, showed a subject in depth, then printed 10 copies for influential art directors in your town and offered all who came to the site a PDF? (Blurb does magazines for as little...
ISLA: A New Book by Ernesto Bazan, Photographer
"No, I don’t [do assignments]. I stopped doing that, more or less, when I decided to become a teacher in 2002. Because of my workshops, I had to leave Cuba in 2006, which is ironic. I fund all my work thanks to the generosity of my students. This will be the third...
What Is The Biggest Problem with Your Photography?
The biggest problem may also be the one that most people focus on. No pun intended. "So let’s get the elephant out of the bag most of you keep it in and into the room where we can discuss it: most people are complaining about their cameras because otherwise they’d...
Photographs = Communication = New Creative
Photographs as communication. The new uses of photography continues to grow. "It’s not that my memory improved but, instead, that I started archiving these events and ideas with my phone, as photographs. Now, if I want to research the painter whose portraits I admired...
Omaha
I have been asked by Christopher Tierney to come out to Omaha for a workshop. I have not done workshops for a while, but I really like the midwest and look forward to spending some time there. REGISTRATION PAGE IS NOW READY. For more information, please click on the...
Documentary Photography with a Fresh Twist
PHOTOGRAPH BY MICHAEL DAVID FRIBERG Michael Friberg and Benjamin Rasmussen find a fresh way to explore the conflict in the Middle East. Part reportage, part editorial, they create a powerful new way of communication on a contemporary problem. “The way that we shoot...
The Last Project 52 Assignment for the 2013 Group
"Cooking With Chili" is the name of the faux cookbook. The assignment was to shoot to the layout. The students did a magnificent job with this, and I want to share the work with you all. You can see the layout, and it was provided as a layered PSD file to the...
Irene Liebler’s “Cooking With Chili” BTS Work
Irene Liebler is a photographer/designer in Connecticut. She is also a Project 52 member and has developed quite a unique style. This is a recent image for an assignment on P52, a "Cooking With Chilis" Cookbook Cover, shot to layout. In this post, she walks you...
Art And Its Detractors
"How has your art been received in your community? Do you have any detractors?" "Oh, yeah. That comes up all the time. If you really, really commit to something, someone will hate you for it. And that’s ok. But the further you pursue your art, and the more you come to...
“NO” versus “YES” – Which Got The Most Response?
On the previous post I mentioned, almost in passing, how negative articles and stories are more highly engaged than are positive ones. A few minutes later, this catches my attention: Just Say NO "So, one answer to my student’s rhetorical question is “Just say NO.” As...
On Change Changing What was Changed…
... or something. My friend Jan Klier (NYC) and I were discussing the recent Getty move to grant access to millions of images for only a byline. He feels it is a good move for photographers, and while I am still somewhat ambivalent we both agree that the worst thing...
Chocolate: Two Shots
Photographer David Price shows us two ways to light chocolate. In the first shot, he is using a very large light source. The source is above and behind the chocolate, and that masks the individual color of the items. This is because the specular - the reflected light...