
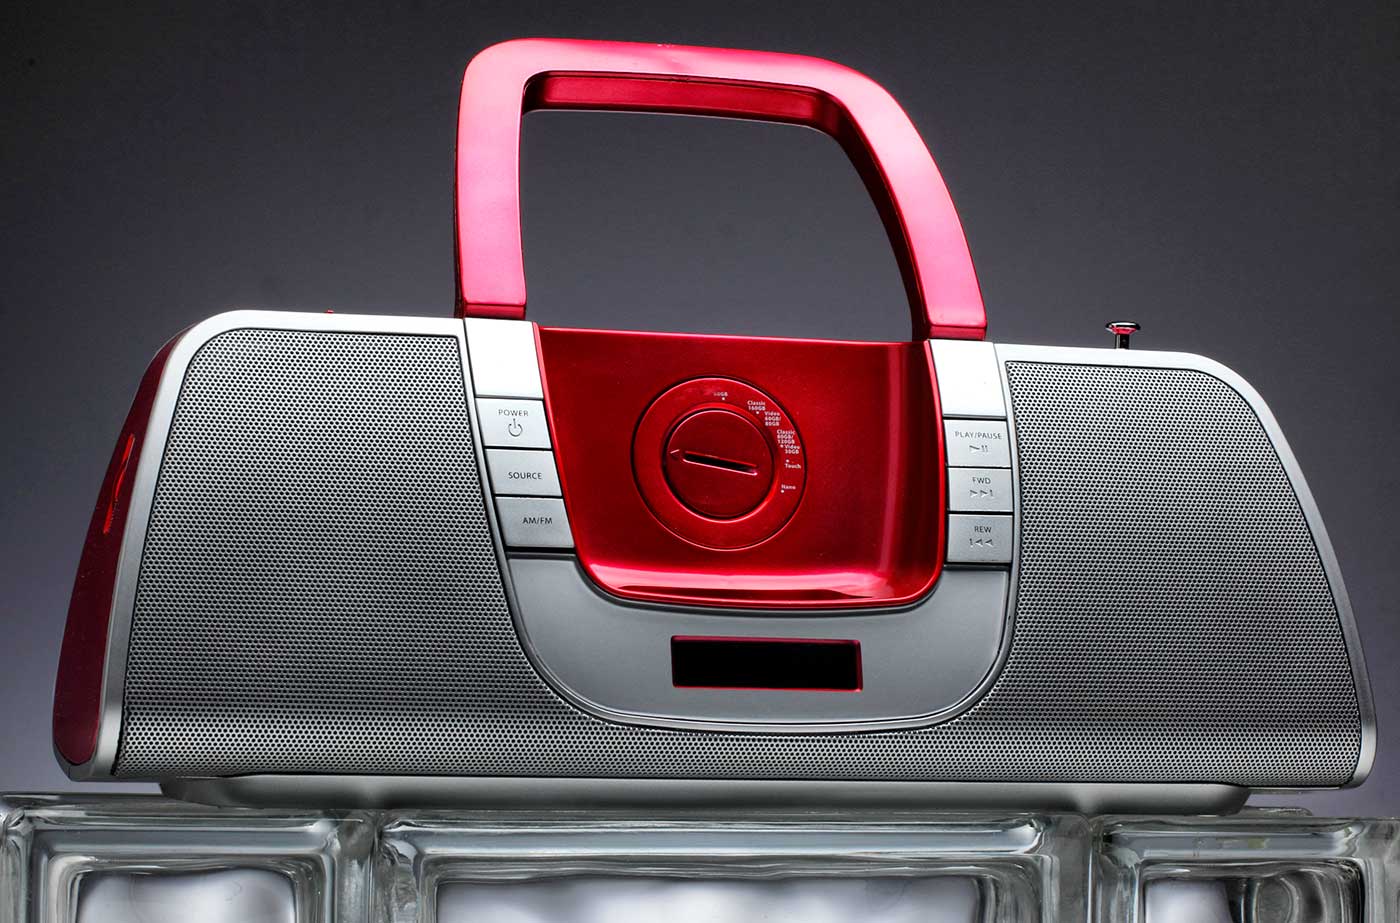
Lighting Principle Number Four: The Angle of the Light to the Subject and the Camera
Law of Physics: Angle of Incidence equals the Angle of Reflection.
This is an axiom that a lot of people hear and repeat without taking careful note of what it means to their photography.
And yet it is one of the most basic and important physical rules of subject centric lighting.
What does it mean and how can we use this to our advantage?
It means that if the light is angled toward a subject, the reflection of that light will be presented back to the camera at the same angle.
Think of the game of billiards or pool. If you hit a ball into the wall at a 30% angle, the ball will come off that wall at a 30% angle. And that completes a triangle. Understanding that triangle is key to making quicker, smarter lighting decisions.
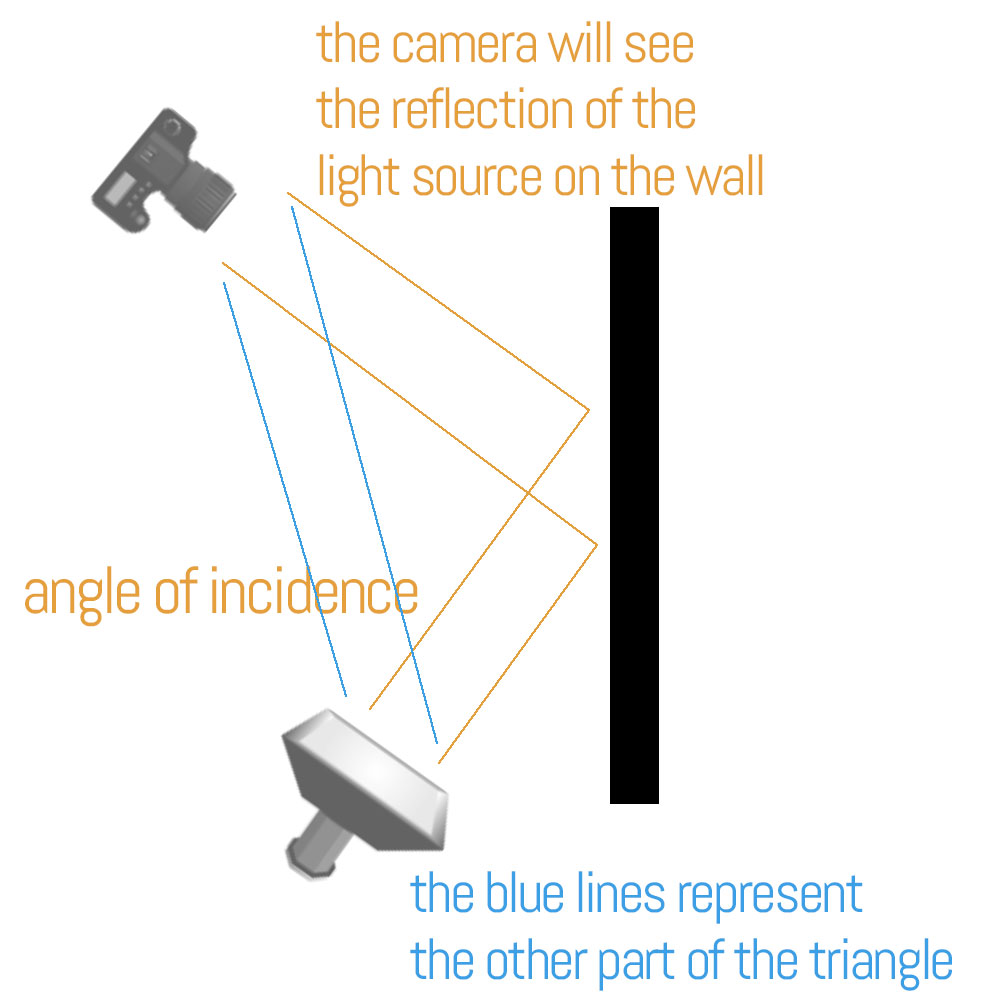
It means that you have to be able to judge the angle of the light as it strikes the subject and understand what that light will do once it strikes the subject. If there is something being reflected in your subject, look at the camera angle from the other side and you will find what it is.
EVERYTHING REFLECTS. EVERYTHING.
Some things reflect more than others, but everything you see is simply the reflection of the light from its surface.
I call it ‘presentation’, and when I discuss lighting, I use the word presentation to talk about how the light looks to the viewer.
Once we realize that the angle of the light source to the subject, and the incident angle of that light source to the subject is going to present to us in ways we can control, lighting becomes so much easier to create.
Think of the way the light strikes hair on a slightly backlit portrait. The reason the hair becomes so much brighter is because it is round in shape, and somewhere on that round, shiny hair is going to be that same angle of incidence that the camera is seeing.
An example.
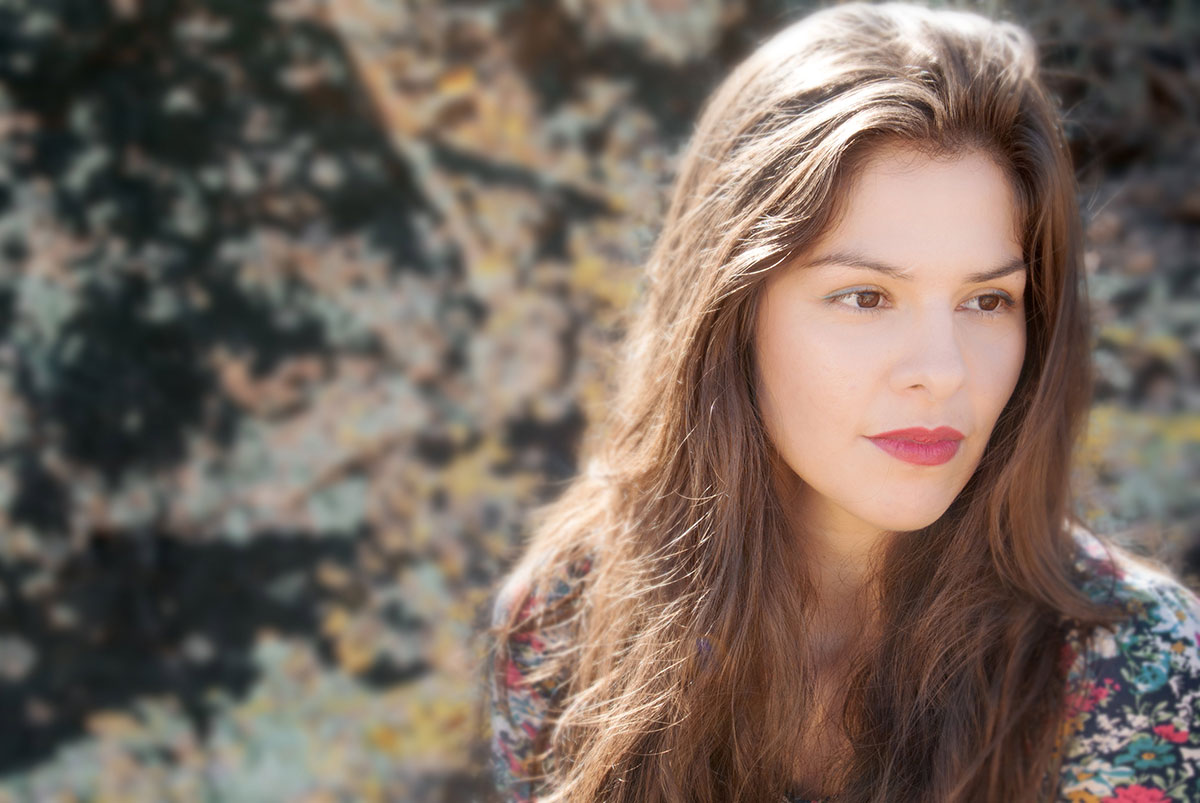
You can see how bright that hair is with the sun shining on it, and each tiny hair reflecting that sun back to the camera.
In the image below, I used a large softbox in order to get a shiny, reflective area off of the wall behind the subject and create a gradient to the background. You can see in the illustration that the angles of reflection come back to the camera on the left side of the model, but not on the right side of the model. The wall is a semi-gloss wall and provides a nice, soft reflection of the light source.
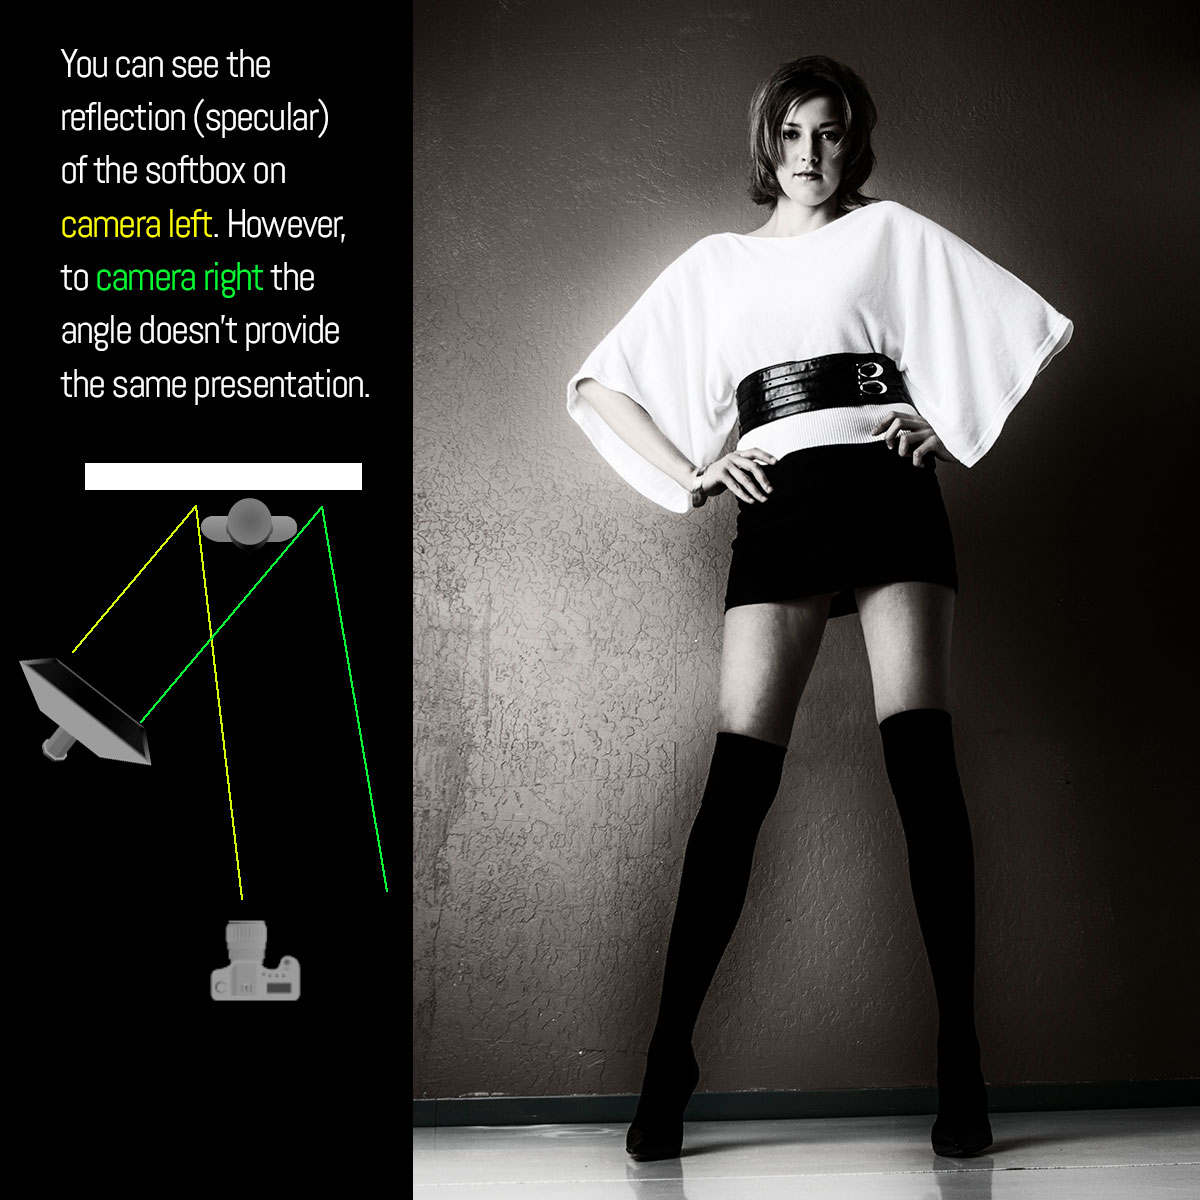
Let’s take a closer look at that triangle that is formed by the light to the subject, the subject to the camera, and the light to the camera.
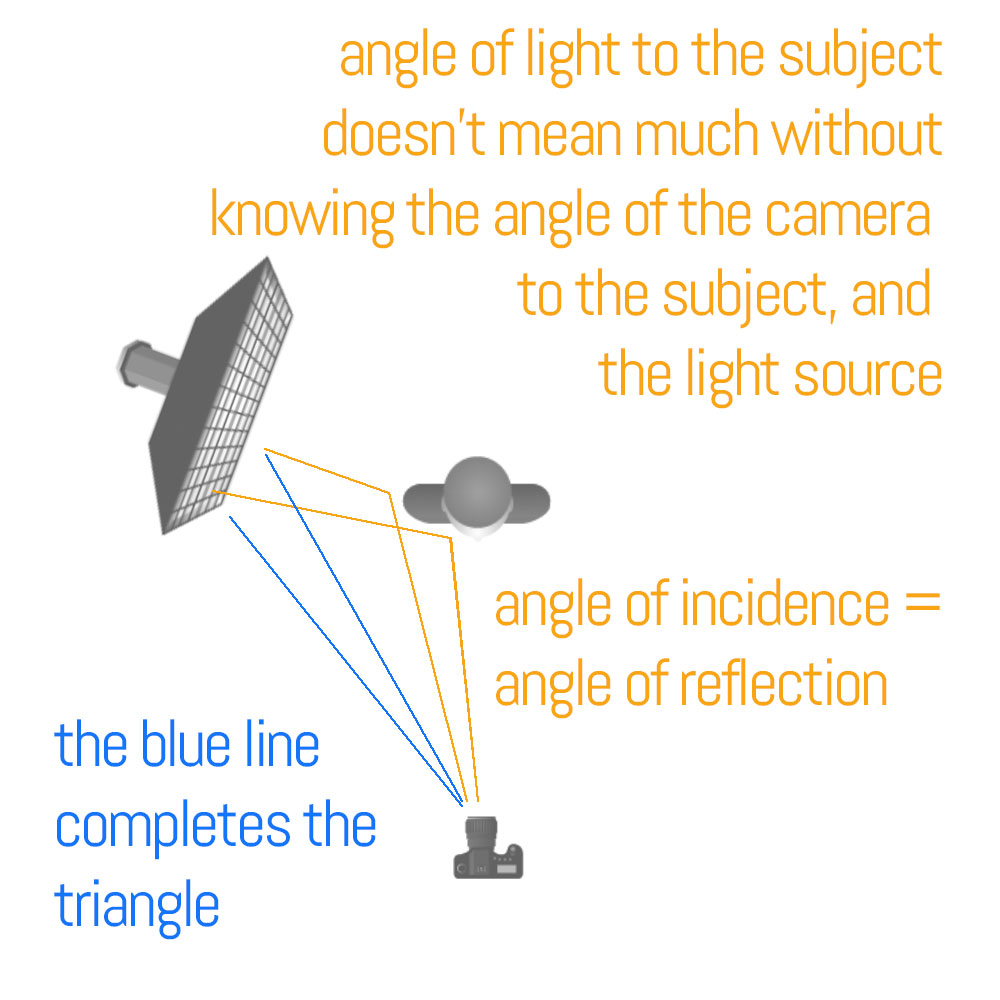
It is being able to see that triangle (shown above with the blue line) and to then visualize the presentation of the light that makes it easier to control. Once you begin to see those angles, and the way they will present back to the camera, lighting can become much more of a finessed technique rather than a flailing exercise.
Let’s talk about direction.
There are three major directions of light and one that doubles as a direction. I will explain.
This is front lighting. The light comes from the side of the camera, and it can be angled quite a bit (90 degrees). The presentation is full angle of incident / angle of reflection, and you can control that fall of incidence by where you place the camera in relationship to the light and to the subject angle.
Front light:
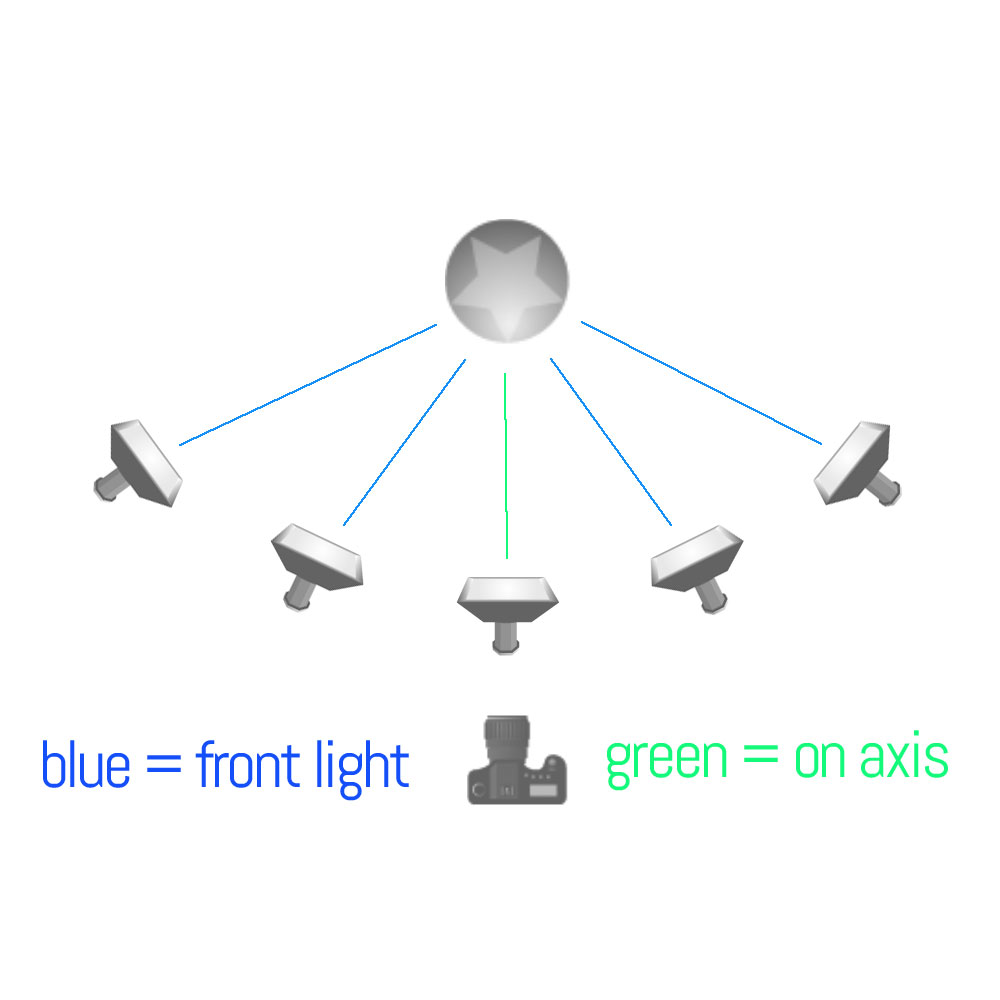
You can see that from right to left there is 180 degrees of placement that will allow you to have front light. There is one point in the middle, however, that is at the same angle as the camera. We call that “on-axis” lighting and is a favorite of beauty and fashion shooters.
On-axis lighting is from the position angle of the camera to the subject, not necessarily at the distance of the camera. That means there is no triangle (horizontally) from light to subject to camera. As you can imagine the reflection is straight back into the camera. A wide, soft light with few shadows.
In the diagram below we see side lighting and backlighting. Side lighting is as its name suggests, directly from the side of the subject creating a 90-degree angle to the camera angle.
When we move the lights farther back from sidelighting, we have backlight. Backlight has all the same angle variations as does the front lighting.
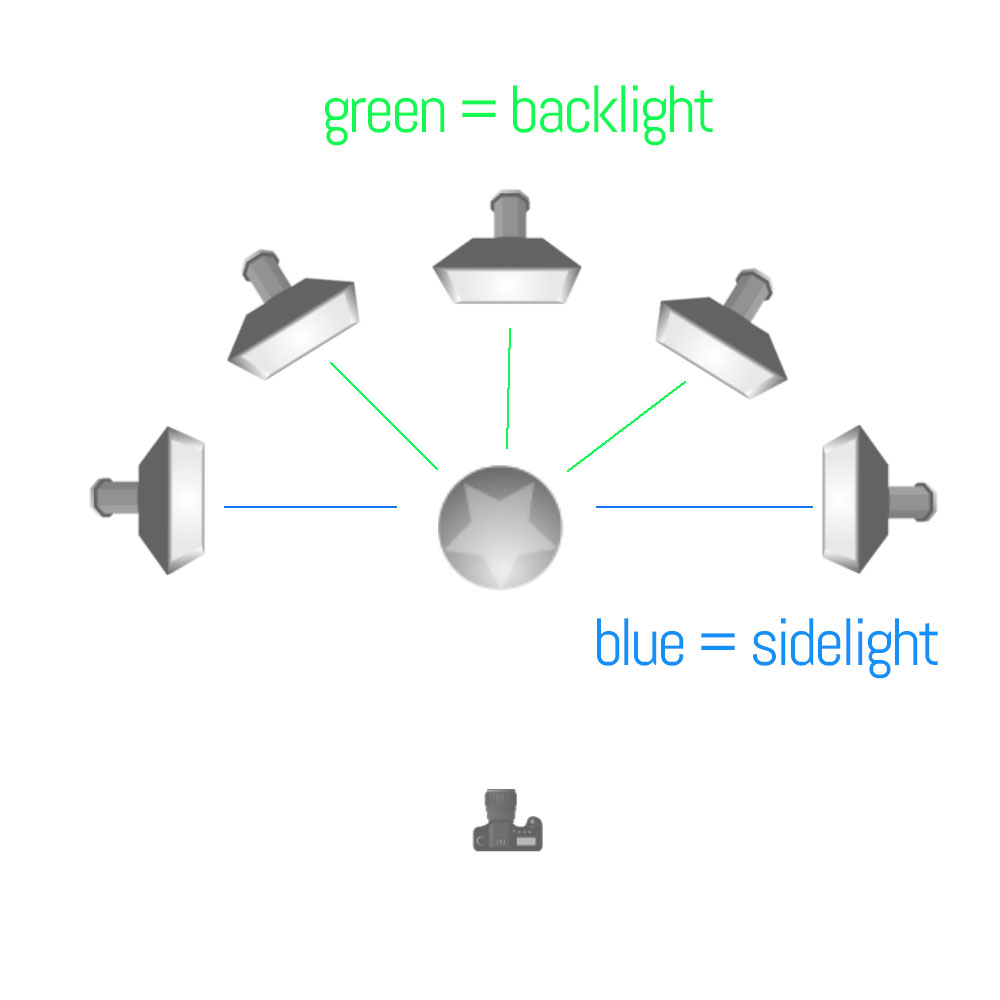
Top lighting from directly above is the same as side lighting if it is at a 90-degree angle to the subject/camera. If it is slightly in front it is front light, and slightly behind it is backlight.
Front Light One
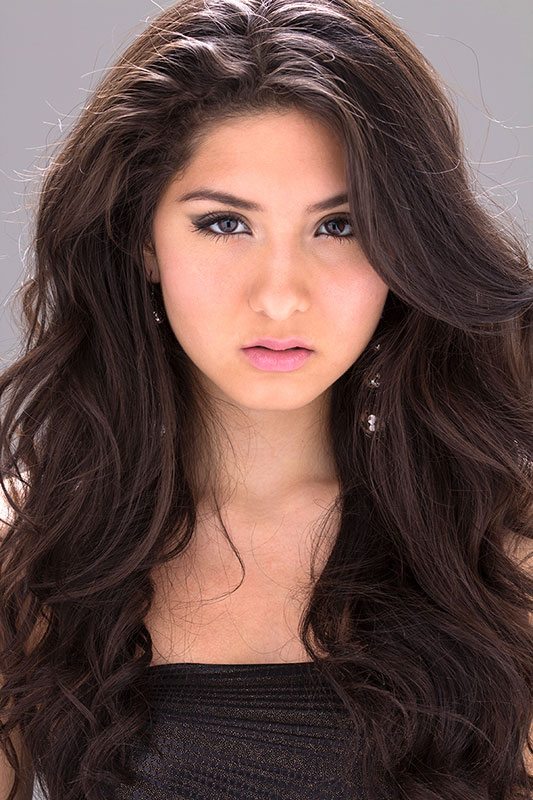
Front Light Two
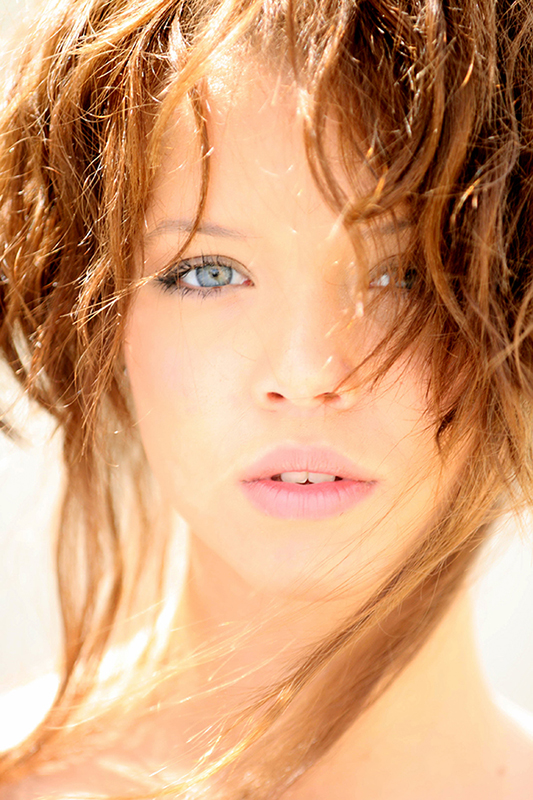
Side Light One
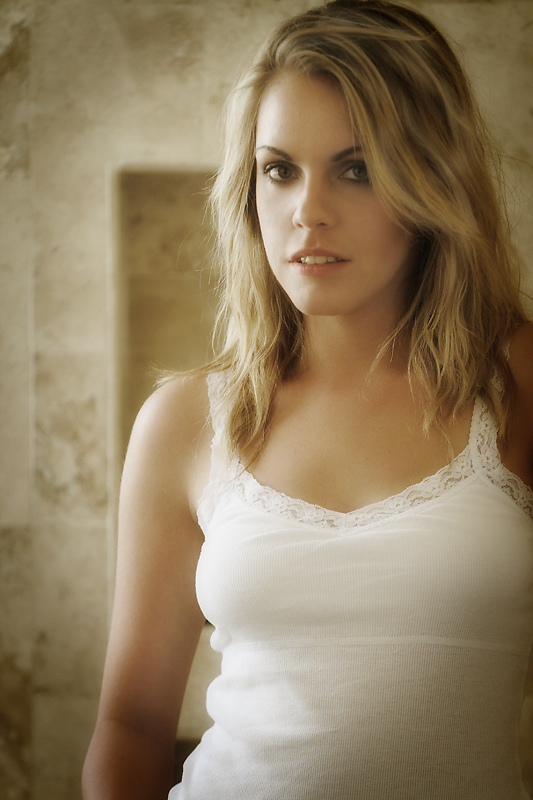
Side Light Two
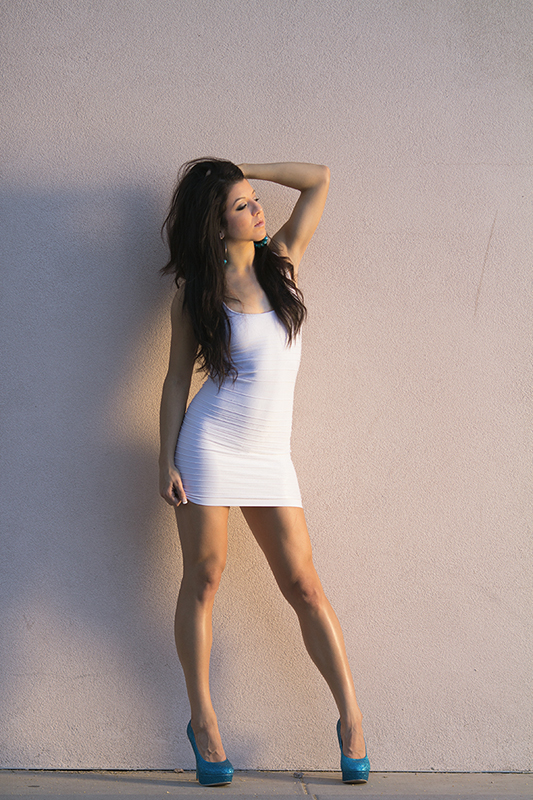
As you can see above, the angle of the light to the subject, and to the camera, makes a big difference when you are working toward making the shot look a specific way.
Let’s wrap it up:
The four different properties of lighting are:
- Size of the light source in relationship to the subject.
- Distance of the light source from the subject.
- Color of the light, and its relationship (if any) to the prevailing ambient.
- Angle of the light source to the subject, and to the camera.
And NONE of them are the most important – they are all equally important. We don’t think of them in an hierarchical way, we think of them in a holistic, symbiotic way. Change one, you may have to indeed change another. Change that one, and you may have to alter two others to make it work for you.
All of this only matters to you if you know what you want your image to look like. Do you want soft light, or do you want hard-edged light? Do you want a mixed light image that looks natural, or do you want to play with color temps in a creative way? If we move our light closer or farther away, what does that do to the look of the image? Do we need to bring out texture, or is a flatter look our goal?
These questions are usually not asked in order in our brains. All of them are asked at the same time, and we react to these creative decisions by utilizing the tools we have for creating them.
And now, with these basics, we can begin to create the images to present OUR vision of the subject in front of our lens.
ASSIGNMENTS:
- Find a subject that allows you to move around it and make images from all the different lighting positions. Do this either early in the morning or late in the afternoon so the sunlight is closer to your head height to the subject.Shoot front light, side light, back light, axis light. Study the images to see how the subject changes in the different lighting positions. Print the images and make notations on how it, and the background, look to you. What changes do you see?
- Using your flash or continuous lights, do the same thing with a subject inside. You can choose something as a still life, or – if you are a people shooter – grab a subject and start moving that light from on-axis to back.Note that when your light is backlight ONLY, the subject is quite dark, possibly even silhouette. You can adjust for that or not – your call. but remember that your adjustments will play the same role as the main light in the angle of light to subject to camera.
One Red Balloon… a Challenge
A recent assignment in my 2014 Project 52 group was to shoot one red balloon... but to stay away from cliche's as much as possible, while definitely creating an interesting photograph in which one red balloon features prominently. The students wee wonderful. Here are...
John Sharpe, Photographer: Calgary, Alberta
Meet John Sharpe, a commercial photographer in Calgary, Alberta. The great frozen north (at least in winter) has many roads to artistic and business success. John has been a photographer for 25 years and has shot for local, regional and national clients. I thought...
What Do You Charge For… (Part Two)
Part Two of our Thinking about our rates post. (Part One) Understanding what we are worth, and how to construct a pricing structure that we feel good about is quite challenging for many of us. But it is a necessary challenge for us to overcome - see previous...
Irene Liebler is Giving Her Book Away…
Project 52 Alum, and incredibly talented photographer Irene Liebler is giving her book away... and you can snag a copy of it. Head on over to her site and download some amazing photography.
Michael Clark’s 2014 Summer Magazine
I love these photographers magazines. From Michael: "This issue includes an editorial about why there was no Spring 2014 Newsletter, a review of the SmallHD DP4-EVF external video monitor, an article my recent expedition in the Amazon with the CauseCentric Production...
Bret Doss: “Fashionista”
My bud Bret Doss turned in a wonderful editorial assignment for "Viva Fashionistas", a Seattle fashion magazine. I want to have Bret on for an interview soon. See more about his shoot at his blog. "Hard to Call It Work" has links to more of his fashion work as...
“What do you charge for…”
Five scary words to a lot of photographers. There is so much of US wrapped into those five words. I think they may be the scariest words we self employed folks ever hear. Although it is exactly what we want to hear… someone wants to hire us. All that marketing paid...
Meet Josh Ross: Product Photographer, Portland, OR
I met Josh several years ago on the stobist forum. We have stayed in touch and I am knocked out by his wonderful still life and product work. I asked Josh to speak about his photography, and we chatted for an hour. Josh walks us through his transition from LA to...
Knowing Your Subjects Well
One of the most important considerations of a photographers work is the subject matter they choose to make photographs. Sounds almost simplistic, doesn’t it? But there is a great deal of thought that goes into this part of what we do. If we have chosen subject matter...
Just an Idea
Getting some pushback. Maybe need more messaging work.
ReBranding With Photography
This was an interesting week. An old friend and colleague reached out to renew a friendship and to discuss some epiphanies she had recently experienced. Lunch was near my studio and it was with a bit of trepidation that I had agreed. While I think the world of this...
Going Back in Time
The great shooters of Project 52 Pros, 2014 just completed an assignment I would like to share. The work was to be shot in a style or period and be as faithful as possible in presentation. The reason for the shoot was to introduce them to the special difficulties of...
Big Ambitions? Where Do We Start?
I want to ride a bike across the country. I want to hike the Pacific Crest Trail. I want to photograph the heartland… from an old Indian motorcycle… with a view camera. I want to do a photo story on Ecuador and Peru and the percussionists of South America. I want to...
“What is Wet?” – Project 52 Assignment
Some beautiful work from the Project 52 assignment on 'wet'. From the assignment: WET… Shiny, smooth, liquid… wet is – well, wet. And we have to show “Wet” in a photograph. For a client who wants to keep things dry. You can approach this one in three ways: You can...

An Easy Set Up For Still Life: with Virginia Smith
I needed a quick and easy set up for the small jobs I so here and there. Branding samples, food photography, accessories for the styling that I do on the side. I love window light, shadows and color so this is my easy set up for my style. The elements are: * a...
Black Angels: with Clare Bambers
Clare Bambers Photography.
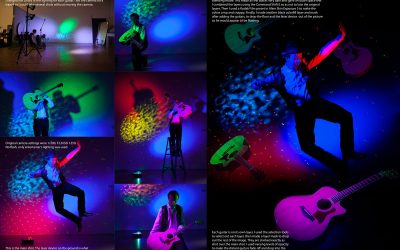
Composite Image with Catherine Vibert
Photoshop file in layers for you to see: Composite_Vibert_Photoshop File.psd Catherine Vibert / Website
The “Test Shot” with Stephen Collins
Objective: Shoot rare military memorabilia (medals, daggers, insignias, etc.) for inclusion in to an auction catalog and online viewing portal. Images must be large (3000-4000px, .tiff), with no specular reflection, especially the dagger blades (ornate etchings), yet...
“Work The Scene” with Rasmus Hald
Work the scene. Rasmus Hald One of the things that separate a good photo from a great photo is often planning, patience and how we work the scene. In July 2012 I was in Italy on vacation, driving around Tuscany in an RV and we went to Florence for a couple of days. I...
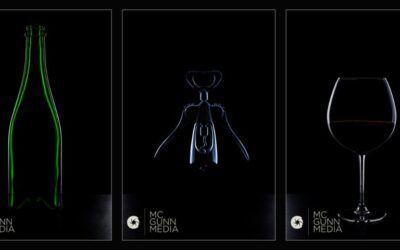
Dark Field Lighting: With McGunn Media
DARK FIELD LIGHTING: A PRIMER Anna and Filipe walk you through the making of these shots. They have a full course on shooting table top and still life work at Udemy. See more of McGunn Media's work at their website.
A Food Shot for a Blog: Daniel Fenwick
Reno Photographer Daniel Fenwick walks us through a simple, but well crafted food shot for his blog. Daniel Fenwick / website / Food Blog MANY OF THE TUTORIALS DURING "SUMMER SCHOOL" ARE BY PROJECT 52 PRO MEMBERS EITHER CURRENTLY ENROLLED OR ALUMNI.
An Interesting Negotiating Tactic
... and it is true. Names have been changed a bit to keep client/photographer privacy. I had lunch with a photographer today. We had met to go over plans for a big project and chose "The Vig" for delicious sandwiches and salads. What has that to do with the story?...
One Umbrella on Location
I am a Photoshop guy who is finding a lot of love in Lightroom. I would say that about 80% of my work goes from LR (or CR) into Photoshop for finishing. But the other 20% is done totally in Lightroom. Briana and I did this shoot last year for some new portfolio...
A Simple Tool for Shooting to Layout
Sometimes we have to shoot to specific layouts or dimensions. Here is a very simple tool for working with layouts that may not be typical. I use cardboard stock for making these little screens. And as I note on the video, I always give the shot a little breathing...