
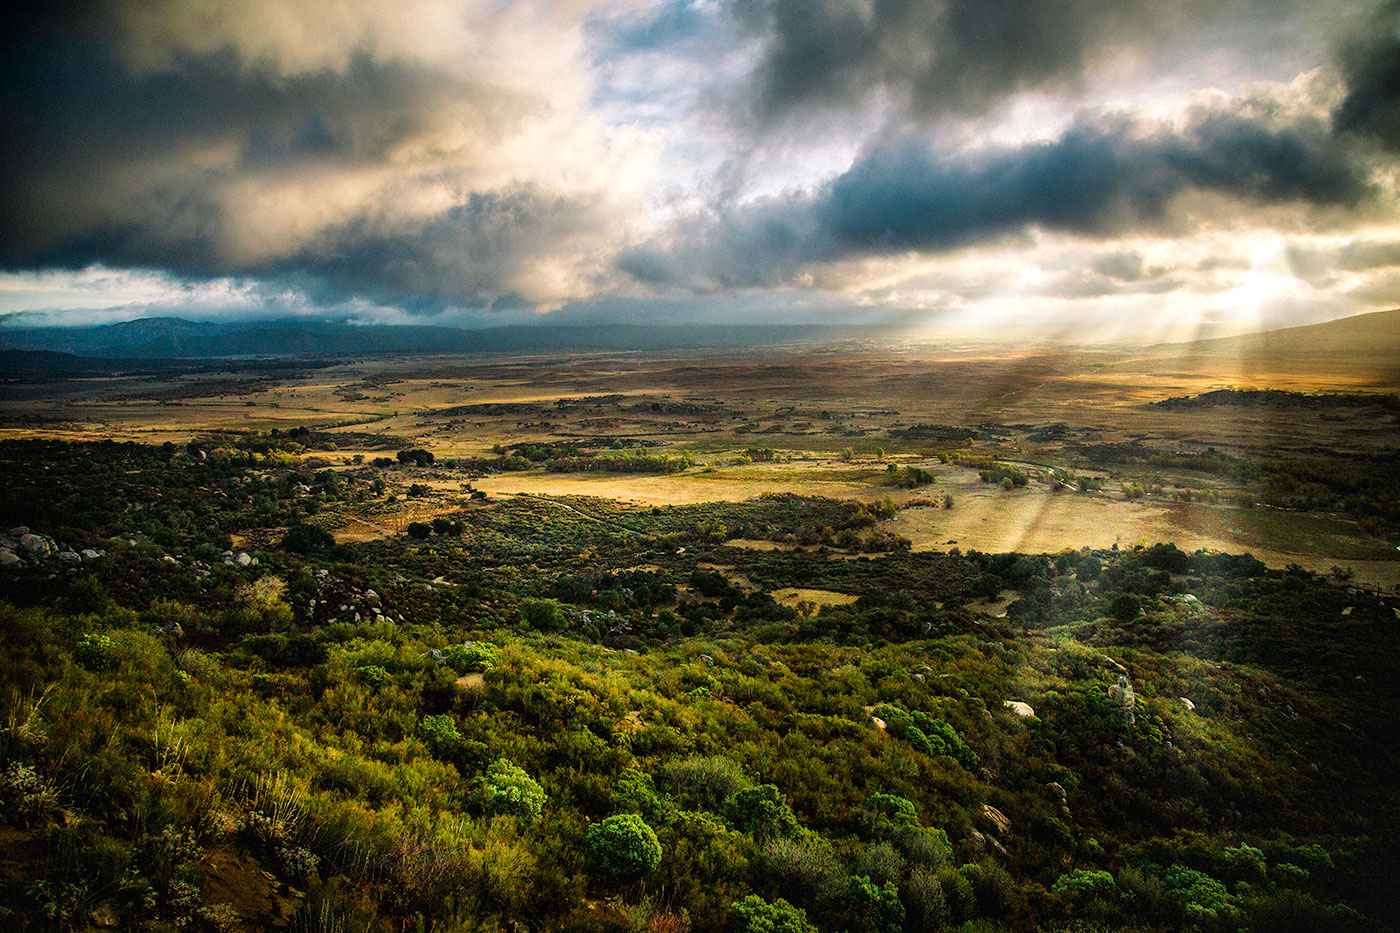
DISTANCE OF THE LIGHT SOURCE FROM THE SUBJECT
The second principle of light is the distance of the light source from the subject.
One thing for sure, if it is artificial light, the distance of the light source from the subject can change the size relationship, but there are other things that happen as well.
With artificial lights, one of the most important rules is The Inverse Square Law.
And it can be kinda scary that one. First, it’s a law. That seems pretty definite. And of course it has something to do with math – ‘squared[. But the word INVERSE? What the heck is that?
Let’s not sweat that right at the moment.
Let’s just acknowledge it for what it means to us.
Essentially, the Inverse Square Law (ISL) means that the farther the light is from the subject, the less bright it will appear. We know that, right. The closer we get to a light source, the brighter the reflectance of that source from whatever we are bringing close to the light.
Say you are in a very dark room, and there is only one small light in the corner. You are desperately trying to read the calory count on your small bag of Cheetos but it is way too dark where you are. Well – simple, we take the Cheetos bag over to the light and as we get close to the light, we can instantly read that we are never allowed to eat Cheetos again.
Now that is way too simple for any rule, or LAW, especially one that concerns math and something called Inverse.
The ISL is a way of measuring that light fall off and it shows us that there is actually a formula to how much that light falls off. Formulas are great. They are like systems. We can use them over and over to achieve the results we need.
This formula is way simpler than the name implies:
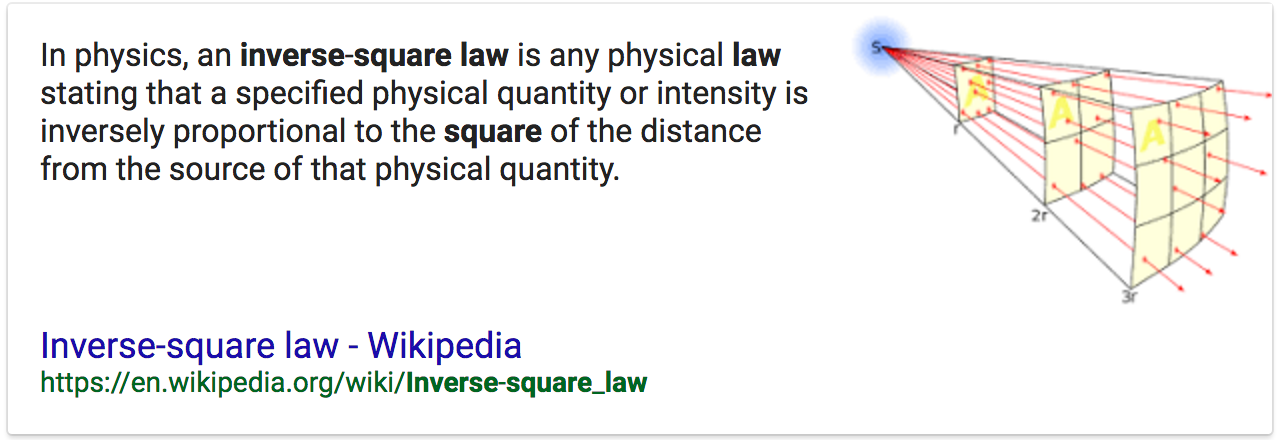
As you can see in the illustration above, at twice the distance the light has to cover four times as much space making it four times less powerful.
Four times less = 2 stops less in f-stops.
So if the light was f-8 on your subject at 4 feet, and you moved the light back to 8 feet, the amount of light on the subject would now equal f-4. If you started at f-4 at 8 ft and moved the light in to 4 ft it would be f-8.
What if instead of moving the light from 8 ft to 4 ft you decided to move it in 6 ft? Well, that would be half way between f-8 and f-4… f-5.6.
Now look at what happens when we apply the rule to a set of distances.
THE IMPORTANCE OF KNOWING RECIPROCALS
A reciprocal is simply understanding the relationships between all the numbers we throw around in photography.
F-stops, shutter speeds, ISO – all work hand in hand with each other to make the image with correct (for you) exposure. Changing any one of these three will necessitate a change in one of the others to compensate.
Let’s look at ISO:
f-4 / 1/125 @ ISO 100
If we change that to ISO 200 one of those above will have to change. Either the f-stop or the shutter speed. Since the ISO is now one stop more powerful, we either have to change to f-5.6 or change the shutter speed to 1/250. Both of these changes have the affect of decreasing the exposure setting one stop due to increasing the ISO by one stop.
Simply knowing the basics of one set will make it easy for you to re-configure for a new set.
I use ISO as my constant. In this case, I will use the settings of Sunny 16 (f-16 at 1/ISO).
ISO is 100 for these reciprocals.
f-16 @ 1/100
f-11 @ 1/200
f-8 @ 1/400
f-5.6 @ 1/800
f-4 @ 1/1600
f-2.8 @ 1/3200
These are committed to rote memory.
Changing the ISO compels me to make associated changes in these figures. If the ISO goes faster, I simply change the f-stop OR shutter speed to correlate to the amount of change in ISO. If the changes go out of the range of my camera, I will change one first, then catch up the other.
Example:
The light is getting a bit low, and I want to shoot with a shutter speed that allows me to hold the camera still. I take a meter reading and find that at ISO 100, my exposure for that shot is f-4 @ 1/15. Well, that aint’a gonna work for me handheld.
So first I decide that f-4 should be f-5.6 because of some Depth of Field issues (which moves the shutter speed down to 1/8), so that means I will have to move the ISO one stop for that aperture change to:
f-4 / ISO 100 @ 1/15 to f5.6 / ISO 100 @ 1/8 (reciprocal, one less stop in shutter speed to correlate with additional stop in aperture.
f-5.6 / ISO 200 @ 1/15
f-5.6 / ISO 400 @ 1/30
f-5.6 / ISO 800 @ 1/60
Learn your reciprocals for faster and more accurate decisions in the field.
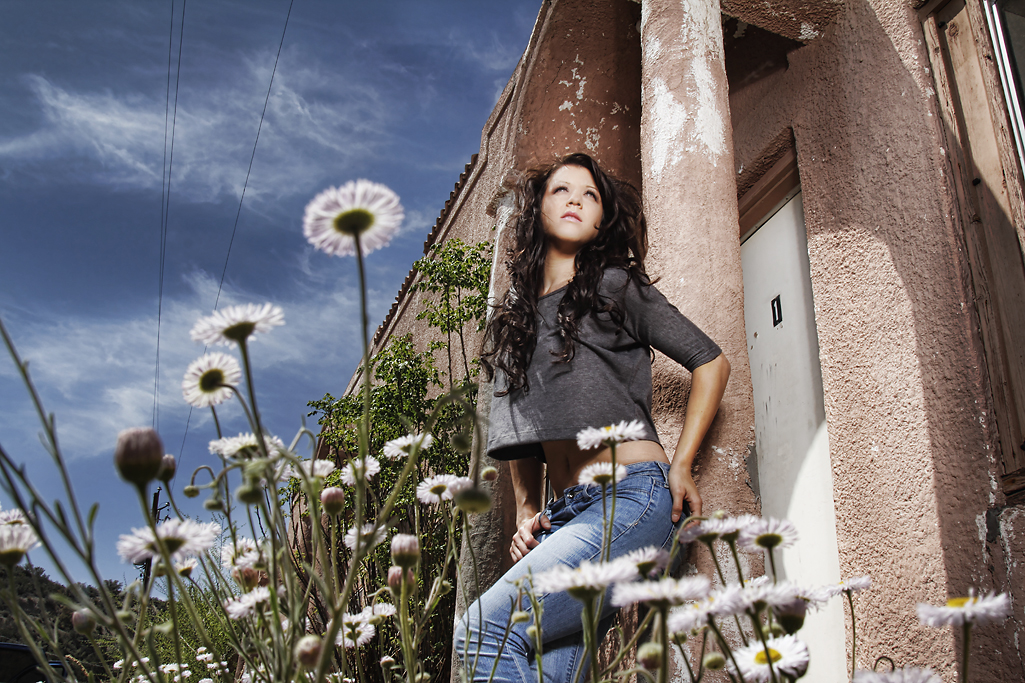
Bri in Miami.
I didn’t want the old building to go too dark behind her so I moved her next to the column. This gave me the ability to move the light in close to her, and let the background fall off fast – but retain the light and the texture right around her so she didn’t ‘pop’ out and look too overly lit.
This is a 4ft softbox with a Profoto 300 WS head and a single diffusion panel in the softbox. It is just above camera viewpoint in this shot – very close to her. You can see the light falling off as it reaches her knees.
I wanted the shot to appear somewhat realistic and not “strobed” so a careful blend of one stop over the ambient was chosen.
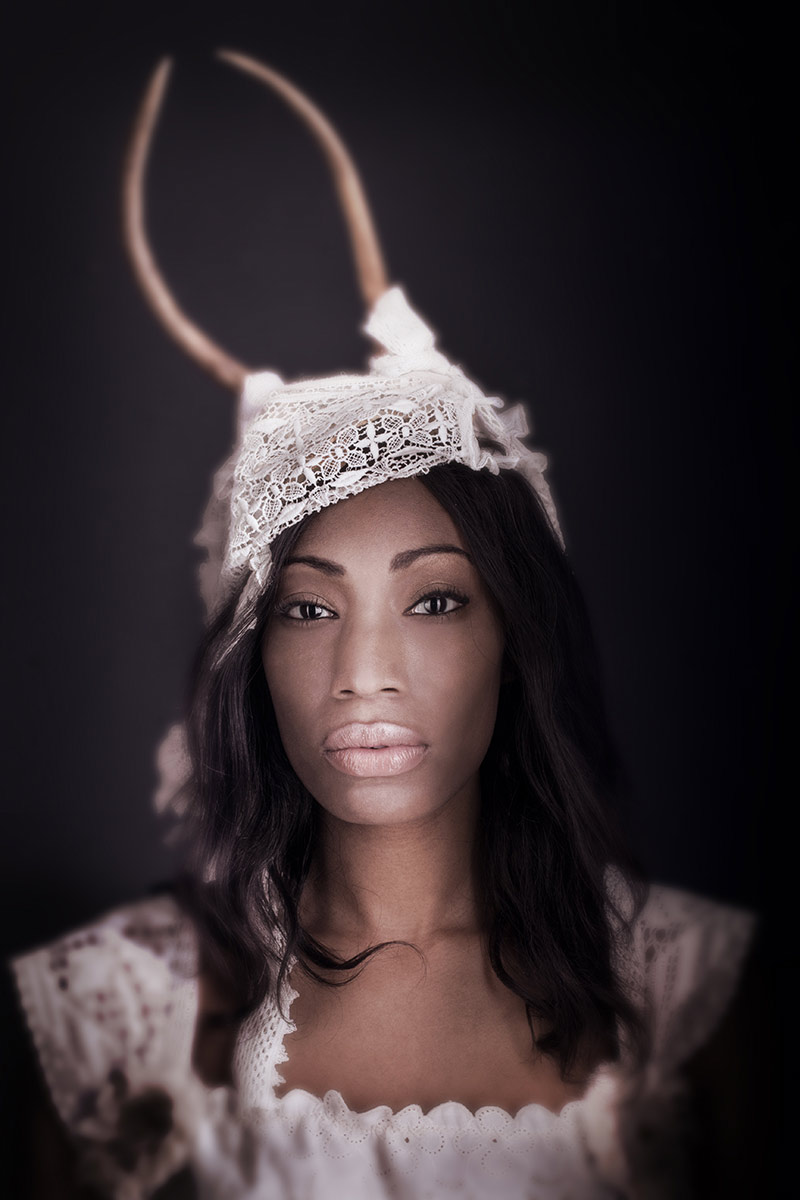
Ivy in the Studio.
My studio had bright white walls in a cove. I didn’t want this image to be on a white background so I moved Ivy far enough away that the light on her had no effect at all on the white wall behind her. It was simply way too underexposed to render at all.
Controlling the exposure through the Inverse Square Law is one of the more important tools you will have at your disposal.
And get this – it doesn’t cost a penny.
ASSIGNMENTS FOR THIS CLASS:
- Using a light source of your own: (studio strobe, speedlight, continuous light) place the light close to the subject and then move the subject AND light source closer to and farther back from a single background. Notice how the image presents itself as you go closer to the background with your subject and light, and what happens when you take subject and light farther away.
- Place camera and background at a fixed point. Then move your subject into the f-16 and make an exposure. Move back to f-11, then f-8, f-5.6, f-4 and if you can f2.8. What happens to the background as you move the subject closer to it and adjust exposure.
- Build your string meter. See below.
Find a piece of good, smallish rope. Clothesline will do nicely.
Put your light on a stand, and run the string straight out from the flash. The flash should be set at 1/8 power if possible. Not full. It should be on “normal” zoom setting neither on telephoto or wide angle.
- Using a meter and a remote flash trigger, find the exposure point for f-4 by going down the rope and aiming the ambient light meter dome directly at the strobe. Keep going until you find the point where f-4 is noted on your meter.
- Using a knot or marker, note that point as f-4.
- Now find the middle of the rope and note it with knot or marker.
- Between the end of the rope and the middle (left side) put a knot or mark in the middle of that area.
- Between the middle of the rope and the end to the right put a knot or marker
- On the right side, now find the middle between the end and the first mark, and knot it or marker
You now have simple rope meter that will be incredibly accurate in all situations.
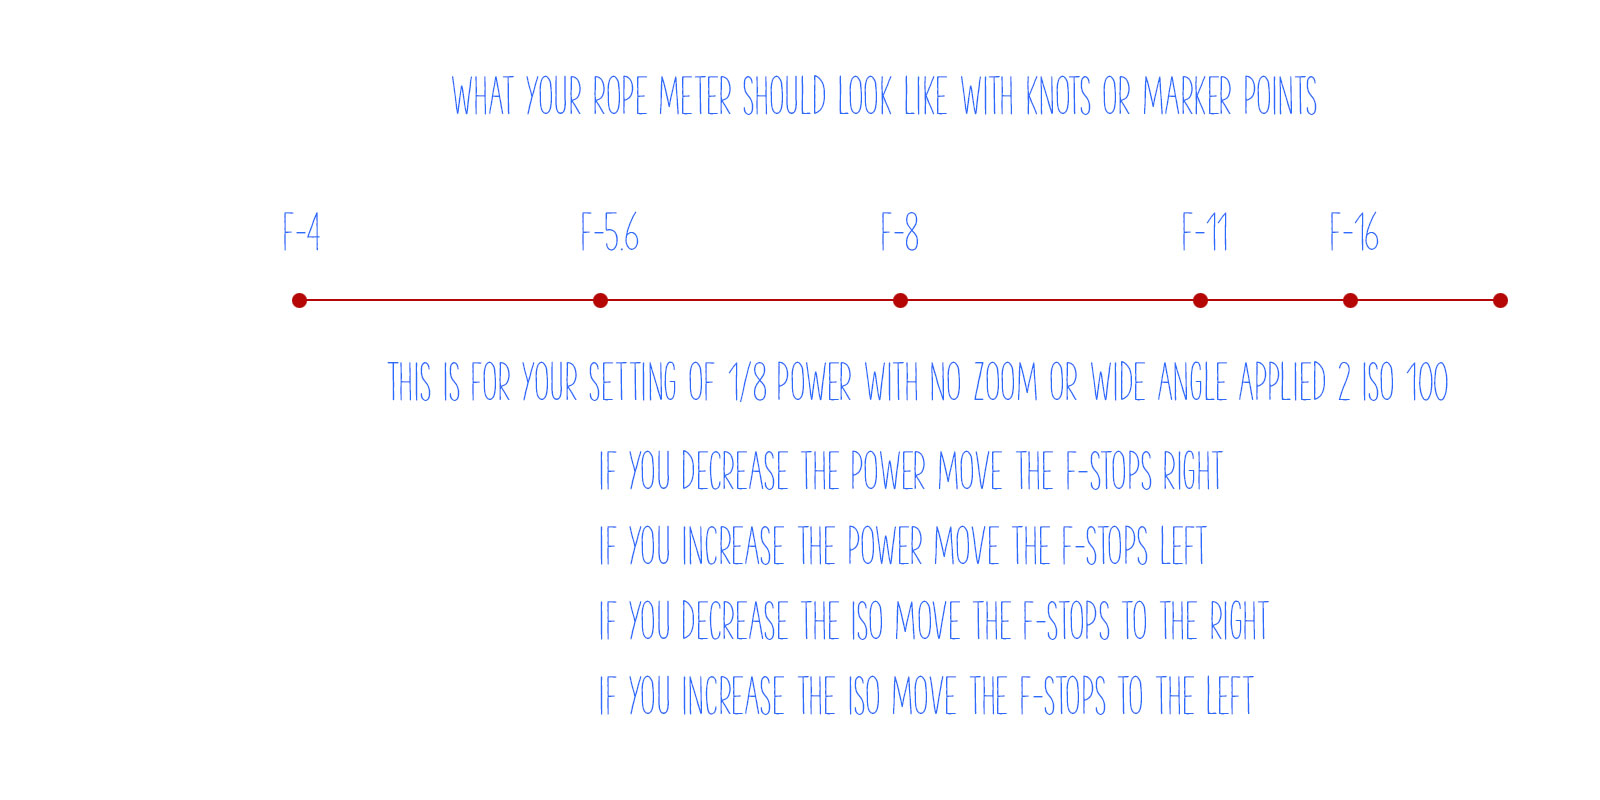
Finding f-4 is the most important part. Use a lightmeter for best results.
If you want to use a gray card, make sure it is at a very slight angle to the light source so it will not have a specular for the camera to see (the reflection of the light source). Shoot at f-4 until you find the distance that will render a single line of pixels in your histogram dead center. That is perfect exposure of a gray card.
Of course, you must fill the lens with the gray card, no extraneous stuff in the viewfinder – just the gray card.
Strip Lights, Fools and Wrapping up the Second Book
A kind of a hodge-podge post this morning. I am deep into the final shooting for the Lighting Essentials II book to be published by Amherst Media sometime in the moderately distant future. These days it seems like a year from completion to seeing it on the shelves. I...
Time to make the jump to full time shooter… the 80’s
I discuss the third decade of my love of photography.
Learning the Ropes: My Earliest Commercial Photography Experience
The 70’s and 80’s were a heady and exciting time for me as I started my commercial photography career. This is part two of the series on how I got started.
My First Brush with Photography
It was 1963. We were on a vacation in California, and my dad wanted to see the town of Carmel. We would do that as a family. Head out from Phoenix to places (usually west of us) and find things that were interesting to my dad. Mom didn't really care where we went, she...
Summer’s Here: Some stuff to read, see and do to keep “Cool”
Well, the hot days are here. Believe me. 110 in Phoenix today. We experienced three of the heat wave days in New York, and then some great respite up in Old Orchard Maine. This is a gathering of some things I think you may enjoy as we prepare for the long hot days of...
Somewhere, Right Now, at This Moment…
A photographer is preparing to make a photograph that may change someone's life, forever. An art director is considering a new photographer for a substantial editorial assignment. He is a little nervous about it, but he also knows that this is the right shooter for...
Our Second Annual Photography Contest, “Summer in My Town” Begins Today, June 1, 2011
IMPORTANT NOTE: Registration for the contest has ended. If you missed it, look for our next contest in the Spring. If you did register, an email with important information was sent out on August 11. If you did not get that email, please let me know and I will find...
Two Different Approaches to Discussing Art and its Future
Well, it seems we have had some interesting discussions on the future (or lack of it) of photography as a career. I personally find the whining very unattractive, and somewhat arrogant. I found two different approaches to discussing the difficult changes facing those...
Kirk Tuck and I are doing a Workshop in San Diego: Focus on Portraiture and Light
OK... this has been in the works for a while, but it is time to take off the wraps and announce a truly special workshop with yours truly and Kirk Tuck of Visual Science Lab. We discussed it a bit last month when I was in Austin, and yesterday we decided to pull the...
Creating an Asset List for Your Photography Business
We are all familiar with lists. Lists of gear for our insurance agencies and reporting. Lists of our clients. Lists of our images. Lists of all kinds of things. When I talk about an asset list, I mean to also consider the assets that are not 'tangible'. Sure that...
Two Book Reviews on Styling for Food
Today we look at two books on food styling directed toward the photographer and the commercial approach to food images. With the lowered budgets these days, the commercial photographer is being called on to style food on many assignments. And while the pure food...
Featured Photographs from Project 52: Part Two
We are really having a blast with Project 52 - "52 weeks to go pro" and I need to share a few of the images from a few weeks projects. If you aren't participating, you should be. Whether or not you go pro, or want to, it is a mind-sharpening, skill enhancing...
Dave Siegel: Photographer. Arizona and the West
Meet my friend Dave Siegel. Dave is a photographer in Phoenix, but works all over the country for major advertising agencies and destination resorts. He has several specialties over the course of his career, and is now focused on the spa/resort industry. I met Dave a...
Gary Crabbe, Enlightened Images: Interview and Images
I am so glad to welcome Gary Crabbe to Lighting Essentials. I met Gary last summer when he contacted me to discuss designing a new website for him. We hit it off pretty quick and I was really happy when he selected me to do the redesign of www.enlightphoto.com. Gary...
Clarion Call II, and getting ready for the new LE Contest
Selina Maitreya, a great friend to Lighting Essentials, is having a second Clarion Call. If you were on the last one, you will remember how cool it was. And if you missed it, you missed one of the most important two days of photography information in a long time....
A Strategy for Going Pro as a Commercial Photographer: Part Three – Engage
A Strategy for Going Pro as a Commercial Photographer: Part Three – Engage We have gone through a basic discovery process in part one, finding out who is doing what in your area. Are there clients and agencies buying photographs and are you able to make photographs...
“Can’t We All Just Get Along?” – Well, no… apparently. SPAM rage in Adland.
(Photograph by Ryan Hyde.) (As was noted in the first comment, the CD who was the focus of this flap has replaced the website with something less onerous. That may take the heat off of the current situation, but it does NOT change the underlying situation, does it. I...
A Strategy for Going Pro as a Commercial Photographer: Part Two – Preparation
This part two of a series on Going Pro from my perspective, experience and research. (Part One here) This one we call "preparation" because before we can launch into strategical and implementation, we must be prepared. Just as a surgeon prepares for his craft with...
Potpourri Friday: Some new and some old – but all about Photography
From the series: Girls looking off camera at stuff." Well, it is Good Friday, and this weekend will be a blur. But I wanted to get some thoughts down before I hit the schedule for the upcoming Project 52 and workshops. First from the web: Some really good reads: From...
Need Inspiration: Try “Immersion”
Have you ever needed some inspiration? Maybe the batteries were a little low and the doldrums of creative deadlock begin to swirl around your camera. Maybe you had to do something really creative and simply needed to see some stuff to “get the juices going.” And then...
What Do You See When You Look at a Photograph?
What do you see when you look at a photograph? Simple question. How you answer it may reveal what you find important in imagery. I was once in a gallery at a large Arizona University. We were looking at a show of a photographer who had just completed his Master’s...
Some thoughts on Photography as I wait for a plane in Omaha
I am in a hotel in Omaha as I write this. Kind of a jumble of ideas and notes I wrote while thinking about my place in the world. I know what you are thinking… right now my place in the world is Omaha. Right, but I was really thinking a bit more metaphysically, so...
A Strategy for Going Pro as a Commercial Photographer: Part One: Discovery
It is one of the paradoxes of our business that one cannot get assignments until one has done assignments. “How do I get assignments if I don’t have any work to show the clients” is an often-heard complaint. And it is a complaint not without merit. It is tough to get...
One Light Portraits: Examples and Discussion
There is something about a one light portrait that gets to me. I don't really know why, but I do love the look. Sure, I can use the sun as a second light, but that's OK - I still let it be a single light portrait with a lot of backlight or sidelight or whatever. Heh....