
EVERYTHING REFLECTS.
Let me say that again. Everything reflects.
Some things reflect more than others. Some surfaces are more reflective than others.
But since everything reflects, we are sometimes presenting what that subject reflects rather than ‘bouncing’ light into a dark area.
In portraiture, I think of providing the shadow side of the face something to reflect back to me rather than ‘filling’ as in creating light on a dark surface. The reason is that the cheek and chin and hair on the shadow side can be made to reflect the object I have placed there if it will indeed be within the angle of reflection to my camera.
I believe I get more control that way. The brighter the ‘reflectors’ the brighter the reflections back to me. Moving the reflector away from the subject increases the distance, and the reflection becomes less bright.
One of the chief reasons that things reflect the way they do is the surface of the subject. Smooth surfaces may reflect absolutely, with lots of contrast, while adding texture will cut down on the reflection of the light and actually cause it to be presented with less contrast.
It is this nature of the subject that I focus on first when deciding what kind of light to use.
I will say this before we go on… there is NO one way or right way or best way do make images. There is your way and my way and her way and his way and on and on. I will present to you what I do and you are free to take it and modify/adjust/deconstruct/start over or discard what I do. It’s OK. In fact it is what I want you to do. Take this information and make it yours. Utilize subject centric lighting in your own way and make better photographs.
Surfaces have a couple of distinct parameters for us to explore: rough, smooth matte, shiny and combinations of all three sometimes. And each one of them reflects light back to us in different and particular ways.
Shiny, glossy surfaces, matt surfaces, and textured surfaces.
We will first look at textured surfaces.
Texture is what I see first when I start to look at a subject. I just do. Of course color and shape and all play into it, but the light has its way with texture, and I notice how it is presented back to the camera. In nature it can help me decide the angle of my camera to subject and in the studio it helps me decide on what kind of lights/modifiers I will be using.
I can choose to either enhance or mitigate texture by using the angle of the light as it is presented to the subject and back to me. A very rough wood wall with light scraping down across it shows a lot of texture, and I can use that angle of light to reveal that texture to my viewers. If I decide to lessen the contrast I can wait for a cloud to come between the sun and the subject, or go around the subject to see if there is texture wood in the shade. It will still be a texture, but it will have less contrast between the bright part of the texture detail and the shadow side.
The cloud lowers the contrast just as being in the shade does. In simple form, the light source becomes larger than the detail of the texture, but we will discuss this further in the next chapter.
If the light is on either horizon, I can change the look of the texture by changing where I put the light in relation to the subject – in relation to the camera.
Light from the side shows more texture. Light from the camera means less texture. The reason is that there is more contrast between the highlights and the shadows cast on the sidelight than there is with the light coming from the same direction as the camera. The light behind the camera actually doesn’t show shadow to the camera (angle of incidence = angle of reflection) while the sidelight throws shadows and creates contrast.
Texture shows the viewer how rough an area is, or what kind of surface they would find if they were there. It delineates the shape of details and it gives us information beyond what we would see on the surface. Old things have lots of texture from the weather or the sun. Areas that are full of texture have lots of visual energy. The eye knows that the light is playing on something that shows itself with character and charm. Cookies have to have texture, as does old barn wood. We want to see the texture in an old book as we want to see it in a pasta dish or leather jacket.
In the picture below, I am using a hard light to emphasize the texture of the pods. A small light source placed at a side angle to the pods and camera gives me highlight and shadow with very little transition between.
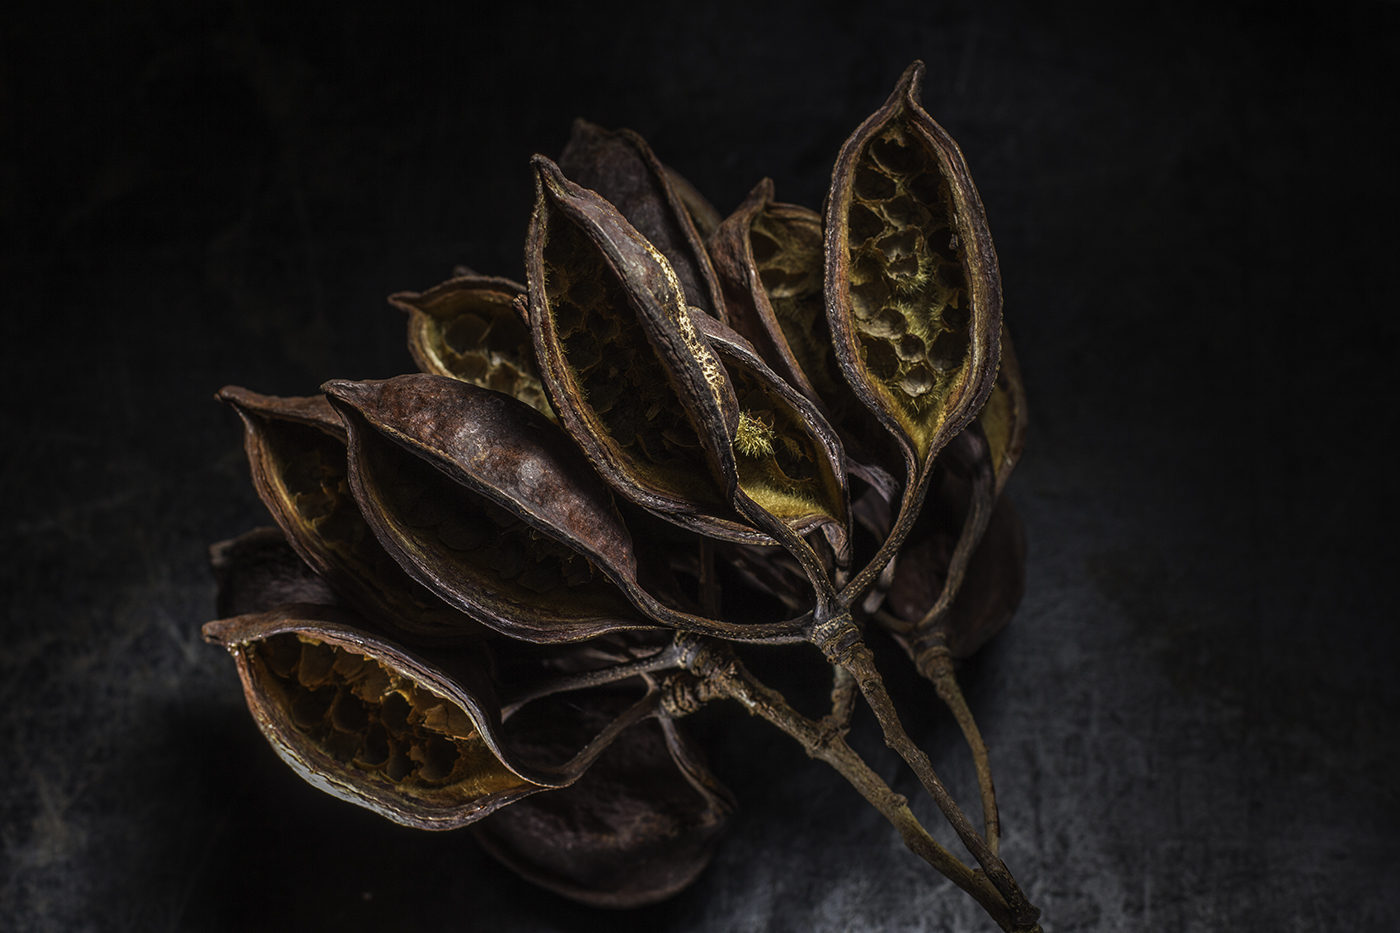
You can see the side light in the stems and the rim of light that is created by the quick fall off from reflection of the light source to the shadow.
Texture gives us context, and it is nearly unconsciously understood. We have seen what light does to texture our whole lives, so when we go to photograph it, we are naturally drawn to those times of day and places where the texture is well rendered.
But there are places where texture may not be as welcome. A subject’s face or skin may not be considered a good thing when rendered with a lot of texture. Unless, of course, they are quite interesting with the texture rendered. Age is something we can show with texture – and along with that inspiration, wisdom and the universal knowledge of what aging does to us all.
The old brick wall that Jamie is running on shows lots of texture due to the sidelight (top light) giving us edges and shadows.
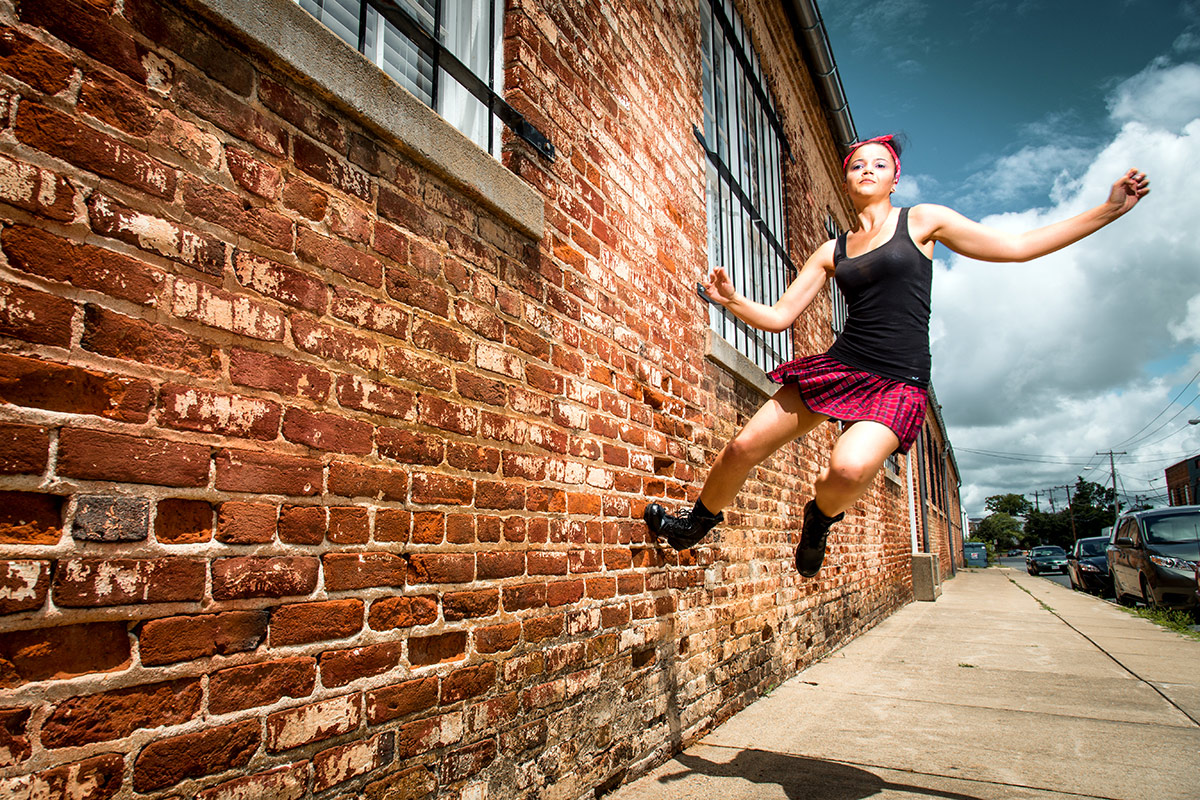
A close inspection shows us the highlights on top of the bricks and then the many indentations exacerbated by highlight and shadow with a fast fall off. This is created by using a small light source – the sun – and a large subject – the wall.
We want our things to be rendered as we expect them to be in real life. Water is wet, rough-hewn wood should look like it is a splinter waiting to happen, glassware should be very smooth, and skin should be smooth and attractive.
Sure there are examples of things being rendered in an un-natural state – and that’s fine. I am talking in a generality here, and one with a lot of history to back it up. While there may be an example of two of rough, scary skin on teenage girls, the vast majority will reject that image instantly.
This shot of cracked earth exhibits many of the properties of a subject / light relationship. Notice how much texture is shown due to the small light source side lighting the cracked earth. The sun is a small light source, and you see no soft, wrapping light, In addition, there is a bright spot in the middle of the image created by the specular – although it is a bit diffused, the dried mud is still reflective enough to show us a reflection of the sun at the same angle from camera. If I moved left or right, I would change where that bright spot was because it was locked into the same angle as my camera from the other side.
I chose to place my exposure one stop less than the recommended exposure to increase the feeling of a vignette.
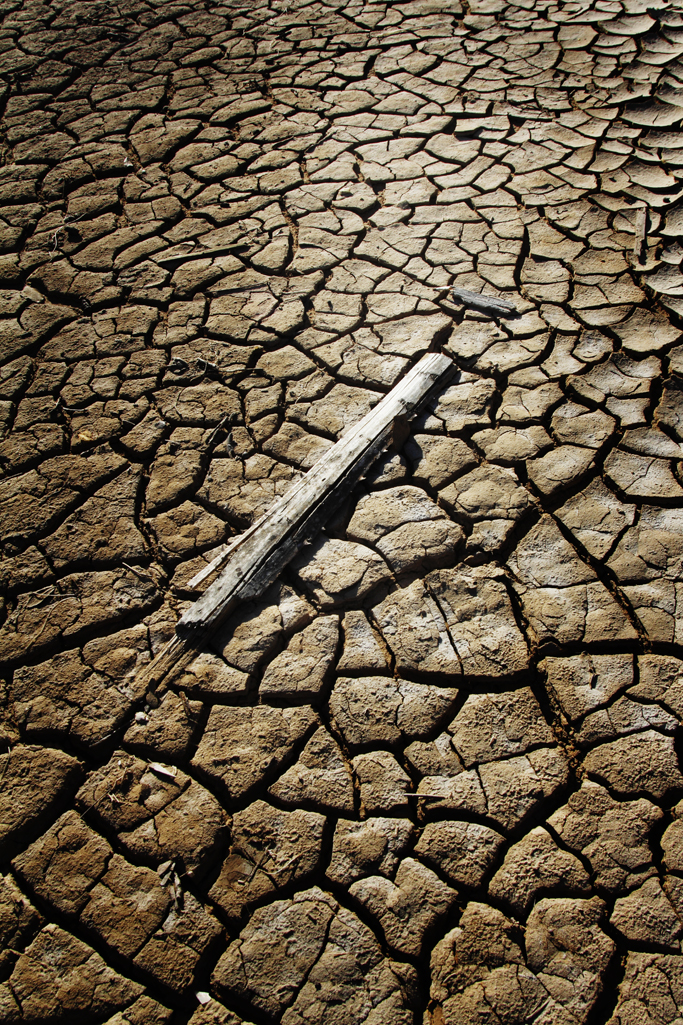
Small lightsource, at a side (back) angle and a slightly reflective surface gives us more to work with than just a dried mud slab.
Texture is also shown by the angle of incidence rule. If we choose to include the light as a part of the composition, for instance, we may choose to include its direct reflection back into the lens. A highlight on a shiny surface will show us how shiny it is by the relationship of the light and the surface around it. A less smooth surface may make a softer reflection of the light source, and that will also tell us about the surface texture.
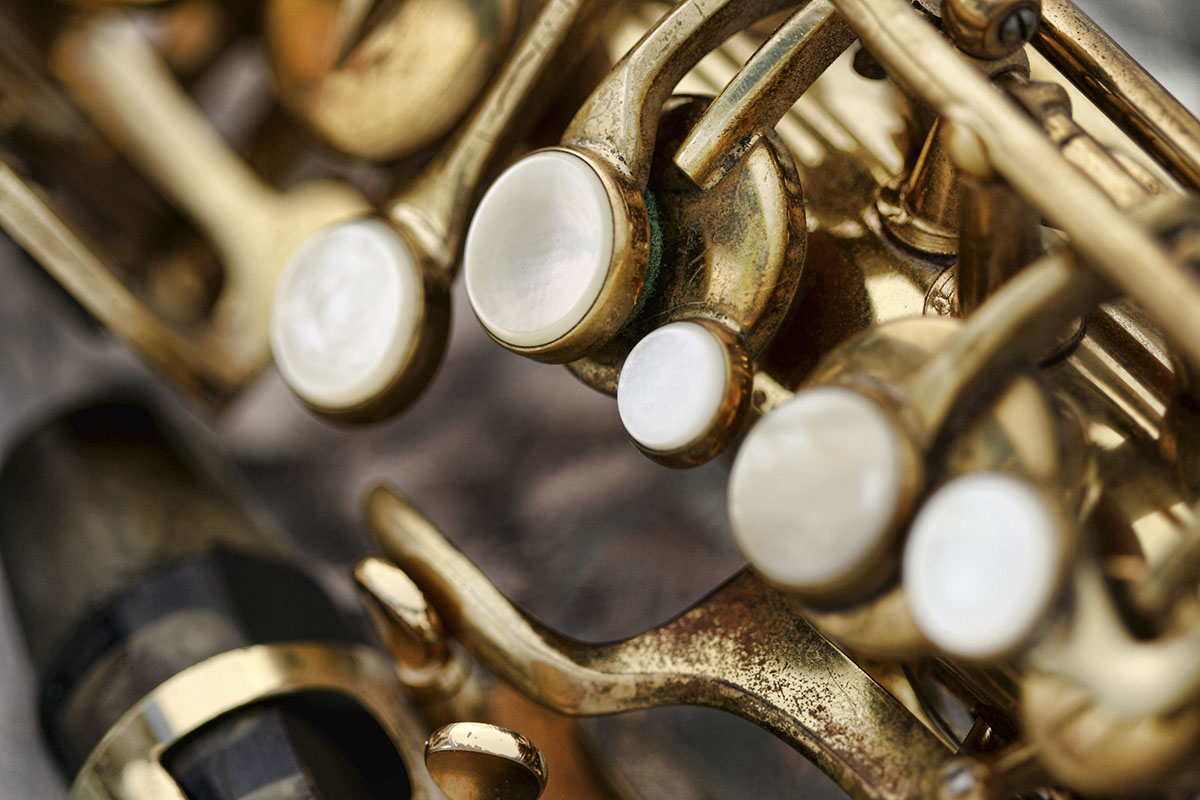
In this detail of an alto saxophone, the light is coming from the top back and it leaves small speculars on the areas that are efficient (shiny) and emphasizes the texture of the old keys and metal discoloration.
There are many places where we can use the reflection of the light source to create a cool looking gradation or highlight to create some interest as a point of composition as well.
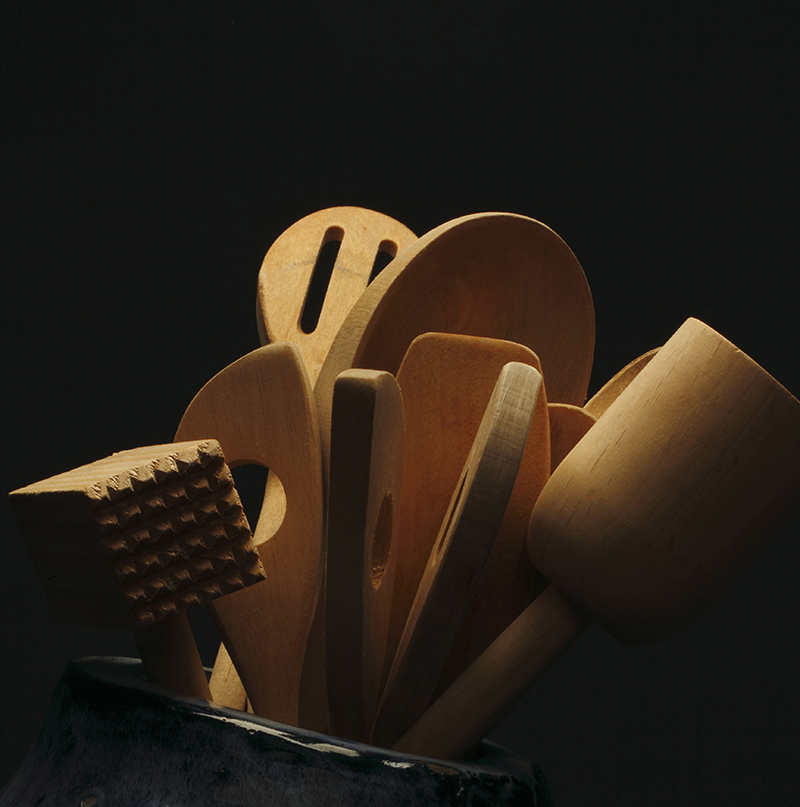
The main point of this composition is the light on the wooden tools. By making sure the matte textured tools have a soft, directional light without any fill, the texture of the wood shows clearly in the image.
Ways to create texture:
Sidelight.
Top light.
Hard light (small source).
Backlight can also be used in many situations.
ASSIGNMENT
- Shoot a textured item (product / thing) to show the texture and find ways to mitigate or lessen the texture. Hint – front light nearly always kills texture, and sidelight nearly always makes it stronger.
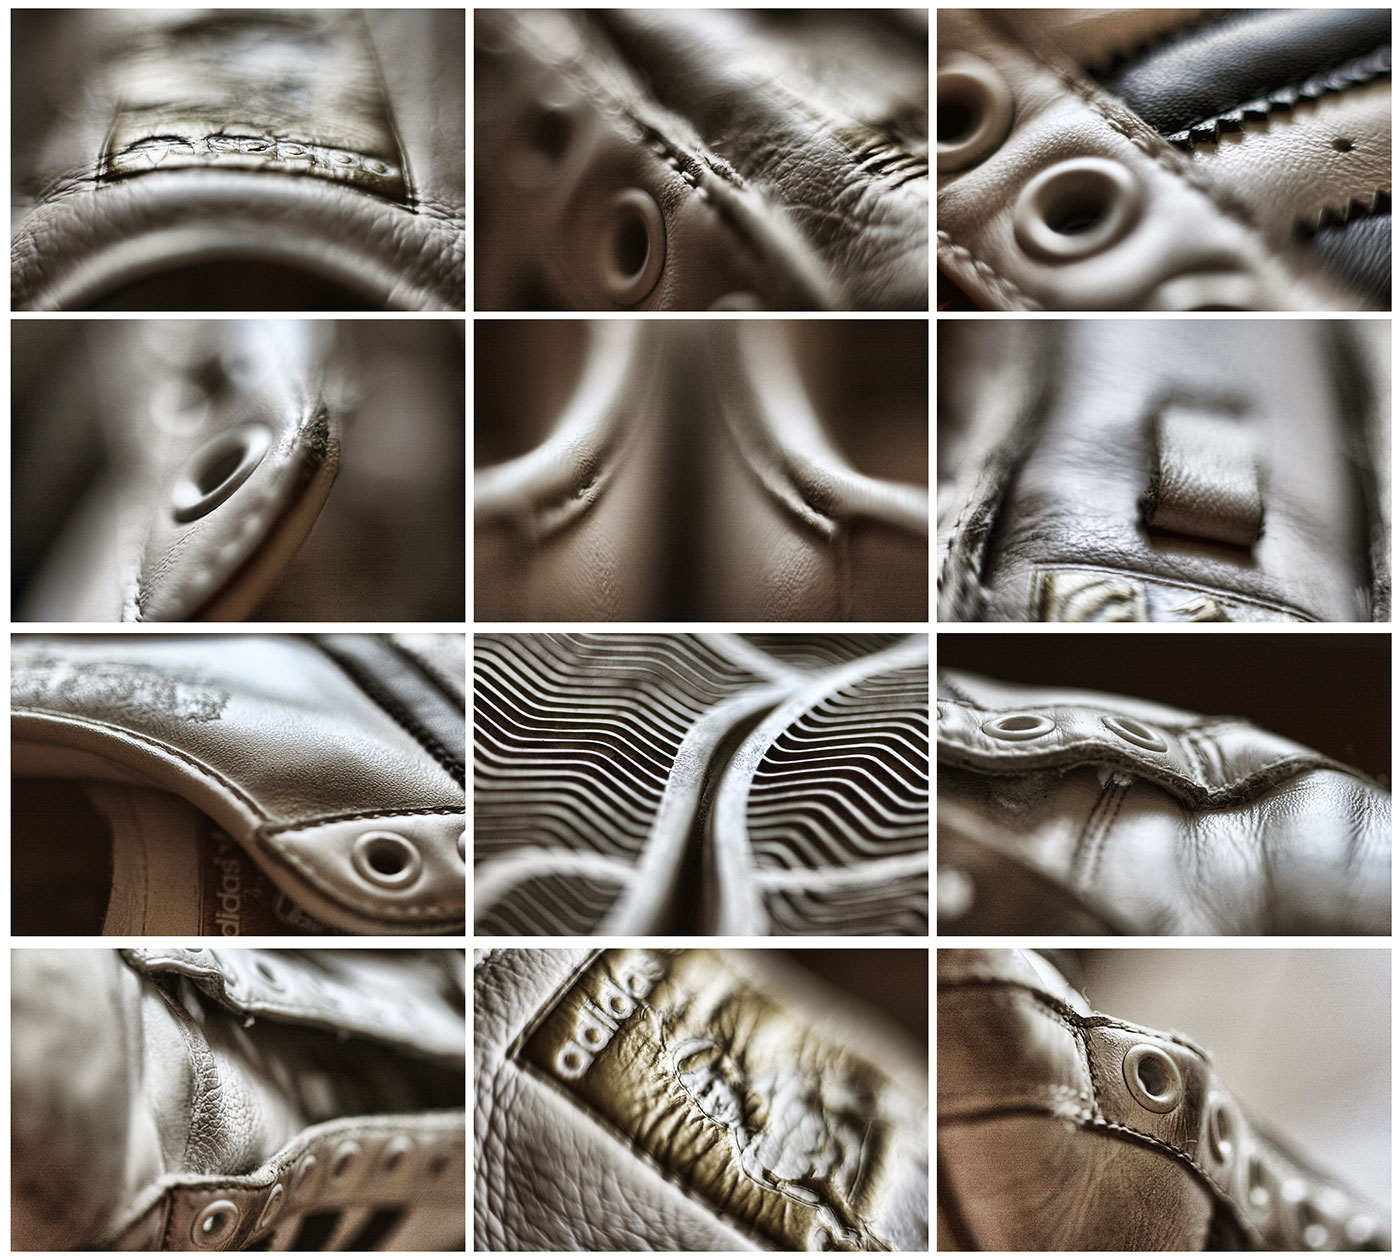
- Take a single textured item – like a shoe – and using your flashes or studio lighting, create as many different texture shots as you can using only one light – no fill.
- Look for texture in nature and shoot images that emphasize and also lessen the texture just by walking around the subject to see different angles of light to subject to camera.
“Twenty Four Frames In May”
The Project 52 members were tasked with shooting something different: 24 frames of film - and making every image count. This is a very exciting time with digital instantaneousness... but something can be said about taking one's time to make an image. Limiting the work...
Extensive Post Production with Tomas Jansson
From Project 52 member, Tomas Jansson. An extensive retouch/edit on a fantastic food shot. ALL THE TUTORIALS DURING "SUMMER SCHOOL" ARE BY PROJECT 52 PRO MEMBERS EITHER CURRENTLY ENROLLED OR ALUMNI. Thanks Tomas!
Photographing a Mundane Item… Is Harder Than You Think
Our assignment #46 was to shoot a power strip. A mundane, easy to find, nearly ubiquitous power strip that could possibly be purchased at any store for about $10. It proved to be quite a challenge. These images are from the assignment, and while the photographers all...
Go Beyond Full Frame Without Selling The Farm: Shane Ernest
Going Beyond Full Frame Without Selling The Farm. In this tutorial, I’ll share my reasoning for going beyond full-frame, a few reasons why you shouldn’t, and some simple steps I use to create images that match your vision. While there are huge differences between a...
Post Production (Retouching) of Wardrobe: with Don Fadel
See more of Don Fadel's work at his website.
Fitness Model on Location with Hiram Chee
I was aiming for a clean catalog feel. We shot this image at high noon in a football field. I used an Einstein F13 in a Softlighter without the sock for fill. I also used a -3f stop ND filter on my 85mm F1.8 to get the blue sky and blurred background. I was shooting...
Jamie in a Kimono, Omaha. Lightroom and Photoshop
Here is a look at my processes. From Lightroom to Photoshop to finished image. These are the simple steps that I use nearly every time. I hope you enjoy it. ALL THE TUTORIALS DURING "SUMMER SCHOOL" ARE BY PROJECT 52 PRO MEMBERS EITHER CURRENTLY ENROLLED OR ALUMNI - or...
Hey… It’s Me. Being Somewhat Controversial… or Not – if you know me.
Creating a Grid Effect in Photoshop with Luxkala
See more of Luxkala's work at his website. ALL THE TUTORIALS DURING "SUMMER SCHOOL" ARE BY PROJECT 52 PRO MEMBERS EITHER CURRENTLY ENROLLED OR ALUMNI.
Don’t Be Afraid of ‘Systems’
As a commercial photographer I know a lot about how to make things happen. In fact, being a commercial photographer is a lot of 'solutions... NOW' sort of life. The locations are too small or too large. Too many lights or not enough. Always need another stand or...
“Photographing Pills” with Alicia Bonterre
The assignment was to photograph some pills and bottle for a drop in to another shot. Parameters for the shot? White background…..that’s it. My thought process for this shot was how can I make this even a little bit interesting What type of shadows do I want and What...
Available Light / Available Tools; with David Price
I wanted to side-light this artisan's hands to highlight the texture both in her hands, as well as the fabric. She was making a set of custom gloves to honor my wife for her many years of service to living history re-enactments. I did not have a lot of equipment with...
Fitness Shoot with a Model by Hiram Chee
For the key light I used an Einstein F8 through a Softlighter camera right and for fill and Einstein F4 through a 8in reflector and 30 degree grid, camera left. The reflector was angled up towards the model's shoulder slightly towards the back wall. I also feathered...
“Layering Your Image” with McGunn Media
McGunn Media (Anna and Filipe) have this great little video for you on "Layering" the different items you use for still life. They have a full course on shooting table top and still life work at Udemy. See more of McGunn Media's work at their website.
Cool Sneakers with Alicia Bonterre
Today's class is from Alicia Bonterre, a photographer who makes her home in Trinidad. This was the assignment: Running Shoes are one of the staples of sports and fitness… and come in all colors and sizes. Distance runners, joggers, sprinters, hobbyists and kids all...
Making a “Splashing” Apple with John McAllister
SUMMER SCHOOL, DAY ONE: JOHN MCALLISTER. John shows how to create this stunning effect. You can download the raw files used to make this photograph here. Image One Image Two Image Three Image Four Image Five image Six For more from John McAllister, visit his blog. ALL...
Visual Literacy – Visual Media Strategy
Even when it is done as a parody, it works. How's YOUR visual media strategy doing?
Viral Visual Strategies
Social Media - VISUAL social media - is really powerful. "On Thursday April 10th I shared the tumblr page with a huge dog magazine I’ve worked with regularly called The Bark. By Friday morning, it had 4,700 likes and 1,080 shares. I also sent the link out to a...
Irene Liebler Interview at Raincoast Creative
This is so cool. Project 52 Alumni Sandra Harris has interviewed p52 Alumni Irene Liebler for Raincoast Creative. Pop on over for a great read and some new work by Irene.
Matt Dutile Adds a New Set of Portraits
LE's bud Matt Dutile has added some wonderful portraits to his website. Check them out here.
Talk About Your Awesome Opportunities… Holy Smokes THIS Rocks!
An "opportunity" for you to bust your ass, make some cool shots and then give them away to someone who will then get to use them for whatever the heck they want to for as long as they want to. Oh, and by the way you need to simply shut up about it. And they are...
My Newest Book Will Take Your Photography To The Next Level… or something
I have decided it was time for me to put it all out there... no holding back, no withholding of the secrets that I am privvy to. All of the stuff that other photographers wont tell you... I will. I am like a man on fire. Without the burning pants and sickly smell of...
Photographers Dump Film so They Can Emulate It Digitally… or, something…
"The company, founded back in March 2011, received the fifth largest Series A round Accel Partners has ever done; the investors are well known for the funds they granted a company called Facebook back when it was just starting up. Besides the app itself, VSCO’s known...
PROJECT 52 ANNUAL FOR 2013
Is available at Blurb if you love the feel of good paper and a quality book. We are also giving it out as a free PDF for all. Please feel free to share it with anyone you think would be interested. All images are copyright the photographer, and there is contact...