
Subject Centric Lighting
LIGHTING ESSENTIALS WORKSHOP: SUBJECT CENTRIC LIGHTING
I hope you enjoy this workshop.
It is the culmination of decades of being a working, professional photographer and having to meet the challenges of making images for other people. Other people with high expectations and demands for the work. Other people who didn’t necessarily care how hard it was to make the shot they wanted, they wanted that shot. Now.
Being a photographer in a small market meant I didn’t necessarily have a strict specialty, although people and still life did make up the bulk of my work. I would occasionally shoot architecture and food, as well as the now and then corporate shoot.
I wasn’t really a ‘generalist’, but some weeks it seemed as though my assignments were as unrelated as they possibly could be.
One week I had a food shot going on in one corner of the studio, with a catalog shoot going on in the other part. All of this while I was shooting a lingerie shoot for an ad agency in the rest of the studio. Heady times, long hours, really damned fun.
This workshop will take us through many of the ways to light photographic subjects. And lighting is, as they say, lighting. Yeah, I am so old I remember when “off camera flash” was simply called lighting.
We are going back to that time. Lighting is lighting and the goal is always the same: to make an image that represents what we see in our mind’s eye. Knowing what we want is step one, making it happen with the tools at hand is step two.
The assignments will be given one per week. They will remain in place for future photographers. You do not have to start at the beginning, but the first five lessons are absolutely important to review before moving to the assignments you want to do.
SUBJECT CENTRIC LIGHTING
I call my system “Subject Centric Lighting” because the subject plays a bigger part in the lighting than the lighting gear does. How a subject renders the lighting we apply to it, and how the camera receives that light is what makes our images interesting.
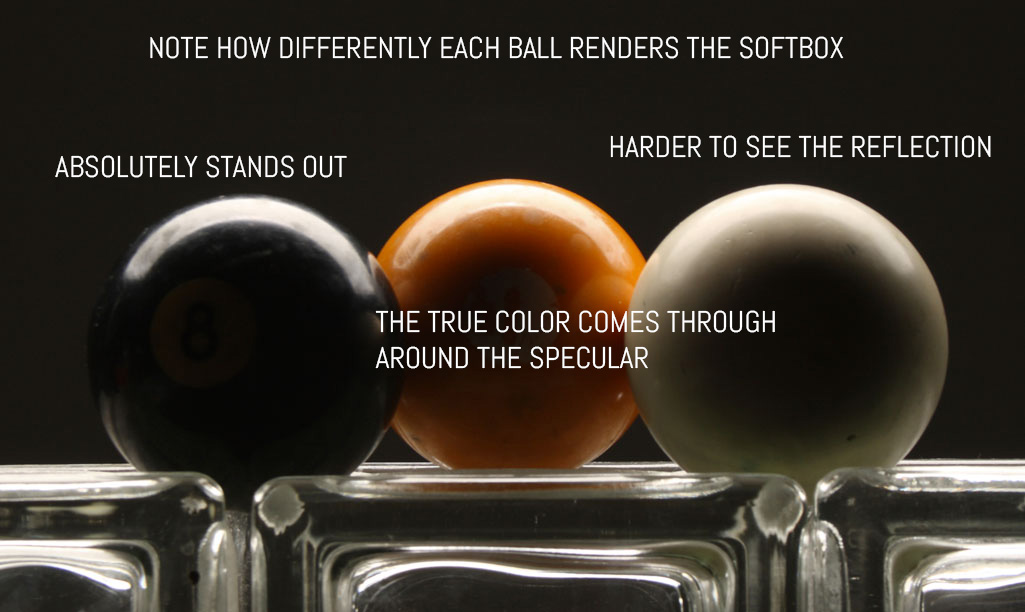
Subject Centric Lighting recognizes that light does the same thing every time. It is the subject that changes the way the light reflects back to our camera, not the light tool we choose to light the subject with. Lighting a dark bowling ball with a soft box presents a far different rendition of the light than using the same light for a white bowling ball. Everything is changed – from specular presentation to shadow fall.
But more of that as we go along.
First, let’s get into the basic principals of light and lighting.
LIGHT DOES THE SAME THING EVERY TIME
It must. Otherwise, we could never control it.
Imagine a saxophone with its many variations of keys. A sax player has to know that if a certain set of keys are pushed, a specific sound will come out. If it was random, then no music could be produced. There would be no point in learning the saxophone since there was no knowledge to be applied that would render it usable.
The same with lighting. We have to know that if we have a flash at 1/4 power, 15′ from the subject, that a specific exposure will be generated. We can control how much exposure that is by changing the ISO of course, but always at any specific setting that flash will produce the same measurable amount of light. Every time.
It is the same thing with modifiers. A softbox will look like a softbox when it is being reflected from a shiny surface. An umbrella will wrap the light if used to do so based on science and physics, not some magical desire to use an umbrella.
So if light does the same thing, how can we use that knowledge to make light do what we want it to do? And if it does the same thing every time, why do images look different from each other when using the same or similar lighting?
Subjects.
Subjects are dimensional, with textures and surfaces, and shadows and speculars and more. A shiny subject renders the light back to the camera differently than a diffuse subject does. A dark subject renders the perceptible highlights differently than a light subject. Subject change, but the physics of light do not.
WHAT YOU WILL NEED:
This workshop is designed to teach you the basic principles of lighting for photography. We will have weekly assignments and you can start anywhere, anytime. There is no charge for this workshop, although we will be asking for your email so we can keep you up-to-date with all that is going on in the workshop.
We have a Facebook Group for this workshop, and you will be able to meet others in the workshop, ask questions and find out when the open webinars will be.
You will need a camera, of course. And while much of the natural light information can be used with even a cell phone camera, much of the photographic education will require a camera with aperture / shutter speed controls.
Lighting gear:
A 5-in-one reflector kit would be a great purchase since it will be something you will be available to use over and over for all sorts of image lighting effects. I call them the best bang for the buck in lighting gear.
White cards. From the Dollar Store or Target, white foam style boards will be a vital part of your gear.
Photographic light stands. A couple of cheap ones would be fine if you do not have any at the moment.
A couple of ‘A’ Clamps from the local hardware store will hold the boards and reflectors to the stands. Get the cheap ones.
A tripod will make your work a lot easier, and there are some good ones that are not expensive.
If you are going to use artificial light, there are too many options for me to tell you much other than we will be doing a lot with them. So whether you are a speedlight shooter, have a couple of studio lights, or even continuous light set ups, all the information is the same. Light is light, and the gear is there to provide that light.
We will learn to control light and make it do provide the look we want.
On the black cue ball, the light is distinctly shaped and no other light is seen. On the orange ball, we see the softbox specular, and a bit of the true tone of the orange around it. That bright orange makes the highlight specular a bit harder to see distinctly – at least as distinctly as the black ball. On the white ball, the specular all but disappears into the white true tone of the ball.
Same light is seen differently by the camera because of the makeup of the subject. We will be discussing this in length in future posts.
Light.
It is a substance that we cannot smell, touch or hear.
Can we see light? No… we can only see what it reflects from. The subject.
I will refer to that as the “presentation of the light” in this workshop. That refers to the way the subject is taking the light onto its surface, then reflecting it back to the camera lens.
No… we can only see what it reflects from. The subject defines the light… we cannot see the light in transit from source to subject, only what the subject reveals after the light has come into contact with it.
To me, that is one of the magical qualities of light, almost mysterious and yet compliant with our wishes. I think of light as a liquid when planning my lighting… it helps
I think of light as a liquid when planning my lighting… it helps me ‘see’ something that isn’t there but yet has similar properties. Direct light is like water from a hose, while diffused light is mist. Ambient is similar to fog in my mind, while umbrellas are more like garden sprinklers.
You can think of light in many different ways to help you plan your shots, but whatever you do to help, keep in mind that light does the same thing every time. Everytime. If you have a light that gives you an exposure at f-ll
If you have a light tool that gives you an exposure at f-ll on 1/2 power at ISO 100 at 6 feet… it will repeat that for you (barring some sort of malfunction) every single time you set it at that distance, power, and ISO.
The predictability of light tools makes controlling it a matter of understanding what it does and how to use the tools at our disposal to modify, control, and adjust it to suit our plan.
Even the sun is predictable. F-16 at 1/100 with ISO 100 film. (Sunny 16 Rule: F-16 at 1/ISO). This makes understanding light far easier than if it was unpredictable.
Getting the idea of what to shoot is harder than shooting it in most case… once you know how to light correctly.
Important Note:
Everything reflects. Everything.
Dark, rough fabric does not reflect as much as a shiny, painted surface. But it does indeed reflect.
It is important to know that as we begin.
We will first turn our study to the four principles of light. While I am not a fan of rules, I will say that understanding these four principles will definitely enhance your ability to handle any lighting situation you may have.
SIZE OF THE LIGHTSOURCE RELATIVE TO THE SUBJECT
DISTANCE OF THE LIGHTSOURCE
COLOR OF THE LIGHTSOURCE
ANGLE OF THE LIGHTSOURCE
Now here is the hard part: there is no hierarchy to these principles. What that means is there is no ‘first, second’, etc. Each one of these four principles are as important as the others. We do not approach it from size first, then color – or any of that. All of it is very important and all are important at the same time.
This single idea – that all four of these principles are equal in importance is perhaps the hardest one to think about – but it starts to flow when you get it down. You can do this.
Now to be sure there are times when we start with one or another of these principles because that is the biggest challenge at the moment. And those priorities will change from shot to shot. It is to be expected since we never know what is going to be in front of us at any specific moment.
LIGHT DOES THE SAME THING EVERY TIME.
And we can control that light by the way we understand the principles of light, and understand how those principles affect a given subject depending on their properties.
Let’s look at the four principles of light.
THE FOUR MAIN PRINCIPLES OF LIGHT
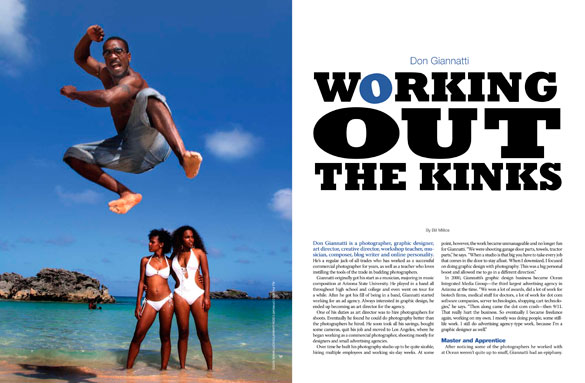
Feature Article in Rangefinder: July 2010
My friend Bill Millios wrote a nice article on me and the good folks at Rangefinder ran it in their prestigious July "Portait" issue. Bill and I chatted down in Mexico during a workshop, and his piece accurately reflected my teaching beliefs, as well as other thoughts...
Take This Photograph, It’s FREE! Free is GOOD!
So I get a tweet 'alerting' me to this interesting argument. This photographer says his photograph is not free: From PetaPixel: "As someone mentioned, THIS single photo didn’t cost me $6,612, but if you wanted to create it, from scratch, that is what is involved. So I...
Project 52 Photographer James Eisele
Say hello to James Eisele, a 'project 52' photographer in Florida. "While project 52 was challenging, I didn't feel it was overwhelming, even though it frequently forced me out of my comfort zone with assignments that were different than anything I'd shot previously....
Macro 4/3 Cameras Get A Pair of New, Fast Primes
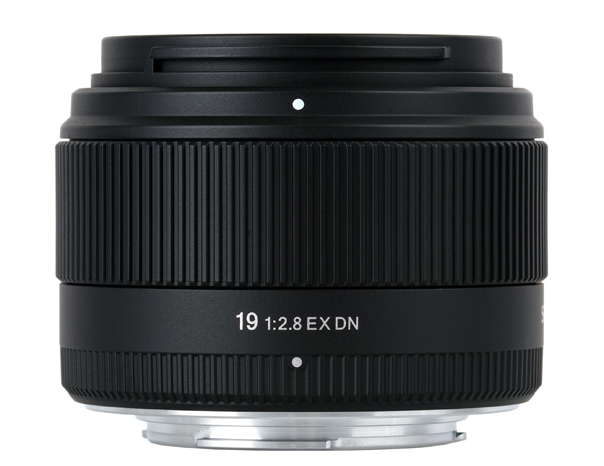
These look pretty cool. "As of now, photographers with Olympus and Panasonic Micro Four Thirds cameras and Sony NEX-series cameras have the choice to couple a pair of sharp Sigma F2.8 primes to the go-everywhere cameras. These two prime lenses for Micro Four Thirds...
Project 52 Photographer Terri Jacobson
Photographer Terri Jacobson checks in with her assessment of Project 52. "Only 52 photos In the beginning I was a point and shoot kinda girl. All I ever needed was the little green box on my Canon dial. In 2010 I began the 365 photo a day project completing it...
Judges Announced for the Wacky Winner Gets Me Contest
We had twenty five entries to the wacky contest. I have four intrepid judges working on the judging process now. Selina Maitreya Photographer Consultant Extraordinaire Site Rosh Sillars Photographer / Social Media Expert Site Seshu Photographer, Entrepreneur Site...

Project 52 Photographer David Price
David Price checks in with this assessment of Project 52. "My thanks to Don Giannatti, whom I found as Wizwow on one of the lighting forums, and followed him to Lighting Essentials. What a terrific resource! When I first heard about Project 52, I wasn’t certain what...
Meet the NEW “Essentials for Photographers”
Lighting Essentials had run its course, name wise. It was not about lighting as much as it was about photography in general. Commercial photography specifically. And the name simply didn't leave room for more options for posting. There is a reason to the change up,...
Project 52 Photographer Tucker Joenz
Today we meet Tucker Joenz, a Project 52 alumni. "Project 52 challenges... A big challenge for me was getting back to the basics of lighting and learning how to apply that to create commercial images that will really captivate my audience, express the feelings that...
Project 52 Photographer, Pete Hudeck
While these guys and gals from Project 52 are sharing their adventures with you all, I am busy creating new content and preparing the Project 52 project and the new Lighting Essentials website. I love how much they share. Meet Pete Hudeck, another who has been with...
Project 52 Photographer Kathy Jan
Kathy Jan found Project 52... and while it was a bit daunting to her at first... she stuck to it, made the assignments - and more usually - and learned a great deal. Her work is now pretty darn fine. I think she has shown tremendous growth. Here is Kathy Jan in her...
Project 52 Photographer: Rob Davidson
Meet Photographer Rob Davidson, from New York City. Rob Davidson Rob Davidson Photography Website Email RobD3 on Flickr Facebook "For the past few years I have been clambering to gain knowledge and insight as a photographer. My hobby had taken that turn to become an...
Project 52 Photographer: Bret Doss
Meet Bret Doss, a Project 52 participant and a friend. I met Bret a while ago when I taught my first workshop in Seattle. He truly loves photography. Website Facebook Twitter "Project 52 presented a unique opportunity: ongoing instruction and critique each week for 52...
New Years : New Changes, New Attitudes, New Looks, New Projects
NOTE: POTTY MOUTH ALERT... Just in case I sound like all those 'oh-so-cool' women bloggers who drop f-bombs and tell us about their sex lives ... ick!" It's time for a change. it's time to get busy, change shit up, make new plans. Stop old habits and forge new ideas...
Project 52 Photographer: Ron Heusser
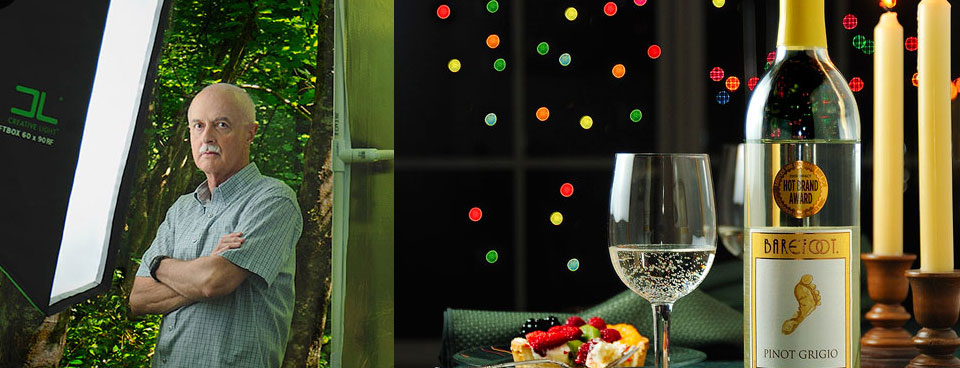
Meet Ron Heusser from Washington State. Ron is active in the Project 52 group. Project 52 Experience Ron Heusser Ron WA on Flickr "I'm a mechanical engineer for my day job, but have always had an interest in photography. I have pursued landscape shooting for the last...
Project 52 Photographer: Christopher Bersbach
Project 52 Photographer, Christopher Bersbach checks in with his thoughts on Project 52. "I had been a follower of Lighting Essentials, as well as several other online photography resources, for a while before Don started Project 52. s a self-taught photographer, I...
A Beautiful Promo
My bud Dave Siegel sent this to me. I think it is very powerful. Showing the before shot next to the final image makes the package more informational as well, and provides the viewer a glimpse into what Dave can do for them. Email promotion.
Interviewed by Frederic Bye: Creativity, Photography, and Purpose
I really enjoyed meeting Frederic and having a chance to discuss art, creativity, and purpose. If you are interested in hearing me blather on about this stuff - and I do so love to do that - give the link a click and listen in. Frederic is a very good interviewer, and...
Deconstructing a Portrait
What We Can Learn from Portraits
2015: A Postmortem and Retrospective.
We humans love to think in terms of beginnings and ends, and where, in reality, January 1 carries no more significance than any other day, we see it as a beginning of a new year full of promise. And that is fine with me. 2015 was a difficult year for me, and I am...
Portraits for a Friday Afternoon
I love portraits. This week the students looked at Peter Lindbergh and were inspired by his elegant simplicity. See the images after the jump. [gallery columns="5" link="file"...