
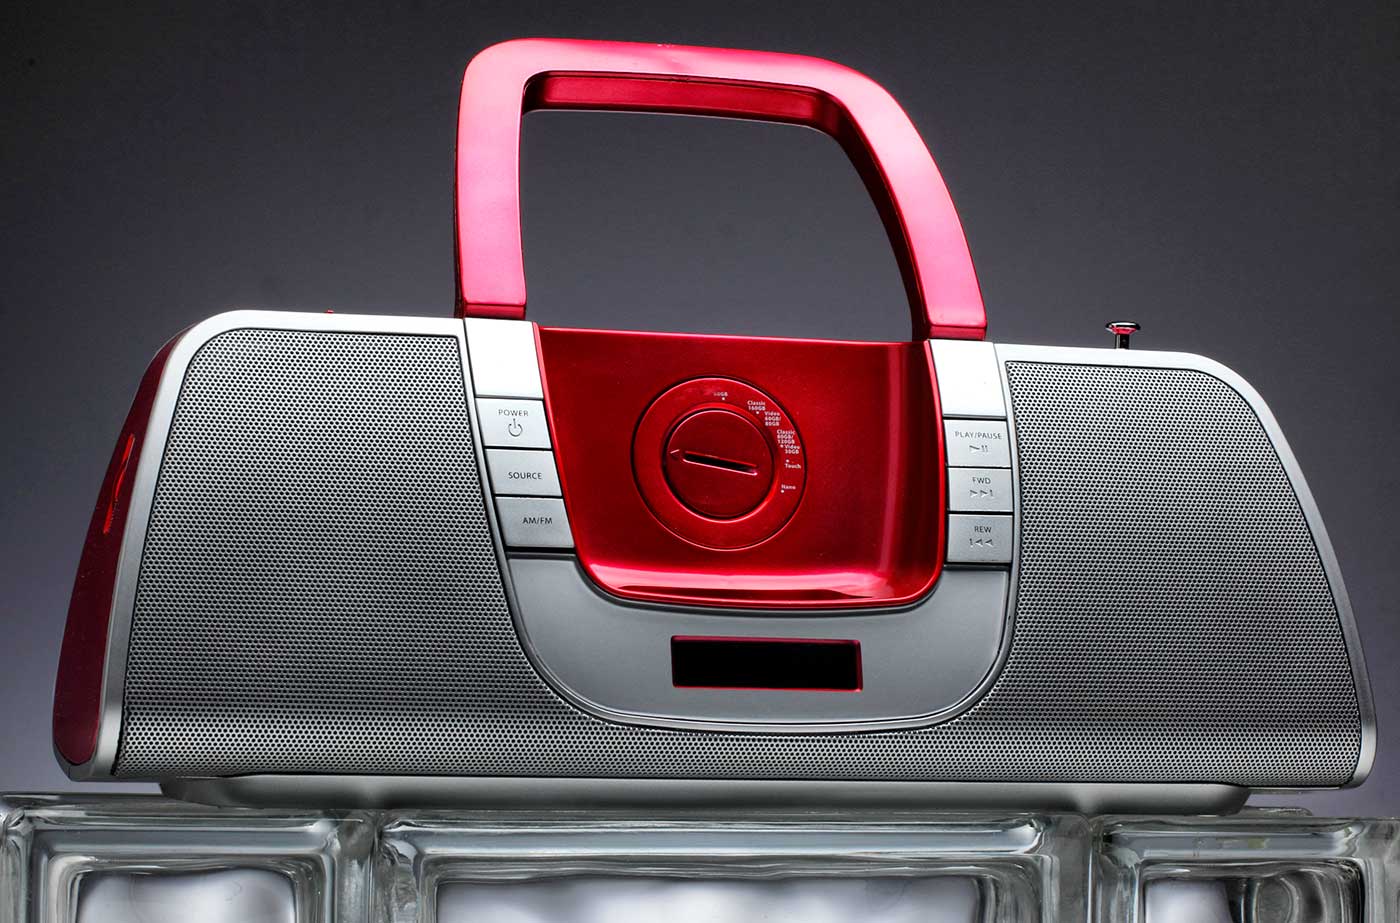
Lighting Principle Number Four: The Angle of the Light to the Subject and the Camera
Law of Physics: Angle of Incidence equals the Angle of Reflection.
This is an axiom that a lot of people hear and repeat without taking careful note of what it means to their photography.
And yet it is one of the most basic and important physical rules of subject centric lighting.
What does it mean and how can we use this to our advantage?
It means that if the light is angled toward a subject, the reflection of that light will be presented back to the camera at the same angle.
Think of the game of billiards or pool. If you hit a ball into the wall at a 30% angle, the ball will come off that wall at a 30% angle. And that completes a triangle. Understanding that triangle is key to making quicker, smarter lighting decisions.
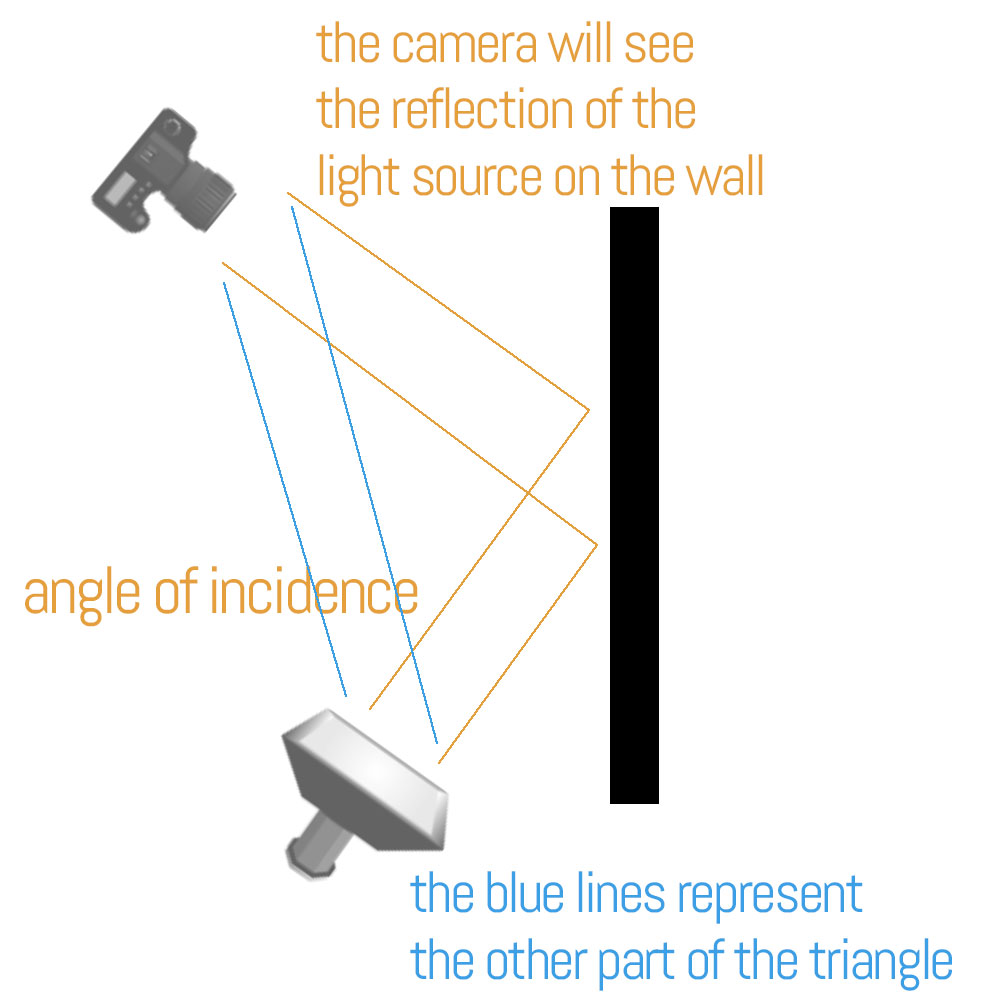
It means that you have to be able to judge the angle of the light as it strikes the subject and understand what that light will do once it strikes the subject. If there is something being reflected in your subject, look at the camera angle from the other side and you will find what it is.
EVERYTHING REFLECTS. EVERYTHING.
Some things reflect more than others, but everything you see is simply the reflection of the light from its surface.
I call it ‘presentation’, and when I discuss lighting, I use the word presentation to talk about how the light looks to the viewer.
Once we realize that the angle of the light source to the subject, and the incident angle of that light source to the subject is going to present to us in ways we can control, lighting becomes so much easier to create.
Think of the way the light strikes hair on a slightly backlit portrait. The reason the hair becomes so much brighter is because it is round in shape, and somewhere on that round, shiny hair is going to be that same angle of incidence that the camera is seeing.
An example.

You can see how bright that hair is with the sun shining on it, and each tiny hair reflecting that sun back to the camera.
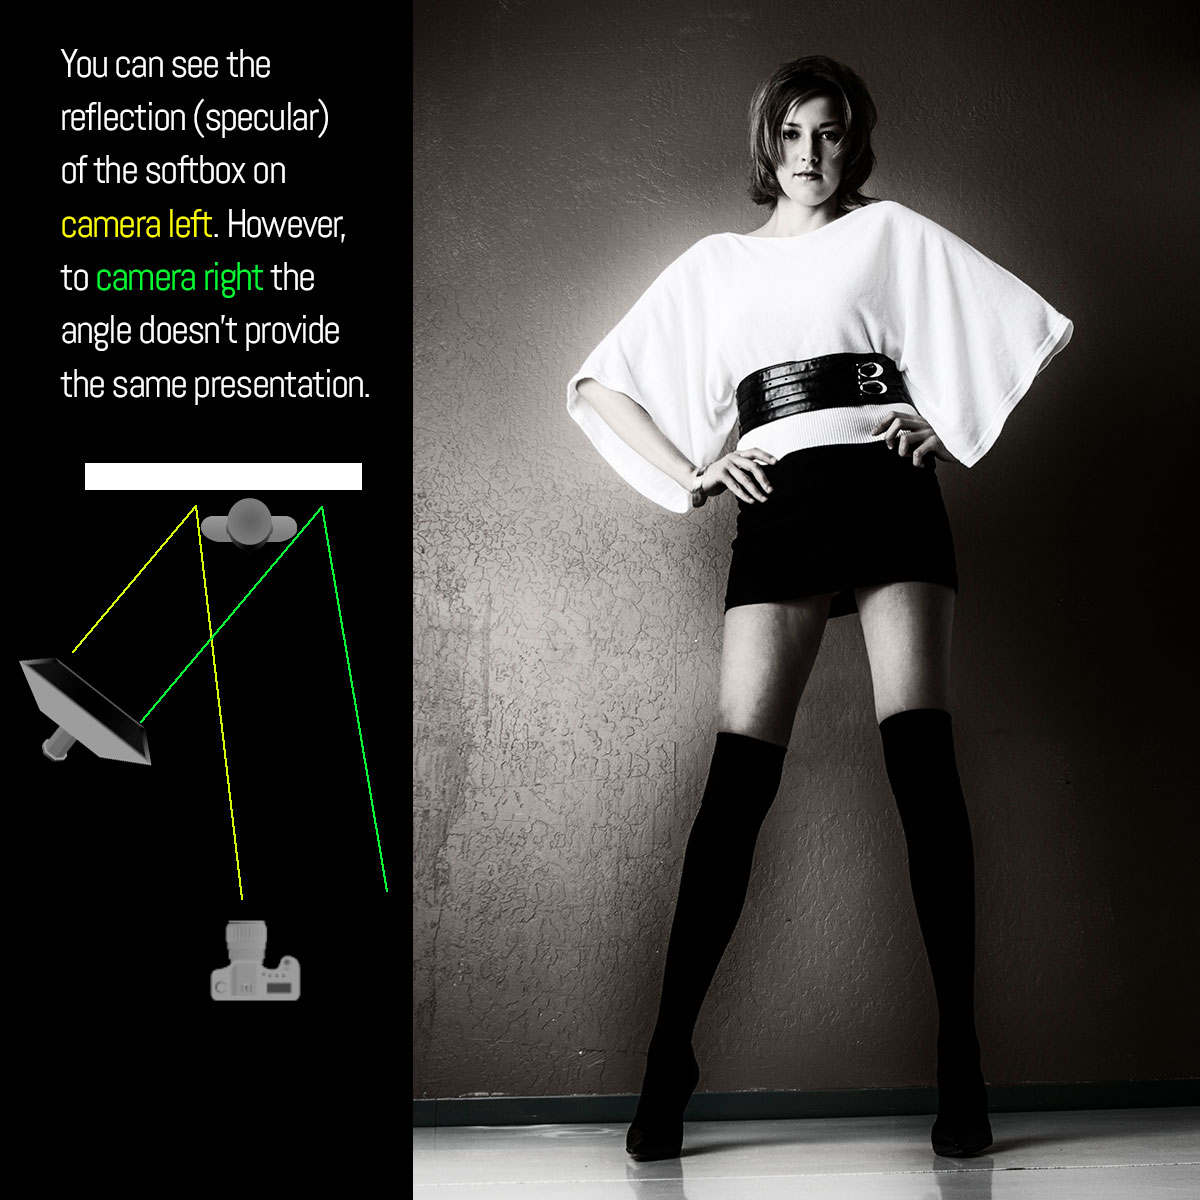
In the image below, I used a large softbox in order to get a shiny, reflective area off of the wall behind the subject and create a gradient to the background. You can see in the illustration that the angles of reflection come back to the camera on the left side of the model, but not on the right side of the model. The wall is a semi-gloss wall and provides a nice, soft reflection of the light source.
Let’s take a closer look at that triangle that is formed by the light to the subject, the subject to the camera, and the light to the camera.
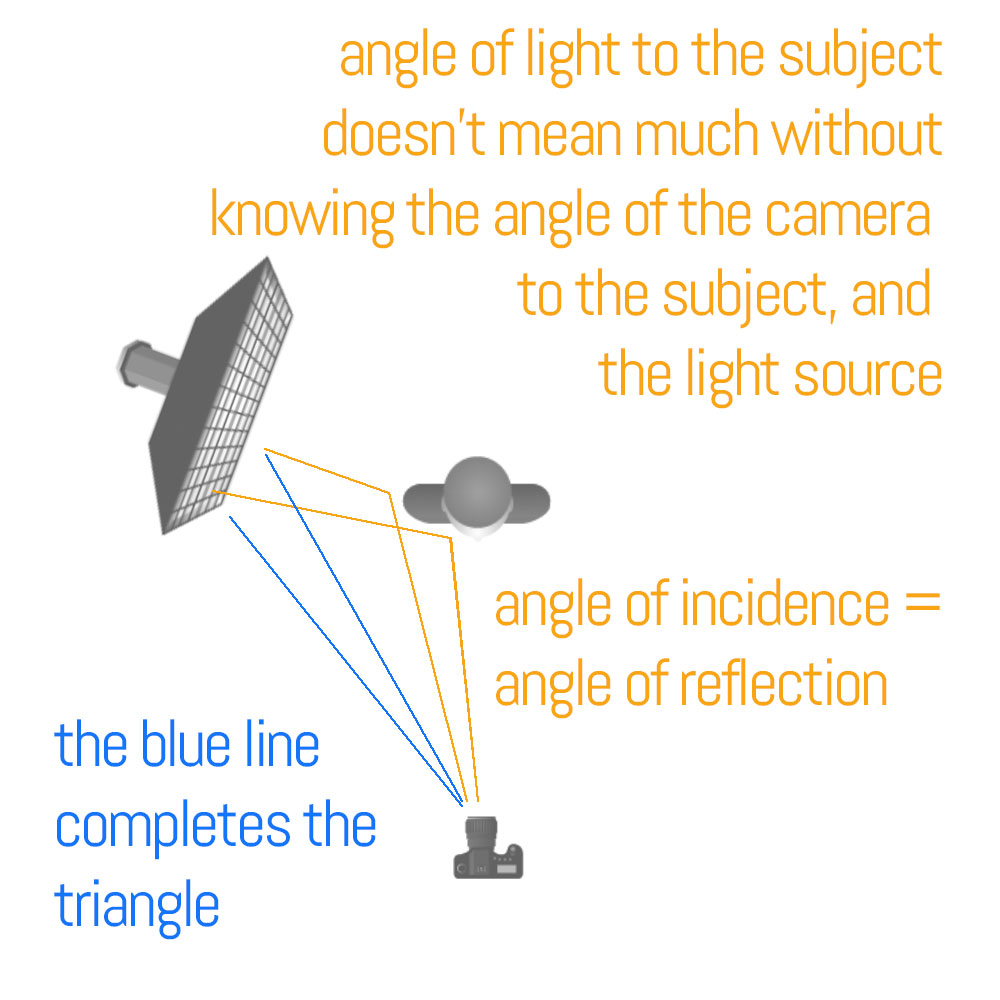
It is being able to see that triangle (shown above with the blue line) and to then visualize the presentation of the light that makes it easier to control. Once you begin to see those angles, and the way they will present back to the camera, lighting can become much more of a finessed technique rather than a flailing exercise.
Let’s talk about direction.
There are three major directions of light and one that doubles as a direction. I will explain.
This is front lighting. The light comes from the side of the camera, and it can be angled quite a bit (90 degrees). The presentation is full angle of incident / angle of reflection, and you can control that fall of incidence by where you place the camera in relationship to the light and to the subject angle.
Front light:
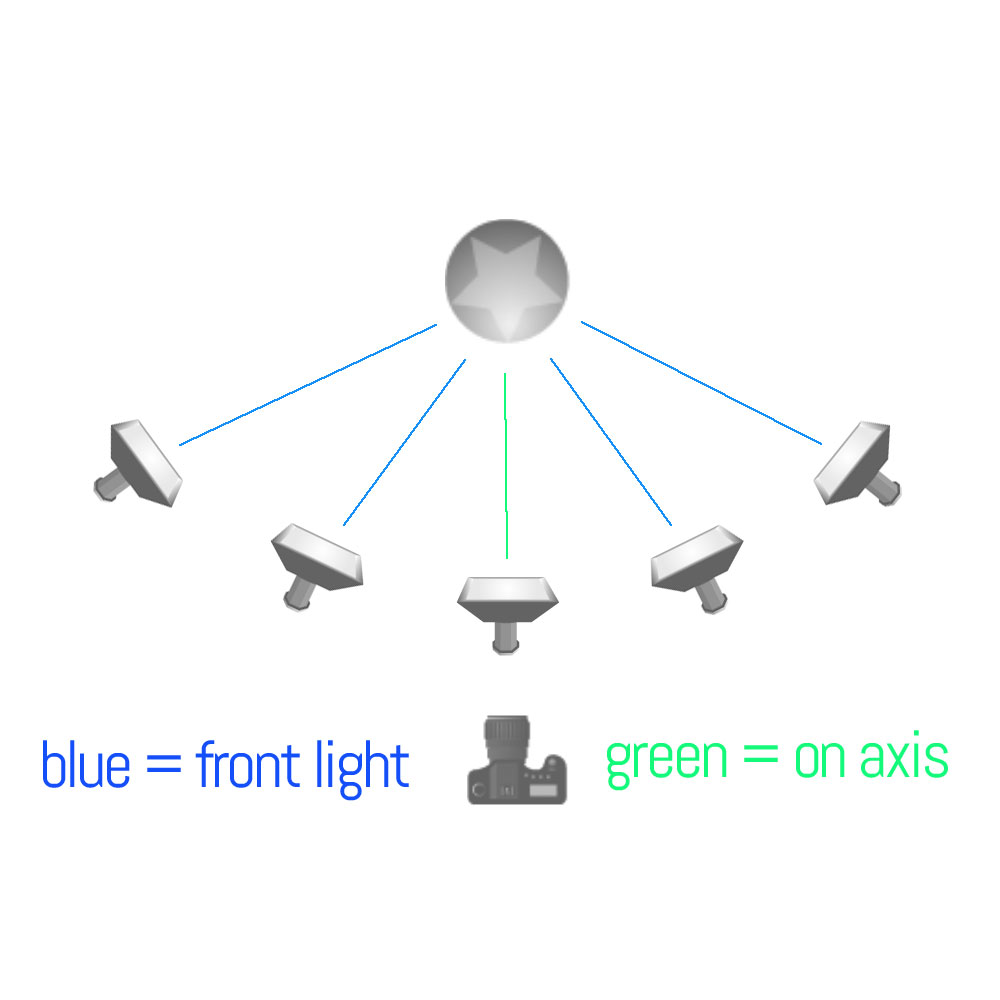
You can see that from right to left there is 180 degrees of placement that will allow you to have front light. There is one point in the middle, however, that is at the same angle as the camera. We call that “on-axis” lighting and is a favorite of beauty and fashion shooters.
On-axis lighting is from the position angle of the camera to the subject, not necessarily at the distance of the camera. That means there is no triangle (horizontally) from light to subject to camera. As you can imagine the reflection is straight back into the camera. A wide, soft light with few shadows.
In the diagram below we see side lighting and backlighting. Side lighting is as its name suggests, directly from the side of the subject creating a 90-degree angle to the camera angle.
When we move the lights farther back from sidelighting, we have backlight. Backlight has all the same angle variations as does the front lighting.
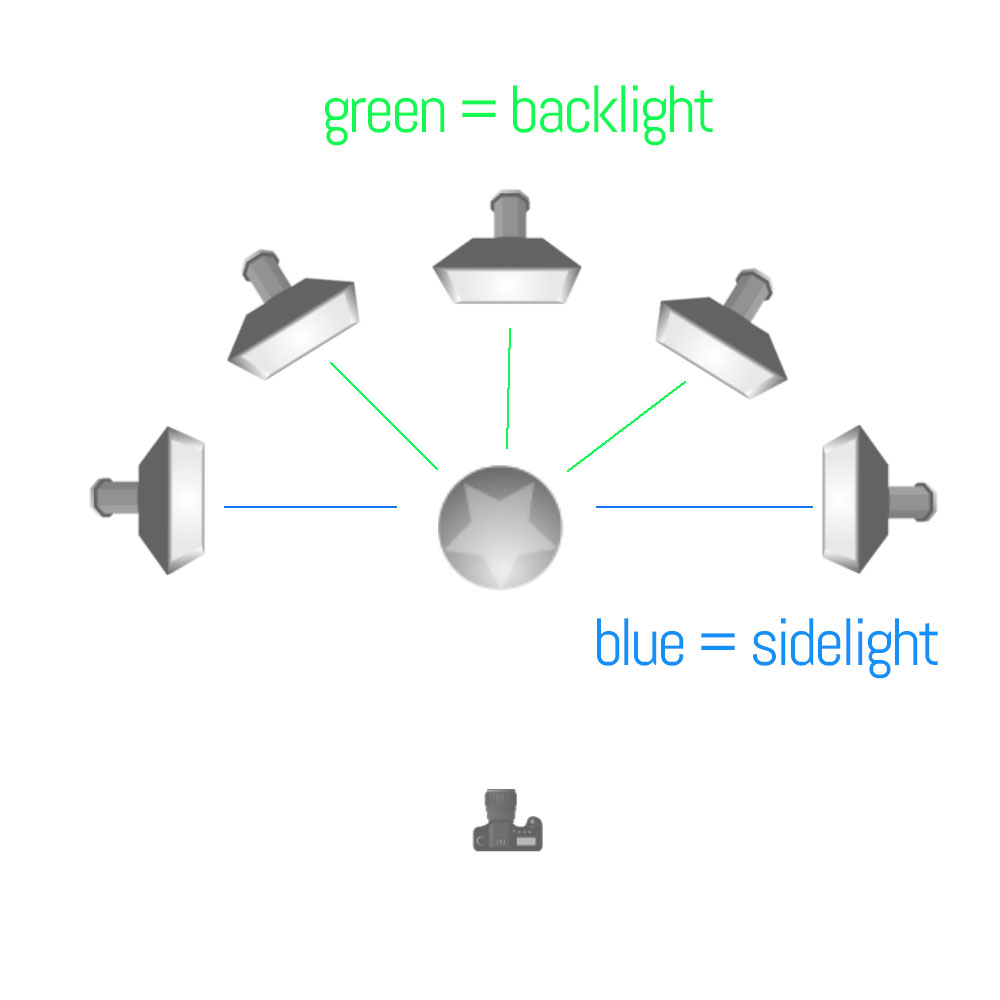
Top lighting from directly above is the same as side lighting if it is at a 90-degree angle to the subject/camera. If it is slightly in front it is front light, and slightly behind it is backlight.
Front Light One

Front Light Two
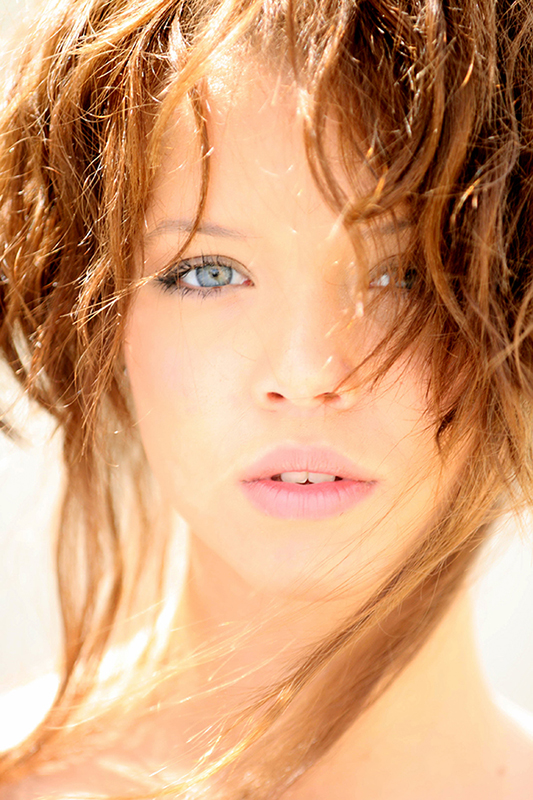
Side Light One
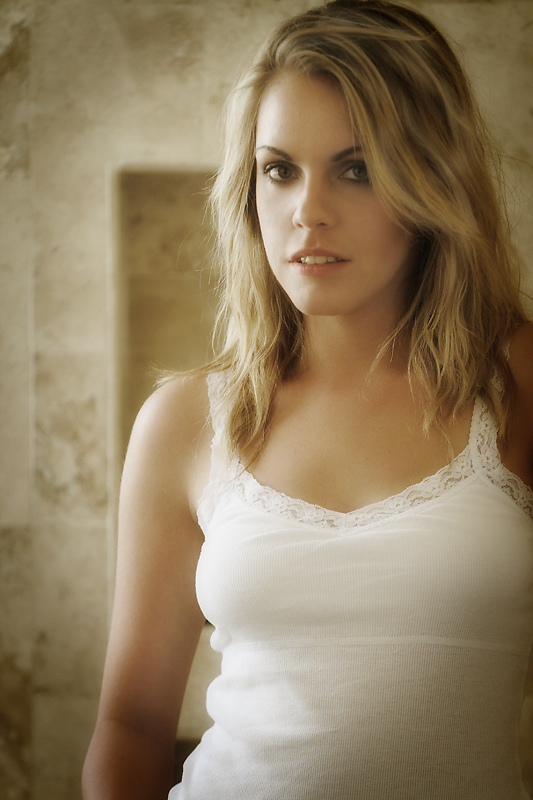
Side Light Two
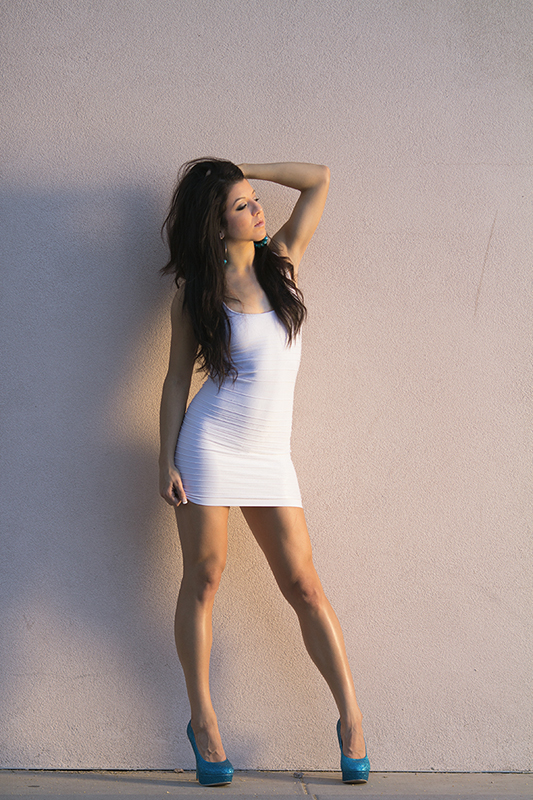
As you can see above, the angle of the light to the subject, and to the camera, makes a big difference when you are working toward making the shot look a specific way.
Let’s wrap it up:
The four different properties of lighting are:
- Size of the light source in relationship to the subject.
- Distance of the light source from the subject.
- Color of the light, and its relationship (if any) to the prevailing ambient.
- Angle of the light source to the subject, and to the camera.
And NONE of them are the most important – they are all equally important. We don’t think of them in an hierarchical way, we think of them in a holistic, symbiotic way. Change one, you may have to indeed change another. Change that one, and you may have to alter two others to make it work for you.
All of this only matters to you if you know what you want your image to look like. Do you want soft light, or do you want hard-edged light? Do you want a mixed light image that looks natural, or do you want to play with color temps in a creative way? If we move our light closer or farther away, what does that do to the look of the image? Do we need to bring out texture, or is a flatter look our goal?
These questions are usually not asked in order in our brains. All of them are asked at the same time, and we react to these creative decisions by utilizing the tools we have for creating them.
And now, with these basics, we can begin to create the images to present OUR vision of the subject in front of our lens.
ASSIGNMENTS:
- Find a subject that allows you to move around it and make images from all the different lighting positions. Do this either early in the morning or late in the afternoon so the sunlight is closer to your head height to the subject.Shoot front light, side light, back light, axis light. Study the images to see how the subject changes in the different lighting positions. Print the images and make notations on how it, and the background, look to you. What changes do you see?
- Using your flash or continuous lights, do the same thing with a subject inside. You can choose something as a still life, or – if you are a people shooter – grab a subject and start moving that light from on-axis to back.Note that when your light is backlight ONLY, the subject is quite dark, possibly even silhouette. You can adjust for that or not – your call. but remember that your adjustments will play the same role as the main light in the angle of light to subject to camera.

PROJECT 52 PRO IS NOW A SUBSCRIPTION COMMUNITY
After 6 years of single start dates, it is time to move the workshop to a monthly subscription service that allows you to join, do assignments, communicate with and learn from peers, and most of all have a highly creative experience. We call it Project 52 Pro System...

10 Questions That May Predict Your Success as a Photographer
Commercial photography is a lot of fun, and it is a lot of work. Hard work. Some of it mind-numbing boring work, but more important than most anything else you do. Understanding what we do, who we do it for, and what its value is can be a crucial part of getting work...

A New Workshop for Learning Video
CREATE A 2-3 MINUTE VIDEO FOR SELF PROMOTION LINK to Enroll. We do it together. Creative Approach > Storyboard > Simple Special Effects (Slow Motion, B Roll, etc…) > Shoot Video to Storyboard > Assembling Assets: A Roll / B Roll / Audio > Building Video...
You Must Believe BEFORE You Will Ever See Success
https://www.youtube.com/watch?v=VrtT-WIka8s
Are Free Images Destroying the Professional Photographer?
IS UNSPLASH DESTROYING THE BUSINESS OF PHOTOGRAPHY?NOTE:MY BELIEFS HAVE EVOLVED QUITE A BIT.I LOVE UNSPLASH AND AM A VERY ACTIVE CONTRIBUTOR.Edited July 2, 2019https://www.youtube.com/watch?v=1VDR7mI5dJM&t=3sA recent article in PDN noted that Unsplash...
Meet Neville Palmer, Project 52 Photographer in Calgary
Calgary Photographer Neville Palmer https://www.youtube.com/watch?v=r510ZZ_FtTg What brought out your interest in photography? How'd you get started? When I was a very young kid I got a Kodak 126(?) cassette type camera for Christmas. I used it to make images of...
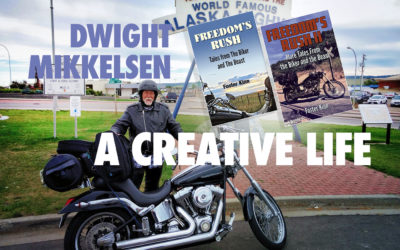
Meet Dwight Mikkelsen: A Creative Life
NOTE: THIS IS AN AUDIO INTERVIEW. Enjoy. Dwight Mikkelsen is a composer, writer, and motorcycle adventurer. His music has been performed all over the world, and he has written and arranged for major motion pictures including "Dichotomy of Man", "She Devil", "Reservoir...

Meet Craig Ferguson: Project 52 Photographer, Taipei, Taiwan
https://www.youtube.com/watch?v=JI-AcRLMl8A What brought out your interest in photography? How'd you get started? To some extent it’s always been there. I remember having a Kodak 110 camera when I was quite young, maybe 7 or 8. For Christmas, birthday’s etc, I’d...

Meet Brian Miller: Project 52 Photographer, St Augustine
Website URL: http://totallyswellstudio.com Instagram URL: @totallyswellstudio Linkedin: https://www.linkedin.com/in/brian-miller-0b04ab10/ Facebook Page: https://www.facebook.com/totallyswellstudio/ Email: brian@totallyswellstudio.com Phone:...
24 Frames in May: Film Is Still Alive and Well
These submissions were from the 24 Frames in May project we did in May. The goal was to shoot one roll of 24 exposure 35mm film or two rolls of 120 on a medium format camera. As you can see, we got some great work. Film is not dead - it is...
Meet Sid Ceaser: Nashua New Hampshire
(All photographs copyright Sid Ceaser) Sid Ceaser Photography www.ceaserphotography.com www.sidceaserfineart.com http://dedpxl.com/author/sid-ceaser/ Video Interview https://www.youtube.com/watch?v=umKQ8VWZIRI 1. What brought out your interest in photography? How'd...
Personal Projects and Recharging the Inner Batteries
This is kind of a personal post for me. There are challenges that I face as an artist and writer. And photographer. And sometimes those challenges can take its toll on me, and us. Creativity, for me, takes nurturing and constant practice. I have always felt that...
Using the RNI Presets for Color Palette Consistency
https://www.youtube.com/watch?v=HTwtS3c45BI I like to 'metaphorically' be shooting film in my head while holding a digital camera. One of the great things that I loved about film was the fact that different emulsions gave different color palettes. Kodachrome didn't...

Three Ideas Thursday: June 8
3 IDEA THURSDAY 1. Partner with an up and coming graphic designer or PR firm. Connect at meetups for creatives and see if there is any synergy there. Find someone who has a similar vision and create a double hit agency to allow you to sell the graphics and them to...

Best of Project 52, May 27, 2017
The Best of Project 52 is a completion of images from our 2016, 2017 P52 Pro groups and any of the 8 Week Courses that may be live at the time. These photographers work hard to create images that will work for a portfolio and to show clients that they can indeed shoot...
Three Idea Thursday June 1
These will become more prevalent as I continue to exercise the brain muscle. Working the 10 ideas a day from James Altucher's great book "Choose Yourself". So here goes. Three Idea Thursday, June 1 1. Photograph all of the Thai Food (Italian, Mexican, French -...
Behind The Image: 5-21-2017
https://www.youtube.com/watch?v=kTQ7x1H1pOA
Best of Project 52: May 21, 2017
https://www.youtube.com/watch?v=9QYPBOhfWis

Do You Want a Stronger Portfolio? Try Writing About Your Images
https://www.youtube.com/watch?v=Ex8zMLrn1ug

Charge What It’s Worth… Or Shoot it For Free
A gift is a gift. If you want to gift your photography, I have nothing to say about it. Your right and good for you for gifting your gift. When you pull the plug on pricing, you bring everyone else down as well, and mostly you hurt yourself worse than anyone. If you...

Best of Project 52: May 14th, 2017 Edition
A new ongoing feature on Lighting Essentials; Best of Project 52. Project 52 has so many wonderful images posted each week and I want to feature the best of the best here for you to enjoy. Whether it is portraiture, product, still life, food or conceptual imagery, the...
“You go where you look…”
ON a motorcycle or in life, what we see in front of us will draw us in. Don't focus on the negativity or the problems, focus on the solutions and the positivity all around you. It works... it really does. WATCH THE VIDEO FOR MORE:...
Second Guessing the Art Director… Don’t Do It
https://www.youtube.com/watch?v=b2jAWaekI4c There are two parts. 1. Don't shoot images you think art directors or clients WANT to see because you will be wrong more often than right. There is no aesthetic that everyone wants to see. So be authentically you and shoot...

I Nearly Destroyed Two Vintage Cameras in One Stupid Move
https://www.youtube.com/watch?v=CsZG_DZmimQ