

Lighting Principle Number Four: The Angle of the Light to the Subject and the Camera
Law of Physics: Angle of Incidence equals the Angle of Reflection.
This is an axiom that a lot of people hear and repeat without taking careful note of what it means to their photography.
And yet it is one of the most basic and important physical rules of subject centric lighting.
What does it mean and how can we use this to our advantage?
It means that if the light is angled toward a subject, the reflection of that light will be presented back to the camera at the same angle.
Think of the game of billiards or pool. If you hit a ball into the wall at a 30% angle, the ball will come off that wall at a 30% angle. And that completes a triangle. Understanding that triangle is key to making quicker, smarter lighting decisions.
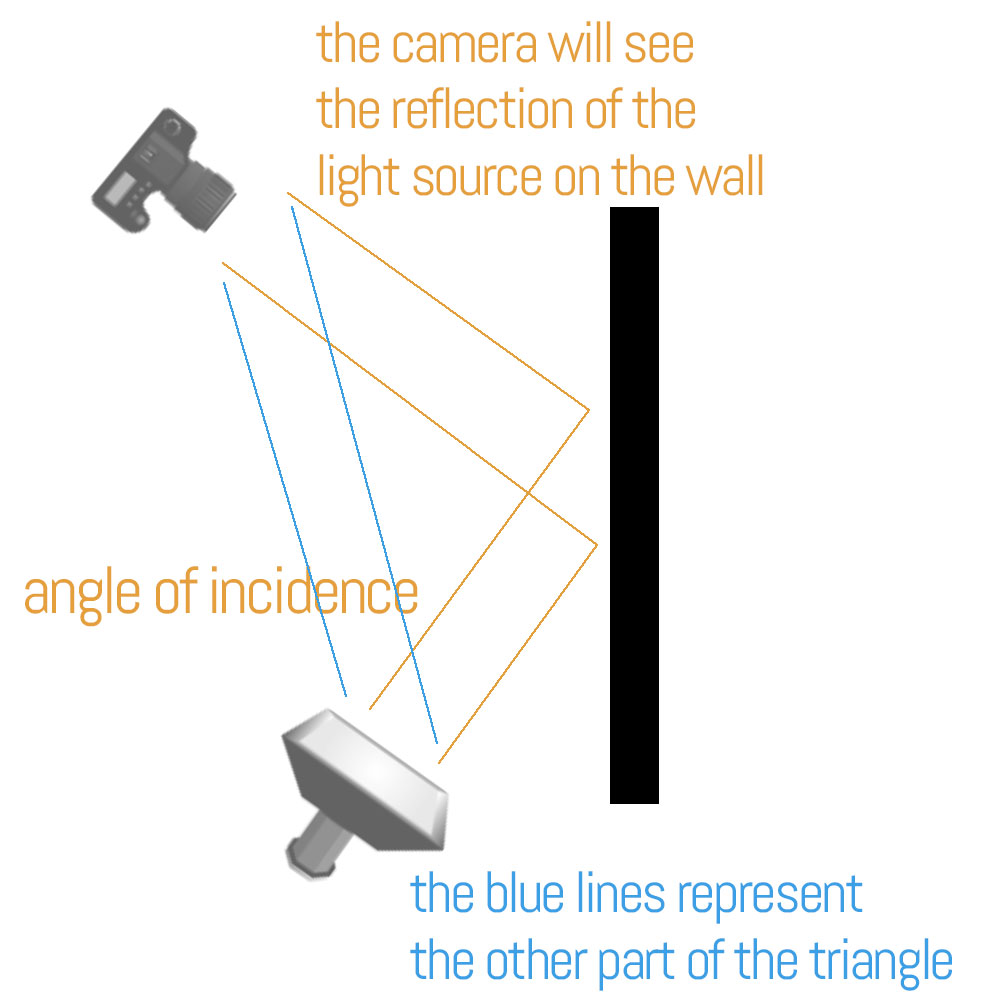
It means that you have to be able to judge the angle of the light as it strikes the subject and understand what that light will do once it strikes the subject. If there is something being reflected in your subject, look at the camera angle from the other side and you will find what it is.
EVERYTHING REFLECTS. EVERYTHING.
Some things reflect more than others, but everything you see is simply the reflection of the light from its surface.
I call it ‘presentation’, and when I discuss lighting, I use the word presentation to talk about how the light looks to the viewer.
Once we realize that the angle of the light source to the subject, and the incident angle of that light source to the subject is going to present to us in ways we can control, lighting becomes so much easier to create.
Think of the way the light strikes hair on a slightly backlit portrait. The reason the hair becomes so much brighter is because it is round in shape, and somewhere on that round, shiny hair is going to be that same angle of incidence that the camera is seeing.
An example.
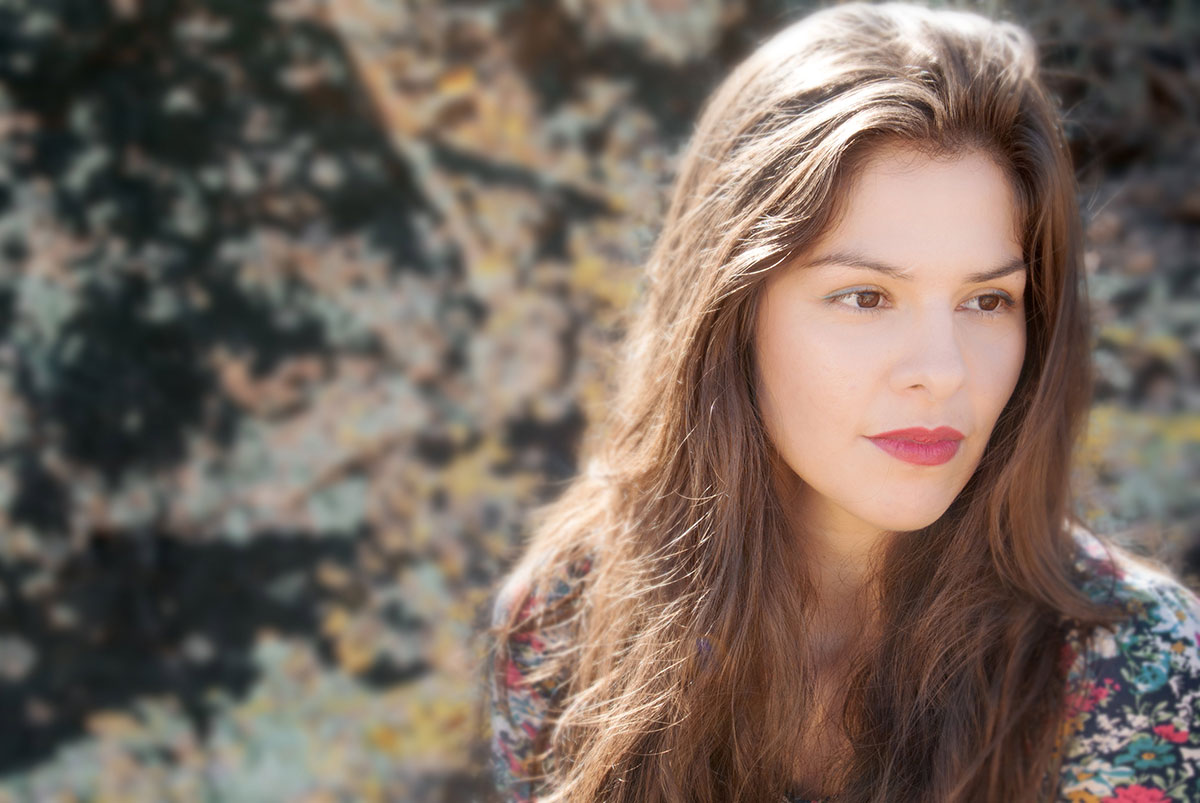
You can see how bright that hair is with the sun shining on it, and each tiny hair reflecting that sun back to the camera.
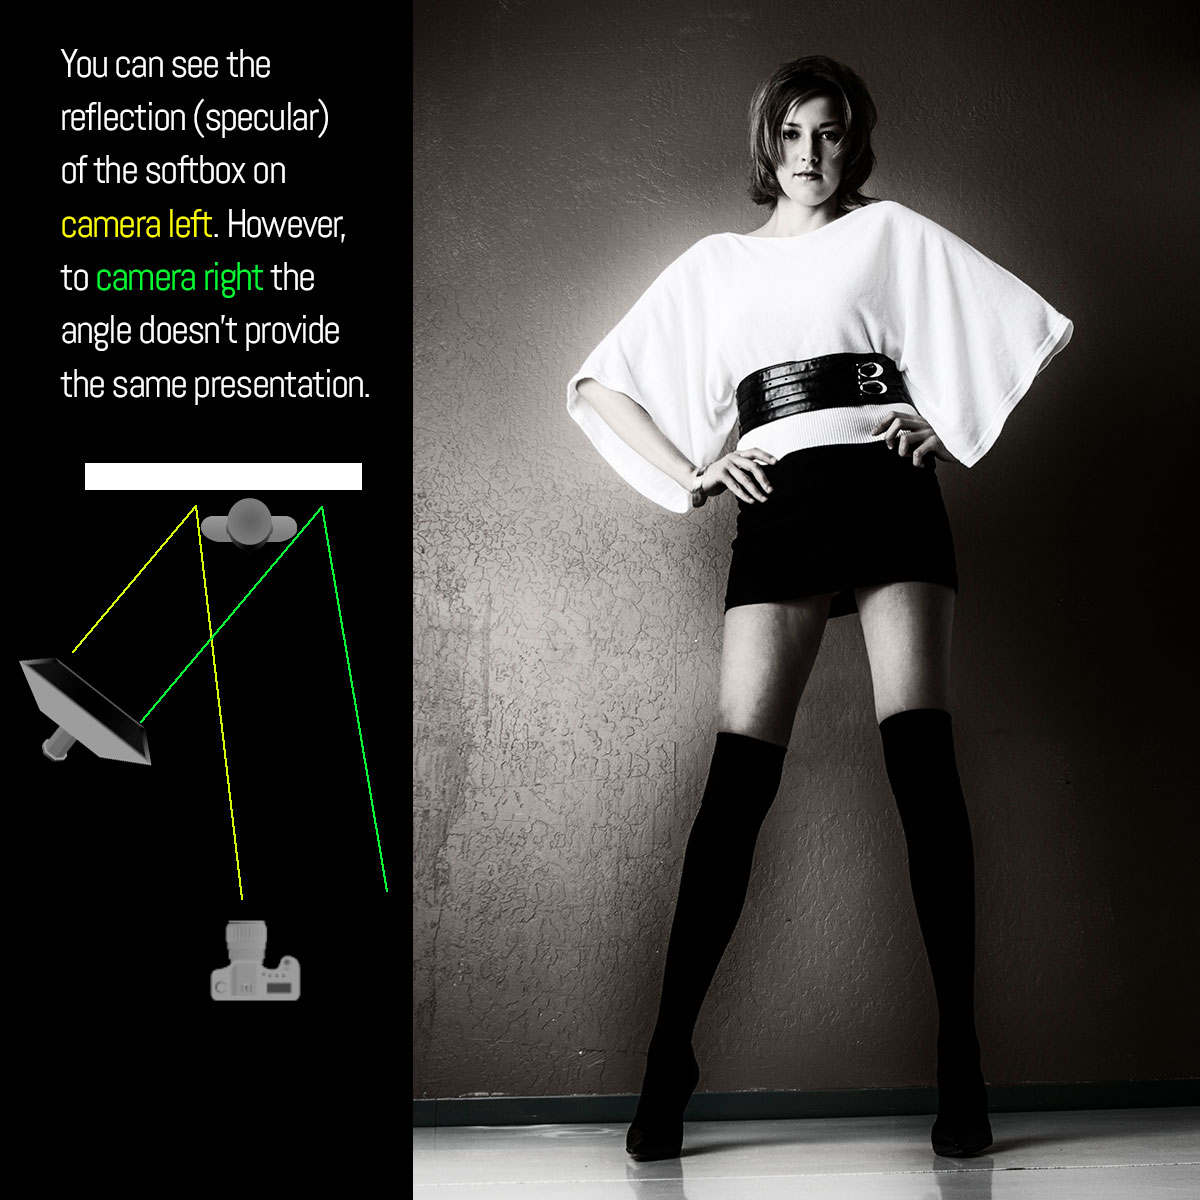
In the image below, I used a large softbox in order to get a shiny, reflective area off of the wall behind the subject and create a gradient to the background. You can see in the illustration that the angles of reflection come back to the camera on the left side of the model, but not on the right side of the model. The wall is a semi-gloss wall and provides a nice, soft reflection of the light source.
Let’s take a closer look at that triangle that is formed by the light to the subject, the subject to the camera, and the light to the camera.
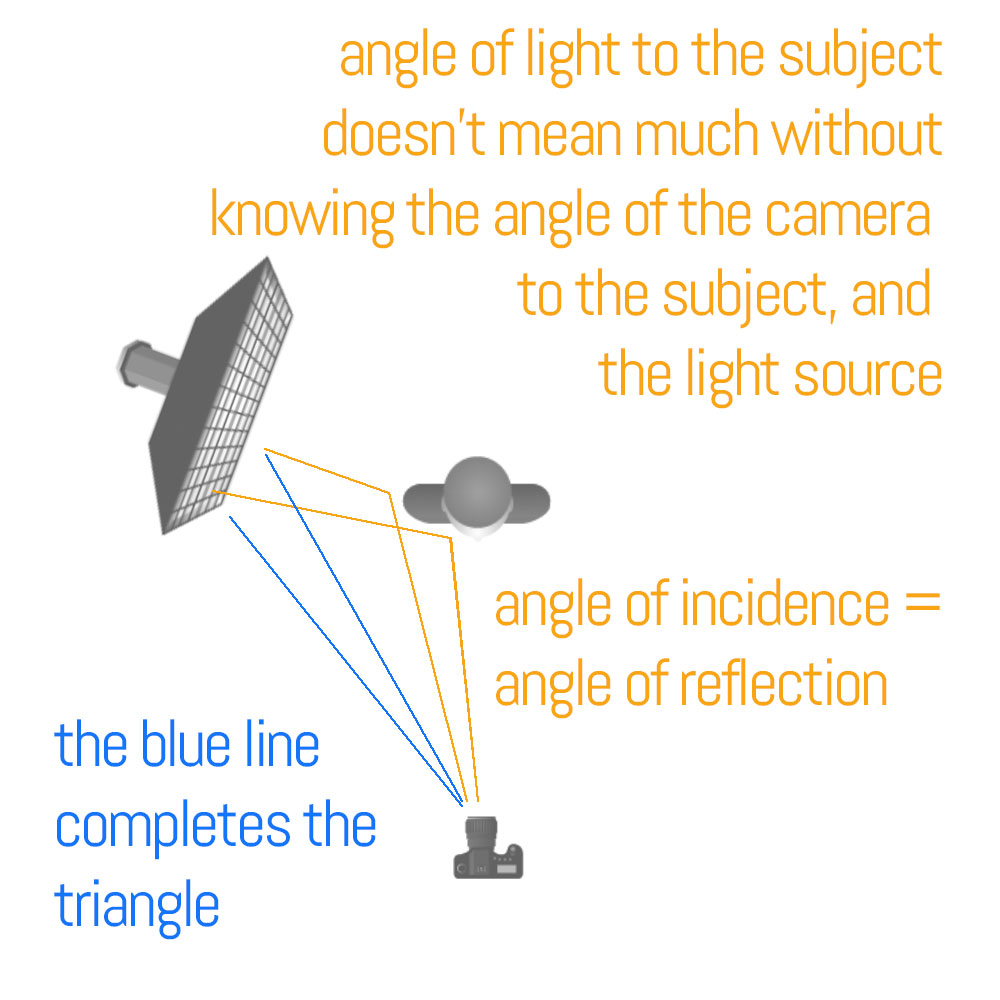
It is being able to see that triangle (shown above with the blue line) and to then visualize the presentation of the light that makes it easier to control. Once you begin to see those angles, and the way they will present back to the camera, lighting can become much more of a finessed technique rather than a flailing exercise.
Let’s talk about direction.
There are three major directions of light and one that doubles as a direction. I will explain.
This is front lighting. The light comes from the side of the camera, and it can be angled quite a bit (90 degrees). The presentation is full angle of incident / angle of reflection, and you can control that fall of incidence by where you place the camera in relationship to the light and to the subject angle.
Front light:
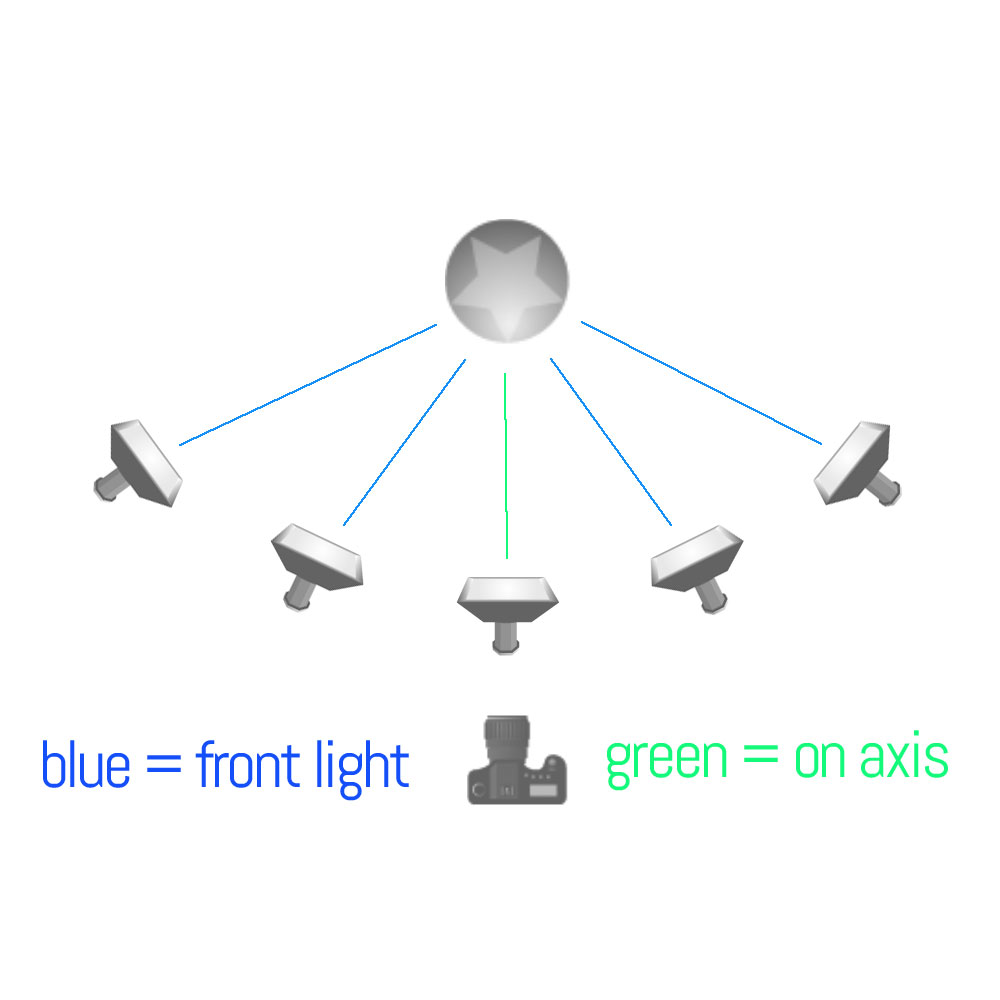
You can see that from right to left there is 180 degrees of placement that will allow you to have front light. There is one point in the middle, however, that is at the same angle as the camera. We call that “on-axis” lighting and is a favorite of beauty and fashion shooters.
On-axis lighting is from the position angle of the camera to the subject, not necessarily at the distance of the camera. That means there is no triangle (horizontally) from light to subject to camera. As you can imagine the reflection is straight back into the camera. A wide, soft light with few shadows.
In the diagram below we see side lighting and backlighting. Side lighting is as its name suggests, directly from the side of the subject creating a 90-degree angle to the camera angle.
When we move the lights farther back from sidelighting, we have backlight. Backlight has all the same angle variations as does the front lighting.
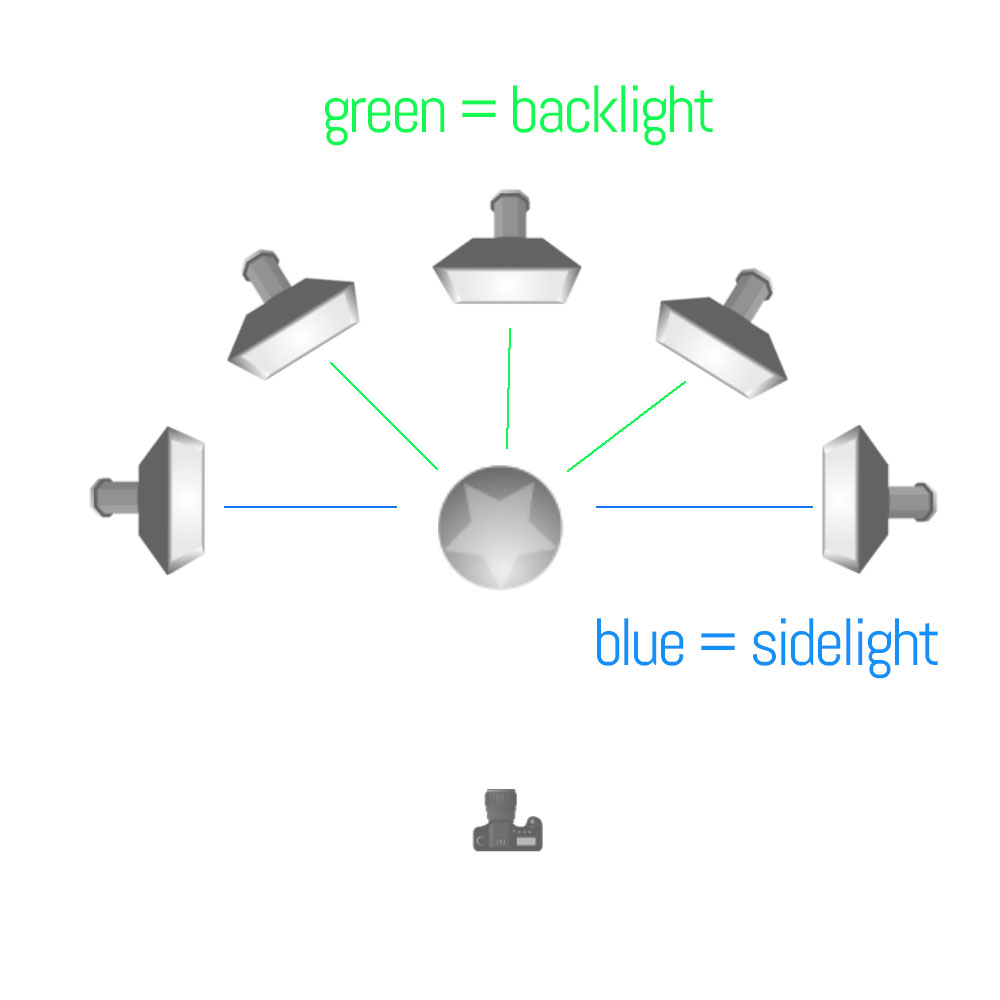
Top lighting from directly above is the same as side lighting if it is at a 90-degree angle to the subject/camera. If it is slightly in front it is front light, and slightly behind it is backlight.
Front Light One

Front Light Two
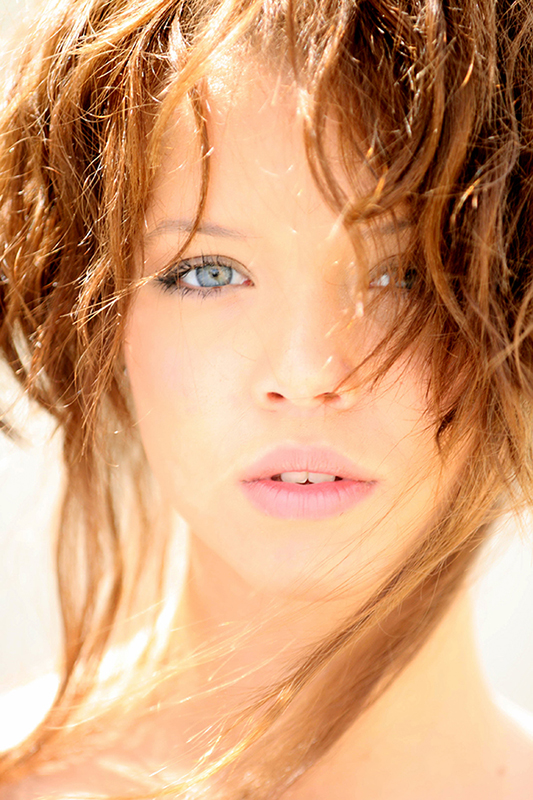
Side Light One
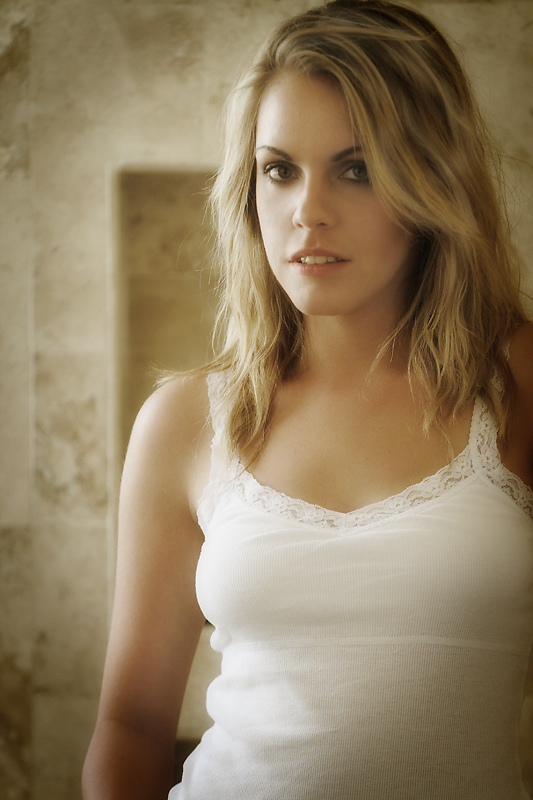
Side Light Two
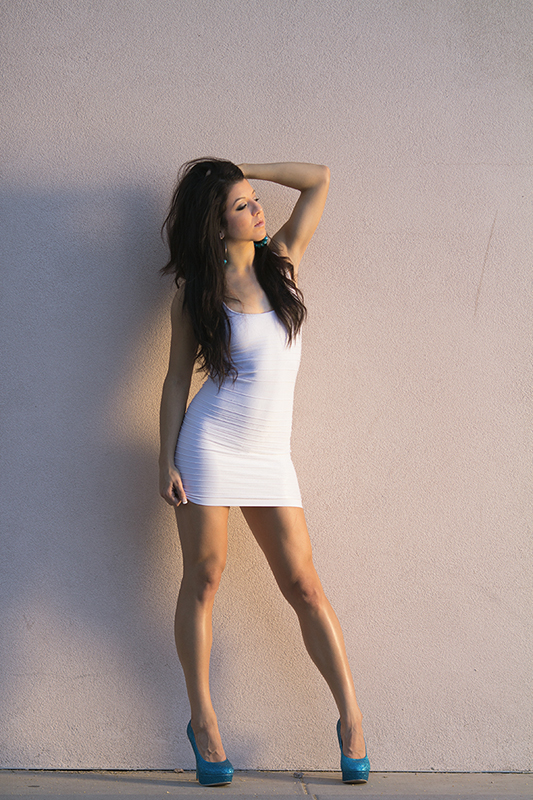
As you can see above, the angle of the light to the subject, and to the camera, makes a big difference when you are working toward making the shot look a specific way.
Let’s wrap it up:
The four different properties of lighting are:
- Size of the light source in relationship to the subject.
- Distance of the light source from the subject.
- Color of the light, and its relationship (if any) to the prevailing ambient.
- Angle of the light source to the subject, and to the camera.
And NONE of them are the most important – they are all equally important. We don’t think of them in an hierarchical way, we think of them in a holistic, symbiotic way. Change one, you may have to indeed change another. Change that one, and you may have to alter two others to make it work for you.
All of this only matters to you if you know what you want your image to look like. Do you want soft light, or do you want hard-edged light? Do you want a mixed light image that looks natural, or do you want to play with color temps in a creative way? If we move our light closer or farther away, what does that do to the look of the image? Do we need to bring out texture, or is a flatter look our goal?
These questions are usually not asked in order in our brains. All of them are asked at the same time, and we react to these creative decisions by utilizing the tools we have for creating them.
And now, with these basics, we can begin to create the images to present OUR vision of the subject in front of our lens.
ASSIGNMENTS:
- Find a subject that allows you to move around it and make images from all the different lighting positions. Do this either early in the morning or late in the afternoon so the sunlight is closer to your head height to the subject.Shoot front light, side light, back light, axis light. Study the images to see how the subject changes in the different lighting positions. Print the images and make notations on how it, and the background, look to you. What changes do you see?
- Using your flash or continuous lights, do the same thing with a subject inside. You can choose something as a still life, or – if you are a people shooter – grab a subject and start moving that light from on-axis to back.Note that when your light is backlight ONLY, the subject is quite dark, possibly even silhouette. You can adjust for that or not – your call. but remember that your adjustments will play the same role as the main light in the angle of light to subject to camera.
PLEASE Make This Guy Famous
Ramona, California. https://www.youtube.com/watch?v=97hfxth3aas This guy needs to be sued into oblivion. Full on sued into poverty. UPDATE: "Police were quick to take action and have now identified and arrested 52 year old Mark Gordon as the driver of the vehicle. As...
Sam Breach’s Extemely Cool, Very Fine Fashion Photography Promo
Meet Sam Breach, a Bay Area photographer poised to break into the San Francisco, East Bay fashion scene. Sam is a long time Project 52 member and we are all totally excited about her new promo piece. If you are a fashion designer, editor, or art director, I recommend...
Project 52 2016 Edition is OPEN for Students
PROJECT 52 PRO 2016 EDITION I am so happy and proud to announce this new workshop for 2016. You can find out all of the information here. We have only 25 slots left, and they will fill really fast. We had the class 2/3 filled by early registration from previous...
Meet John Covington, Photographer – Musician
MEET JOHN COVINGTON I had interviewed and had lunch with John early in June of 2016. We met at his studio which is built in his backyard in a wonderful little neighborhood full of trees and greenery. I have been aware of John for a few years, but this was the first...
Let’s Uncheck Boxes That Kill Our Creativity
Let's Uncheck Boxes That Kill Our Creativity I recently listened to a speaker talk about unchecking the boxes he had that put an artificial hold on his career, and how that had helped him in his pursuit of sports excellence. I realized how many boxes we photographers...
2016 P52 Roadtrip Book: FREE PDF
Every year we go on a roadtrip and all of the Project 52 members can come along. It is not a workshop, although we do photography nearly all the time. There is no charge for it, members simply pay their own way and their portion of van rentals. We spend a week in...

The Art of Still Life: June 2016 Edition
Examples from the Still Life Class here at Lighting Essentials. Finished photos and the BTS shots of the lighting used. (cover image by Carla McMahon) A big shout out to the students for such wonderful work. And the BTS shots. Photographer: Doris Rudd...
The Porto Photography Experience
From Anna at the Porto Photography Experience: "As photographers living in Porto, Portugal, we feel privileged: the UNESCO World Heritage area backdrops to shoot in, the kind of sights all photographers dream of; amazing food; great weather for most of the year;...

“A Disturbing Trend” – by Neal Rantoul
PHOTO BY NEAL RANTOUL FROM THE PORTFOLIO "WAVES" "Look, the practice of making pictures used to be hugely craft based. You needed to study photography and the making of pictures hard to be good at it. It used to be difficult to do well. As a professor I seldom saw any...
Digital. Film. Images.
“I don't think using film per se makes someone stand out in a digital world,” he says. “That's never been a motivation to me. It's essentially a photographer’s understanding of his craft and sensibility and way of seeing that makes him stand out... And that certainly...
Is Snapchat a New Story Telling Medium?
“Snapchat brings the reader into the story. Each viewer becomes a part of the assignment. They are my travel companions,” Stanmeyer tells TIME. “When millions of readers pick up the magazine each month, they only see 12 to 15 photographs. But so much more takes place...
Overheard: Keith Taylor, Photographer, Atlanta
Keith Taylor, Photographer, Atlanta: "You must learn to be content with where you are & what you have, yet still push yourself. Otherwise, you will destroy yourself - mentally - by comparing yourself to where somebody else is at. What somebody else is doing...
Project 52 Professionals – 2016 Edition: “Let’s Get Serious”
NEW CLASS STARTS APRIL 2017... More information coming soon. Watch this space for more news coming February, 2017.
Phoenix to Fairbanks on a Motorcycle… coming soon!
https://www.youtube.com/watch?v=TMyLaR0_mV8&feature=youtu.be You can follow along at www.phoenixtofairbanks.com Special thanks to Jerry O'Connor, joconnor.co
TAINTED LOVE: Why Photographers Fail
TAINTED LOVE: Why Photographers Fail Recently there has been a spate of very sad, and ultimately defeatist articles decrying the “death of photography”. We have no shortage of examples. Seriously. In all their pain and detailed examples of how the art and business of...
Meet David Giral: Architectural Photographer, Montreal
https://www.youtube.com/watch?v=mWByphn0dwU
Jay B Sauceda: Ya’ll Need To Meet This Texas Photographer
Jay B Sauceda is an Austin based photographer with a Texas-sized appetite for making killer images. Whether it be piloting a plane through a mountain canyon, or hiking the Utah plateaus, Jay looks for images that spark the imagination. Jay is also behind the zaniness...
A Few Spots Are Open in the Upcoming Workshops
8 WEEK PORTRAIT WORKSHOP ONE One of the most popular workshops we do. This is an intense, shooting workshop where we study the work of 8 top level photographers to learn what they do, how they do it and why. MORE INFORMATION HERE Be sure to watch the video on the...
“Body and Soul” a New Book by Boudoir Sensation, Susan Eckert
Meet Susan Eckert, a photographer in Long Island, NY specializing in intimate portraiture of women. (Blog) Her new book, "Body and Soul" is one of the best photo books I have had the privilege to read. It is a wonderful mixture of artful images, and real down to earth...
An Interview with Photographer LaRae Lobdell, Florida
MEET LARAE LOBDELL For those who may not know, LaRae started her career in the Seattle area, and is now living in the Miami area. She has been a host on CreativeLIVE, shot many musicians and artists, and is now working with Polaroid University on a project to teach...
Webinar Replay: Find Photo Clients Now with Special Guests.
The Webinar last Thursday was really fun. Big shout out to Steve Collins and James Eisele for joining in and letting people know how the system works for them. Here is the replay. Enjoy. https://www.youtube.com/watch?v=k5qro3NZXWU
PHOTOGRAPHY WORKSHOP INFORMATION
TWO WORKSHOPS AND A WEBINAR COMING UP 8 WEEK PORTRAIT WORKSHOP ONE One of the most popular workshops we do. This is an intense, shooting workshop where we study the work of 8 top level photographers to learn what they do, how they do it and why. MORE INFO HERE. 8 WEEK...

Find Photo Clients NOW Webinar This Thursday
THE WEBINAR! I want to share a few things about the Find Photo Clients Now System, and why I know it will help emerging photographers in smaller markets develop a real and meaningful approach to business. I will discuss how it came about, how I used it successfully in...
Why I Changed the Approach to Find Photo Clients Now
AUTHENTIC TRAINING STARTS WITH AUTHENTIC PRESENTATION I have wanted to teach this system for quite a while now. It works. I know it works because I have helped dozens of photographers to use it and make it work for them. There is a wave of teaching going on out there,...