
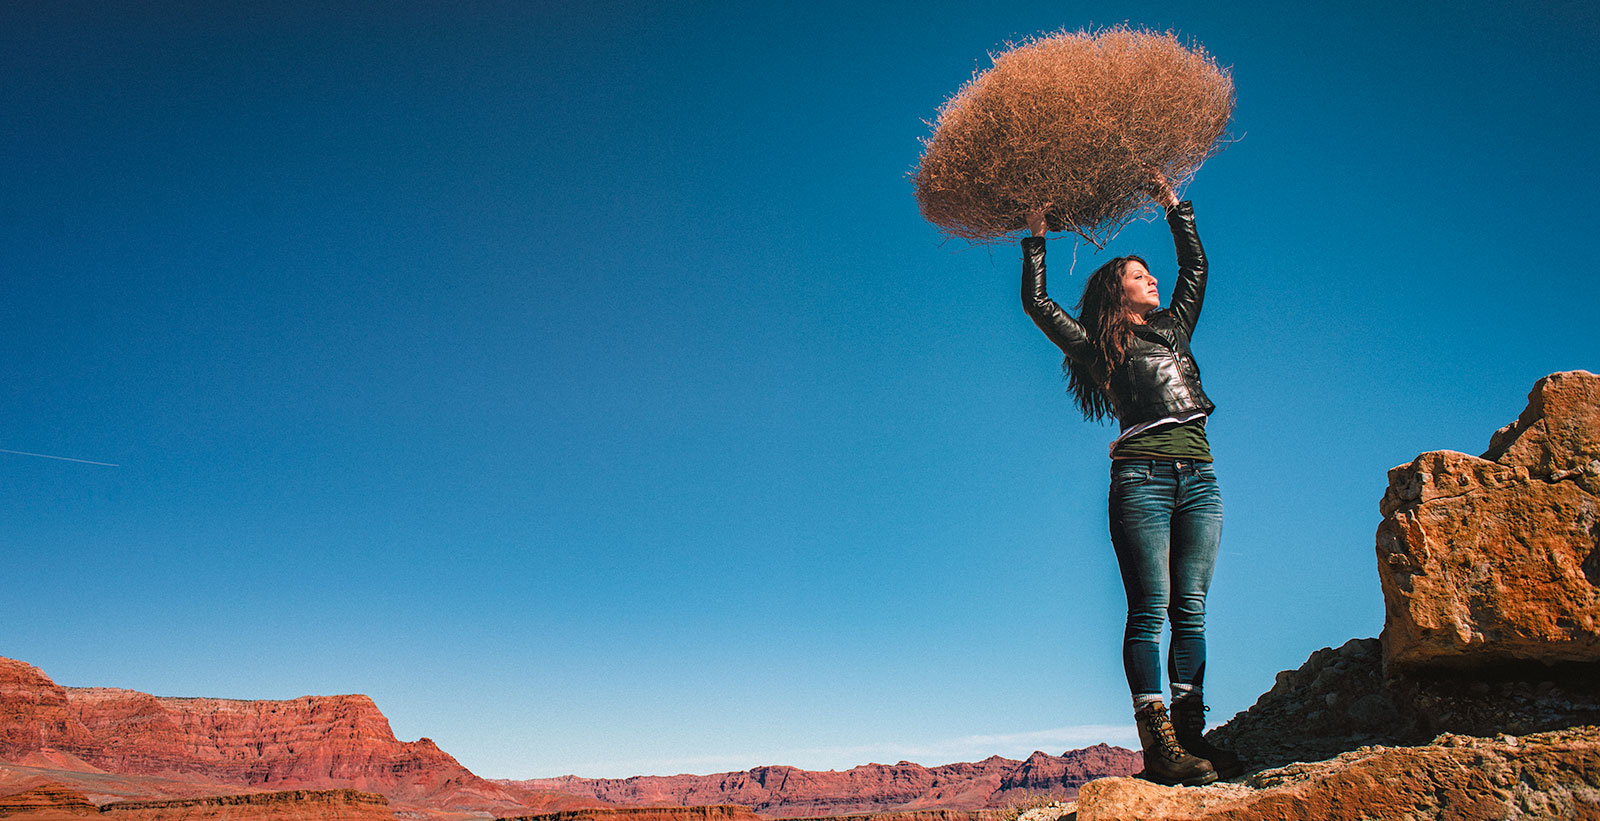
LIGHTING PRINCIPLE THREE: THE COLOR OF LIGHT
We see light usually as a white source, or at least a neutral source.
It isn’t. neutral, it has a color to it and that color can influence all the parts of your image, from shadows to highlights. We don’t see the color of light because our brain changes it to a neutral “white” color as we see it.
Here is a wonderful article that explains the way that the color of light affects your image. Read it now.
When we look at the color of the scene in front of us we can change it globally by changing our color balance in the camera, or using a filter. What “globally’ means is that everything in the photo is changed to the same setting. All the colors are altered by this global change to the color of the light.
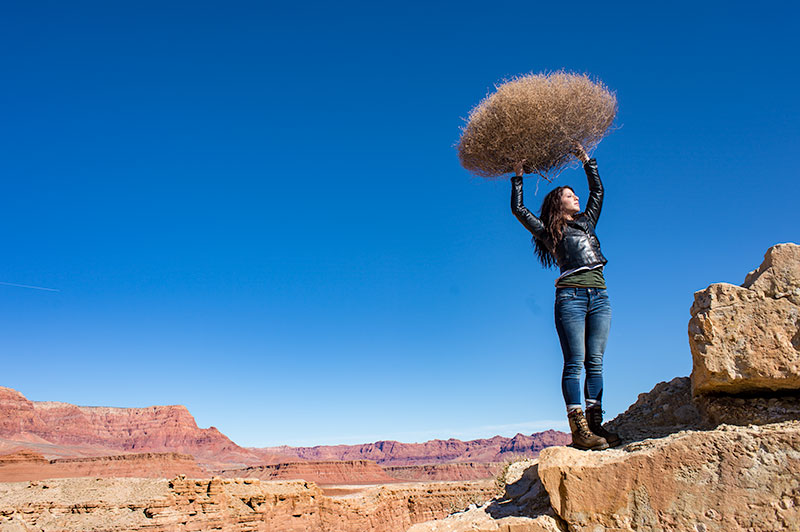
On the left is a photograph taken near Mable Canyon. The sun was quite bright, and there was a bit of warmth to the image because of all the warm browns and oranges of the topography all around us.
This image is as shot. I have applied global changes to the color of the light source so you can see what that does to the image.
Below from left to right:
Daylight / Shade / Tungsten / Flourescent
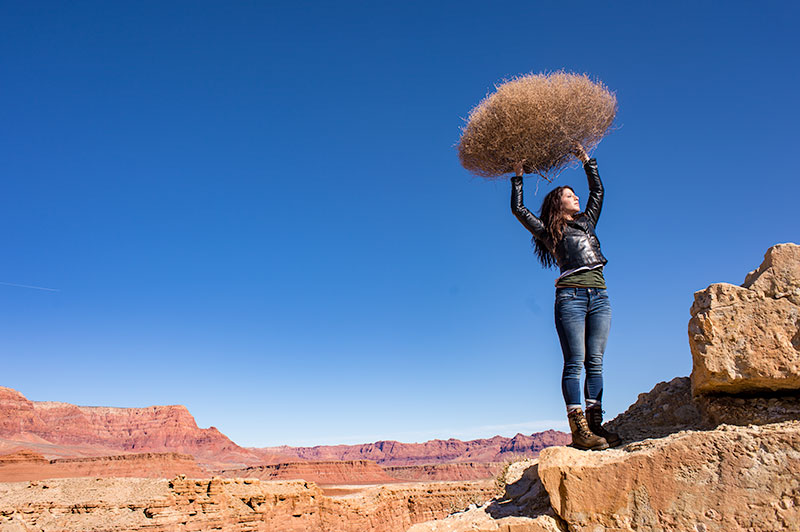
DAYLIGHT
Changing from As Shot to Daylight shows very little difference, although the daylight color balance makes it a bit more warm.
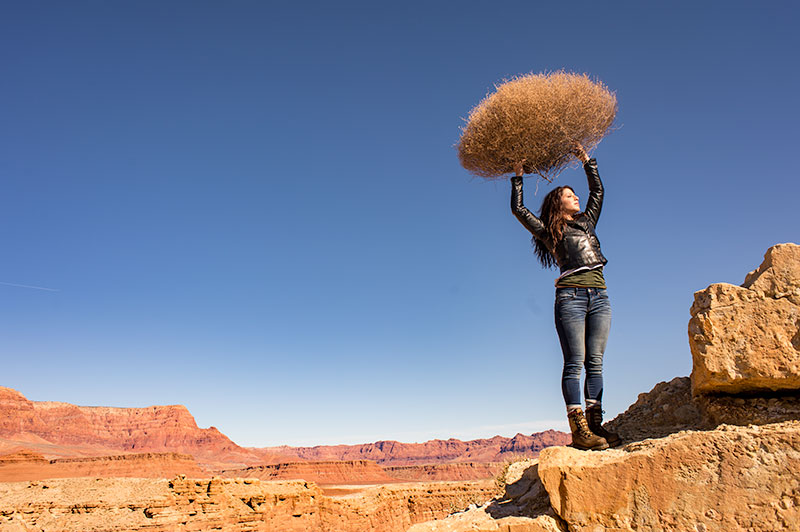
SHADE
Since the color of the light in the shade is a bit more blue, we add some warmth to the overall image to compensate for it. In this shot you can see the global warmth is not going to work because the image was not shot in the shade.
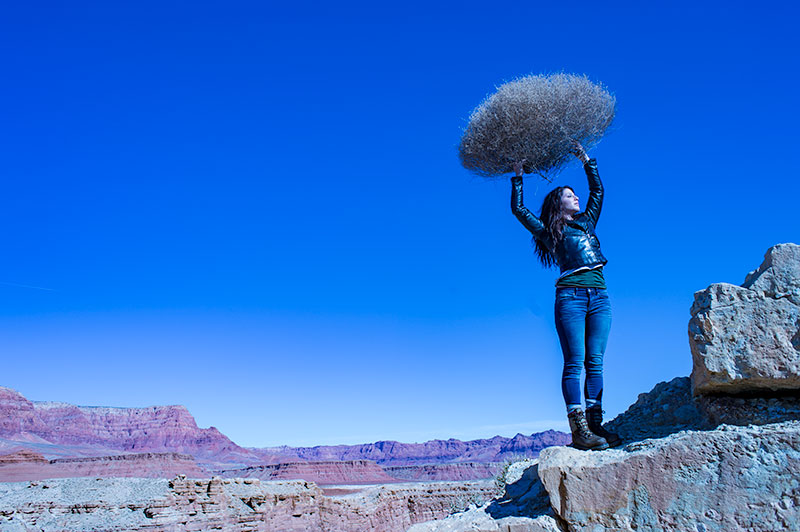
TUNGSTEN
Tungsten light is very orange, so when we apply a tungsten color balance to a shot that is not too orange, we get this very blue looking shot. This is a good reminder of just how ‘warm’ tungsten light is if it takes this much blue to make it correct.
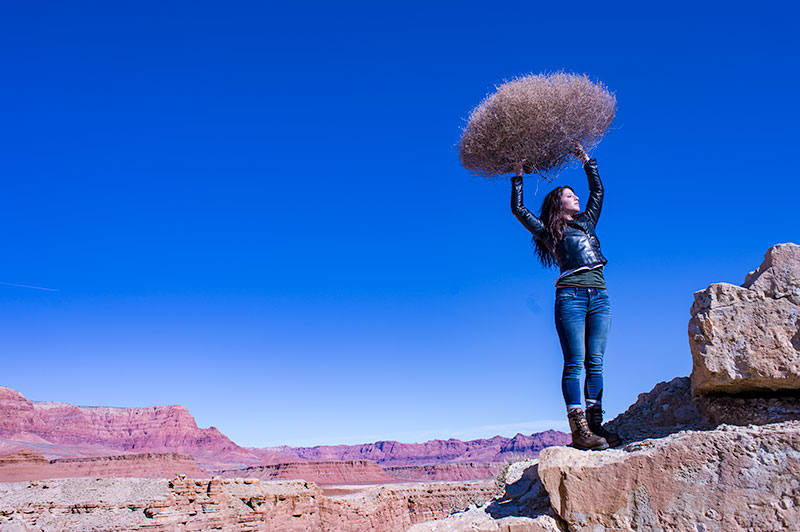
FLUORESCENT
Fluorescent light is blue/green so it makes it difficult to compensate for. In this application of the fluorescent color balance, we can see the sky going a deep blue, while the desert mountains behind become more magenta.
LOCAL LIGHT SOURCE MATCHED TO AMBIENT
Working with a secondary light source that may be a different color presents us with a challenge. We cannot change the image globally because adding a correction to the image to correct for the different light source will affect the entire image.
We must then change the different light source to the ambient (or overwhelming light) in order to ‘balance’ the subject in the ambient setting.
The ambient setting is the overwhelming light that we usually cannot change: the sun, a large warehouse, a home. Bringing in our own lights means we must know how to match what we bring to what is there.
ASSIGNMENTS FOR THIS CLASS:
- Using the color settings on your camera, take the same image with each of them. Shoot with Daylight, Shade, Tungsten, Flourescent at least and do this in places where those colors exist. In other words, shoot some images outside, inside with regular household lamps, and some place that has Flourescent. (NOTE: Many big box stores use a light source known as Mercury Vapor. Mercury Vapor is blue/green so it is very difficult to adequately address. We can add magenta to offset the green, but that turns the blue part of the light to purple. If we address the blue with something warm, we add that to the green part of the light.For Mercury Vapor correction, try “auto” on your camera setting. It is the best I have found for correcting most of that blue/green color shift.
- Using a strobe (speedlight), take a photograph of someone while the sun is going down behind them. Do not alter the strobe setting, just let it keep making the shot as the light turns warmer and warmer. You will then see how “blue” the light source seems coming from the flash.You may have to change the settings as the light gets dimmer, but I think you will see the changes pretty well.
We will be addressing color balance in all of the upcoming classes.
“No Plastic Sleeves” a Review of the Book
This is one of the best books on the holistic creation of a creative's portfolio in quite a while. There are certainly quite a lot of portfolio books out there, and many of them are terrific. However, I like the total take on creativity and creating a unique...
“So You’re a Photographer, Quick… Tell Me What You Do”
How's that for a panic inducer? So could you tell them? Say someone walks up to you at a mixer for the Art Directors club meeting, introduces himself and you realize he is one of the guys you have been trying to see for a few months. Now he is standing there, and in...
Meet My Friend, Ken Easley, Photographer, in Phoenix, Arizona
Full disclosure... Ken and I have been friends for about 25 years or so. We have traveled the back roads of the Sierras together and solved the ills of the world over about a hundred lunches. It is fun to present this interview with him for you all. We met and chatted...
Do You Know Your Camera Well Enough to Master Your Craft?
A sorta Rant and sorta Rave: Knowing your instrument in music means knowing it so well that you can pick it up and play whatever note you want to play. There isn't a hesitation at all in the choice of keys, or fingering, or hand position. With a piece of music in...
Throwing Other Photographers Under the Bus May be Great Fun, But Is It a Good Thing?
This is a RANT, folks. I am totally and definitely pissed off. If you decide to read this, you will find I am not kind or reticent in my total loathing of this situation. You are warned. (UPDATE: There are many, many comments to this post. Seem to break into two...
STOP Censoring Your Vision
(A rant about self censoring your work) Have you ever stopped yourself from taking a photograph? And then thought later that “I should have taken that shot…†The excuses and reasons abound for not taking a photograph that presents itself to you. Not the right...
Nick Onken’s New Travel Photography Book, “Photo Trekking”
I discovered Nick's work a couple of years ago. Surfin' from link to link, I stumbled upon his opening page and the image there of a woman with some amazing flare engulfing her. I immediately liked that shot, so I took some time to look around his site. simply...
Content is King: Guest Post by Daron Shade
Content is King In preparation for the Social Media Marketing article, I came to the realization that most of us have trouble figuring out what to say about ourselves, so I decided that we first need to talk about content – both on the website and in the portfolio....
24 Portraits With a Sense of Drama from the LE Flickr Pool
Portraits... man I love portraits. People are so interesting and the combination of an interesting person and a creative photographer reveals more than simply a photo of someone... it reveals the nature of all of us. And that makes it timeless. From the earliest...
A Sense of Urgency. Are You Demanding More Of Yourself?
I ran across this quote today: "I have been impressed with the urgency of doing. Knowing is not enough; we must apply. Being willing is not enough; we must do." -- Leonardo da Vinci It gave me pause. The "urgency" of doing. Pretty much says it all. Doing is the thing...
Seattle Workshop Images: The Great Pacific Northwest
Hey... how are ya? I'm back from three workshops in very close proximity. In Seattle we did two in a row, and then back for a day and off to San Diego for a fun workshop. Lots of excitement, and I got to meet so many talented people. I have some images from the...
Thoughts on Photography, and Other Stuff, While Driving Across the Desert.
I love to drive. Cars and motorcycles and trucks... I love to get behind the wheel and just go. This weekend I drove to San Diego for the workshop there. And, BTW... it was a very fun and exciting workshop with a lot of talented photographers, some wonderful models,...
Before You Shoot for Peanuts, Consider the Risks
Ummm... this is a Rant, so be warned. I stated in the last post that I would tell you why I would prefer beginning photographers shoot for free rather than dirt cheap. And I mean that totally. I am not saying you should shoot for free, I am saying to cut out the...
Pricing Issues: One Big Monster of a Problem
A day or two ago a firestorm of sorts broke out on the interwebs on pricing. It got heady and angry and although I initially made a post on one of the players in this dramas posts here, I subsequently found that I had stumbled on to something that was just getting...
Go Ahead and Play!
Today's Rant is really a Rave... sorta. it is about the fun and joy of photography... beyond the craft and business of photography. I don't know what happens to us as photographers when we get to the point where the cameras stay in the vault until someone pays us to...
Just a Camera and a Subject. Simplicity Can Be Fun.
Recently there was a discussion on whether natural light shooters would be able to compete with the strobe-heavy photographers and those deep into the Photoshop illustrative techniques. And before we begin it must be stressed that I love all kinds of photography. This...
30 Cool and Fabulous Images from the LE Flickr Pool
Well, we present 30 images from the pool today. Images that are soft and wild and quiet and loud... but all of them compelling in their own way. As always, the images link to the photographer's Flickr pages so please click and visit. Leaving them a comment always...
Selina Maitreya: 4 To Do’s for Photographers (Interview in Three Parts)
We present a three part look at the current business of commercial and editorial photography through the 'lens' of Selina Maitreya, photographers coach and consultant. Selina's 30+ years experience working with photographers all over the globe has given her a unique...
Selina Maitreya: Trends… or Not. (Interview in Three Parts)
We present the second of a three part look at the current business of commercial and editorial photography through the 'lens' of Selina Maitreya, photographers coach and consultant. First things first: Selina's website is 1PortAuthority.com, and it is there you can...
Selina Maitreya: What’s Working Now (Interview in Three Parts)
We present a three part look at the current business of commercial and editorial photography through the 'lens' of Selina Maitreya, photographers coach and consultant. Selina's 30+ years experience working with photographers all over the globe has given her a unique...
Recharging the Soul with Personal Projects
This is kind of a personal post for me. There are challenges that I face as an artist and writer. And photographer. And sometimes those challenges can take its toll on me, and us. Creativity, for me, takes nurturing and constant practice. I have always felt that...
Controlling Your World With the Lens Cap On
Seems like a crazy thing to say... put the lens cap on. Lens caps make taking photographs impossible. They don't let any light in. Maximum Density Filters ya know. They keep the lens clean and don't let images be made unless the photographer wants them to be made. But...
Shooting Fast: Keeping the ‘Mojo’ Going
Well this was a fun gig. Once per year my friend Troy asks me to photograph his choir kids for a year of marketing for them. We spend about 4 hours and shoot a gazillion images. Neat part... he lets me do what I want. I can be as 'creative' as I want - as long as we...
24 Examples of Emotional Lighting from the LE Flickr Pool
Photograph by Evan Romine. At least they strike me as being lit with the 'feeling' or 'mood' of the photograph foremost in mind. I have made some notes on what intrigued me about each of the images. They will get the ol' juices goin' for thinking about light before we...