
02: 8-WEEK PRODUCT WORKSHOP: ASSIGNMENT TWO: SHOES
MEN'S AND WOMEN'S SHOES (NOT SNEAKERS) Back to Product Class Home PageASSIGNMENT UPLOAD
1. Must not be larger than 1200 pixels on the longest side.
2. Must be .jpg format
3. Include BTS shots (at least one per set)
[wordpress_file_upload]
There are many ways to shoot shoes: catalog, editorial, advertising, and drop-n-pop. We will be looking at advertising since it is the highest paid of that group, and because it allows great freedom while demanding top technical skills.
Shoes usually have three demands that must be considered; the texture of the shoe, the height of the heel, the instep, and the bottom of the shoe. The heel height may not be of importance in sports shoes, and we may not be able to meet every one of the demands if artistic intention is to win out. But we MUST keep them in mind while approaching the photography.
PHOTOGRAPHING SHOES... A CHALLENGE FOR EVERY PHOTOGRAPHER
Course Outline: Shoe Photography for Beginners
Introduction & Objectives
Course Goal: By the end of this module, you will be able to produce two polished shoe photographs suitable for a magazine ad or website header/index page.
These are the five most important things to consider when shooting men’s and women’s shoes.
- Key Details to Capture:
- Heel Height (for women’s and men’s dress shoes)
- Texture (fabric, leather, mesh)
- Sole Details (especially if it’s unique, like sports shoes)
- Insole Branding (if it’s an important design element)
- Main Feature (buckle, zipper, logo, embossing, etc.)
Unless the concept is to somehow distorr the image, simple gear is all that is needed.
Basic Gear & Space Setup
-
Camera & Lens
- A DSLR or mirrorless camera with a standard kit lens (e.g., 18–55mm) or a 50mm prime lens.
- Tripod (optional but highly recommended for stability and consistent framing).
-
Lighting Options
- Simple Home Studio Setup: One or two inexpensive lights (LED panels or speedlights), plus reflectors or white foam board.
- Window Light (Scrimmed): A large window with sheer curtains or DIY diffuser to mimic a softbox effect.
- Light Modifiers:
- Softbox or umbrella for key light.
- Reflector or foam board for fill.
-
Background & Surface
- Neutral backdrops (white, black, or gray) for a clean, commercial look.
- Or a simple textured background (wood, vinyl backdrop) if going for a more editorial feel.
Composing & Highlighting Shoe Features
-
Angles & Framing
- 3/4 Angle: Often the most dynamic angle for product shots. Captures both side profile and some front detail.
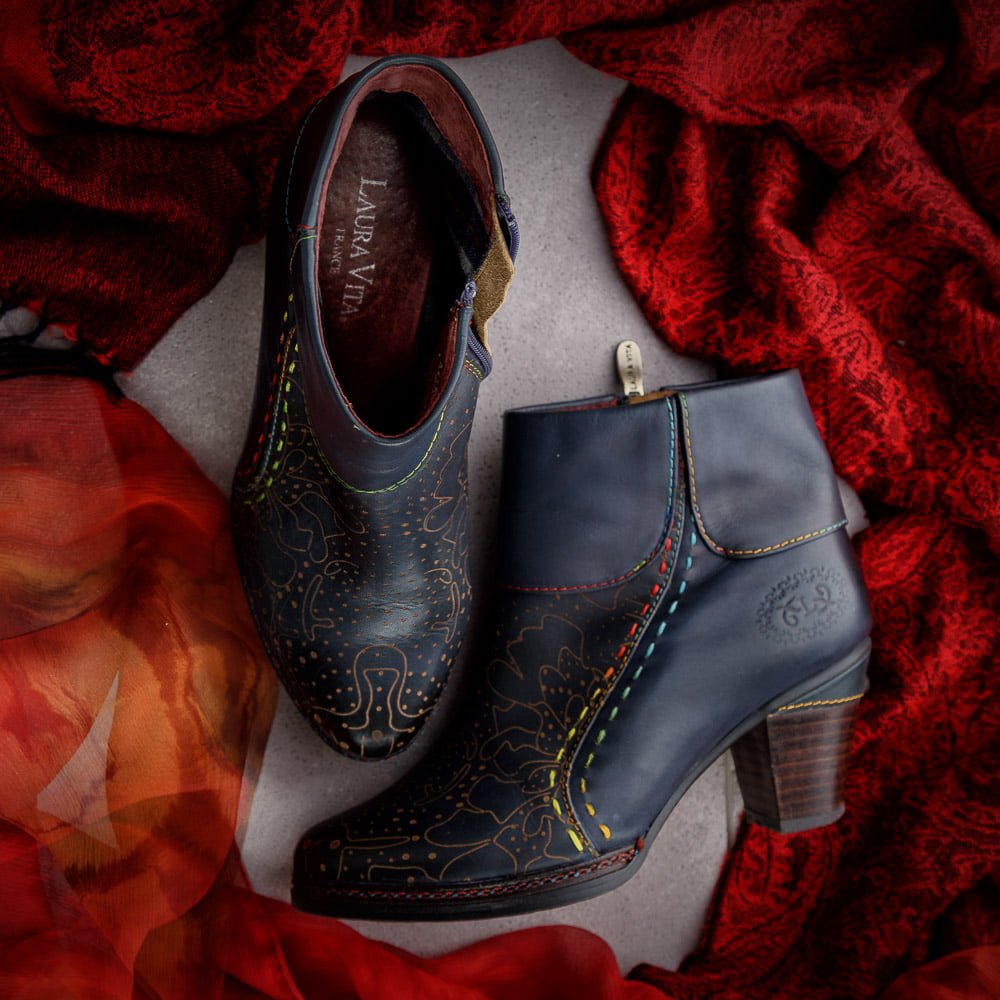
- Top-Down: Great for showing insole details, especially if branded.
- Side Profile: Ideal for capturing the entire silhouette, including heel height.
-
Focal Points
- Height of the Heel: Tilt or raise the shoe slightly to emphasize the heel.
- Texture: Use side lighting or backlighting to bring out fabric grains or leather texture.
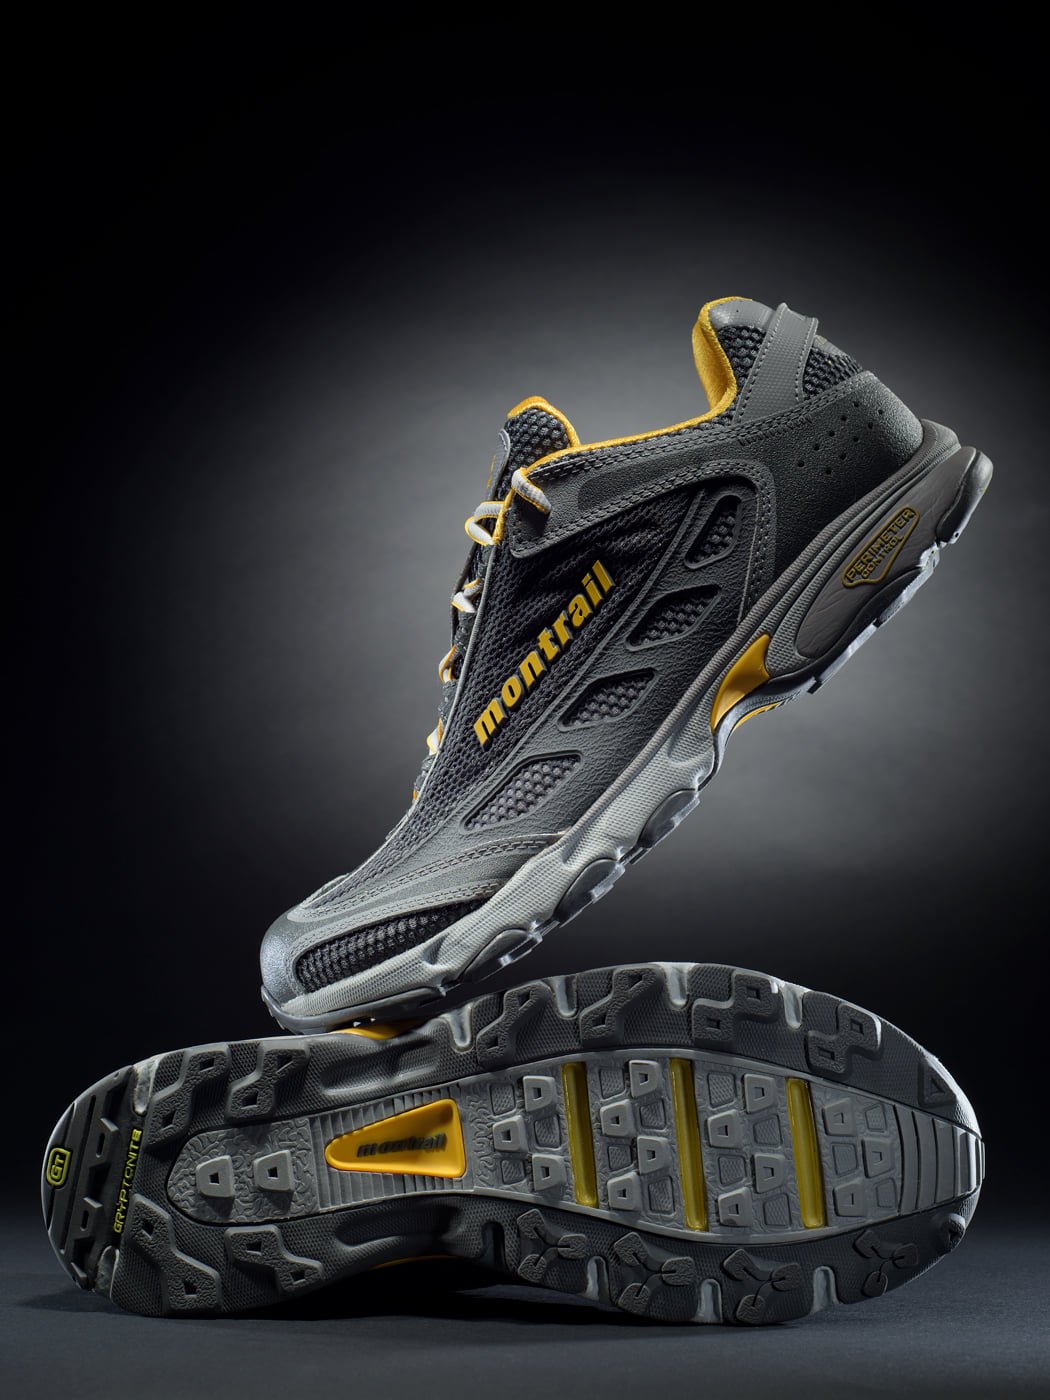
- Sole: If it’s a sports shoe with an interesting tread design, angle the shoe so the sole is partially visible.
- Insole: If it’s branded or has a unique design, consider a top view or a slight tilt to reveal it.
- Main Feature: Buckles, zippers, logos—make sure your lighting highlights these clearly.
-
Lighting Tips
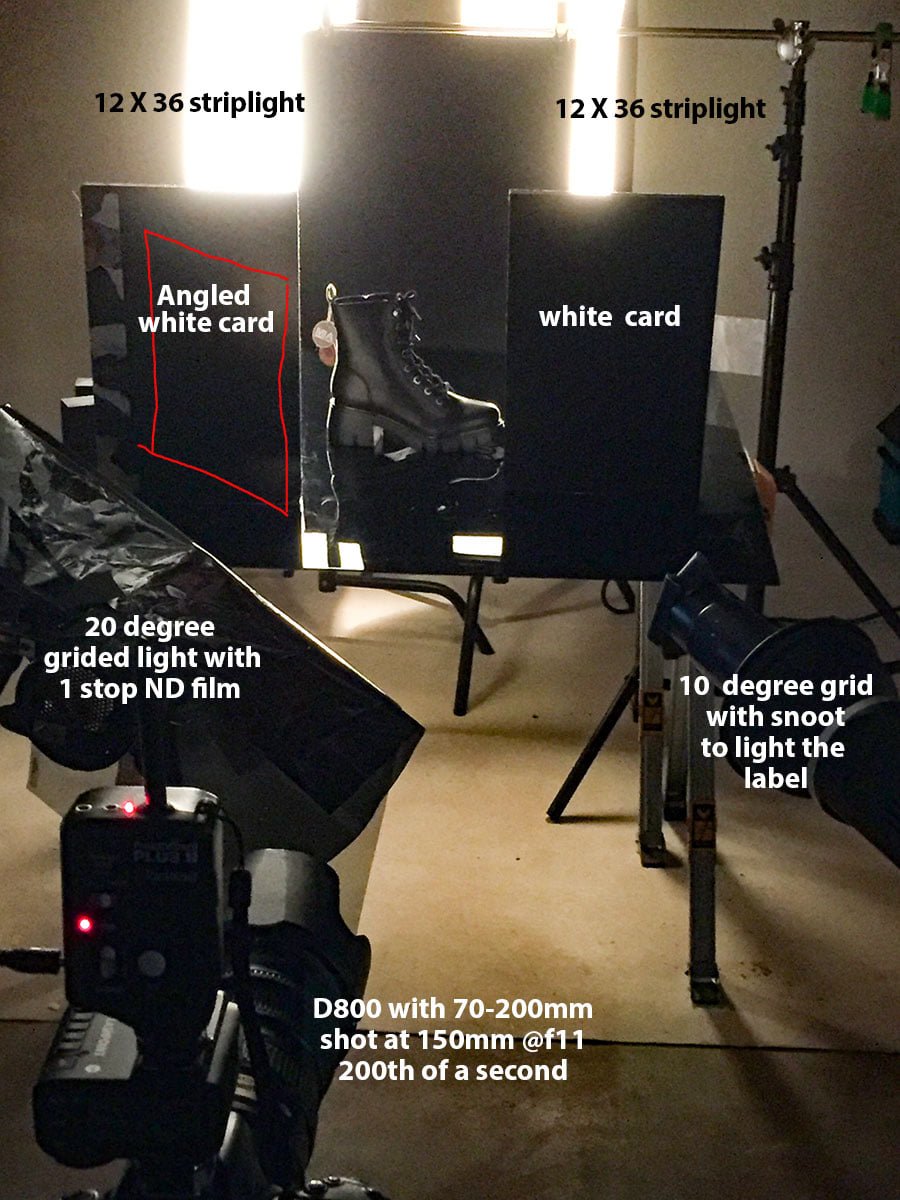
- Key Light Position: This position is decided by what you are needing to do with the highlight. Shiny shoes will have to reveal their glossy surface with a highlight, while leather shoes may need a bit of a different approach to show the texture.
- Fill Light/Reflector: Use a second light or reflector on the opposite side to soften shadows.
- Background Light – Or Spray Light (Optional): Helps separate the shoe from the backdrop if you want a more commercial look.
Practical Workflow & Best Practices
- Step-by-Step Setup:
- Place your background.
- Arrange the shoe at an angle that shows both silhouette and key design elements.
- Position your main light or window light to the side and slightly above.
- Use a reflector on the opposite side to gently fill in shadows.
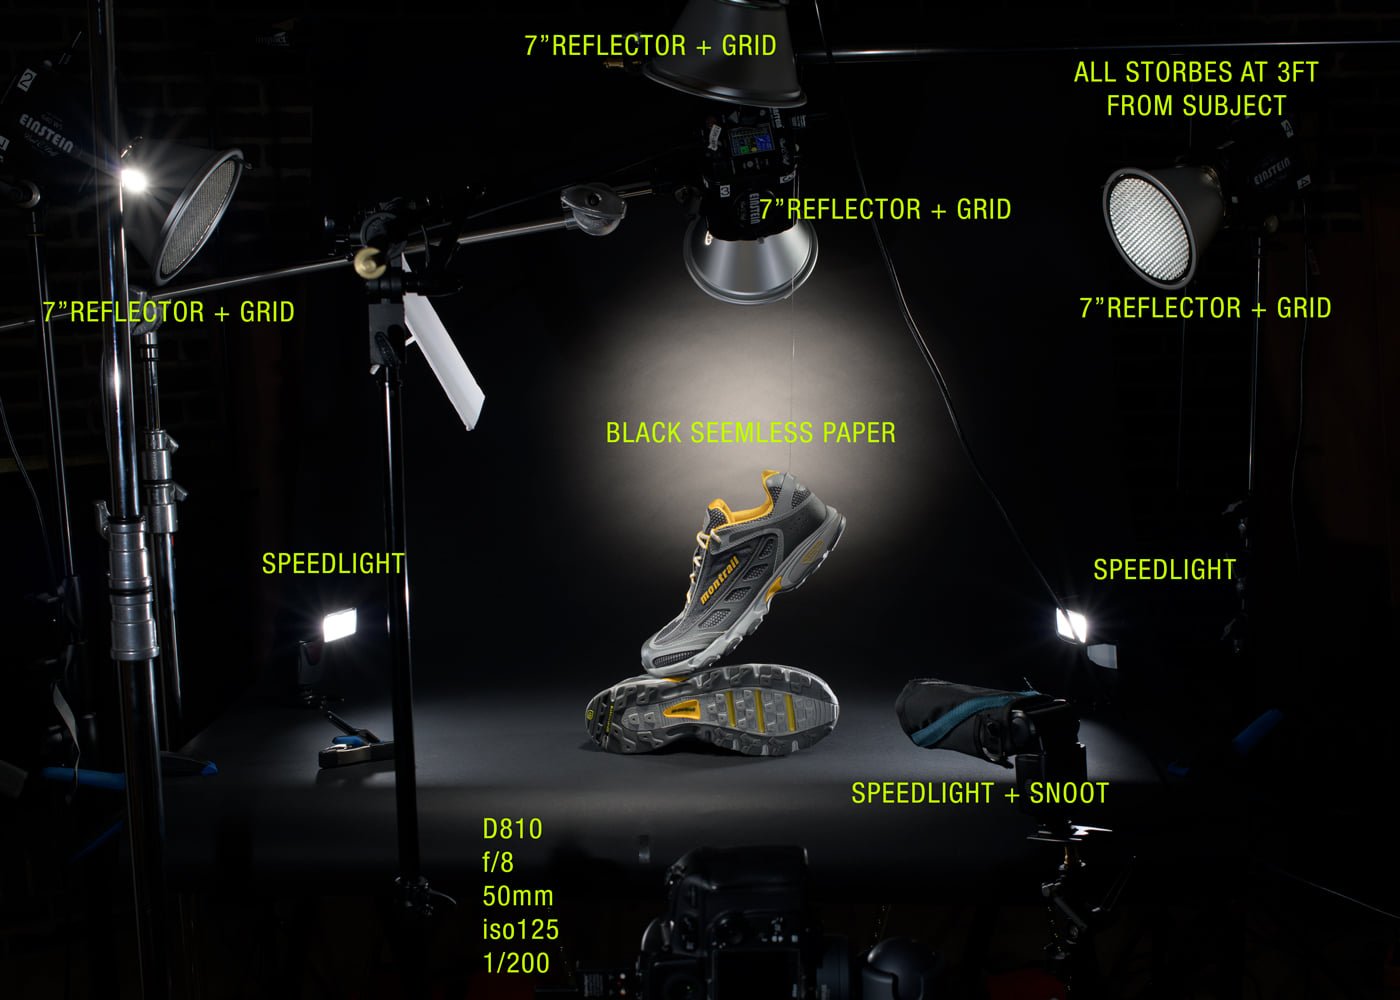
- Adjust camera settings (ISO, aperture, shutter speed) to properly expose the shoe—typically, use a smaller aperture (f/8–f/11) for greater depth of field and sharp detail.
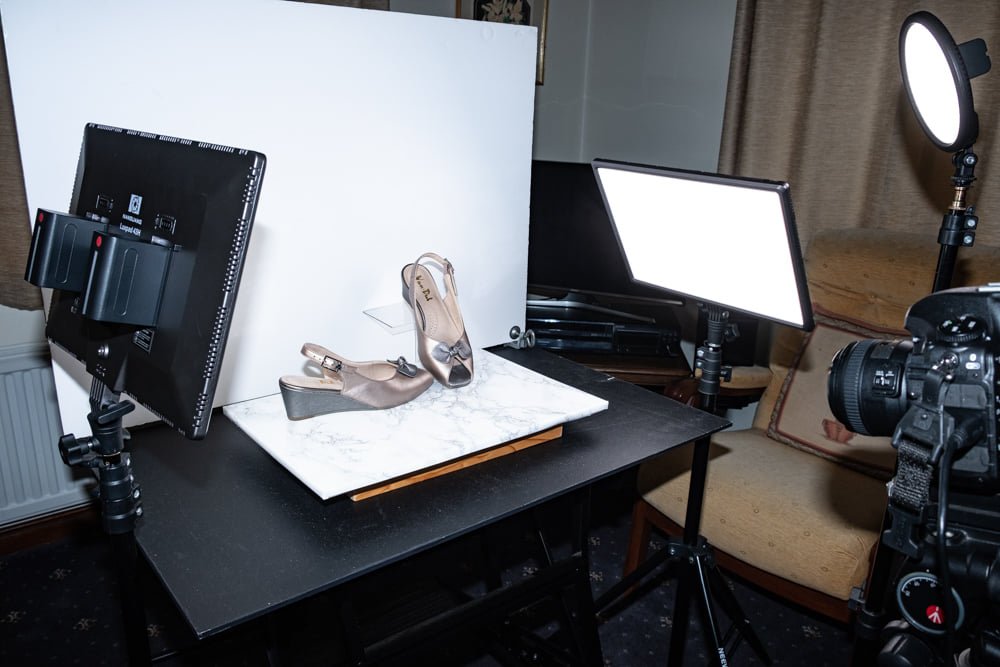
- AT THIS POINT: Sketch with your camera… off tripod, move in and back and around it and make photographs in every way that you think looks good. No worries about lighting or sharpness or any of those technical things – in fact, shoot with available light if you must. We are only looking for a good angle to start with. You’ll find it if you keep shooting.
- Test Shots & Adjustments:
- Check your histogram and adjust exposure.
- Review the image on-screen to ensure the main features are highlighted.
- Angle Variations:
- Take multiple angles (front, side, 3/4, top-down) to find the best look.
- Consider a “hero angle” that will really make the shoe pop for an ad layout.
Final Assignment
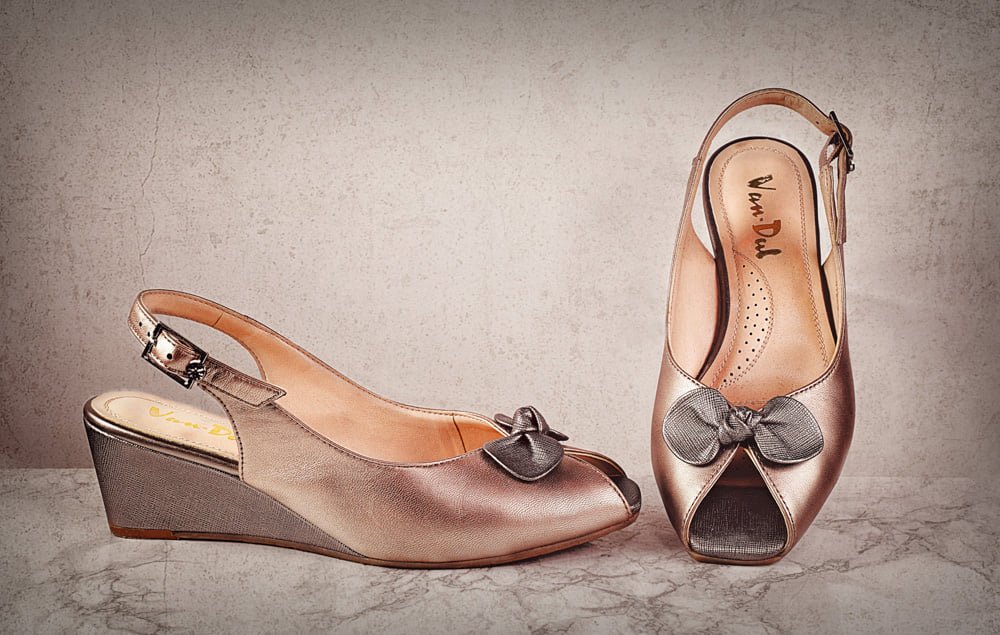
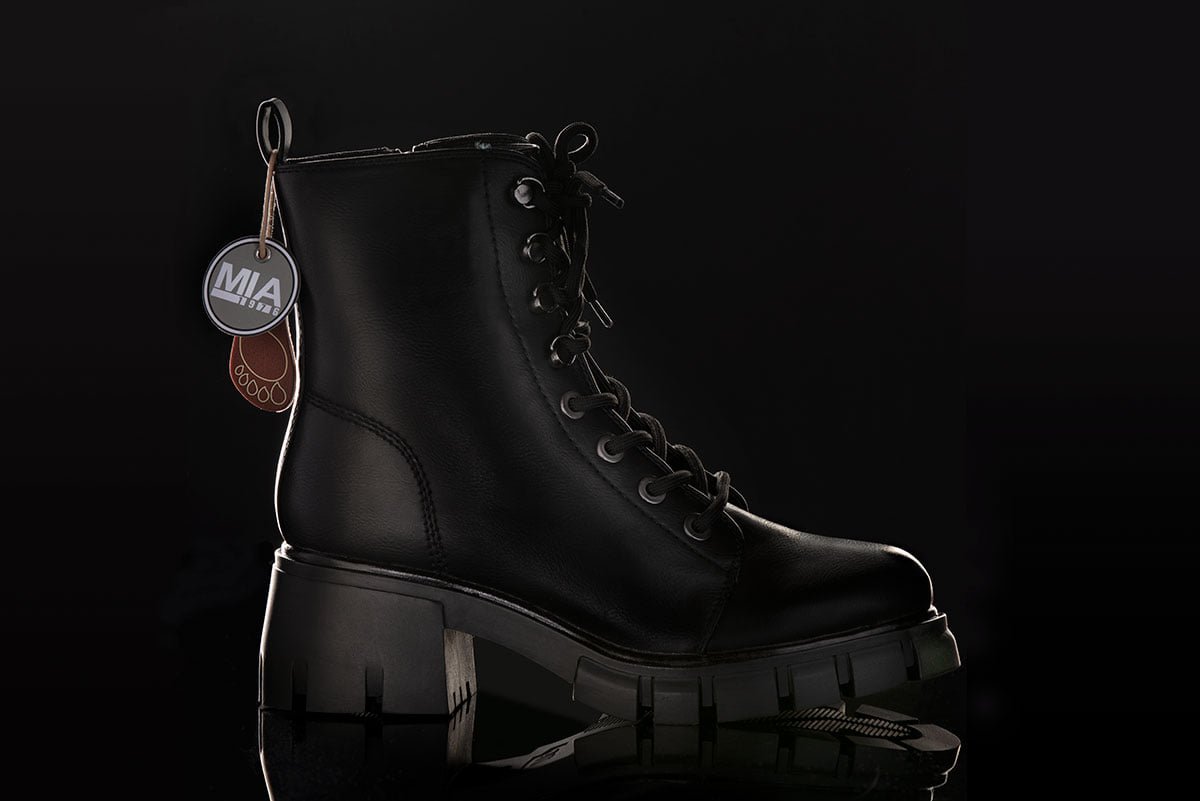
Create Two Photographs of a Single Pair of Shoes (for Ad Use)
-
Photo 1: Primary Product Image
- Goal: An eye-catching shot that could be used for a magazine ad or website banner.
- Requirements:
- Showcase at least three of the five key details (heel height, texture, sole, insole if relevant, main feature).
- Clean composition, even lighting.
- Minimal distractions—focus on the shoe.
-
Photo 2: Detail or Secondary Image
- Goal: A close-up or alternative angle highlighting an important feature.
- Requirements:
- Emphasize a unique element (e.g., buckle, zipper, embossed logo, interesting texture).
- Complement the first shot (e.g., if Photo 1 is a broad profile, Photo 2 can be a top-down or macro shot).
- Maintain consistent lighting style and background for a cohesive ad layout.
Submission & Review
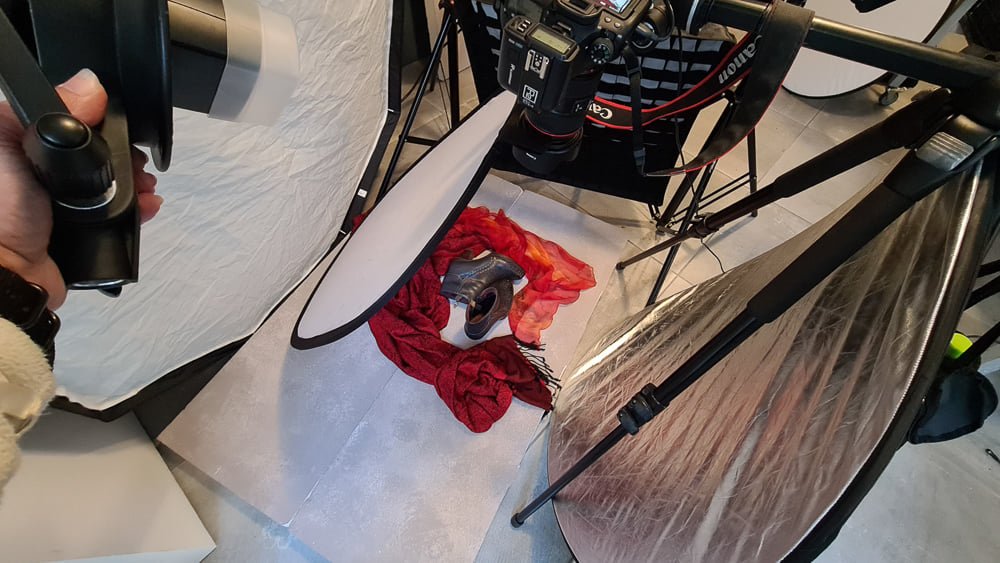
- Two images, and Two Behind the Scenes shots of the setups (remember to resize all images to 1200 pixels on the long side.)
- Key evaluation points:
- Did you showcase the key aspects (heel height, texture, etc.) effectively?
- Is the lighting balanced and appropriate for the brand/editorial style they’re aiming for?
- Are the images sharp, well-composed, and free of distracting shadows/reflections?
- Double check your exposure in Photoshop / Lightroom / Capture One
- Make sure your focus is not letting any of the show fade into blur.
- This may be a good time to learn focus stacking.
Bonus Section: Pitching & Setting Up Rates
Because this is a commercial photography context, a basic understanding of business and pricing helps students turn their hobby or new skill into a service:
-
Building a Portfolio
- Select 3–5 strong shoe images to show potential clients.
- Focus on variety: different angles, different types of shoes (dress, athletic, casual).
-
Approaching Clients
- Identify local boutiques or online sellers who need fresh images.
- Create a simple pitch email that includes a link to your portfolio, your style, and how you can help them stand out.
-
Pricing Considerations
- Time & Effort: Factor in shooting, editing, and communication.
- Usage Rights: Will the images appear online only, or in print ads as well? Usage scope affects pricing.
- Packages: Offer tiered packages (e.g., basic vs. premium editing, 3 angles vs. 5 angles) to accommodate different budgets.
-
Basic Legal & Brand Guidelines
- If shooting for a brand, clarify logo usage, disclaimers, and any brand-specific style guidelines.
- Always confirm deliverables (number of final images, file format, resolution) in writing.
Next Steps
- Key Takeaways:
- Lighting and composition are critical to showcasing product details.
- Always prioritize the shoe’s unique features: heel, texture, sole, insole, and any standout accents.
- Consistency in lighting and styling unifies your shots for ad layouts.
- Suggested Follow-Up:
- Expand your product photography portfolio beyond shoes—experiment with bags, accessories, or other fashion items.
- Refine editing and retouching skills to polish images for higher-level commercial work.
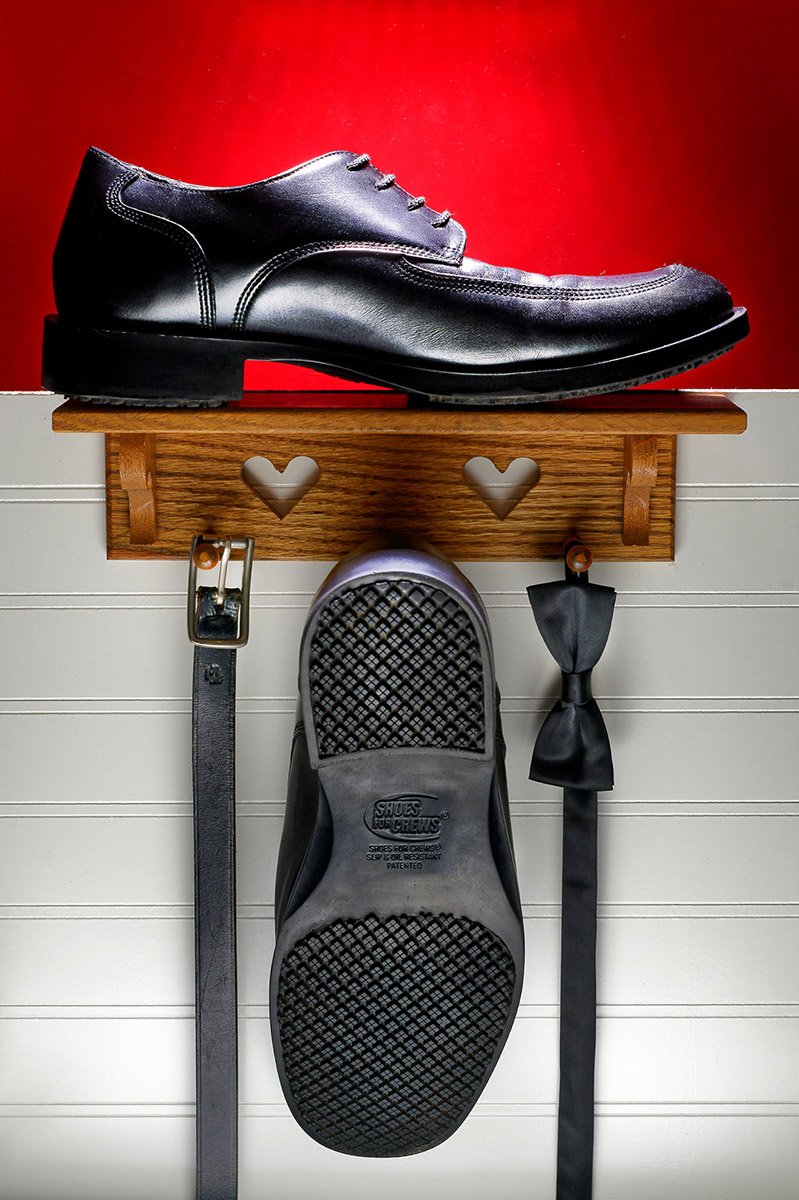
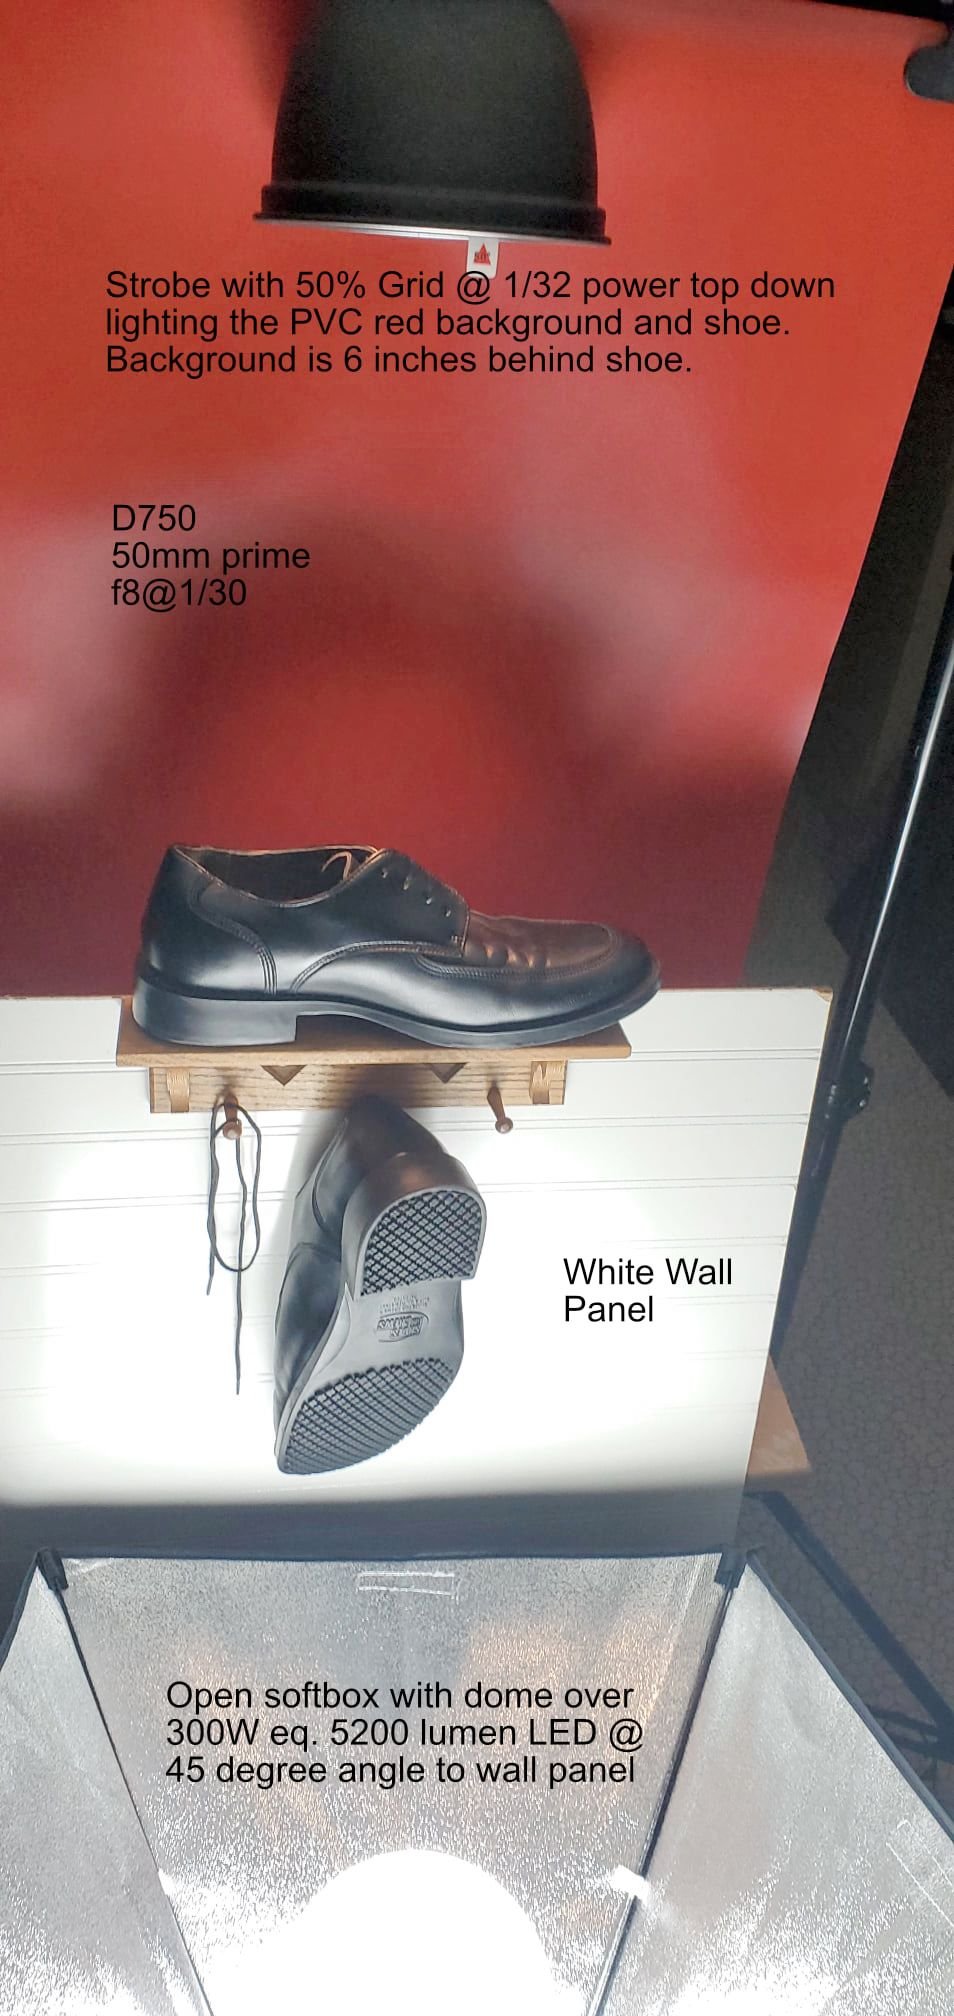
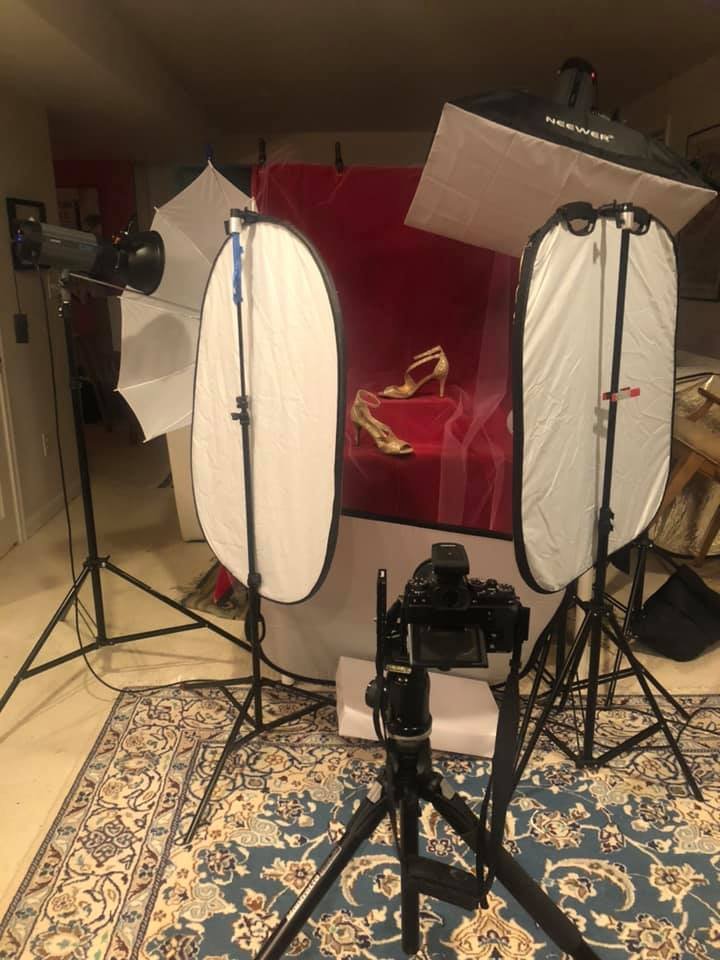
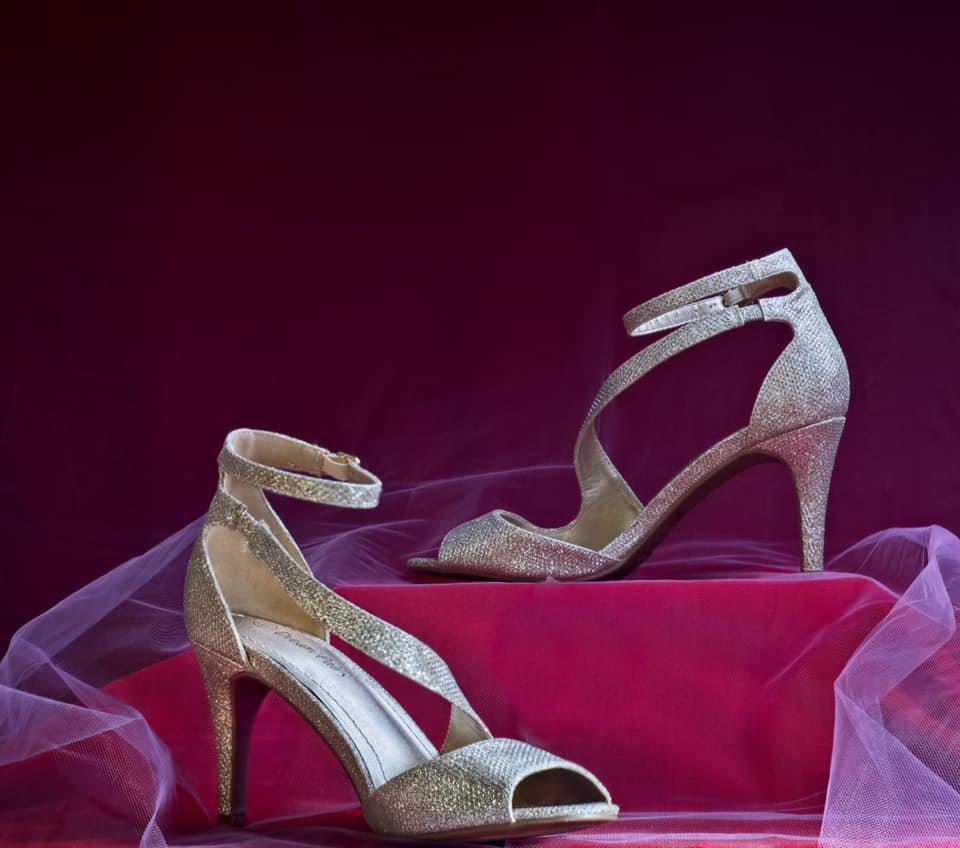
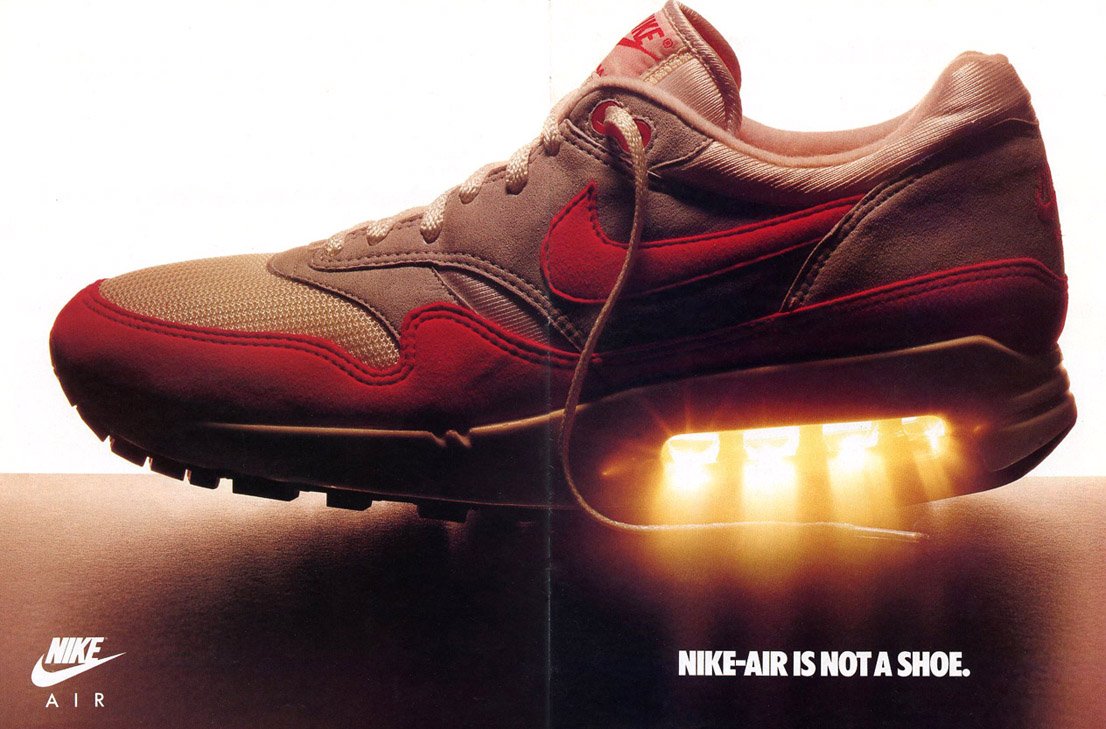
This NIKE Air ad is using a special light to show the area under the foot. This area is empty, so the photographer is using a flare to show the hole in the sole of the shoe. One big softbox over the top completes the texture portion and notice how nice the shoestring looks folded back with a nice, soft curve.
Thinking of doing an outdoors shot? Cool – as long as you light the image. Here we have a feeling of low, natural sun – and it is possible that is what it is, but you must make sure your light is as clean and bright when doing this kind of image. Also notice how perfect the set is. If it has dirt, wash it – leaves, rake them – marks, take them out either in the real space or in photoshop. It is absolutely important that NO extraneous problems enter the frame.
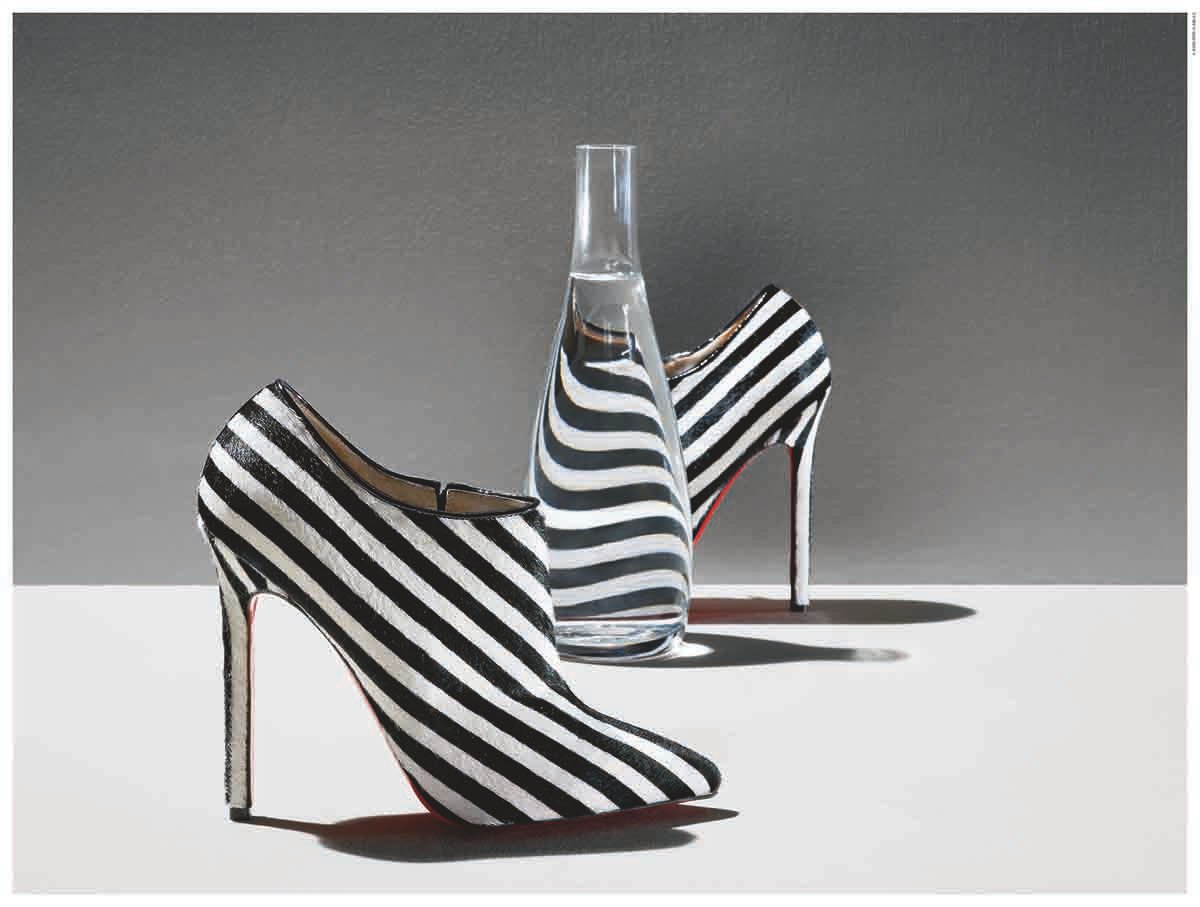
It’s nearly a monochrome shot, with only hints that it is indeed a color photo. The stripes dominate the set, so the photographer let them be the focal point, and used the glass of water to introduce a bit of whimsy to the design. Perfect placement of horizon line, and good use of some hard light gives even more punch to the black and white shoes. Dark shadows, white surface… good work.
ASSIGNMENT TWO: A PAIR OF SHOES.
Women’s or Men’s – even childrens shoes are fine.
Just make sure they are perfectly lit, and work to find a POV that makes them look more special than sitting on a table at the Walmart discount racks.
🙂
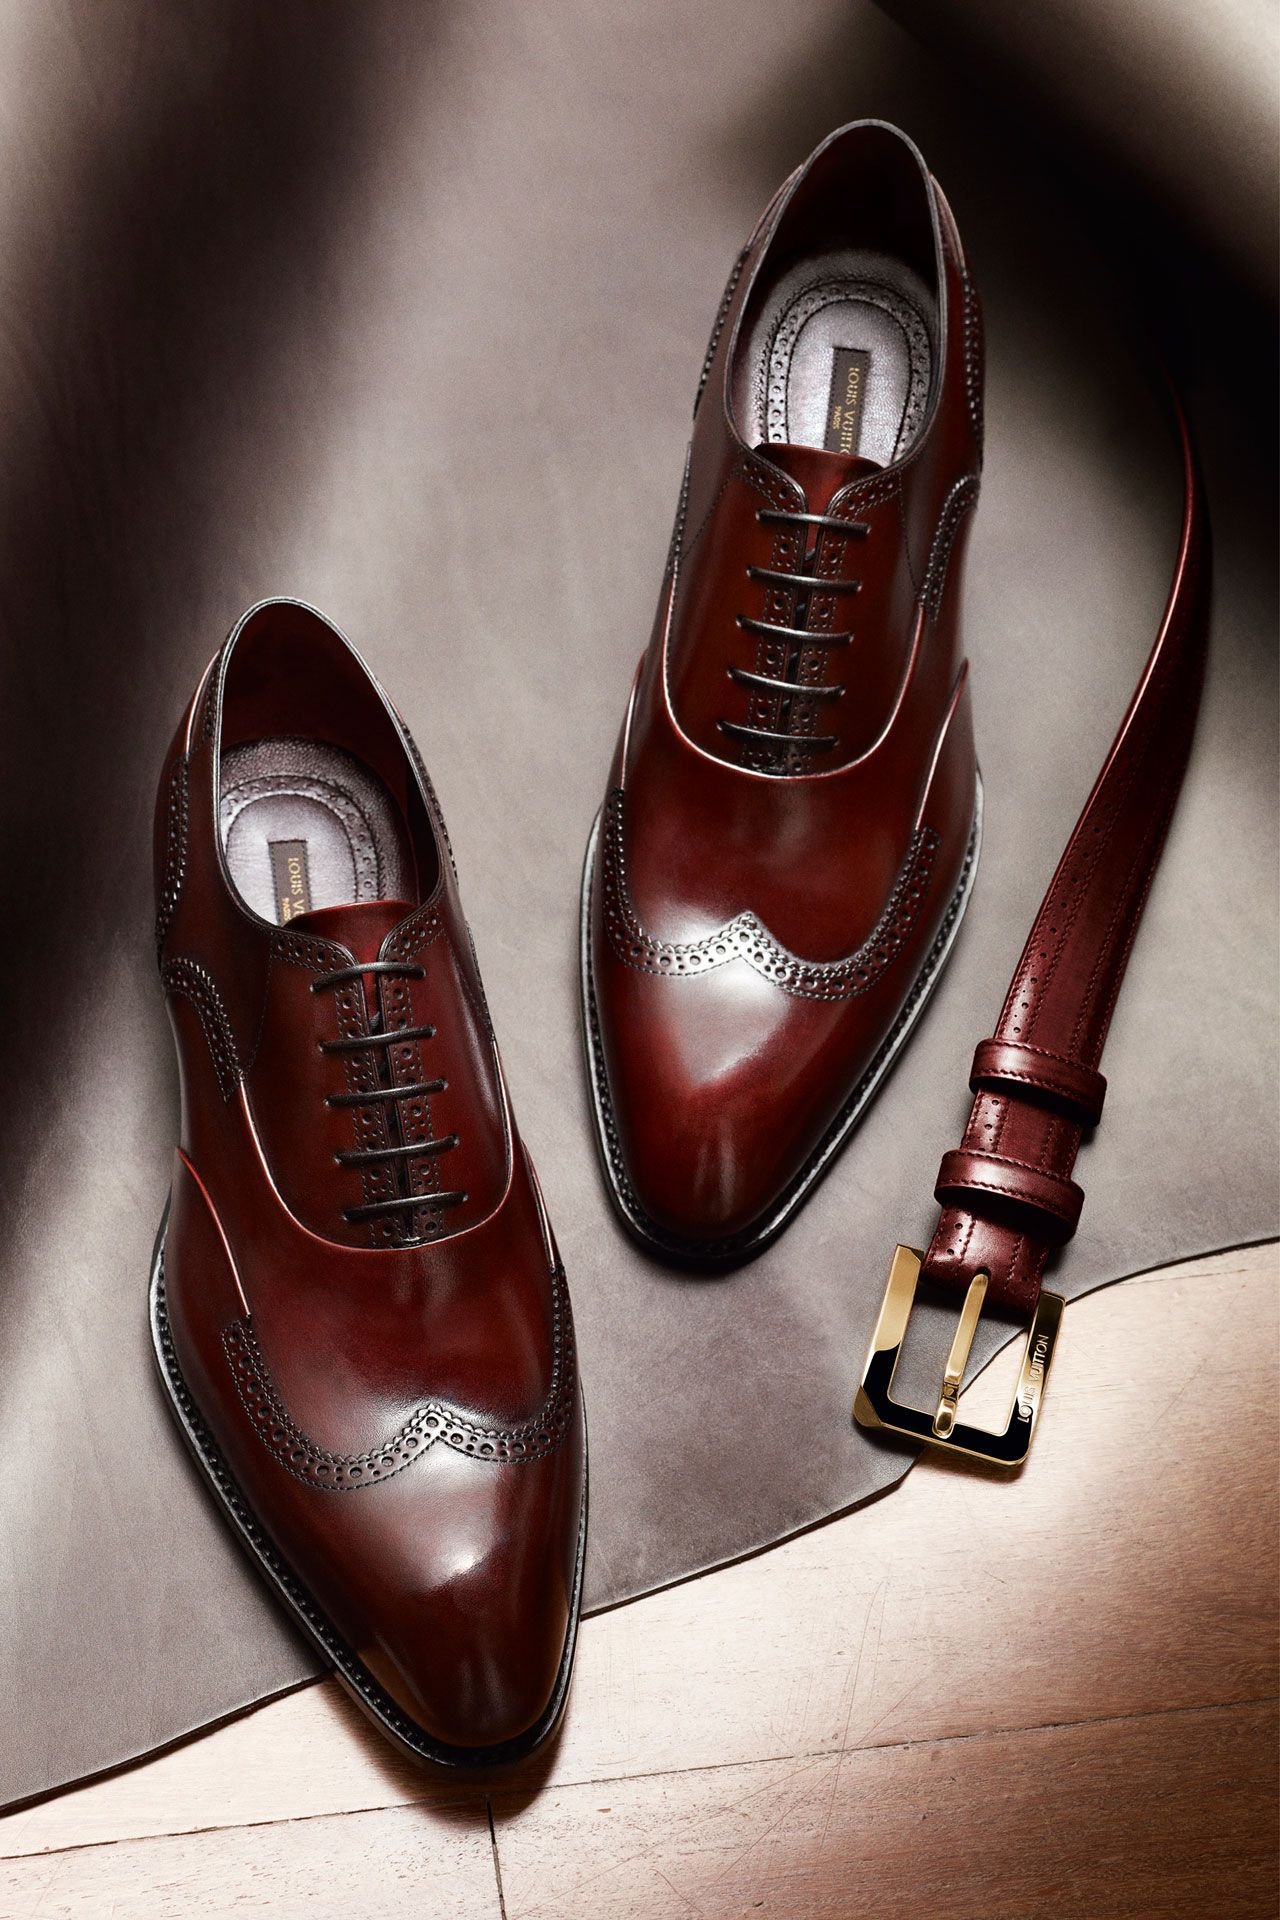
Men’s shoes shot from above to show the fancy inside, and the detail in the stitching that runs around the shoe. Also added are some shadows from the back to give the shot some drama and design. A single light from above is reflected back in the toes of both shoes. Soft edges AND harder edges means the light was modified. Most likely it is a softbox behind a scrim at an angle to give a sharper edge and break up the feeling of the softbox.
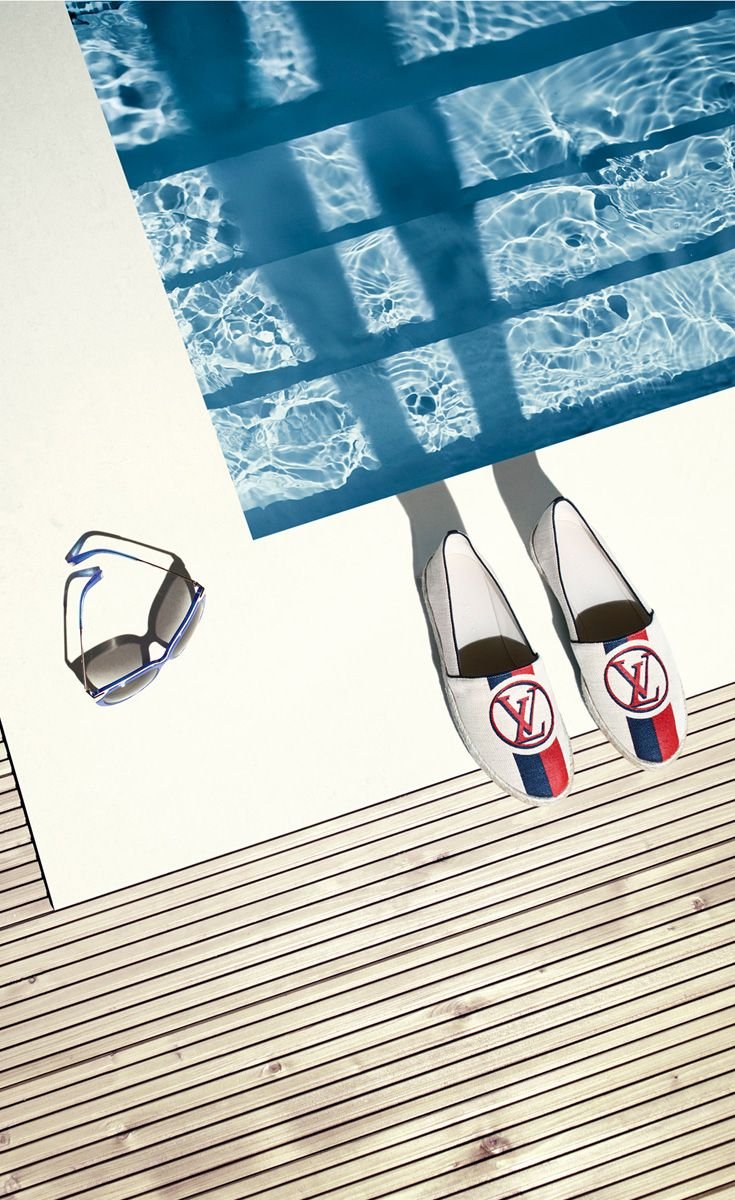
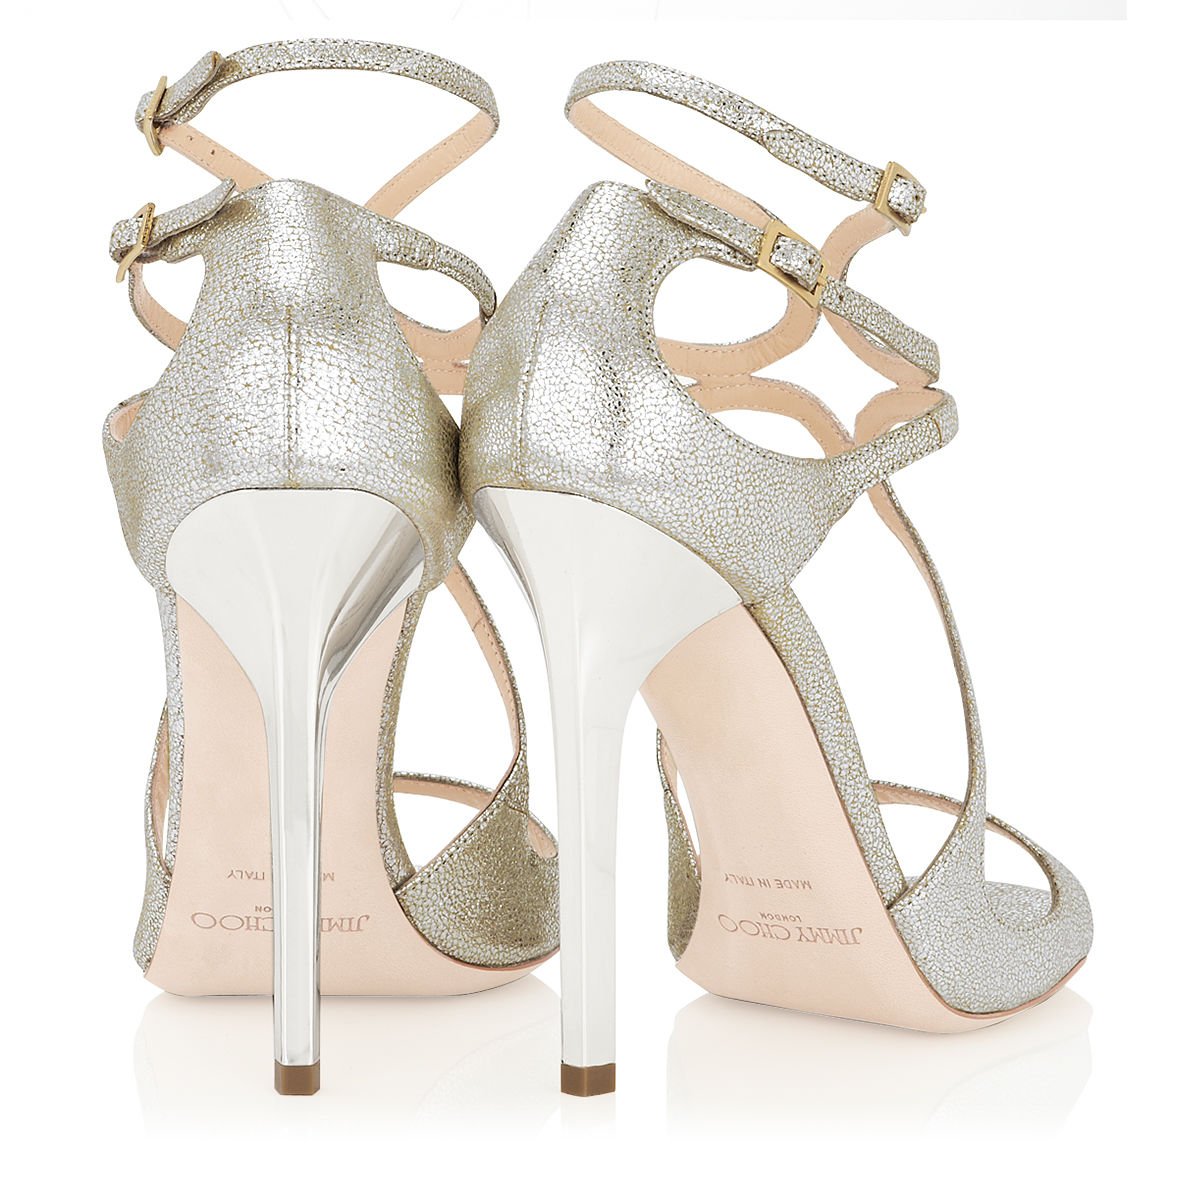
A beautiful pair of women’s shoes by Jimmy Choo. Notice how clean the lighting is, and how well the sole is lit, as well as the texture of the silver shoe. Also notice how incredibly perfect the straps are formed. Use tape or wire or whatever you can to make your straps be as perfect. Of course we see the sole, the logo, the height of the heel, the different textures of the shoe, and from an angle that tends to make them look almost architectural in design. We can also see the instep on the shoe on the right… and we now know that it is also the same look as the outside of the shoe.
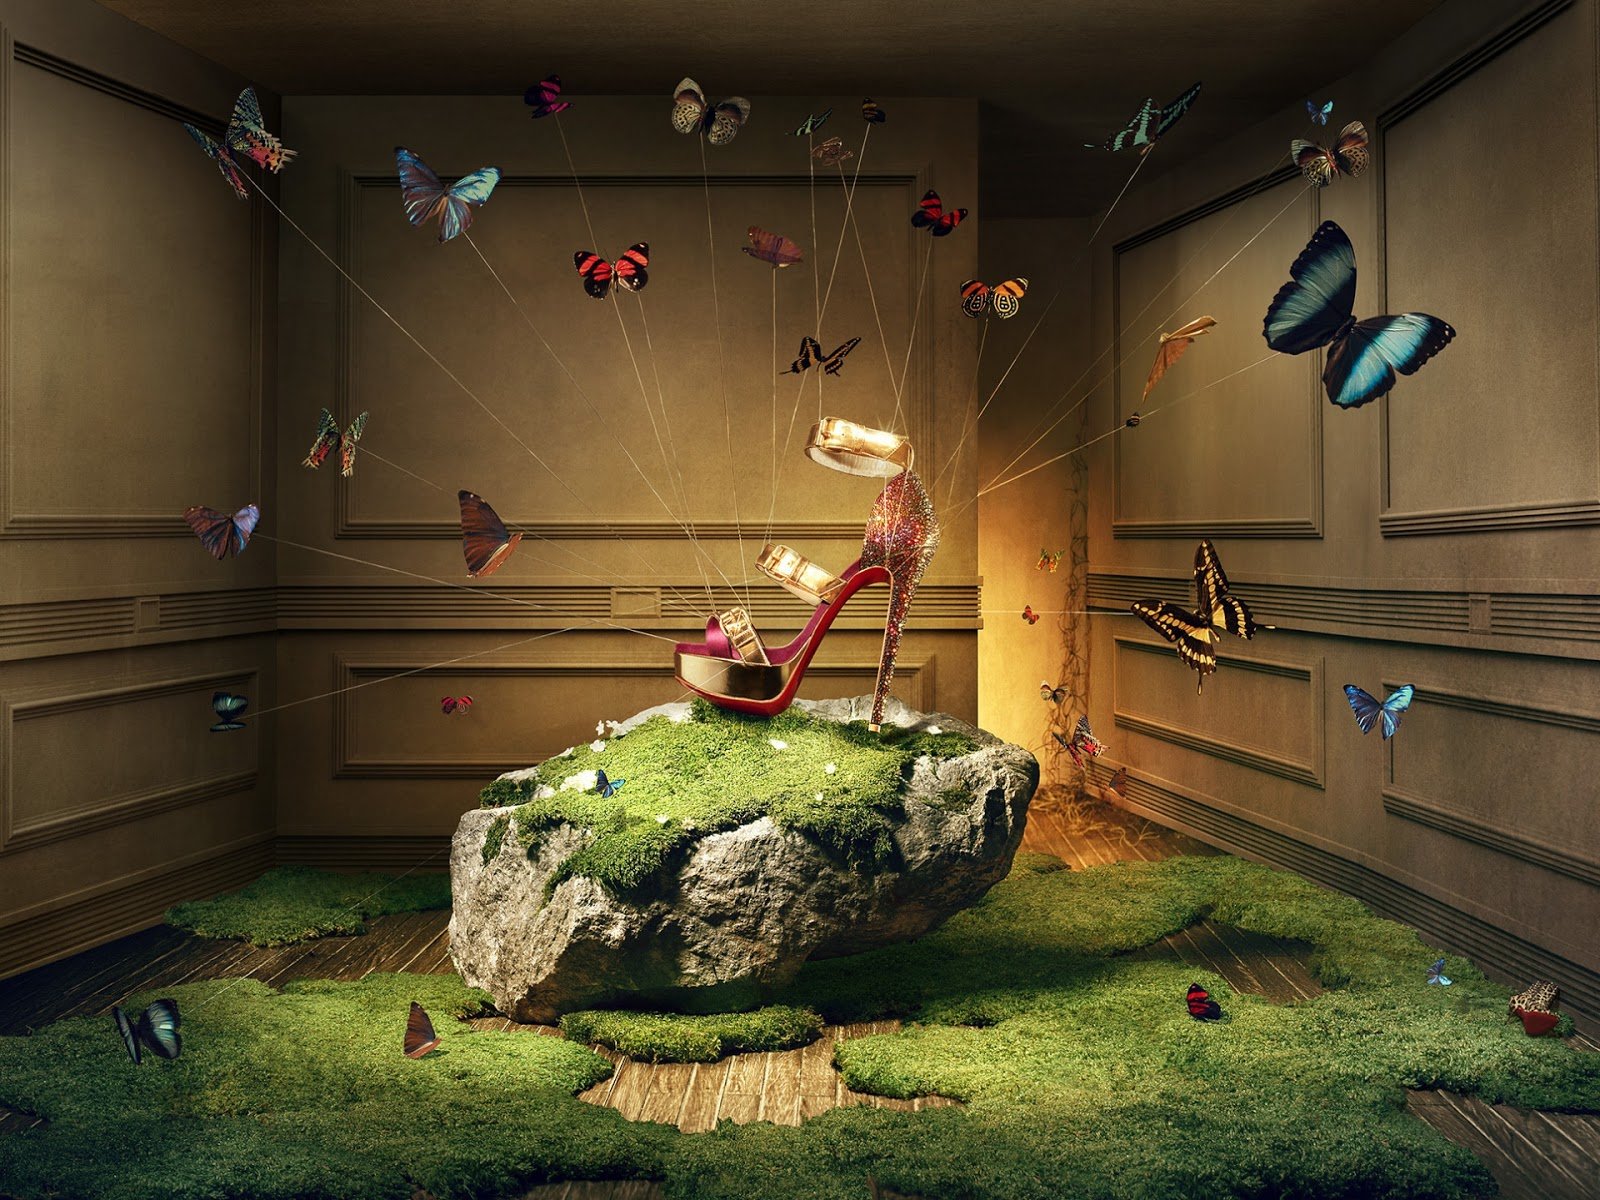
If you want to get crazy, here is an excellent image that combines a large set, brilliant concept and incredible technical skills. If you choose this sort of image, make sure you bring your A-game to it. Notice that with all that is going on, the shoe is still lit perfectly. We see all we need to see, and the photographer works a subtle vignette into the post processing to keep our eyes from escaping the frame.