8-WEEK PRODUCT WORKSHOP 2025
ASSIGNMENT EIGHT
COSMETICS
ASSIGNMENT UPLOAD
1. Must not be larger than 1200 pixels on the longest side.
2. Must be .jpg format
3. Include BTS shots (at least one per set)
[wordpress_file_upload]
ASSIGNMENT EIGHT:
TWO SHOTS:
Shot number one should show the product without any additional styling, but still in a creative and visually exciting way.
Shot number two should show the product in a fanciful still life, using other props to integrate into the image. NOTE: this must tell a story. Like “dry”, “wet”, “shimmery”.
Here is a fascinating and popular type of product, and just like fragrances, it is a booming channel with national brands and local boutiques creating everything from skin toner to eye shadow.
We are going to make essentially fashion images in a still life / product environment. This will take close attention to the product as it can be messy, and liquid. Controlling speculars is harder as well because the items are generally quite small.
Here is a chance to perfect your lighting for smaller, shiny, liquid, and powdery substances. You can add dynamics to the image with explosions of color, or dripping paint. Or just create a feeling of elegance with composition and elements of design.
Cosmetic photography is one of the most creative genres of product and still life photography.
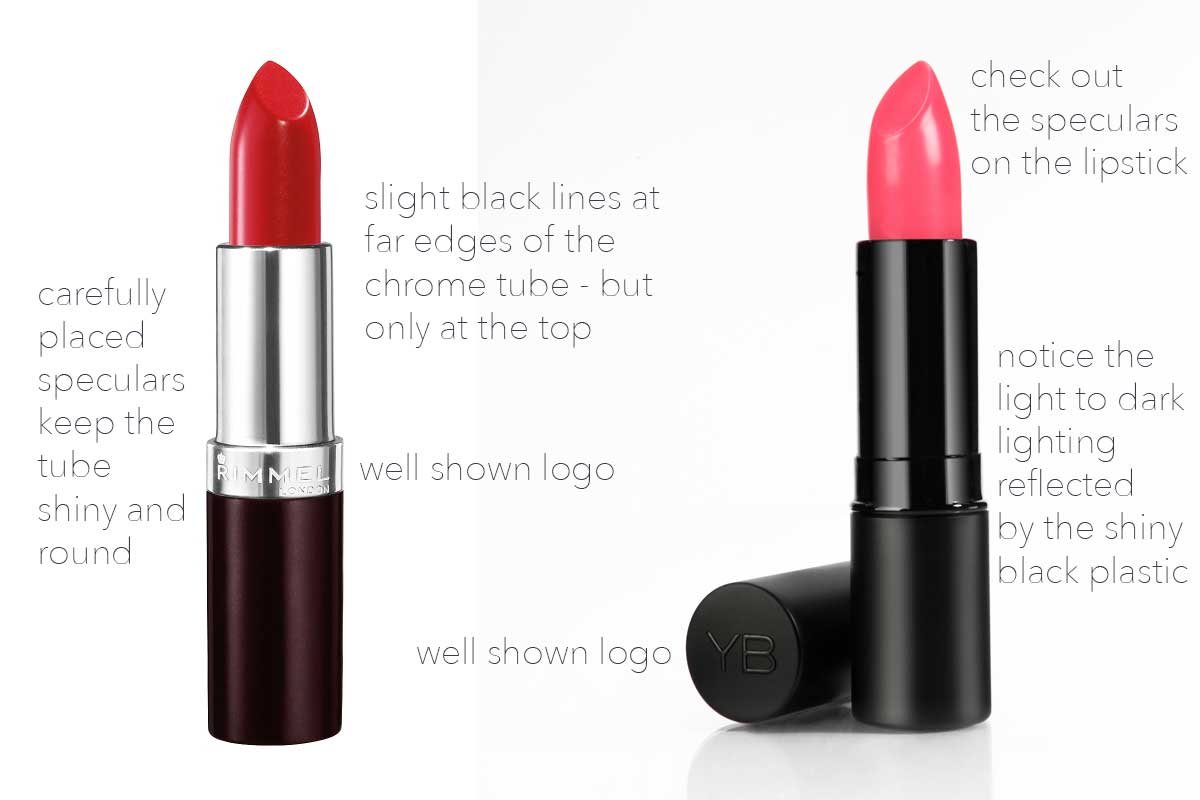
CONTROL THE REFLECTIONS:
While being super precise with composition.
Cosmetic Product Photography Checklist
Cosmetic Product Photography Checklist (No Models)
Optimized for Clean, Consistent, and Marketable Product Shots
1. Pre-Shoot Planning
-
Review brand guidelines (colors, textures, mood, light preference)
-
Identify hero products and variants (shades, sizes, packaging types)
-
Create a shot list (angles, groupings, details)
-
Determine final usage (web, print, packaging, ads, etc.)
-
Choose background style (white seamless, color block, lifestyle flat lay, etc.)
-
Decide if props are needed (natural elements, stones, swatches, etc.)
2. Product Prep
-
Clean all packaging (no fingerprints, smudges, or dust)
-
Remove price tags or stickers
-
Check labels are straight and facing front
-
Use fresh, unused product samples (no scratches or leaks)
-
Prep smudges, swatches, and crushed powder details if needed
3. Set Design & Styling
-
Use consistent surfaces (matte, glossy, natural textures)
-
Select and arrange props if applicable (keep brand voice in mind)
-
Maintain spacing and visual balance
-
Test layout for symmetry or flow
-
Include negative space if layout will support text/graphic overlay
4. Lighting Setup
-
Choose lighting style (soft & diffused, directional for drama, etc.)
-
Use reflectors to soften shadows
-
Minimize unwanted glare on packaging (especially glossy surfaces)
-
Test color accuracy—especially for tinted creams, foundations, lip colors
-
White balance set correctly (or use color card)
5. Camera & Capture
-
Use tripod for consistency
-
Lock focus manually if needed
-
Frame tight product shots and wider contextual shots
-
Shoot multiple angles: straight-on, 45°, top-down
-
Capture texture details and close-ups
-
Include packaging open and closed if appropriate
-
Bracket exposures for high-contrast or reflective products
6. Post-Shoot Handling
-
Back up RAW files
-
Review for focus, dust, reflections, and label alignment
-
Select best shots per product variation
7. Retouching Notes
-
Remove dust, smudges, imperfections
-
Ensure brand colors and product textures are true-to-life
-
Clean up edges and reflections on containers
-
Sharpen key product details (logos, textures)
-
Export versions for web and print
-
Apply consistent file naming convention
Cosmetic Product Photography Checklist
Cosmetic Product Photography Checklist (No Models)
Optimized for Clean, Consistent, and Marketable Product Shots
1. Pre-Shoot Planning
-
Review brand guidelines (colors, textures, mood, light preference)
-
Identify hero products and variants (shades, sizes, packaging types)
-
Create a shot list (angles, groupings, details)
-
Determine final usage (web, print, packaging, ads, etc.)
-
Choose background style (white seamless, color block, lifestyle flat lay, etc.)
-
Decide if props are needed (natural elements, stones, swatches, etc.)
2. Product Prep
-
Clean all packaging (no fingerprints, smudges, or dust)
-
Remove price tags or stickers
-
Check labels are straight and facing front
-
Use fresh, unused product samples (no scratches or leaks)
-
Prep smudges, swatches, and crushed powder details if needed
3. Set Design & Styling
-
Use consistent surfaces (matte, glossy, natural textures)
-
Select and arrange props if applicable (keep brand voice in mind)
-
Maintain spacing and visual balance
-
Test layout for symmetry or flow
-
Include negative space if layout will support text/graphic overlay
4. Lighting Setup
-
Choose lighting style (soft & diffused, directional for drama, etc.)
-
Use reflectors to soften shadows
-
Minimize unwanted glare on packaging (especially glossy surfaces)
-
Test color accuracy—especially for tinted creams, foundations, lip colors
-
White balance set correctly (or use color card)
5. Camera & Capture
-
Use tripod for consistency
-
Lock focus manually if needed
-
Frame tight product shots and wider contextual shots
-
Shoot multiple angles: straight-on, 45°, top-down
-
Capture texture details and close-ups
-
Include packaging open and closed if appropriate
-
Bracket exposures for high-contrast or reflective products
6. Post-Shoot Handling
-
Back up RAW files
-
Review for focus, dust, reflections, and label alignment
-
Select best shots per product variation
7. Retouching Notes
-
-
Remove dust, smudges, imperfections
-
Ensure brand colors and product textures are true-to-life
-
Clean up edges and reflections on containers
-
Sharpen key product details (logos, textures)
-
Export versions for web and print
-
Apply consistent file naming convention
-
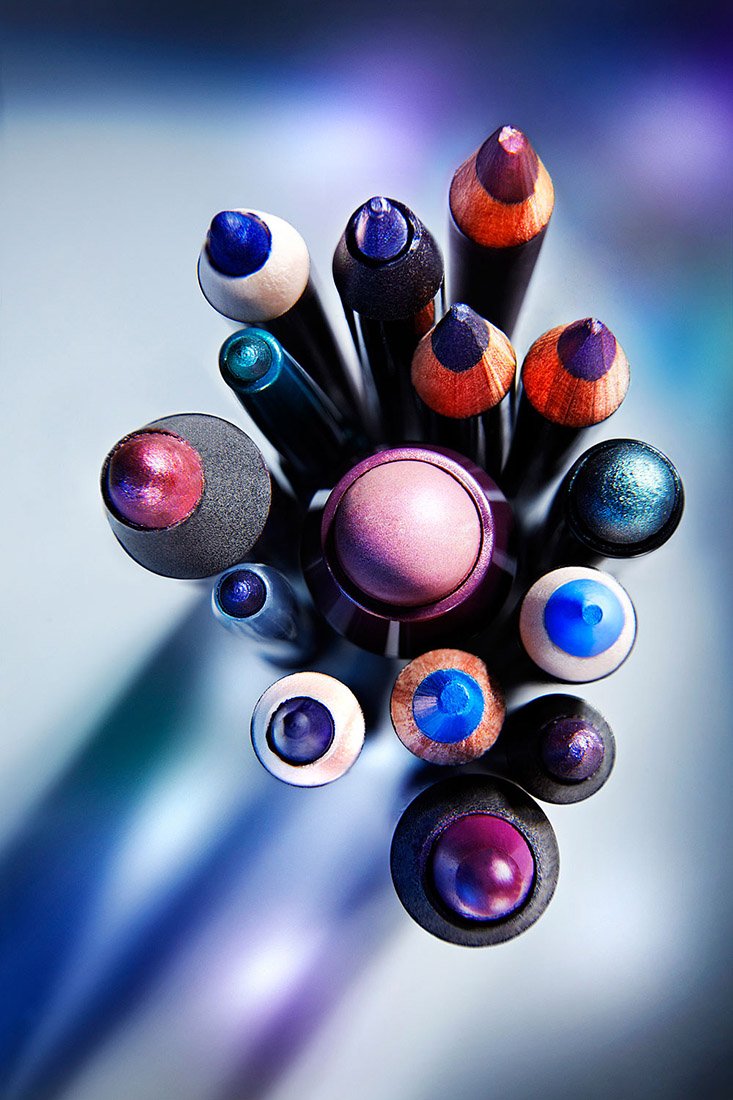
POV
Try something a bit different for even more drama. Shooting down on a group of pencils and brushes minimizes their length, but that is covered in the use of the shadow below. Well conceived and lit image.
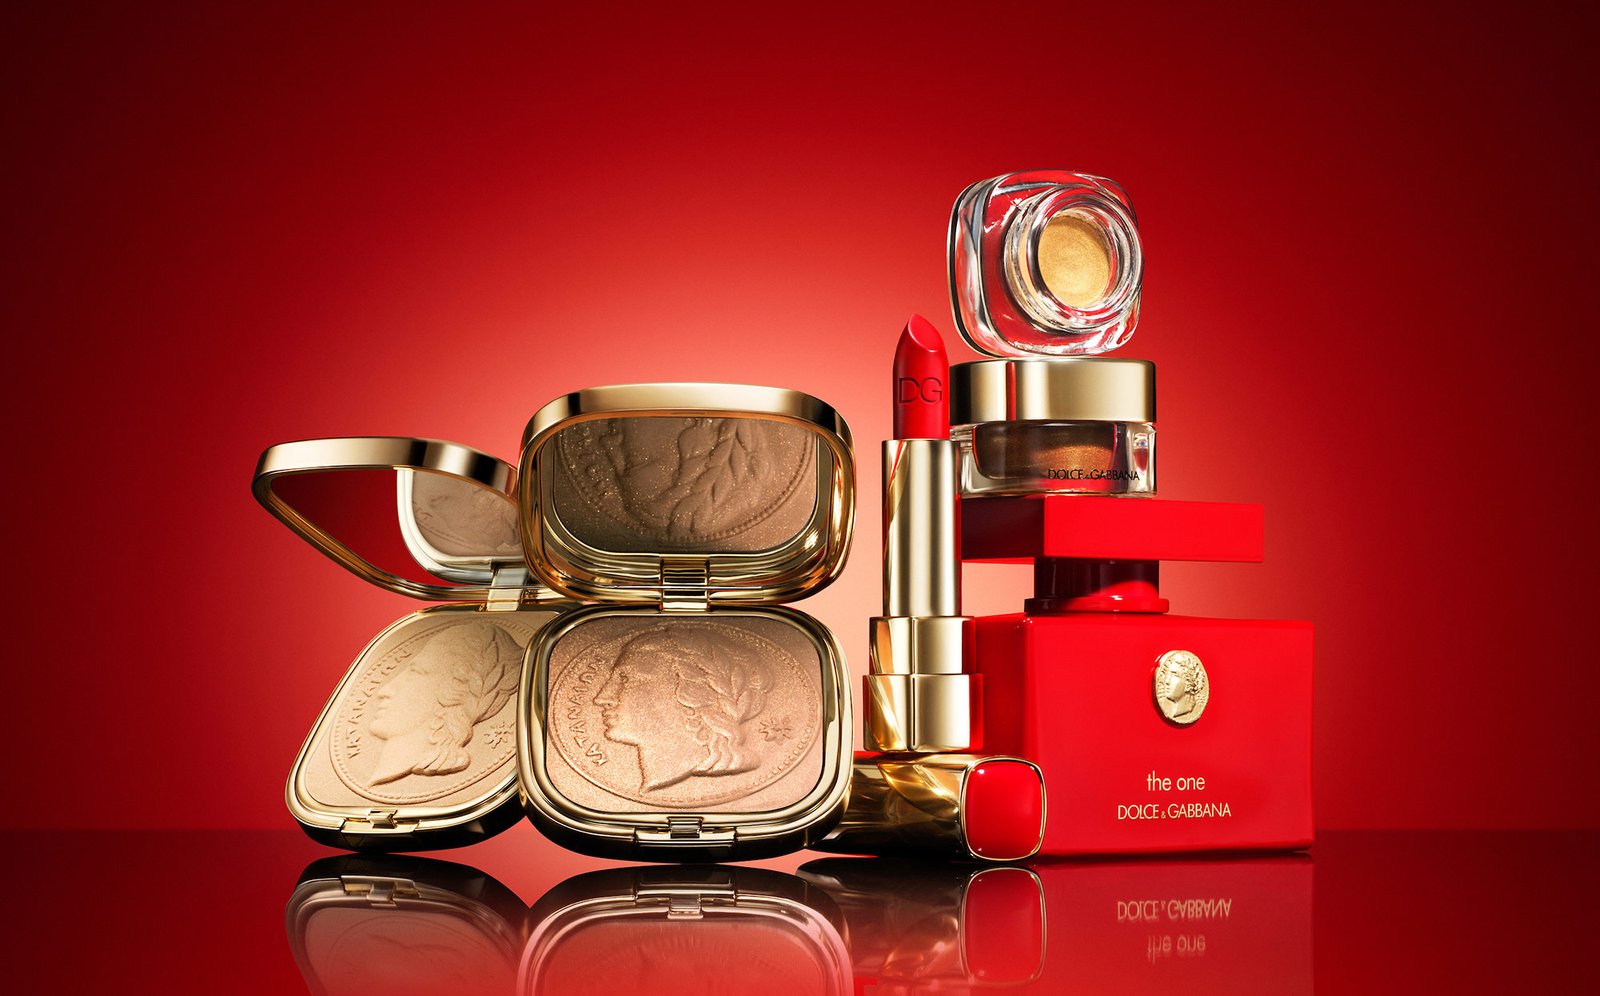
SHOW THE PRODUCT IN A STILL LIFE
A beautiful still life view of Dolce Gabbana items arranged with clever design. The red motif carries through to the background and surface. And the slight glow behind the product helps them stand out from the background. Notice the use of scrims to make sure the light has a bit of gradient to it.
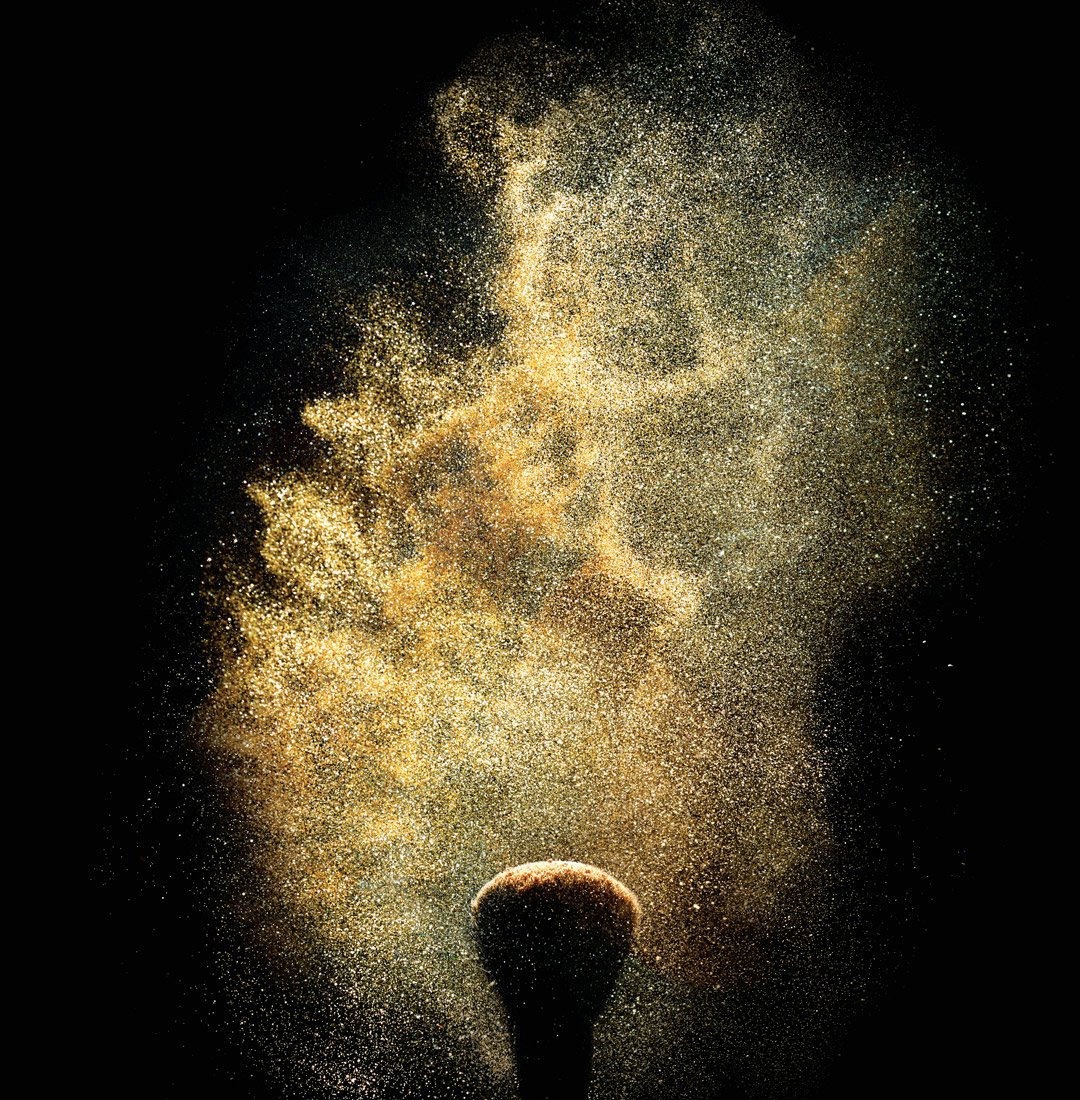
LET THE COLOR EXPLODE
A very exciting and minimally created image delivers an explosion of color. Back light is the only light used here, and the spray of product may be produced many ways… including throwing it into the air to shooting it on black and carefully bringing the brush in with a mask in Photoshop. Pick your poison.
SHOW THE PRODUCT IN WAYS IT IS NOT NORMALLY SEEN
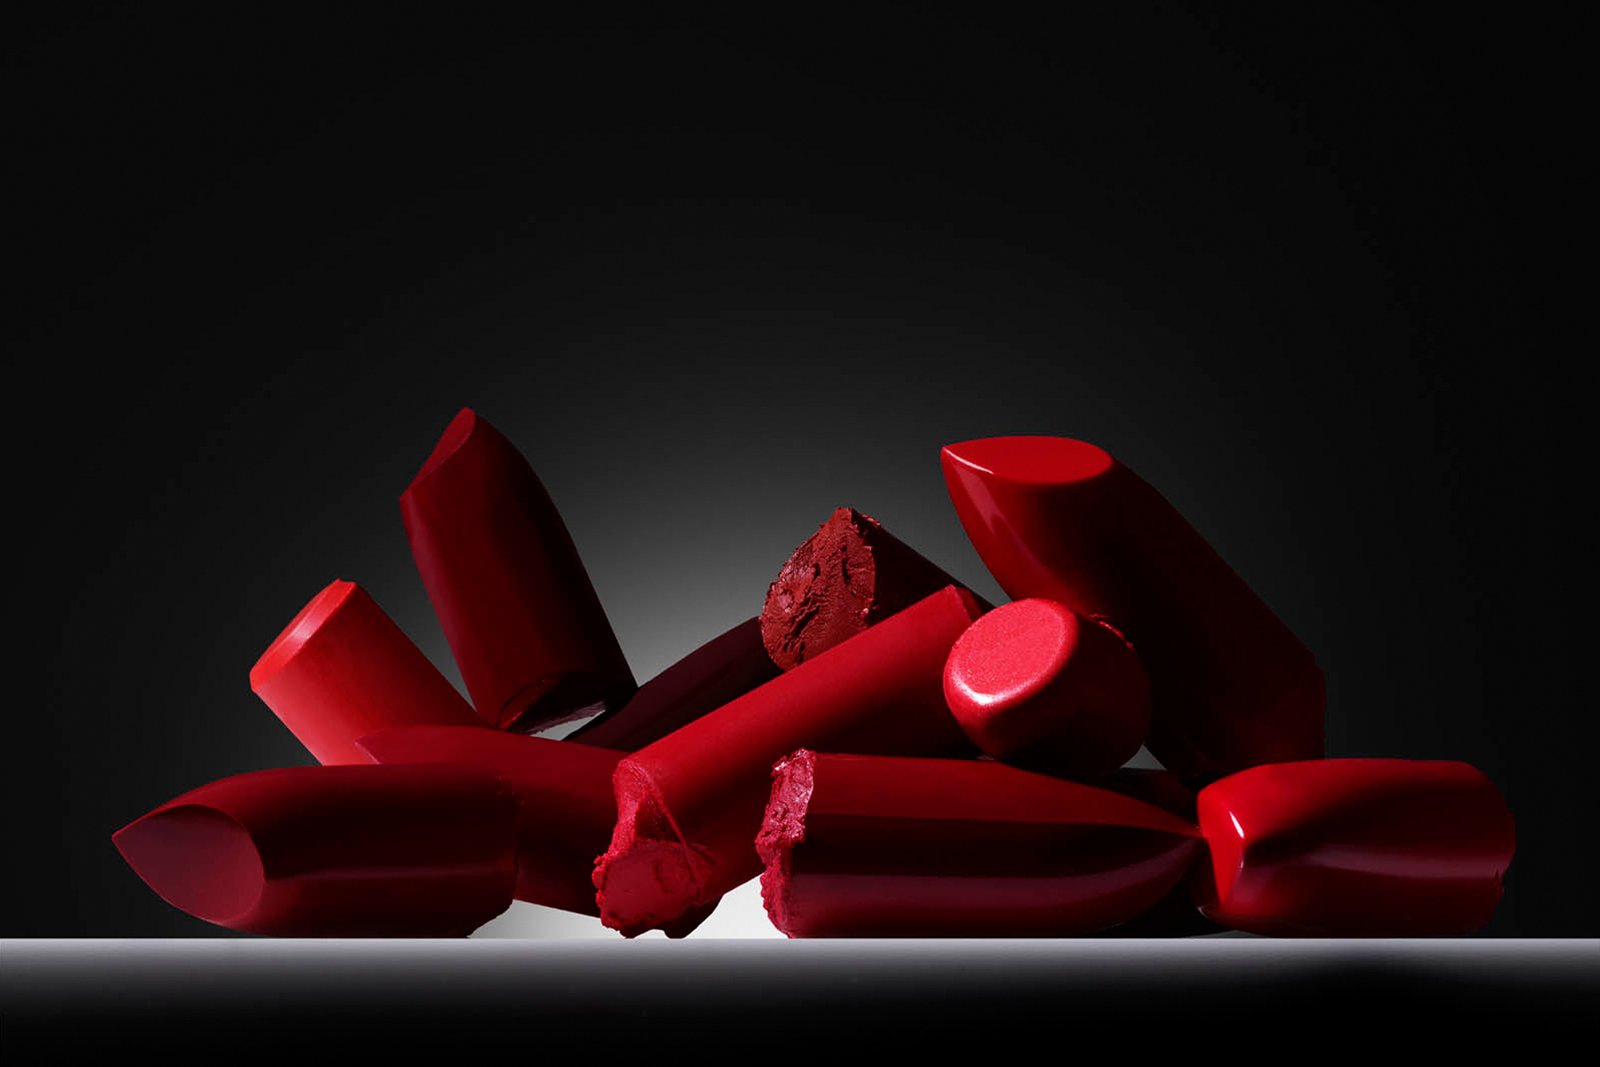
Creating a pile of lipstick carcasses and then shooting them with luscious, liquid light is another way to present the essence of the product. What looks to be broken trash is treated as though it were something special by lighting and composition. Nice use of the edge to define the stack… and the graphical nature of the POV helps make the items seem larger than life.
TELL A STORY
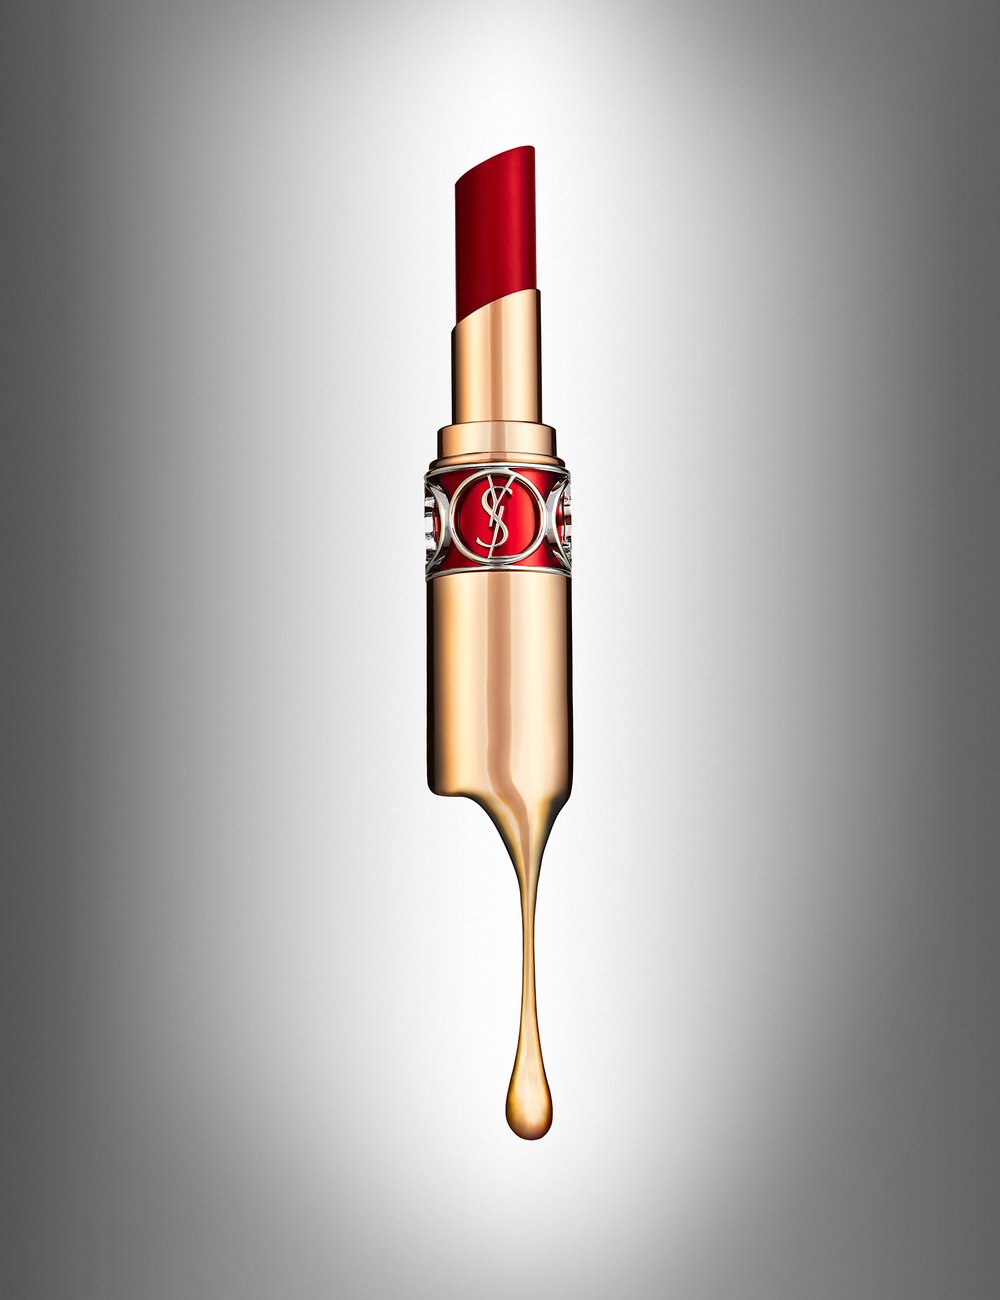
Is this lipstick creamy smooth – hells yeah, it is even melting. Telling the story with some clever Photoshopping skills, the photographer also made use of excellent light and perfectly placed YSL logo. I imagine this lipstick is a bit on the expensive side… note the dripping gold.