
Classic, for me anyway, method that I shoot jewelry. Most of the time my clients want clean, easy to see pieces that show off the finish or the stones. I find that large soft light with lots of fill works to deliver the smooth highlights and well lit jewels.
You can create this with a scrim and lights, a double scrim (two separated by 6 – 10 inches), a softbox or combination softbox / scrim. Just depends on what you want to achieve. I use lots of canned air to clean set, bees wax to affix the jewelry, makup mirrors for adding snaps of light and an assortment of small cut white fill boards.
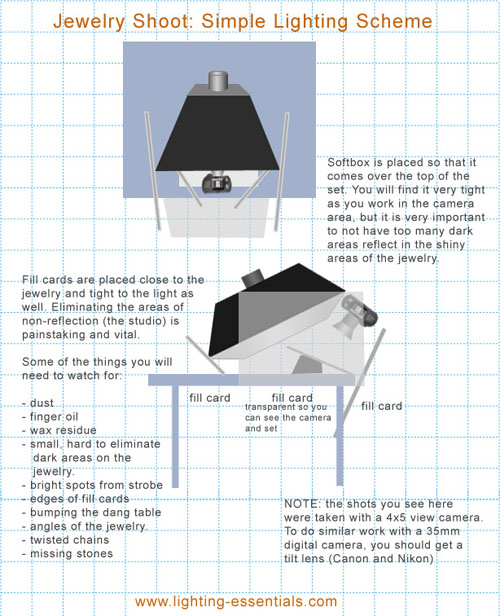
Here are some shots using the above lighting scheme. There is a lighting diagram at the bottom of the page.
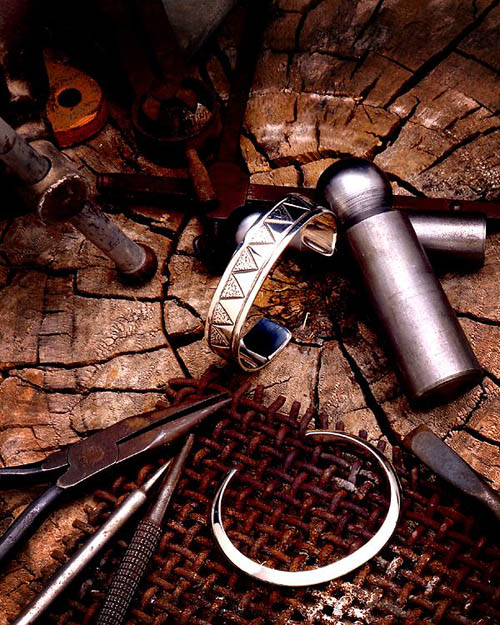
Jewelry Brochure for a Navajo Silversmith:
There are additional small cards added, but the most obvious is the half-circle bracelet with the bevel toward the camera. A white card was positioned to pick up that bevel as it was reflecting a dark studio.
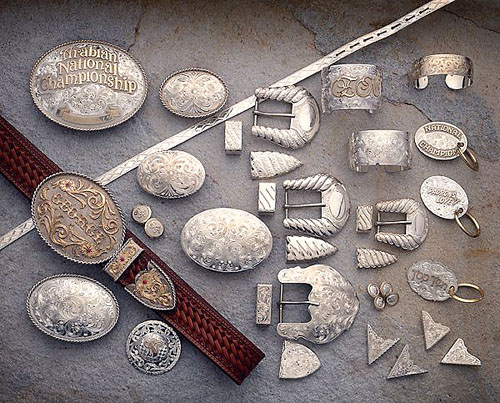
Custom Silver Smith for Western Riders Catalog:
This shot took nearly a half day to set up. The 4×5 is mounted straight down and I stood over it watching my assistant carefully place the buckles on the background – getting them straight in the camera – and then ‘tacking’ them down with a small bit of bees wax. After we were finished placing them we had to bring in fill cards to help keep the convex buckles from reflecting dark studio.
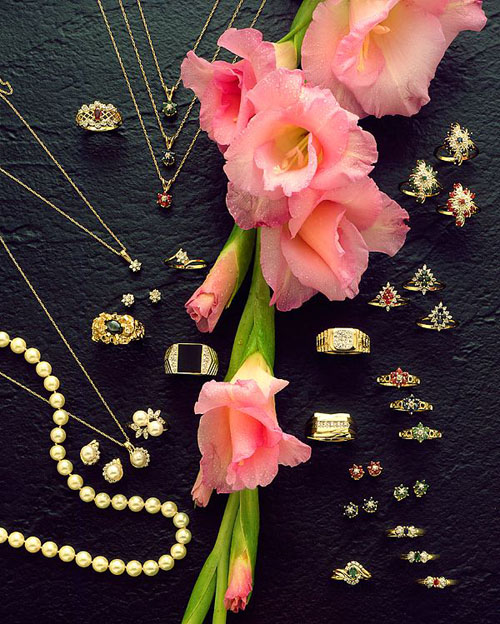
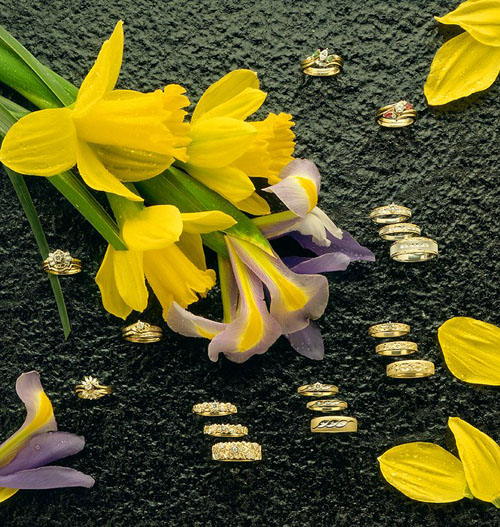
Above and below:
Two shots from an oversized direct mail piece for consumers. Each image was a single page. The designer would add the type to the image in production. Watch the multimedia presentation for a closer look at how they were done. These were both done with the setup in the diagram below. Very painstaking work, but also very much fun.
Here is a quick little multimedia presentation of the jewelry shoots here..
Thanks for visiting Lighting Essentials.


Very useful information !
Some ideas from my own jewelry photography experiences:
* get a real macro lens not a lens that *also* will do macro work; the optics are designed for close work
* a 105mm macro lens is much easier to work with than a 55mm macro; same image from farther away
* wear white clothes and white gloves otherwise your skin or clothing will show up as a reflection
* 12×12 inch backgrounds can be found in the tile department of stores like Home Depot or Lowes
* gloss black tiles will make a mirror-like background but the largest I have found in stock are 8×8 inch
* 3×5 index cards (recipe cards) make great, cheap reflectors
* some art supply stores carry inexpensive black velvet forms for folks who make custom jewelry
* get a small roll of thin flat-black wire at the hardware store; great for holding jewelry, easy to edit out
* nylon fishing line is shiny and reflects light; use the black wire instead
* a ZeroStat will neurtalize static electricity making dust removal much easier; I find them on eBay
* watch bands can be held open with a specially made clear plastic C-shaped form (difficult to find)
* a tripod is a PAIN to use; a heavy (and expensive) camera stand is worth its weight in gold
* do a Google search for Union Brothers camera stands; I believe they are a Las Vegas-based firm
* Ikea sells adjustable saw horses for about $33; great for tilting the whole set if needed
* Home Depot and Lowes sell 24×24 boards made of various woods; paint or stain for a background
* I painted all the walls of my studio (home living room) flat white so I can light the walls, it is like working inside a HUGE soft box
Terry Thomas…
the photographer
Atlanta, Georgia USA
http://www.TerryThomasPhotos.com
(go to my Products page then scroll to the bottom to see my studio in action)
Sorry to be a stick in the mud, but you misspelled the word jewelery on the top photo. It should be spelled jewelry. Love your site. Thanks for sharing your wealth of knowledge with us.
Cary Nettles
I found your site on del.icio.us this morning and really liked it. I bookmarked your blog and will definitely be back soon to read your new posts!
I loved the article! These types of resources are extremely valuable to anyone interested in making jewelry. I can’t wait to read some more of your articles!
very interesting and beautiful photos….. like it. have you twitter or some Social networking to follow…? I didn’t find it.
Very Good Information and web, but I didn’t find any Social Networking to Follow Like Twitter or Facebook.. for reader Update Information Immediately when the posting, This will be very useful for you and other people who looking the best information from you.
Thanks.
It appears my WP Plugin for the SM is not working. Thanks for this, I may not have noticed.
Will be installing a new one shortly.
Glad you enjoy the site.
very beautiful and good info for sharing, I like it so much
very beautiful info that you give to us, thank for your kindness to share this benefit info to us. it’s really help me… thank
very nice info to sharing other peolr. thank
To cary nettles, in ENGLISH we spell the word- jewellery!!!!
Would you recommend an affordable (lower price range) camera body to start with? I am just now photographing my own jewelry but all i have is a point and shoot at the moment. Overwhelmed by the DSLR or 4/3 lens choices and wondering what the minimum model i can get away with. If you have any pointers, i really appreciate it!
Hi Juliet.
The challenge you are going to have with smaller cameras is the close focusing ability. My experience with the Lumix FZ40 is that it is an excellent camera. I did not try macro when I was using the Lumix, but I do believe it has a close focus setting. However, I understand that the G10 and G11 Canon cameras have a macro setting. Both of these cameras are able to make professional looking images and are pretty darn inexpensive for what they deliver.