Lighting Basics, Class Three
I am often asked what do I decide first when making a photograph. The answer is easy… aperture. Aperture changes the way my photographs work more than any other thing. It is important to note that I am not an ‘action’ shooter or sports shooter, for whom shutter speed may be the most important decision you need to make. Shooting action means knowing what shutter speed is needed to make it as sharp as you want it to be.
My work is not shutter speed centric, if that is a term that we can agree on. Aperture controls depth of field, and that is the first thing I look at when deciding what kind of photograph I am going to make, or what kind of look the photograph will have in relationship to the focus of subject / background.
We know that at f-16 things are more in focus in the background than if we shoot the same shot at a ‘wider’ aperture like f-4. Additional situations that can create or diminish the DOF blur is the distance of the subject from the background and how close the subject is to the lens.
Add to that, what the lens is… wide/normal/telephoto and we see there are lots of things to think about along with the aperture itself. The shot below was shot on an 80-200MM f2.8L lens and it is zoomed to 200MM. I shot this image at f2.8 so that I could maximize the blur behind her, and distinctly show her face in detail. As you can see, the DOF is so shallow that the back of her head is falling out of focus. Exactly what I wanted, so aperture first was the most important decision. The background was a house and bushes probably 30 feet behind her. 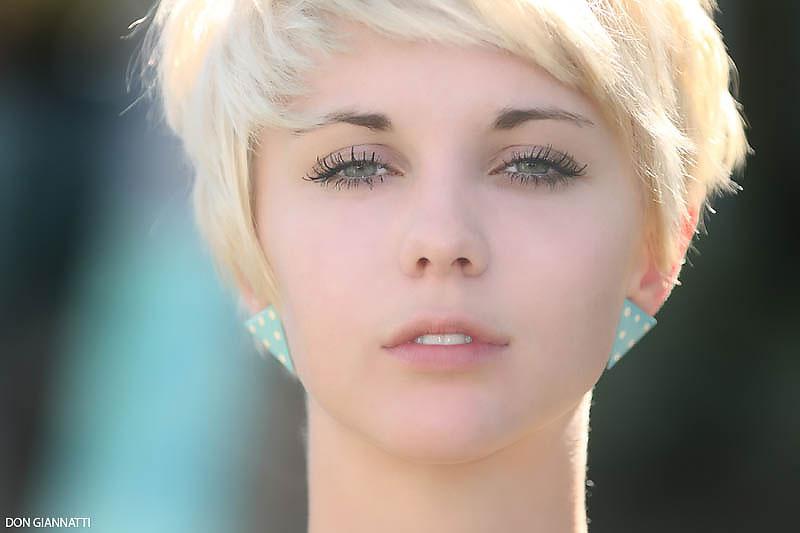
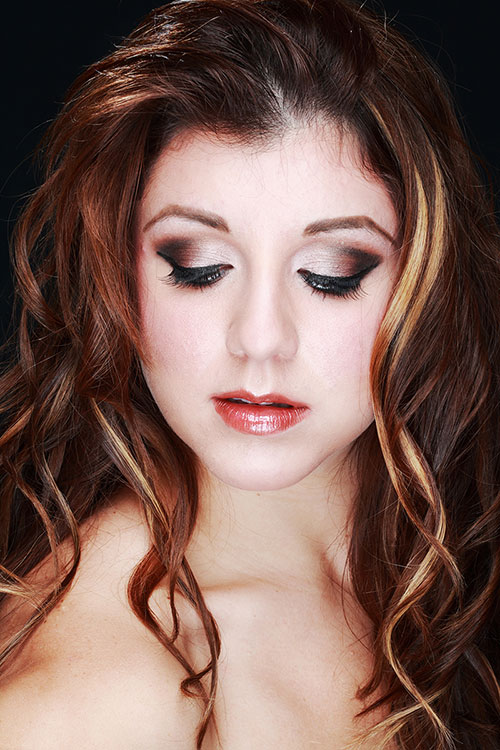
The same lens was used in the studio before, but I wanted all of the subject in focus. Front of the nose to the back of the hair. The crispness was what I was seeking. I chose f-11 for this shot so that the DOF would be deep enough with the lens being as long as it was and as close as it was.
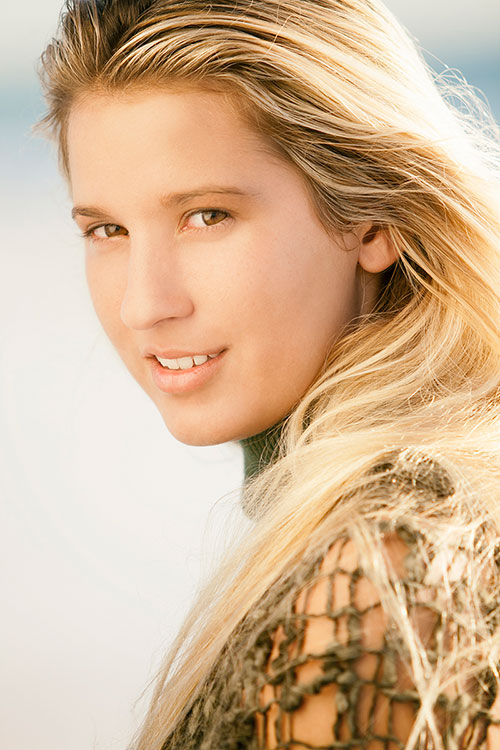
The image below was taken in Florida and the first thing I determined was that with my 200MM lens at f2.8, I would not be able to get all of her face in focus. Knowing that the background was simply sky and clouds as far behind her as possible, I could grab a little more depth of field and still have the feeling of a very shallow photograph. I chose f-5 for this shot and kept both of her eyes in focus as well as most of her hair. The background seems to be as blurred as the background in the first shot because it is so far behind her.
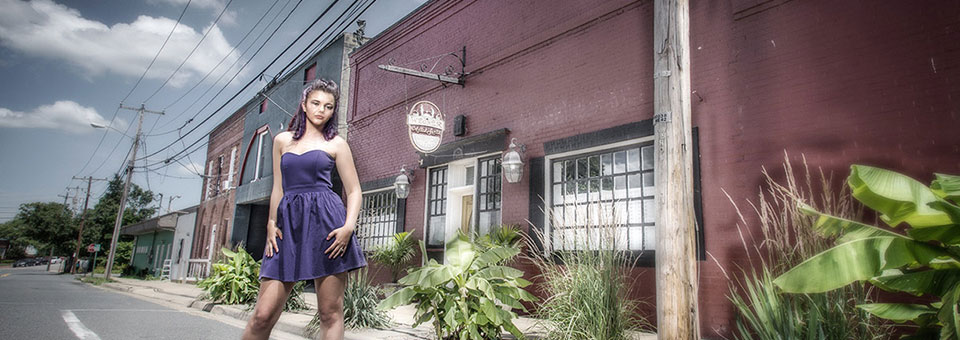
We know that lens length can affect DOF as well. Below is a photograph taken in Bermuda. I used my 20-35MM f2.8 L Canon for the shot, and I was set at f-4. Look at how much more the background is in focus behind her. At this distance, the wide angle lens has much more DOF than a telephoto making the same image. (Part of your assignment for next time.)

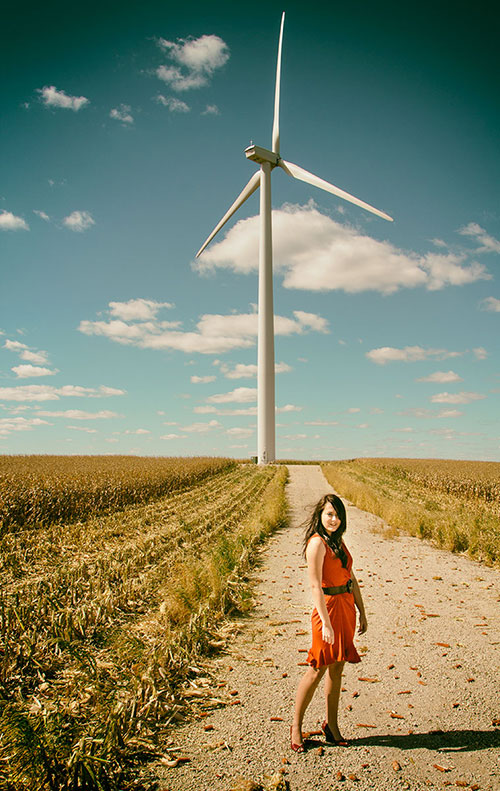
A wide angle lens used at maximum aperture (f22) was able to keep the subject in the foreground AND the windmill in the background in very sharp focus. This shot, taken in a Minnesota corn field, was done with the 20-35MM zoom at 20MM. The resulting image has full depth of field.
In order to do this in a reasonable amount of deliberation, it is important to understand our reciprocals… the relationship of shutter speed to aperture to ISO needed for exposure.
ISO 100
f-2.0 @ 1/4000
f-2.8 @ 1/2000
f-4 @ 1/1000
f-5.6 @ 1/500
F-8 @ 1/250
f-11 @ 1/125
f-16 @ 1/60
f-22 @ 1/30
As the aperture becomes smaller, the shutter speed gets longer. The same amount of light is coming in based on brightness (aperture) and time duration (shutterspeed), but it is rendered much differently on the film or sensor. F-2 has far less DOF than f-8 with the same lens at the same distance.
I do everything at ISO 100 to start. That is my base and I can make simple decisions faster if I have the same base for each situation. NOTE that I do not necessarily SHOOT at ISO all the time, I just use it for a simple base. So if I know that we are shooting at ISO 100, and the meter says f-8 @ 1/250 I can make a decision rather quickly… I want to shoot the picture for minimal DOF and that means f2.8 or f-2, right?
So I simply open up the aperture three stops (5.6 to 4 to 2.8) and shorten the shutter speed the same equivalence of three stops as well… 500 to 1000 to 2000. The exposure of f2.8 @ 1/2000 is the same as f-8 @ 1/500 but the image has less DOF.
Knowing how to use reciprocals, and working with them on every shoot will help you understand the choices YOU must make for your own imagery.
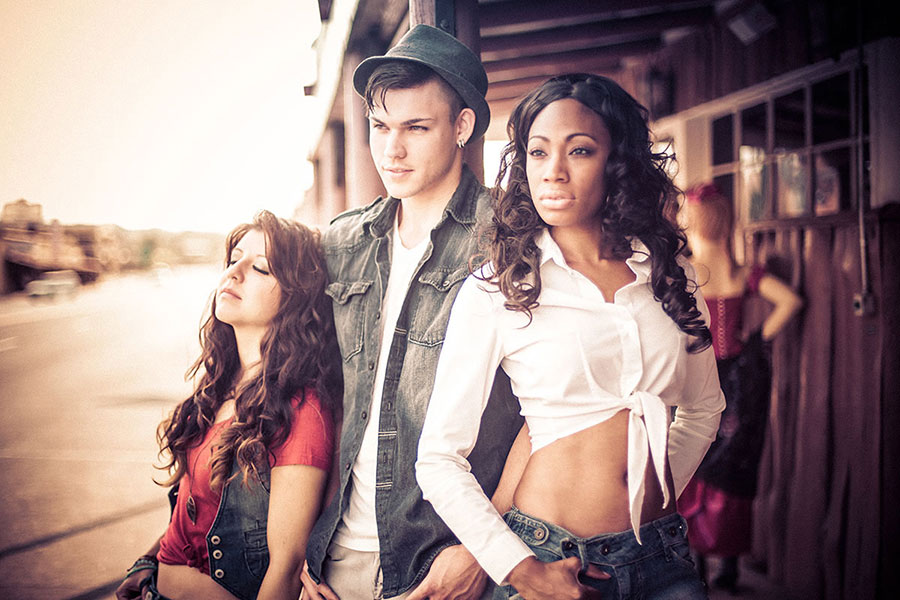
In the shot below, I was using a Canon 50MM f-1.4 lens. I knew how much DOF I needed to keep the three subjects in focus, and set the camera settings for EXACTLY that setting – f2.8 to be exact. At a wider aperture (f2 for example) one of the two ladies would have been out of focus. Being able to take a meter reading and make the reciprocal changes in my head meant that I was able to catch the shot as the light began to play in and out of the clouds.
Tutorials from YouTube:
Assignment: 1.
Telefoto or Zoom Lens:
1. Frame a subject at the longest length you have on your zoom. A tightly cropped headshot or similar. Shoot a set of reciprocals for your test. Start at f-16 and end up at the widest aperture you have. Meter for f-16, then adjust by quickening the shutterspeed for each adjustment wider on the lens.
f-16 @ 1/125
f-11 @ 1/250
f-8 @ 1/500
f-5.6 @ 1/1000
f-4 @ 1/2000
f-2.8 @ 1/4000
2. Leaving the zoom at it’s longest setting walk backwards to get a full length shot of the subject. Do the same exposure range as you did before.
3. Now use your normal lens, or zoom back on your zoom and make the same set of exposures at the same crop… so you will now be closer to your subject with a bit of a wider lens (50MM / 70MM on the big zooms).
4. Put on a wide angle lens and come in close to approximately the same distance. Do the same exposure exercise as above. Pull all the images into Lightroom or Bridge and compare. Notice how the exposures are the same, for each series – in fact they should all match exposure wise, but how wildly different they look with the different lenses, and the different apertures.
This is a great exercise to do to get familiar with WHY you make the choices you do and how those choices affect the way the final image looks.


