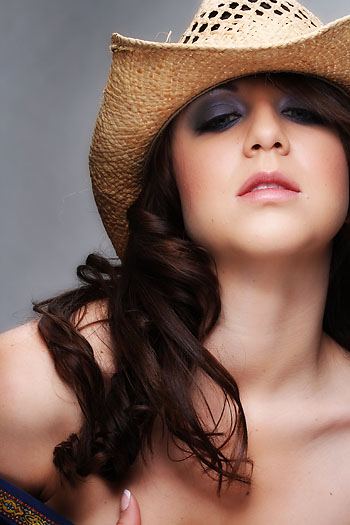
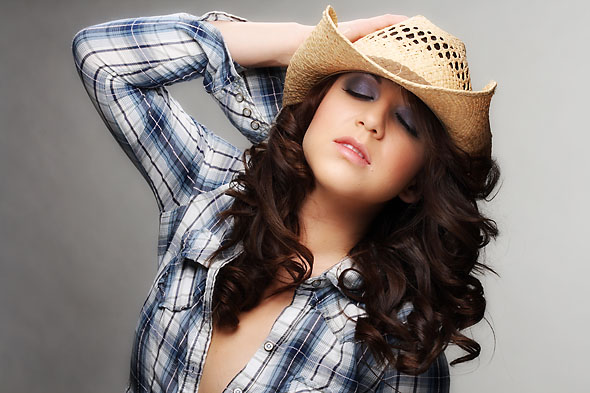
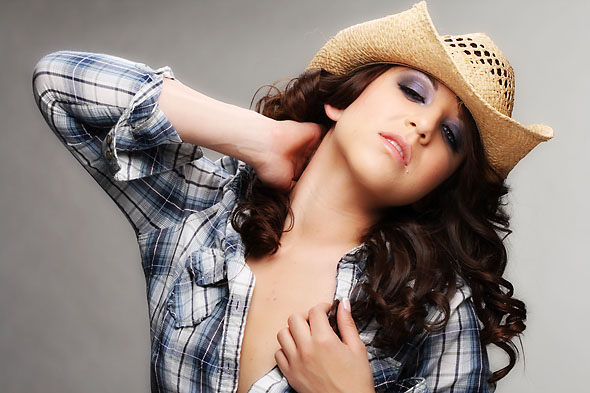
The Two Light Workshop rolls on with this cowboy hat look on “Miss Briana.” We shot some with a western shirt and some with bare shoulders… both are represented here. One of the things I wanted to do was to create a bright light on her face and a quick dropoff. I also wanted to make sure there was a dark shadow under the hat to give it drama. In the shot featured here, the shadow is well defined and gives the drama I wanted.
I did have a third light going here, but it is totally optional for a back light. The model is still lit with only two lights: a Zebra umbrella and a Beauty Dish. I added a shiny fill for under her chin so that the light would be dramatic under the hat, but not too much under the chin and in the neck area.
In this shot you can see how the lights, which are very close, create a soft look to the skin while providing a dramatic shadow area where the light does fall off. You can see how fast it falls off on her left side on the cheek into the hair.
The light from the Beauty Dish is metered at f13 and the light from the umbrella is metered at f12. So it is only 1/3 less than the beauty dish… and that is OK with me because the object that light is hitting is the brightly colored hat and I don’t want to run any risk of blowing out the highlights. Using the Canon 100MM USM 2.8 lens at f13, I was able to move in very close to her to get the shot cropped any way I wanted. When I was back farther, I had to watch for the beauty dish to make sure that it wouldn’t slip into the frame… that is how low it was to the shoot angle. BTW, I use ISO 100 in the studio whenever possible.
Here is a set shot from the shoot:
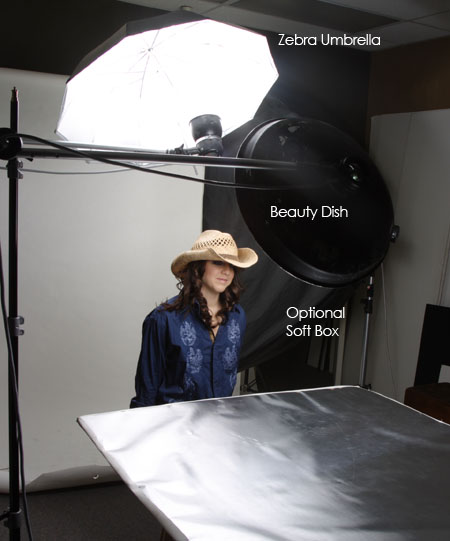
You can see how close the dish is to her and how low the umbrella is. For a shot like this, flare can always be an issue. Interestingly enough, in this shot the beauty dish provided the flag for the hairlight, keeping any flare off the lens… pretty cool, eh! Take a look at the shiny board as well to see how it is as close to the subject as we can get it, just barely out of frame on the 1/2 shots.
Speedlight Information:
Two matched speedlights in silver umbrellas could be a place to start. Or two shoot-thru umbrellas in very close. Go with equal distance from the subject and go for something like f8 on both. Keeping the light close will help the drop off. You can always use a DIY beauty dish with an umbrella for the hairlight.
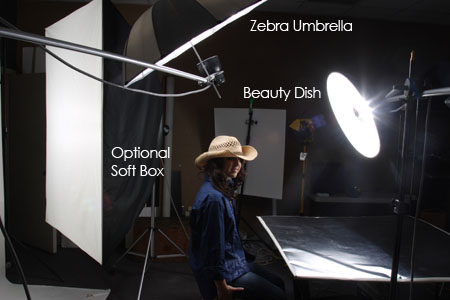
Here is the set from the side. You can see the backlight softbox. I used it to give a little light-to-dark on the background, but it is totally an option that you can choose to do if you want. You can also see that I am not using any fill cards so the image is totally lit from direct light coming from the front.
One last shot to take a look at.
|
Information for today’s photographer. From novice to pro, LE Magazine has it all. |
 |
 |
Let me know how this shot works out for you. I will be creating a place to post assignment work soon, so watch for it. Thanks for visiting Lighting Essentials and keep on lighting!
Part One of this Workshop.
Part Three of this Workshop


