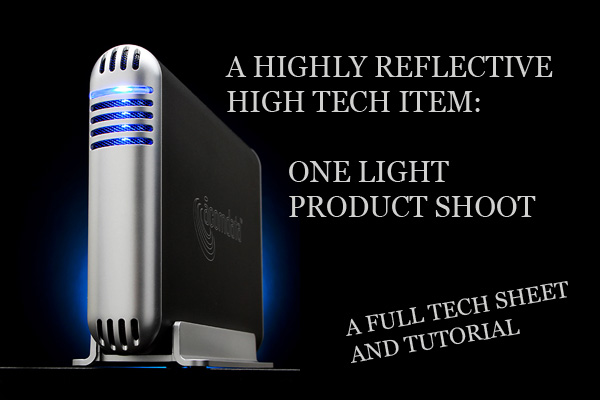
A simple product shot can sometimes present a lot of challenges for the photographer not used to thinking about reflected specular lighting. In this shot, the product is practically lit with specular reflection. There is very little direct light on the Hard Drive case, rather we have built an environment where the unit is simply reflecting all that surrounds it with our control to make it look fantastic.
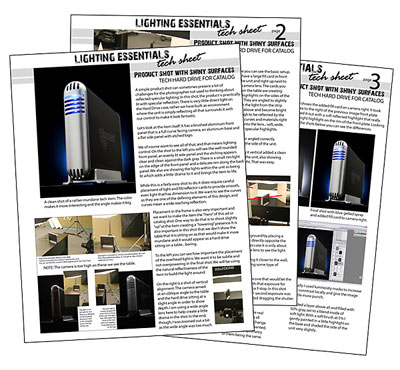
This is our newest Tech Sheet and it is three pages long. I have put it into a PDF for printing and working with. I hope anyone who would like to work on something like this shot finds it helpful.
You will need a scrim and boom for your speedlight or a softbox for your strobe. I used a strip light of 48 x 18, but you can use a smaller one for similar results. Four small sheets of fome core will also be of use, minimum 24 x 18 or a little larger. I find that stands, clamps, and booms come in to great use when working with the finesse that a shot like this requires. A second light for the background can be added for more interest.
You should have at least 4 feet behind your product so that the spray light can be used without having it bleed back on the product.
Before we jump on over, I am glad to announce that the workshops for the first part of next year are being set up now. You can see the list here. If you are thinking about hosting one, let me know as soon as possible so we can get it set up. There is also a new post at LE Magazine on Shooting For Free, a subject that David Hobby mentioned recently in a blog post and got a lot of people talking pro and con. My take here.
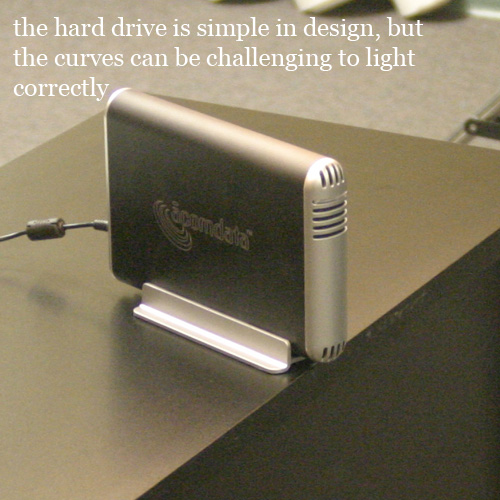
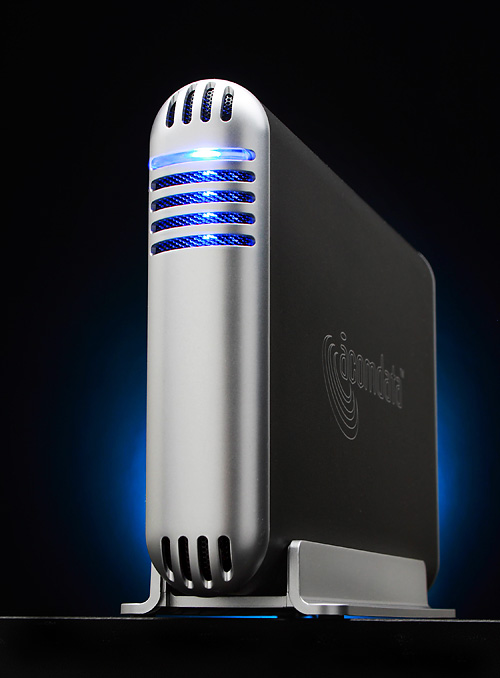
Let’s look at the item itself. It has a brushed aluminum front panel that is a full curve facing camera, an aluminum base and a flat side panel with etched logo. Download printable Tech Sheet here (PDF).
Our Tech Sheet this week is three pages in PDF form.
We of course want to see all of that, and that means lighting control. You will see the well rounded front panel, an side panel that needs to be evenly lit and the etched logo that should be visible in our final shot. I want a cleanly let front panel, some edge lights for drama and separation and the unit should look like it is important… and worth the hundred bucks or so it would cost.
While this is a fairly easy shot to do, it does require careful placement of light and fill/reflector cards to provide smooth, even light that has dimension to it. We want to see the curves as they are one of the defining elements of this design, and curves mean a wide reaching reflection.
Placement in the frame is also very important and we want to make the item the “hero†of this ad or
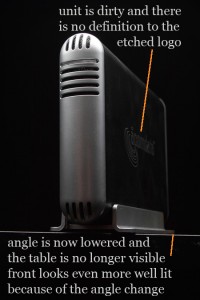
catalog shot. One way to do that is to shoot slightly “up†at the item creating a “towering†presence. It is also important in this shot that we don’t show the table that it is sitting on as that would make it more mundane and it would appear as a hard drive sitting on a table… boring.
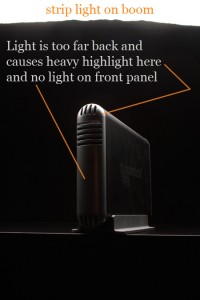
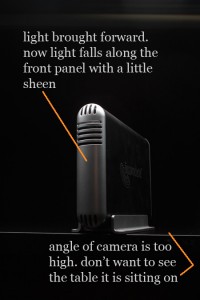
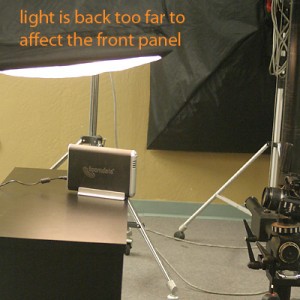
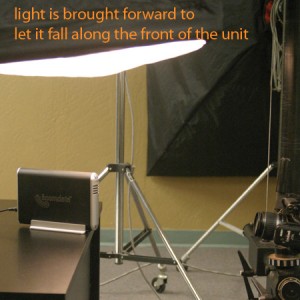
Below you can see how important the placement of the overhead light is. We want it to be subtle and not overpowering in the final shot. We will be using the natural reflectiveness of the item to build the light around.
Here are some shots of the vertical alignment of the light. The camera aimed at an oblique angle to the table and the hard drive sitting at a slight angle in order to show depth. I am using a wide angle lens here to help create a little drama in the shot. In the end, though, I was zoomed out a bit as the wide angle was too much.
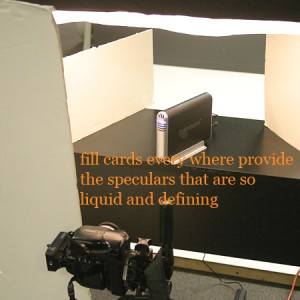
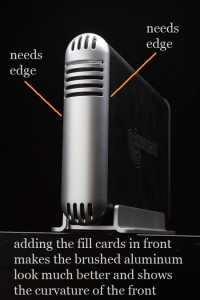
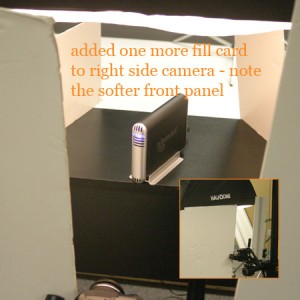
You can see the basic setup. We have a large fill card in front of the unit and right up next to the camera lens. The cards you see on the table are creating the highlights on the sides of the unit. They are angled to slightly catch the light from the strip light above and become bright enough to be reflected by the units curves and materials right back into the lens… soft, wide, liquid specular highlights.
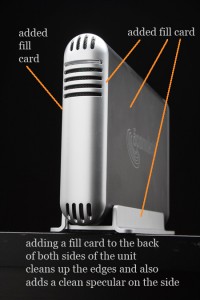
Putting a fill card angled to reflect light back to the side of the unit added a clean wide specular down the side, also showing the logo as an embossed highlight. That was easy.
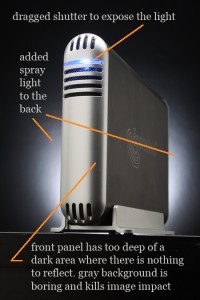
We added a “spray†light to the background by placing a head with a small parabolic reflector directly opposite the lens and right against the wall… in this case it is only about 4†from the wall. I stand and sight the lens to see the light.
This spray can be controlled by moving it closer to the wall, changing the power settings or putting some type of diffusion over the head.
I tried some long exposures to find the one that would let the light of the unit shine and we went with that exposure for shutterspeed, and the flash exposure for f-stop. In this shot it was f-11 at ISO 100 at 1 second. The 1 second exposure was for the light to burn in… sometimes called dragging the shutter.
Final setup shows the added fill card on camera right. It took the dark area to the right of the previous image front plate and cancelled it out with a soft reflected highlight that really offset the bright highlight on the rim of the front plate. Looking carefully at the shots below you can see the differences.
We decided a blue gel would nicely set off the blue light inside the unit so a double set of blue gels were added to the front of the spray light and clamped in place. The modeling light was then turned off to prevent heat build up in the reflector.
The back light was tuned a bit by moving it in and away from the wall. I checked how it looked by shooting without the top light on. That gave me a silhouette against the background. Once I got it in the correct final position I made sure the unit was clean and made my exposures, bracketing by third stops. I always shoot in RAW by the way.
On the Tech Sheet you will find some information on the Photoshop work we did.
I hope you enjoyed this high tech product shot using only one light for the product itself. Here is one last shot of the product as it was finished.



Very informative. The Tech Sheet really helped too. Thanks!
-S.
Indeed very helpfull. Thanks!