At the Project 52 2014 group, the assignment was “Air”. There were many wonderful submissions. This one by Meggan Joy Trobaugh was exceptional I thought. She carefully planned out the work and made the elements for the final work with a previsualized image already in her mind.
Here are Meggan’s steps.
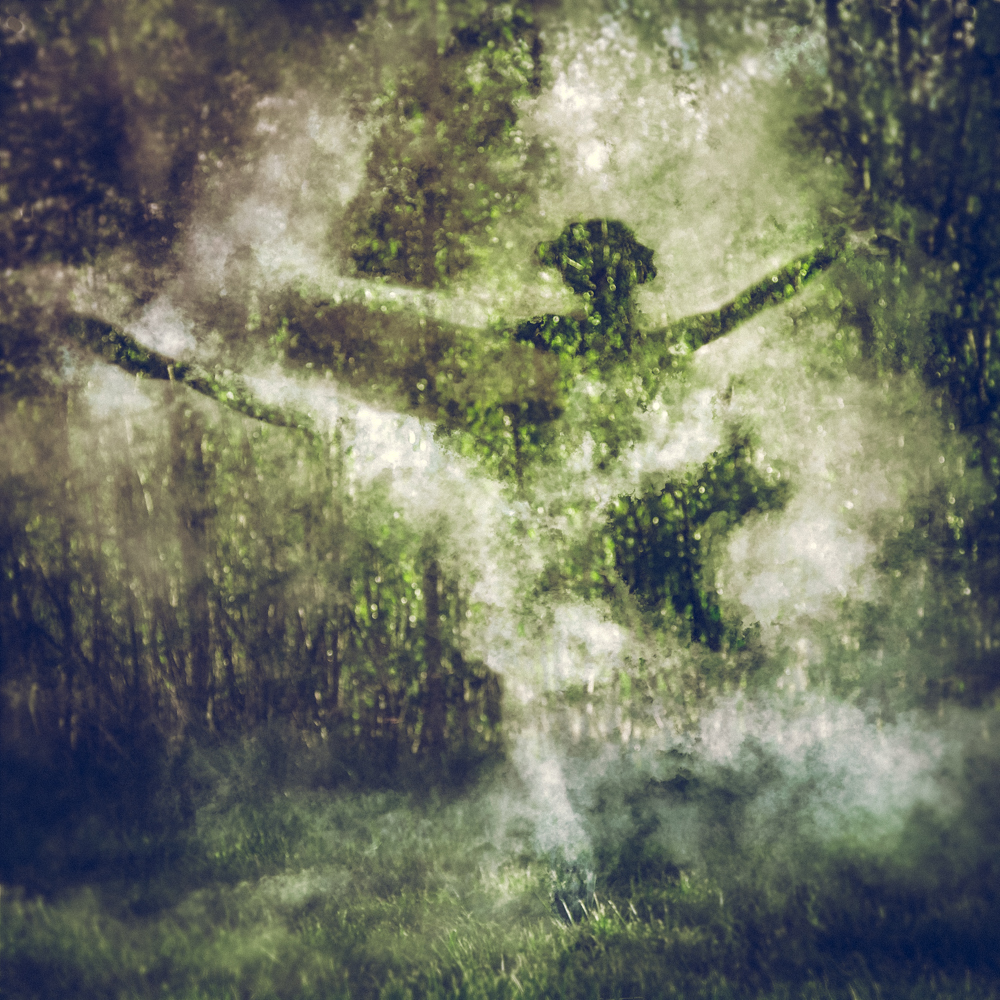
“I made this smokey ballerina to represent air. I wanted to make something that “felt like Monet” would like it. It might of ended up more along the lines of Degas but I will take it either way.
This image was made with only a tripod, smoke bombs, a patient husband and a well placed mask in Photoshop.
First, I sketched my idea. I would share my sketch but I actually lost it while shooting to some mud. Basically, imagine a very crude drawing of a stick figure with smoke all around it. THAT, was the starting point.
While I was sketching, I was trying to figure out what I needed to do to make it happen. I knew I could layer multiple images and mask out certain parts of them to make a negative human shape. So that was the rough plan.
But I was still not sure it would visually work. So before I spent my afternoon shooting and the rest of the evening buried in Photoshop for nothing – I did a test shoot. That way, I could figure out any bugs and if the idea needed to be abandoned I could toss it and have plenty of time to come up with a new idea.
So I went to the backyard and “volun-told” my husband to stand in as my human shape to mask out in post.
It went bad.
I learned that my background needed to be out of focus and that my human shape needed to be almost “too perfectly human” for the eye to recognize it. I also learned that I did not need a “real” human to stand in which was good because my husband was not enjoying this. We also figured out that we needed a better way to hold and manipulate the smoke bombs, because they actually get hot and can burn you. Go figure.
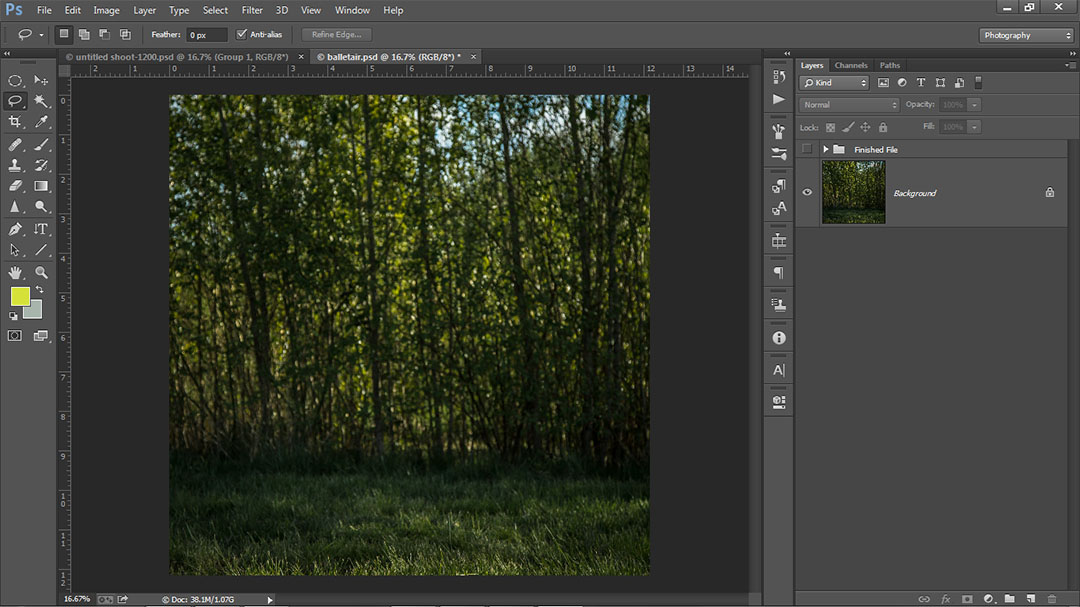
So while the test was ugly as all get out, it served it’s purpose. I regrouped the plan and found a better natural backdrop (that may or may not of been on private property) and made a container to hold the smoke bombs. We spent about an hour shooting different frames with smoke coming in all different directions. Also making sure to get a “blank slate” starting point to build off of.
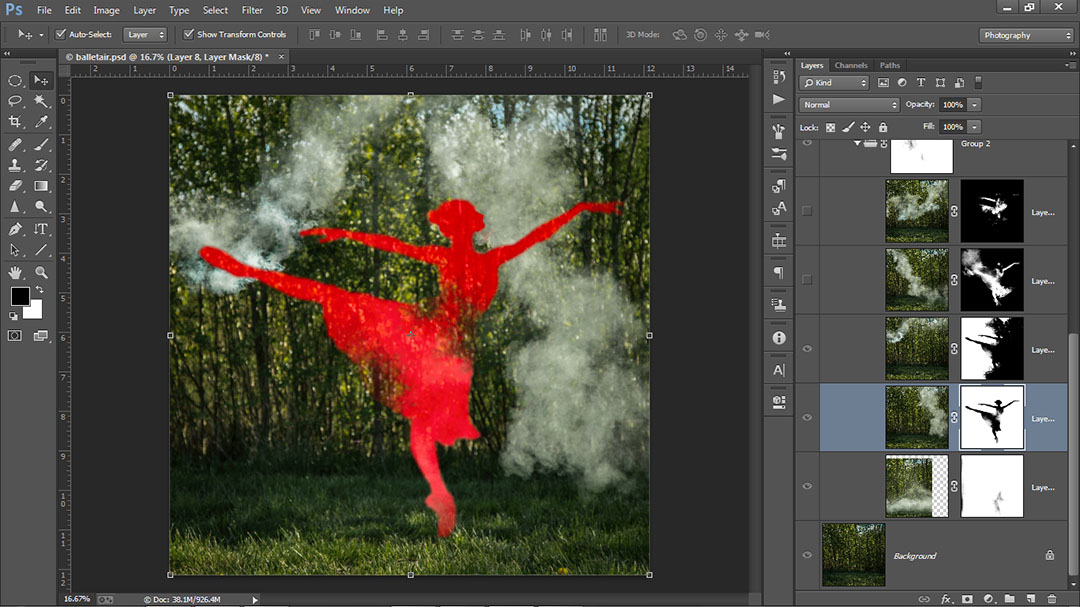
The technique I used to layer in the smoke is hard to see with the type of images I was using if you are unfamiliar with masks, selections and the like. So I will demonstrate what I did with some solid color adjustment layers. Then come back to the actual files later.
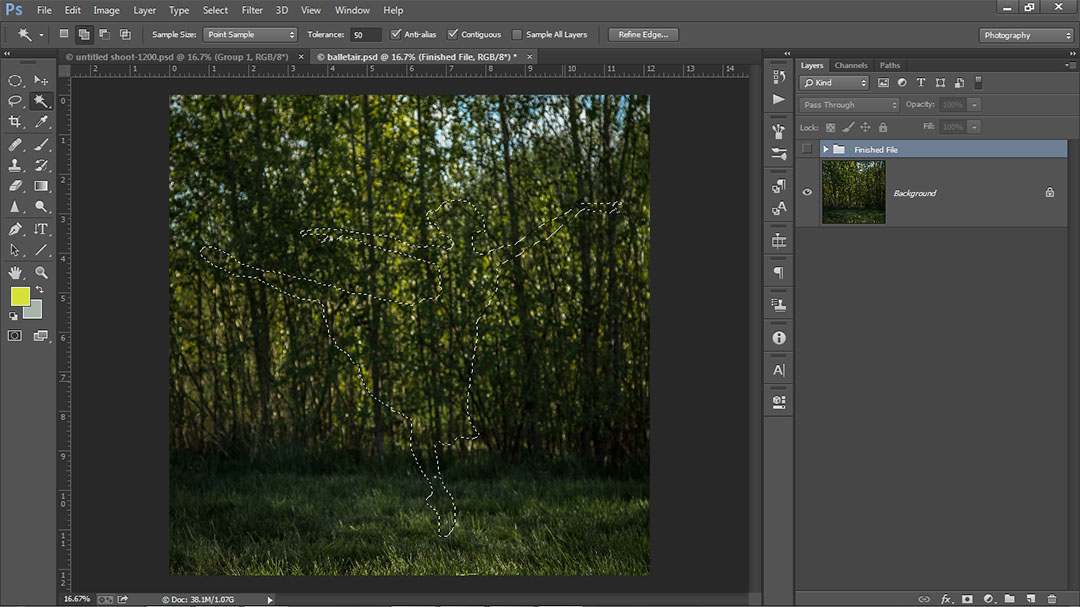
First, I made and saved a selection so that I could apply it to my mask for each individual layer and keep it matching. I purchased and used a ballerina vector file so I could get a head start using the magic wand tool, it cost me a dollar and saved me a couple hours of work. Well worth it in my opinion. But you could easily make a selection in any shape you wanted and it would work just as well. As it were, I ended up changing the shape of my ballerina quite a bit to suit my own tastes.
At this point, I would suggest saving your selection. You can find out how to do that in a quick google search. For now we’ll just assume you know what I mean when I say that.
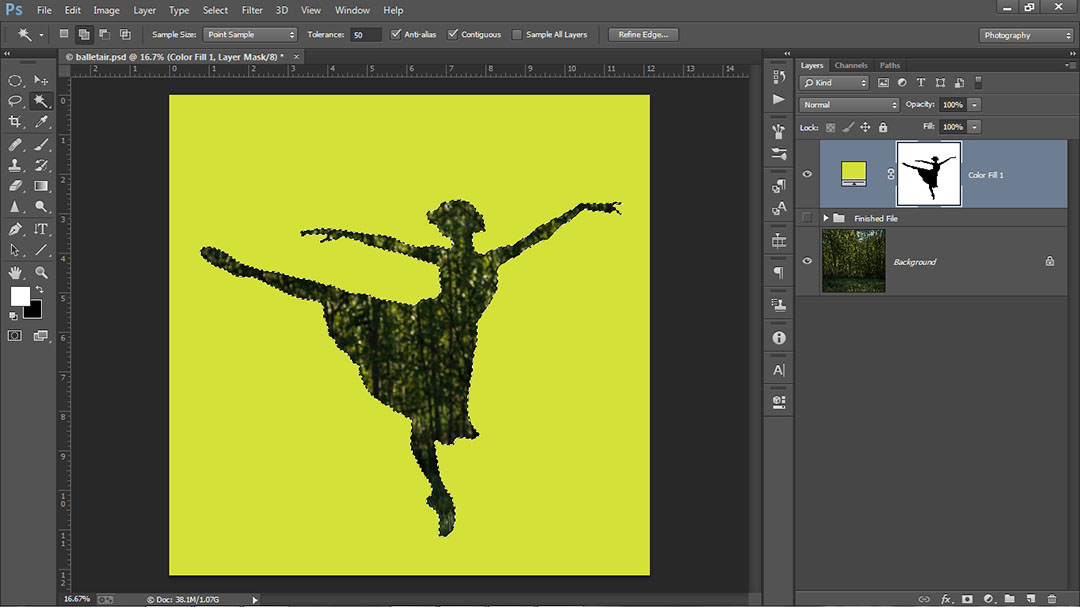
I am going to add a yellow fill layer to represent one of my smoke layers.
* there are a lot of ways to add a selection to a mask, this is just the way I do it *
To make a mask with my selection shape – I first, need to make sure I have the layer I want to cut out selected WHILE the marching ants are on my project.
From there, I just add a mask and POOF.
I am sure there are much prettier and sexier photoshop ways to go about this, but this is what I did.
By nature of my image – being full of smoke and all – I needed to refine this mask to feel more smokey. You can do a gaussian blur or you can feather the mask – I did different versions of all of these, but I also used a custom brush tool that was made to look like smoke.
This brush was from a tutorial from www.Phlearn.com which is a go-to check every day website for me. This is the tutorial I learned this trick from it even has the brush I used there to download for free. http://phlearn.com/atmosphere-and-effect – it really is handy.
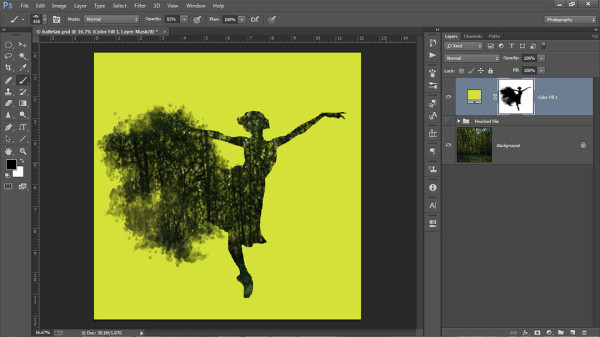
I was being really heavy handed with the brush for this yellow layer – normally, I would have it at 10% opacity at the most and just build up into masking out parts that I don’t need.
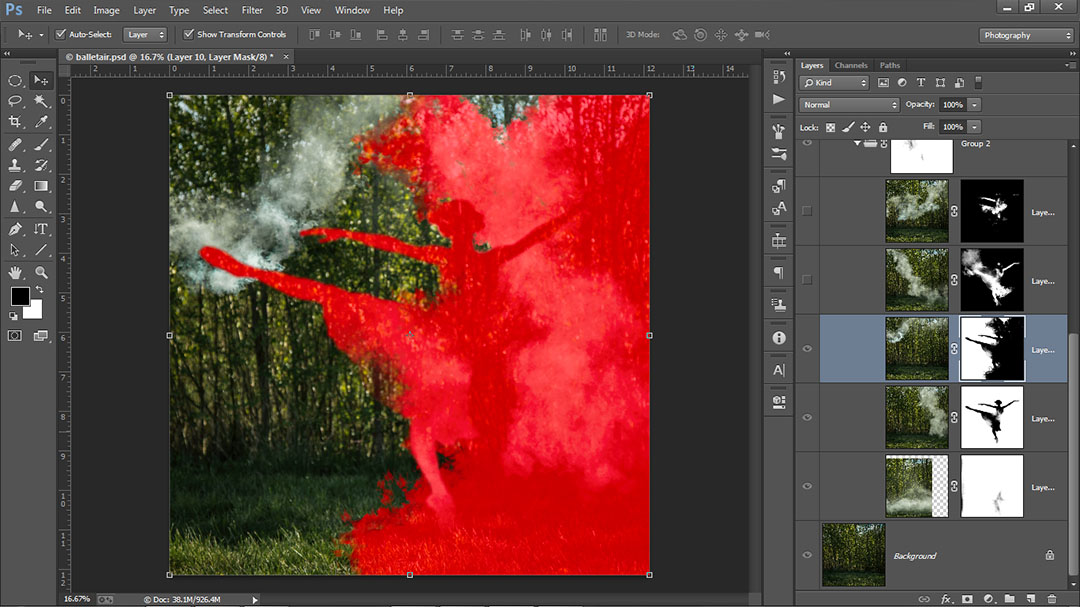
However, my aforementioned finished image was a mix between the ballerina being shaped by negative space AND being filled with smoke in select places. So, on my next layer I need to do exactly the same thing only before I start refining it with a smoke brush I need to invert it.
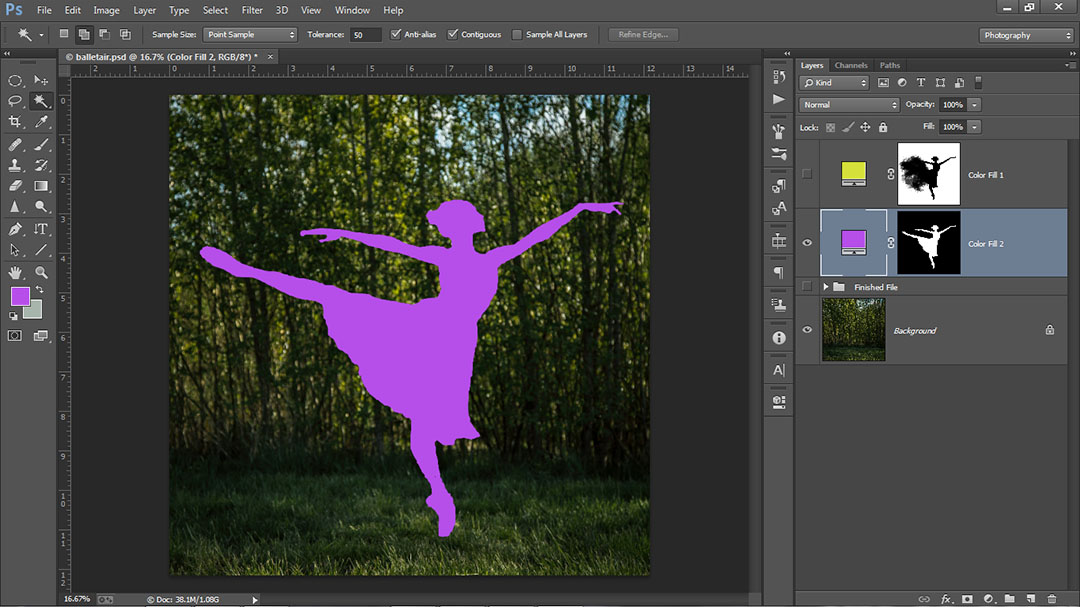
Inverting a mask is rather simple. Highlight the mask and hit Command-I / Control-I or you can double click the mask and a properties panel will show up with a invert button. That is also how you can easily feather the mask as well.
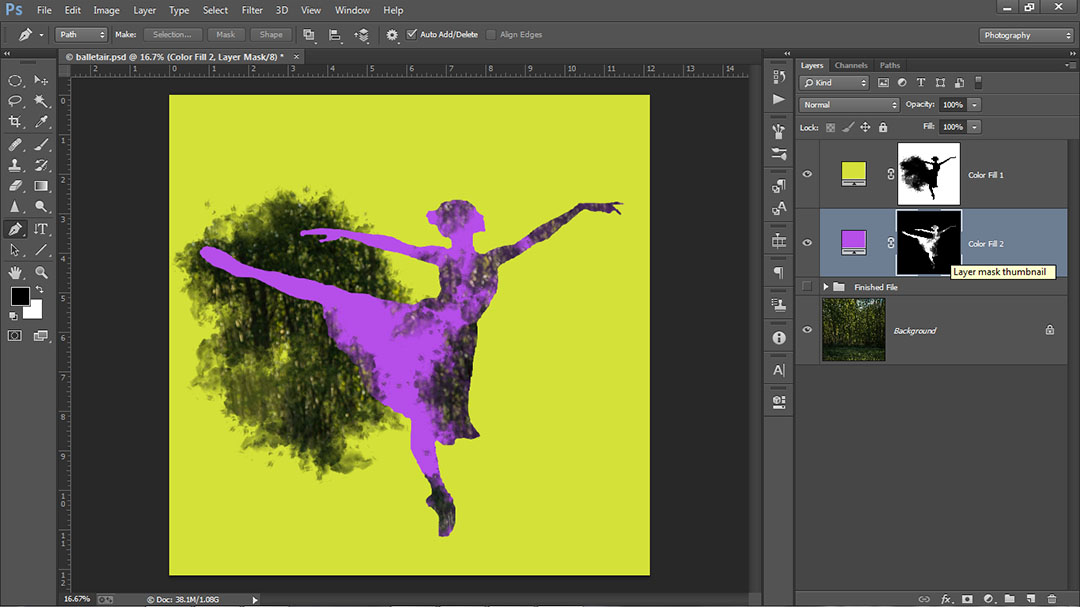
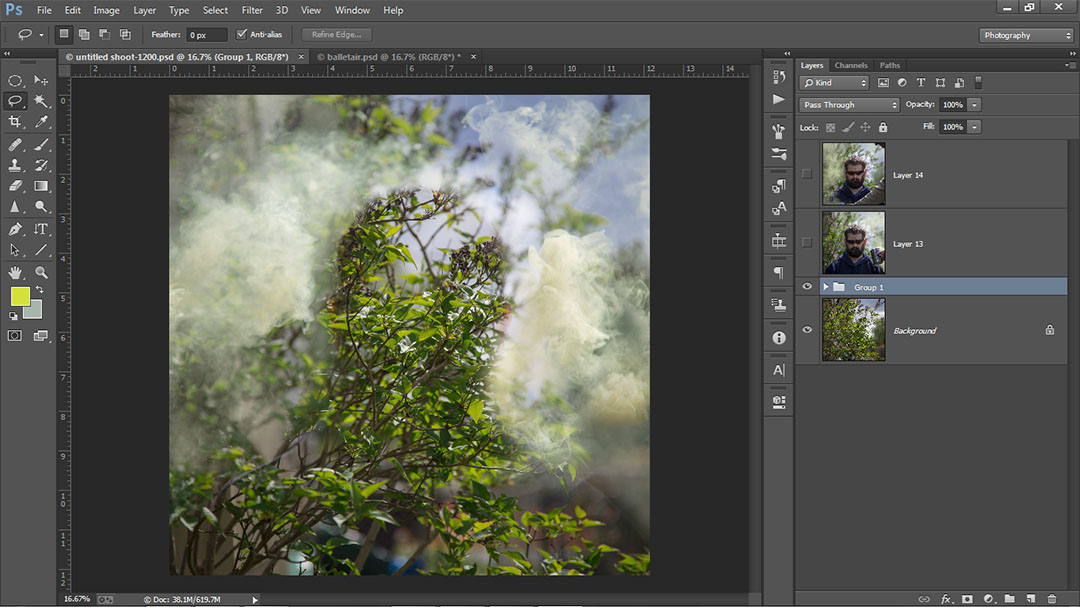
These two layers demonstrate the basic principle of what I did. Only I did it with layers of photos of smoke taken on the tripod. Here is what my actual working file looked like while it was coming together. I will highlight the mask so you can see how each layer was built up.
and …
Some of my masks only included a tiny bit. This is because the smoke was all over the place. I had to create a uniform shape out of many images. To keep myself organized I cropped them and toned them all the same in Lightroom. Then I pulled each image in one by one depending on what I felt I needed.
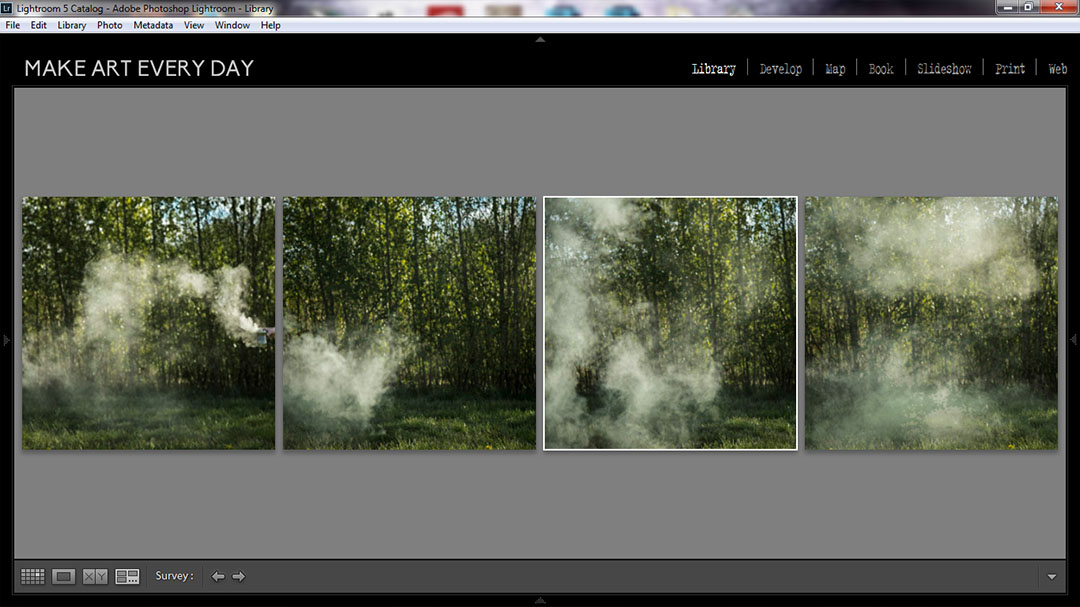
I would like to think it helps Photoshop run smoother if I keep the files out of the program until I absolutely have to use them.
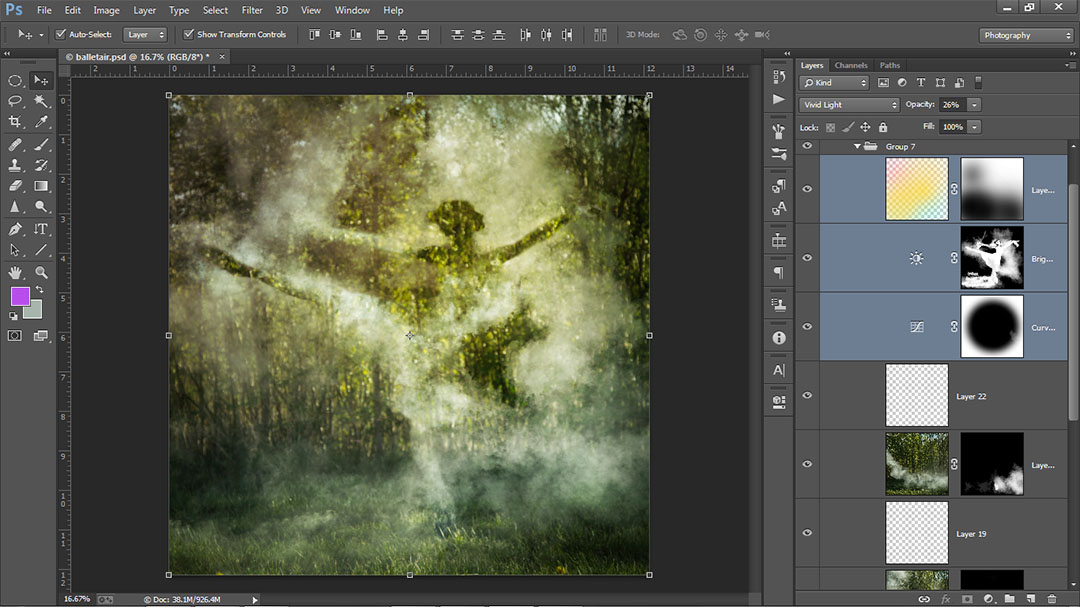
Once I got my shape the way I like it, it still had that “photoshop” feeling to it. So to help bring it together I added a few adjustment layers. Including: a few washes of color with a blending mode, a brightness/contrast layer masked to fill just my “subject smoke” with more “light” and then a vignette made with a curves adjustment layer. I also sharpened a few things and added a blur around the edges with the Iris filter run on a stamp visible layer. If any of these details interest you, or confuse you – I suggest either Phlearn (again) or reading Lesa Snider’s Photoshop CC: The Missing Manual. (http://www.amazon.com/Photoshop-CC-The-Missing-Manual/dp/1449342418) Both of these resources are invaluable to me and could not come any more highly praised.
From there, I saved it back into Lightroom and did some final adjustments there. I like to add the split toning ext in Lightroom because I have custom presets made so that my full body of work feels more cohesive together. That is my personal preference because I certainly could of finished off the image completely in Photoshop with the same results.
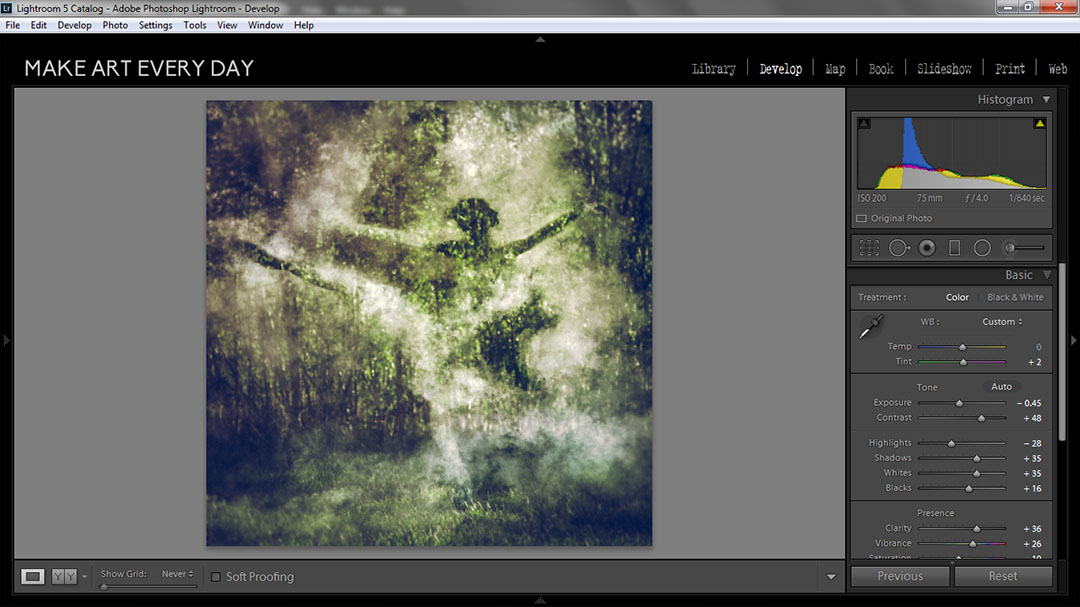
So there you have it. A ballerina-air-smoke thing. Made from a few smoke bombs and Photoshop.
P.S. It actually took much longer to type out what I did then actually completing the post processing, so don’t be intimidated. I also used a crappy old windows laptop and this was all done with just the trackpad. If I can do it, anyone can. So no excuses. And if you do make something similar – let me know! I really would love to see it.
Thank you so much Meggan. A wonderful tutorial for such a unique image.


I simply cannot abandon your web blog prior to suggesting that I really treasured the common information anyone deliver in the website visitors? Is going to be yet again normally in order to look at fresh posts