Subject Centric Lighting: The Five Areas of Light Presentation
Cover image by Project 52 student, Gabriel Alvarez.
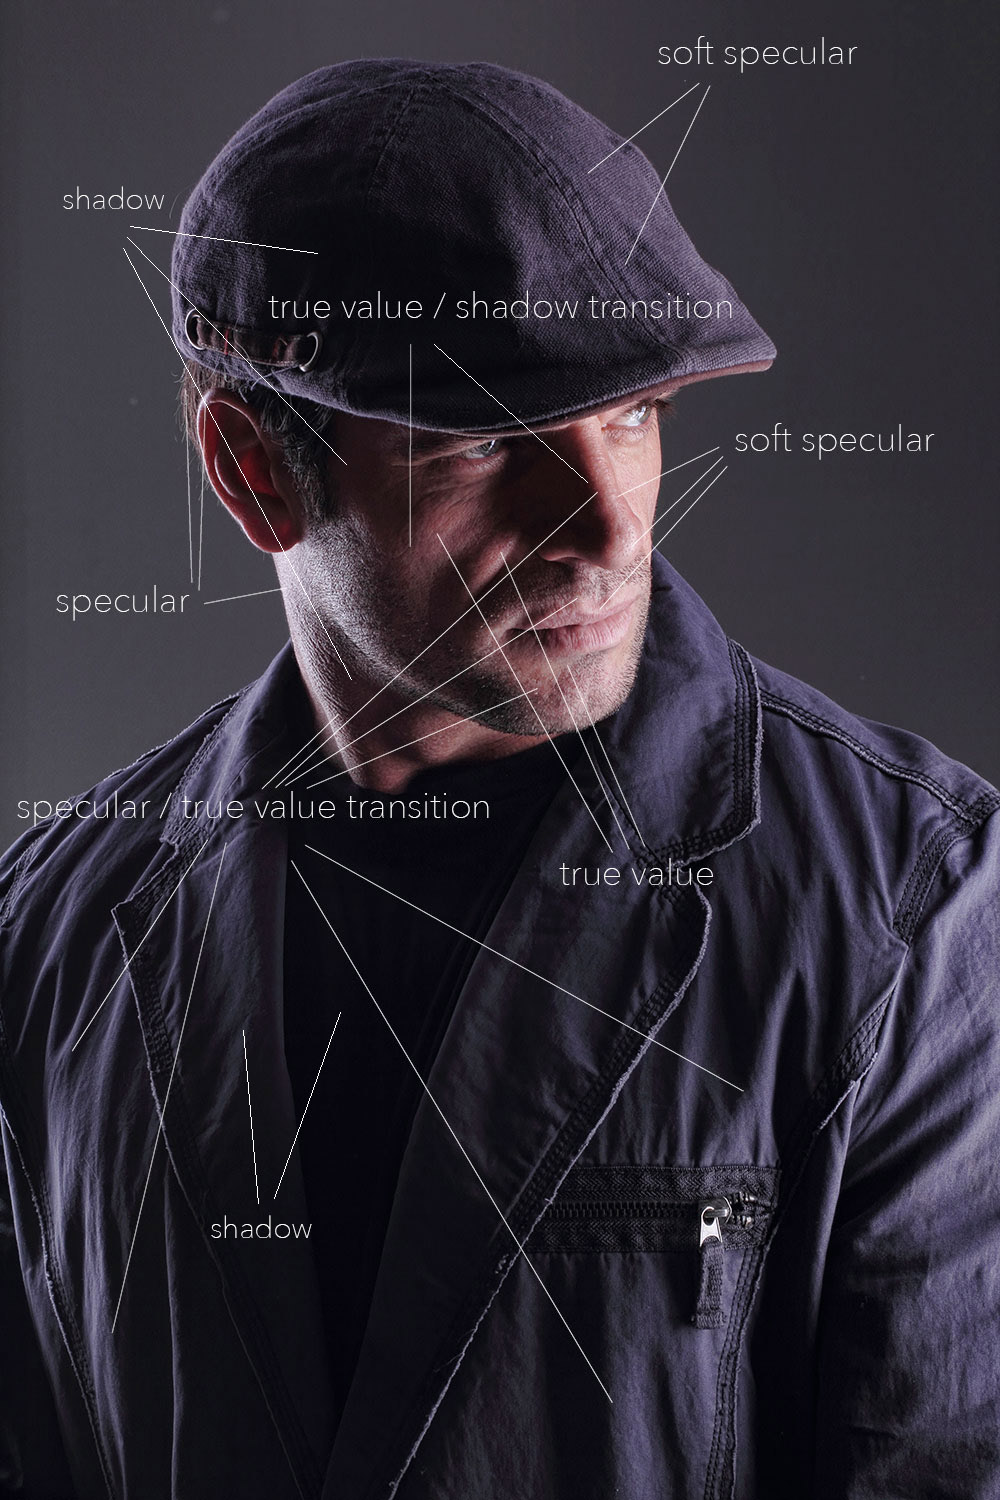
When the lighting choices we have made are used, the light is ‘presented’ back to the camera in expected, and controlled ways. There are five parts of the light presentation, and we use them in every image we make.
True Subject Value:
What the subject looks like when not in specular or shadow, this is the area that shows us the color of the subject as well.
Specular:
The exact or absolute reflection of the light source.
Specular Transition:
The point where the specular reflection transitions to the true subject value
Shadow Transition:
The transition between True Subject Value and Shadow
Shadow:
The places on the image that are not lit, the opposite side of the light source.
These areas of light are found in nearly every subject. By understanding what they do, and how they are controlled, we can understand much more about the light that is used to present these areas in the ways we want to show them.
In other words, knowing what causes a shadow transition, how to present true value, and how to control a specular highlight means we have control over our lighting and we can create the looks we want. Whenever we want.
Photographers and artists use these representations of light to show texture, shape, dimension, color, clarity and mood. Illustrators use highlight and shadow in their work to create their own light. And they use the same tools to light their drawings, although quite imaginary, as photographers do.
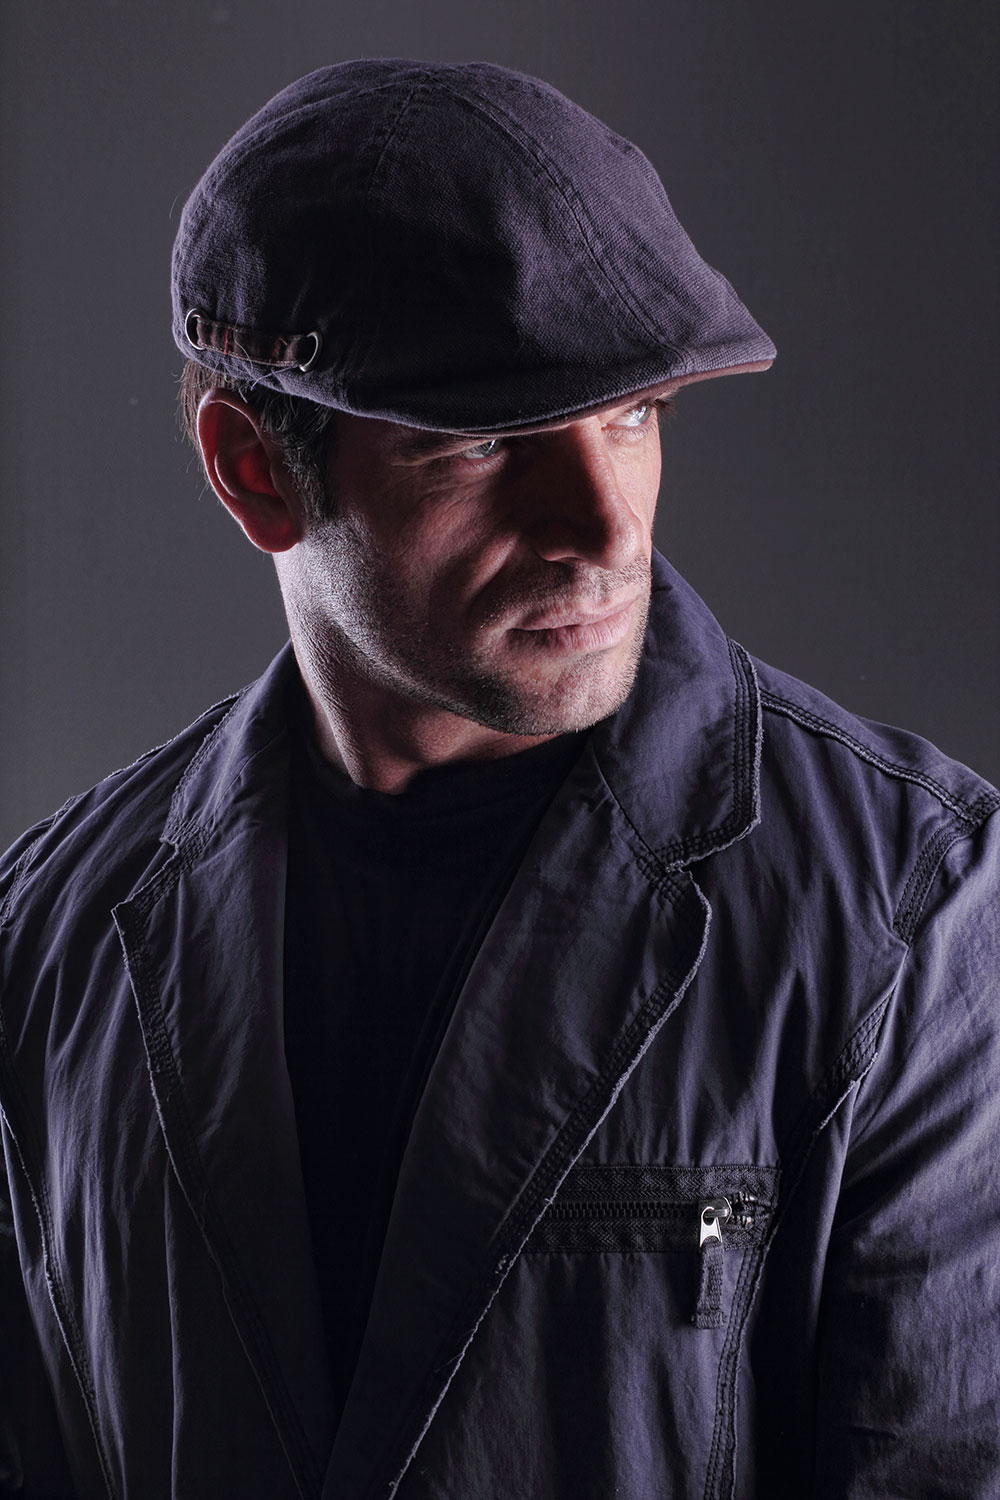
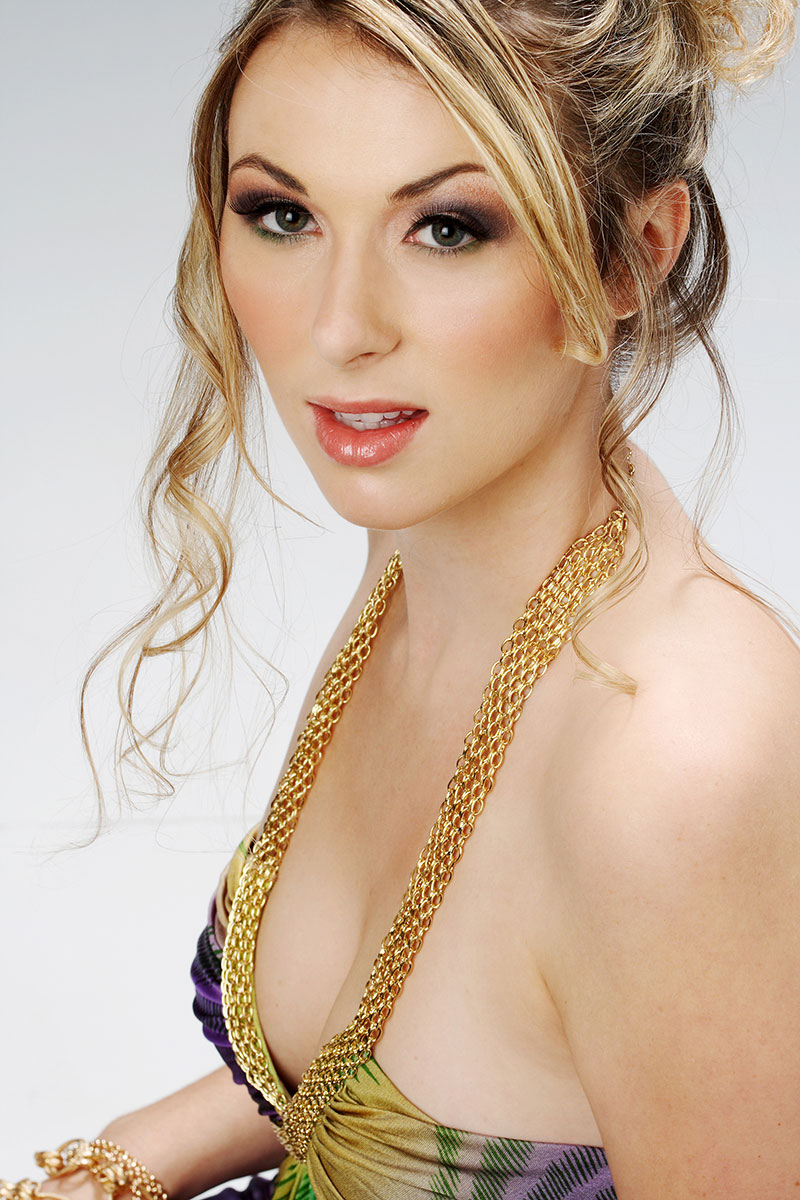
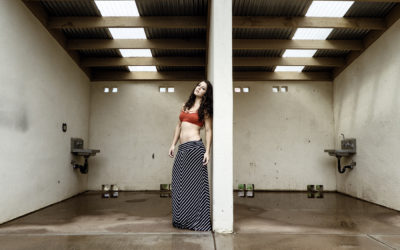
We can see all the presentations of light in this image of Inaudia.
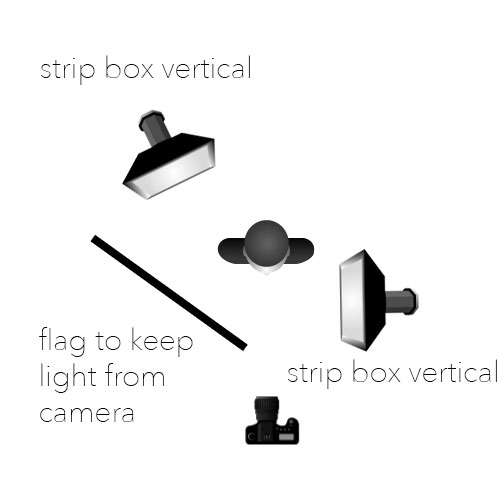
Lit with two strip lights (one on each side), the one on camera left is behind Inaudia and aimed forward just bit. The one on the right is slightly in front of him, and angled at an oblique angle.
This renders two different kinds of specular presentations, the absolute one on his neck and left side, and the softer one on the right side.
All of the transitions are there, and these transitions are what we see when we are determining soft light from hard light. A fast transition is a hard light, where a softer transition – as in the picture below – is a softer light. We would call this image a hard light image because of the fast fall off in the transitions between highlight and true value, and true value and shadow.
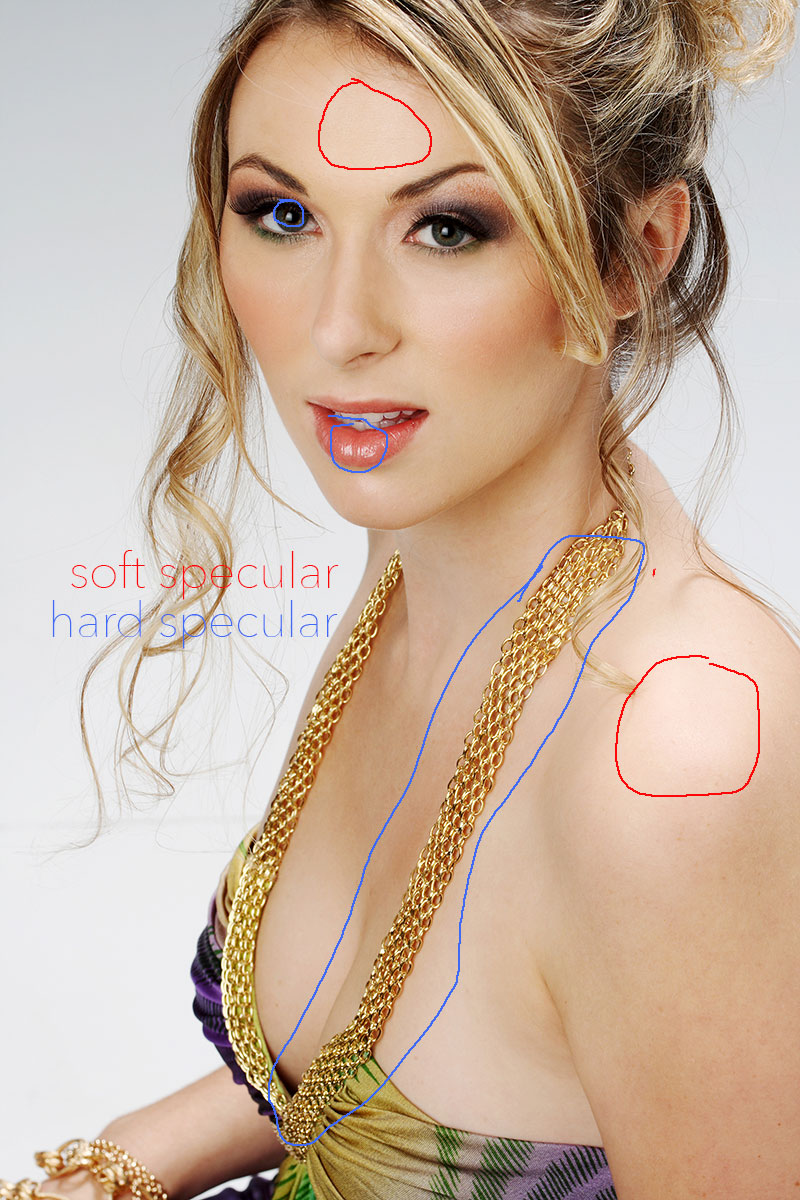
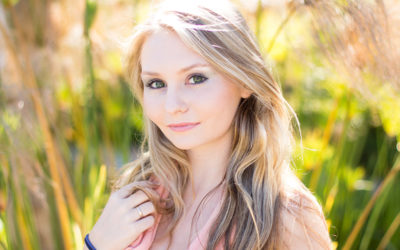
This image shows a lot of true value skin tone. One of the reasons is that the model is not shiny (wet) or perspiring to cause a shinier surface. Powder is used to intensify the diffuse skin (true value) so the speculars (in red) are presented softly. The blue speculars, however, are presented with very sharp transitions. Note that the specular on the shiny lips is absolute, with no soft transition. The gold jewelry on the dress shows as highlight/black because the reflection of the light source from the shiny metal is absolute.
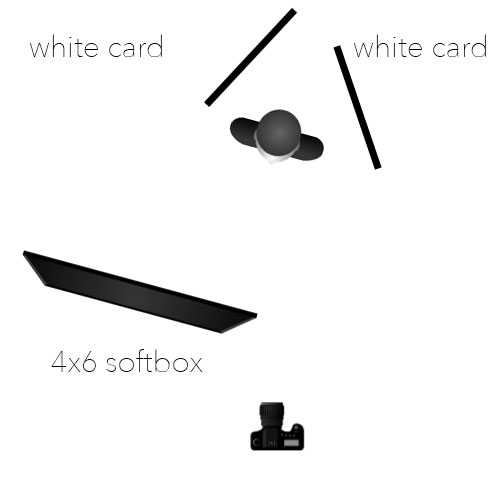
Lighting: Very large softbox directly in front of the model, and back 5 feet. White cards are positioned on either side of her, but pulled back to a point where they will not reflect in her eyes.

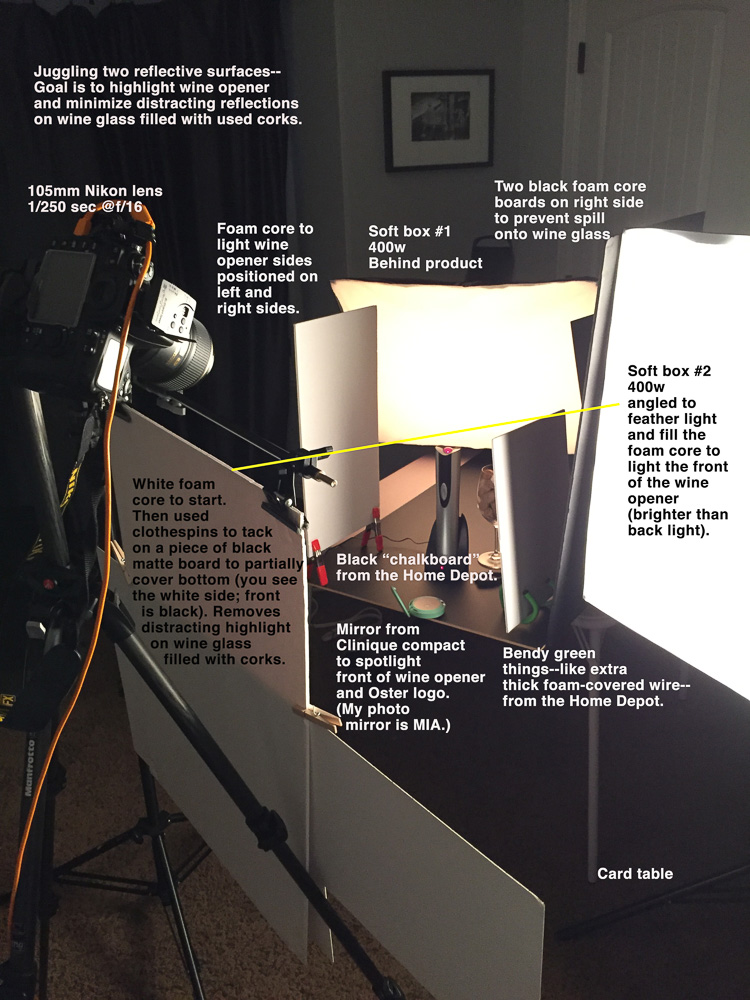
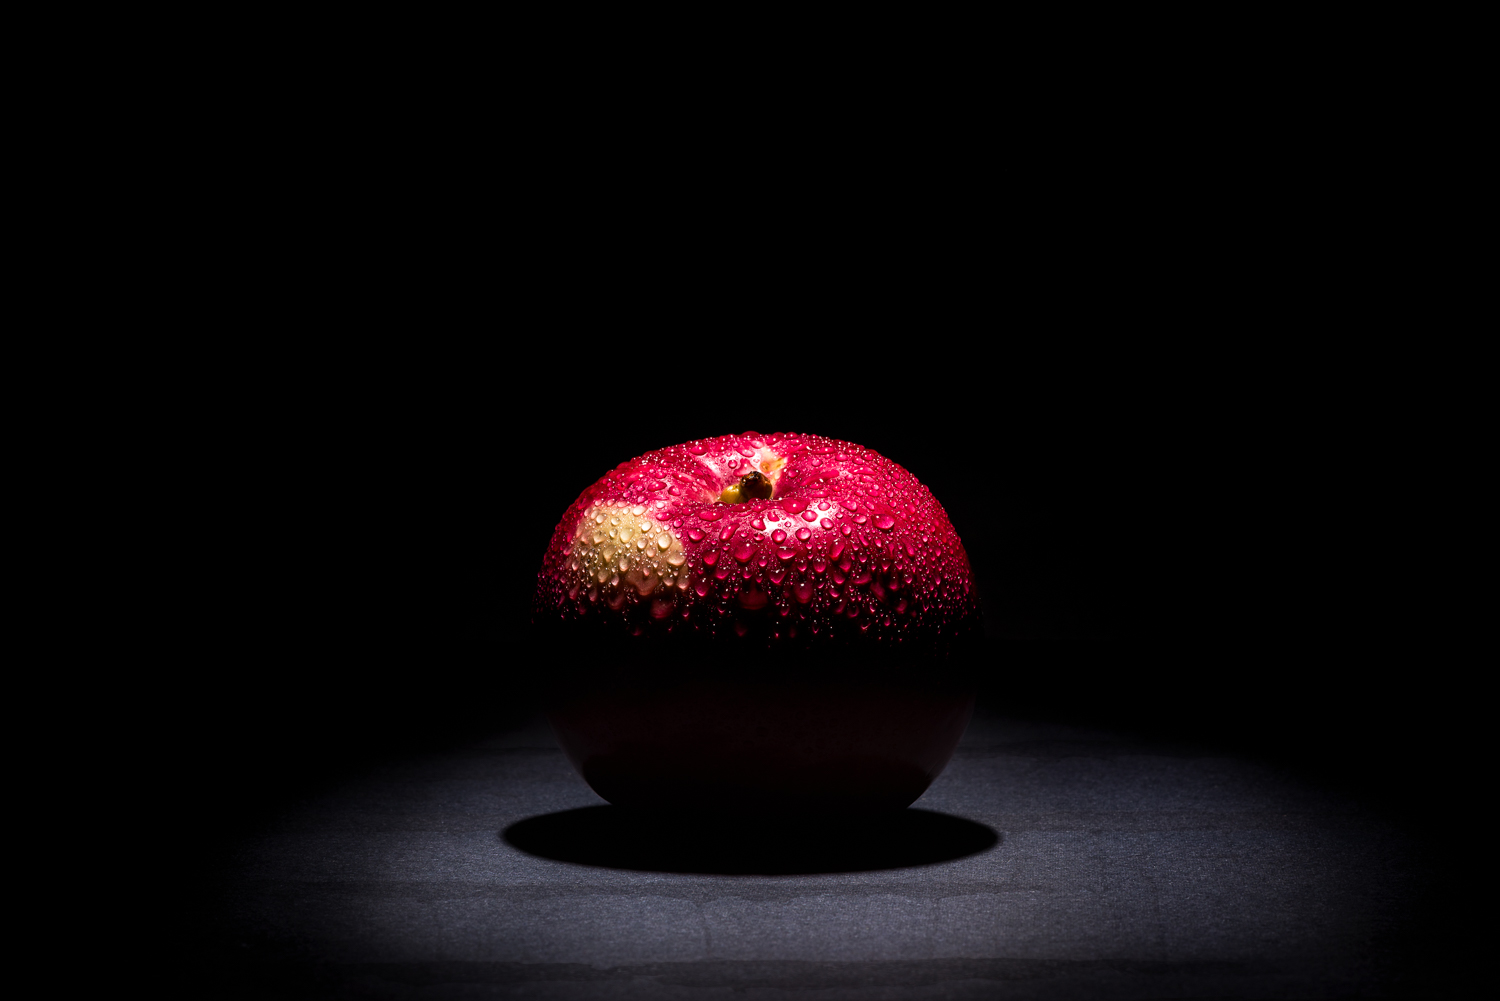
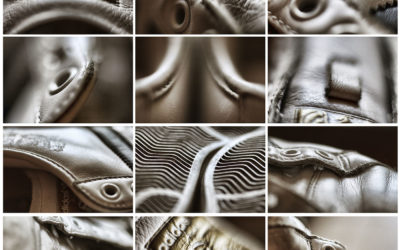
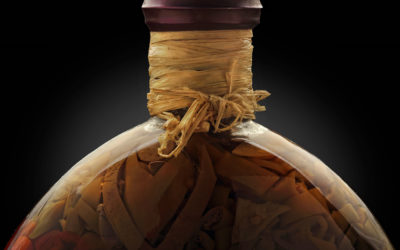
Photographer Anne Stephenson shows how to control the specular, true value, shadow and transitions in this seemingly simple table top product shot. As you can see, nothing done well is simple. Every kind of surface is in this shot.
Let’s start to put all of this together now.
01: Lighting Class: Light Principle One: The Size of the Light Source
Let's look at light and the four principles of how light works. First up, the size of the light source in relation to the size of the subject. Imagine looking out the window at the front yard and without seeing the sky knowing whether it is sunny or cloudy. We do...
02: Lighting Class: Light Principle Two: The Distance of the Light Source
DISTANCE OF THE LIGHT SOURCE FROM THE SUBJECT The second principle of light is the distance of the light source from the subject. One thing for sure, if it is artificial light, the distance of the light source from the subject can change the size relationship, but...
03: Lighting Class: Lighting Principle Three: The Color of Light
LIGHTING PRINCIPLE THREE: THE COLOR OF LIGHT We see light usually as a white source, or at least a neutral source. It isn't. neutral, it has a color to it and that color can influence all the parts of your image, from shadows to highlights. We don't see the color of...

04: Lighting Principle Four: Angle of the Light Source to Subject / Camera
Lighting Principle Number Four: The Angle of the Light to the Subject and the Camera Law of Physics: Angle of Incidence equals the Angle of Reflection. This is an axiom that a lot of people hear and repeat without taking careful note of what it means to their...
05: Subject Properties: Part One
EVERYTHING REFLECTS. Let me say that again. Everything reflects. Some things reflect more than others. Some surfaces are more reflective than others. But since everything reflects, we are sometimes presenting what that subject reflects rather than ‘bouncing’ light...
06: Subject Properties: Part Two
Matte Surfaces These are surfaces that are not as rough as texture, but not smooth either. Skin, cloth, natural leather, finished woods and many food items are examples. Most of what we deal with in our daily lives would fall under the Matte surface example. Matte...
07: Subject Properties: Part Three
Shiny or Glossy surfaces: The third of our major surface efficiencies is glossy or very shiny surfaces. The complete opposite of the textured surface, the glossy surface will record the reflection of the light source absolutely. That means we have to be very careful...
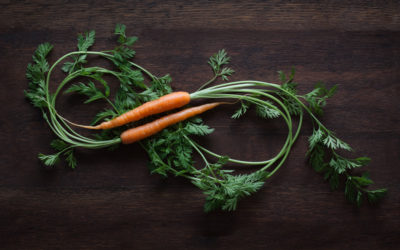
Arc of Beauty: Side to Back Lighting
Have You Considered the "Arc of Beauty" in your lighting? (Image by Tracy Sutherland) We are going to take a high-level view of lighting today and discuss what I call the "Arc of Beauty". And while no lighting scheme is going to be directly discussed, what we are to...
